
【Unreal Fest 2024】Optimizing UE5 Advanced Rendering, Graphics Performance, and Memory Management
来源:D:\迅雷下载\Graphics Materials\Unreal Fest 2024 - Optimizing UE5 Advanced Rendering, Graphics Performance, and Memory Management.mp4
提取时间:2026-05-17 11:25:53
Slide 1 — 00:00:00

📌 要点汇总
- (过渡内容,无关键要点)
Hello, everybody! A quick show of hands: Who was here for Ari’s talk?
Slide 2 — 00:00:06

📌 要点汇总
- (过渡内容,无关键要点)
I’m sorry, I don’t have a guitar. I’m not as cool.
Slide 3 — 00:00:12
📌 要点汇总
- (过渡内容,无关键要点)
Is Ari? No, my name is Matt Ostlay. I am but a humble senior technical artist at Epic Games, and to the surprise of…
Slide 4 — 00:00:20

📌 要点汇总
- (过渡内容,无关键要点)
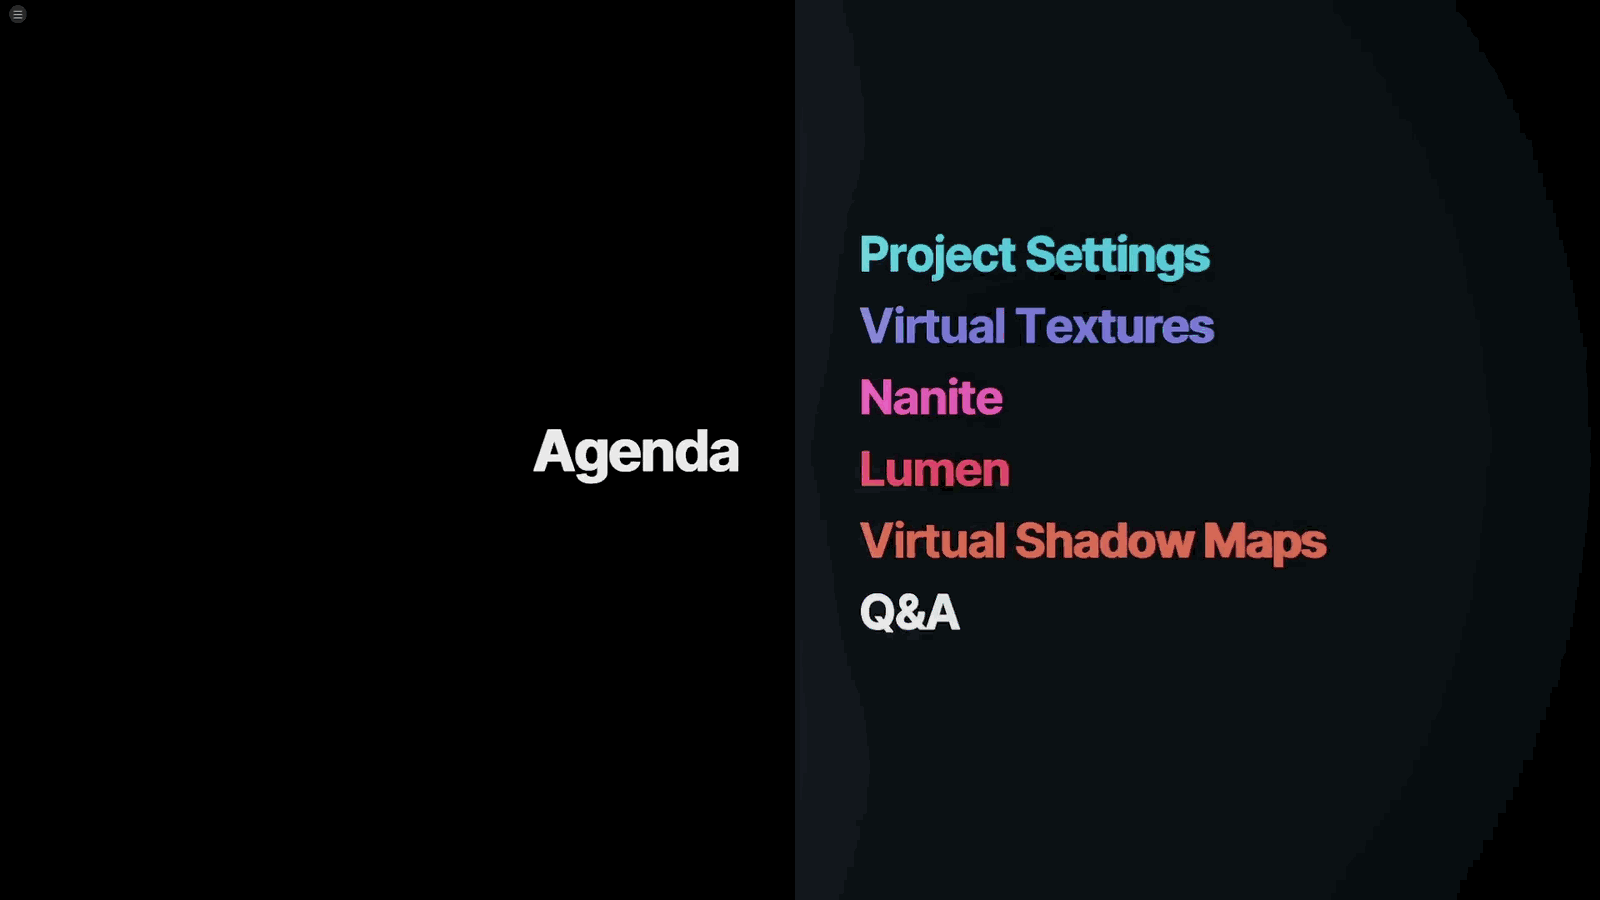
Nobody, I have more to say about the performance and memory of our next-gen graphics features. I’m going to assume that we are all reasonably familiar with things like Nanite, Lumen, and Virtual Shadow Maps, so I’m not going to get into the intro stuff. I want to give some updates on them, show you some new things, and get into the weeds a little bit, so to speak, on all these features. Here’s a general overview of what I’m going to do.
Slide 5 — 00:00:43
📌 要点汇总
- 提到将补充关于Epic方法的额外项目设置信息
- 将详细讨论虚拟纹理(virtual textures)
- 强调虚拟纹理部分内容可能超出预期长度
Really quickly, I’m going to throw out some project settings. So Ari was talking about the Epic way. There’s a couple more things I wanted to add on top of that. I also want to talk about virtual textures — for probably longer than you would expect — and obviously we’re going to talk about it.
Slide 6 — 00:01:01
📌 要点汇总
- 演讲将涉及 Nanite、Lumen、虚拟阴影贴图及问答环节
- 主题聚焦于 GPU 时间与内存的高效利用
- 也关注开发者时间与内存的高效利用
- 演讲前将快速介绍部分项目设置作为参考
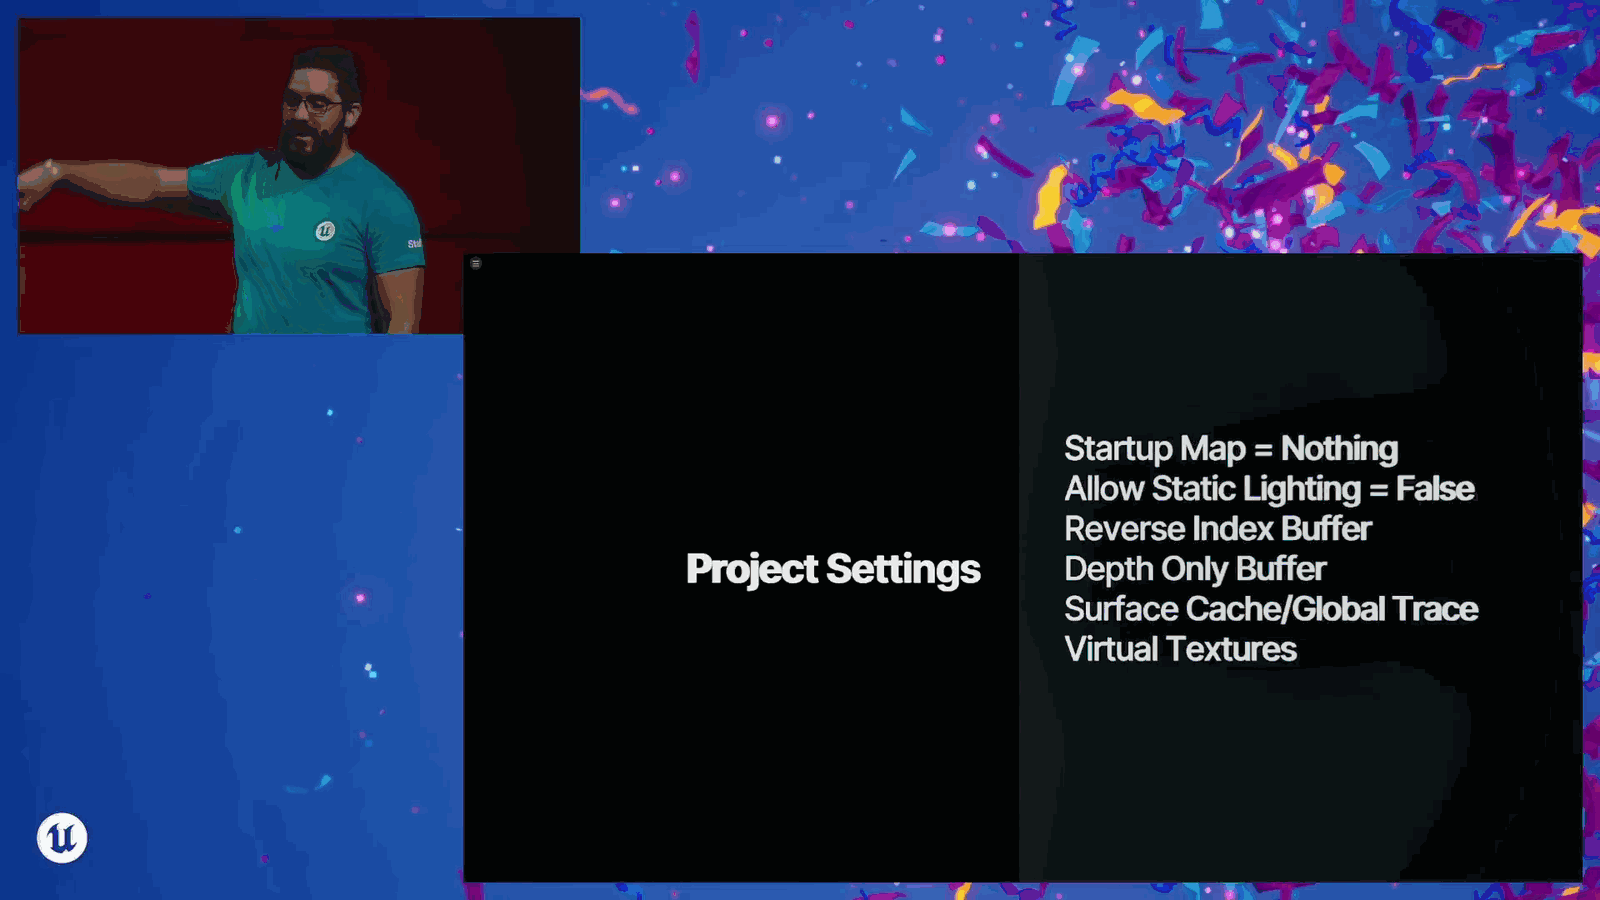
Nanite, Lumen, virtual shadow maps, and maybe even some Q and A. And ultimately, this talk is about making efficient use of time and memory—both efficient use of time and memory on the GPU, and efficient use of your time and memory as developers. Right. So, in the spirit of efficiency, wanted to cover some of these project settings really quickly before we get started. Wanted to have a slide that’s a reference.
Slide 7 — 00:01:25
📌 要点汇总
- 提到的是一个功能齐全、使用最新UE5技术的高质量游戏项目
- 并非完全与渲染相关,但作为开场内容提出
- 强调项目规模大、技术要求高,包含所有高级功能
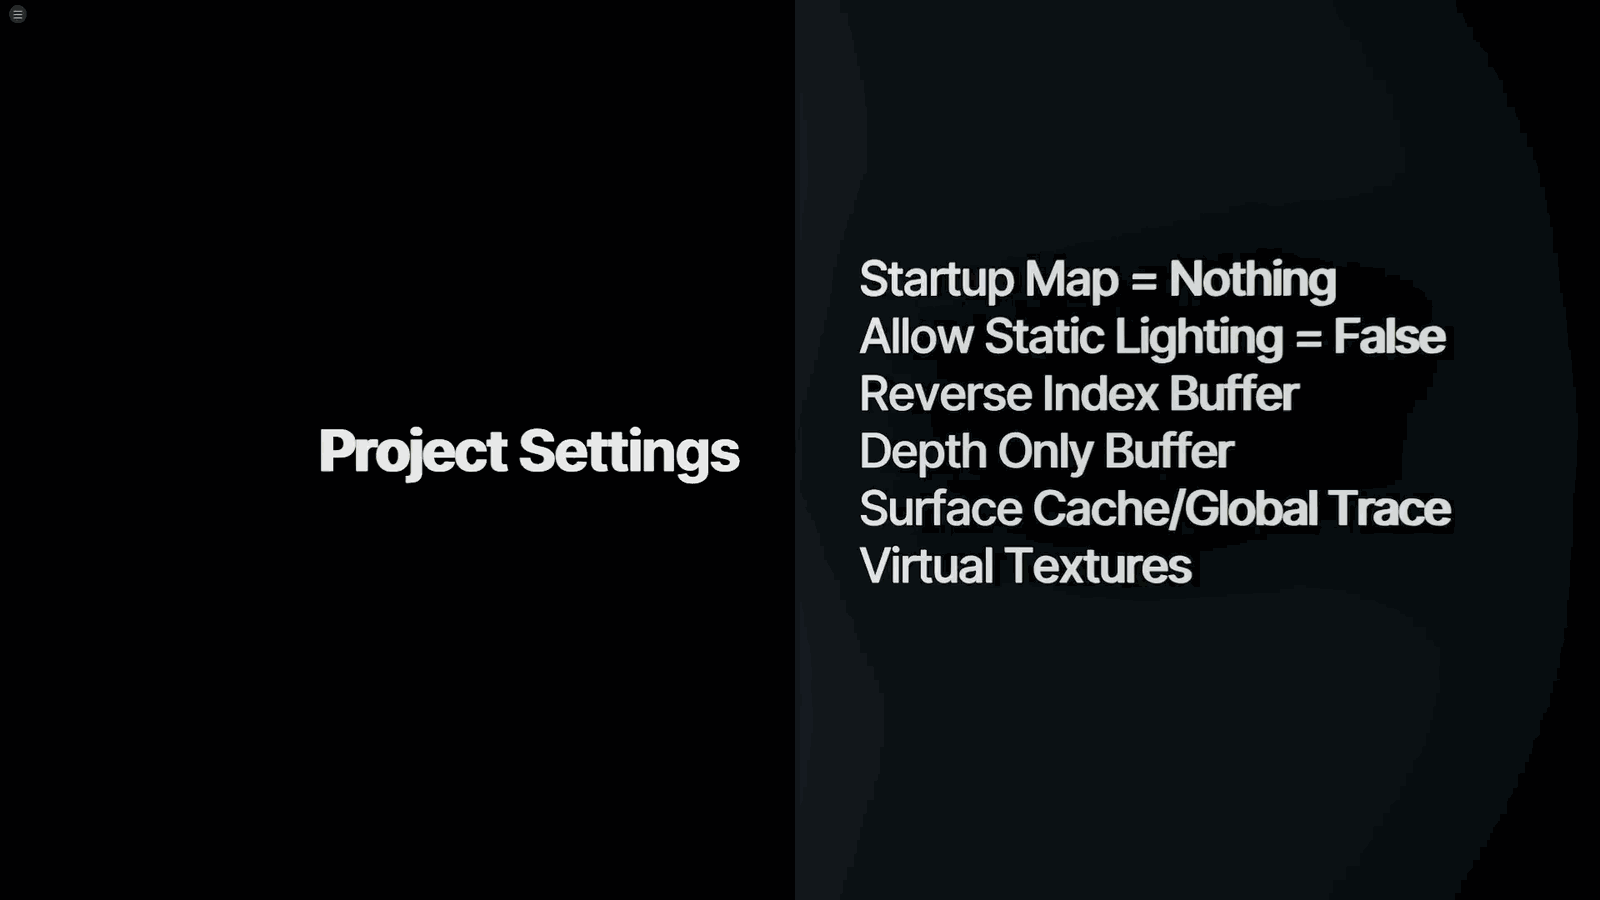
And this is assuming that we are doing a full-blown bells and whistles, all the features, top-of-the-line UE5 title. Not totally rendering-related, but I want to throw this one out first.
Slide 8 — 00:01:37
📌 要点汇总
- 在项目设置中将启动地图设为空,以提升编辑器启动速度
- 创建并保存一个空的关卡作为启动地图
- 假设将使用 Nanite、Lumen 和虚拟阴影地图
- 可关闭静态光照烘焙功能,因为不进行光照烘焙
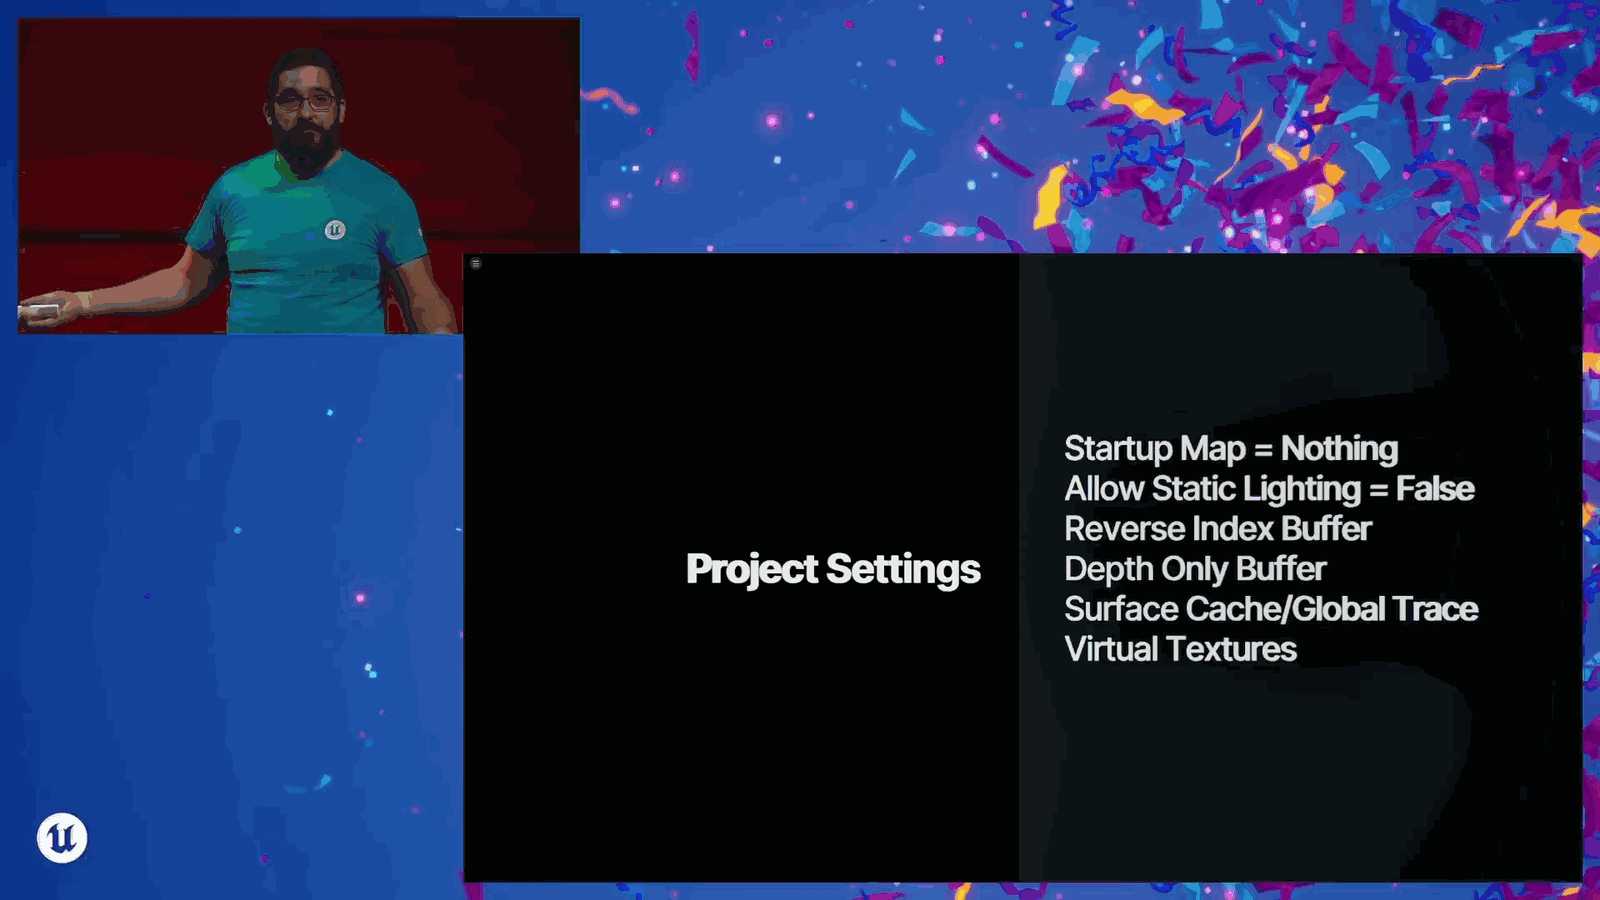
Go into your project settings and set your startup map to nothing. Just make a new empty level, save it. That’s your startup map. It improves your editor startup time, so you don’t always have to load every single thing in the map every time you want to do something. And I’m assuming that we are going to be using Nanite. I’m assuming we’re going to be using Lumen, and we’re going to be using virtual shadow maps. So you can turn off allow static lighting because you’re not baking lighting.
Slide 9 — 00:02:03
📌 要点汇总
- 使用 Lumen 可以结合材质环境光遮蔽技术
- 反向索引缓冲区和深度仅缓冲区是两个项目设置
- 这些设置通过改变静态网格顶点数组的顺序提升绘制效率
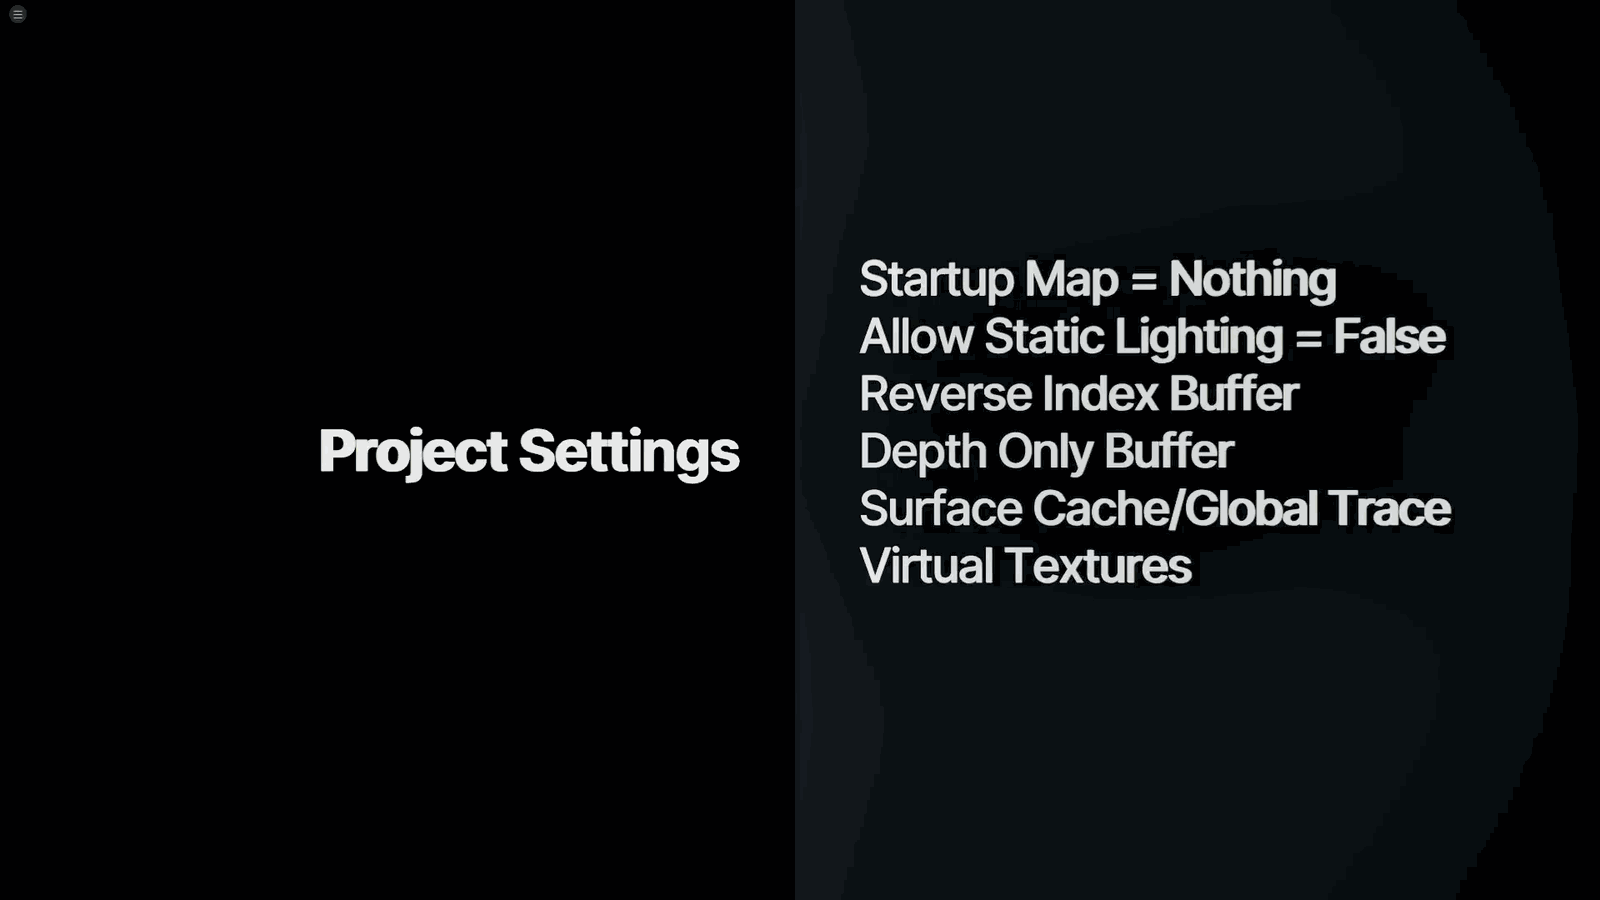
And it’ll let you also use material ambient occlusion with Lumen, which is nice. Probably not going to get to talk about these during the Nanite section, but there are a couple of project settings called reverse index buffer and depth only buffer. This basically creates a version of the vertex array for all of our static meshes in a different order, so that it’s more efficient to draw for.
Slide 10 — 00:02:26
📌 要点汇总
- 避免使用负缩放比例以防止渲染问题
- 使用 Nanite 时无需深度仅缓冲区,可节省静态网格内存
- 使用 Lumen 进行软件光线追踪时应启用表面缓存采样
- Nanite 可处理高精度几何体,三角形数量可达数百万级
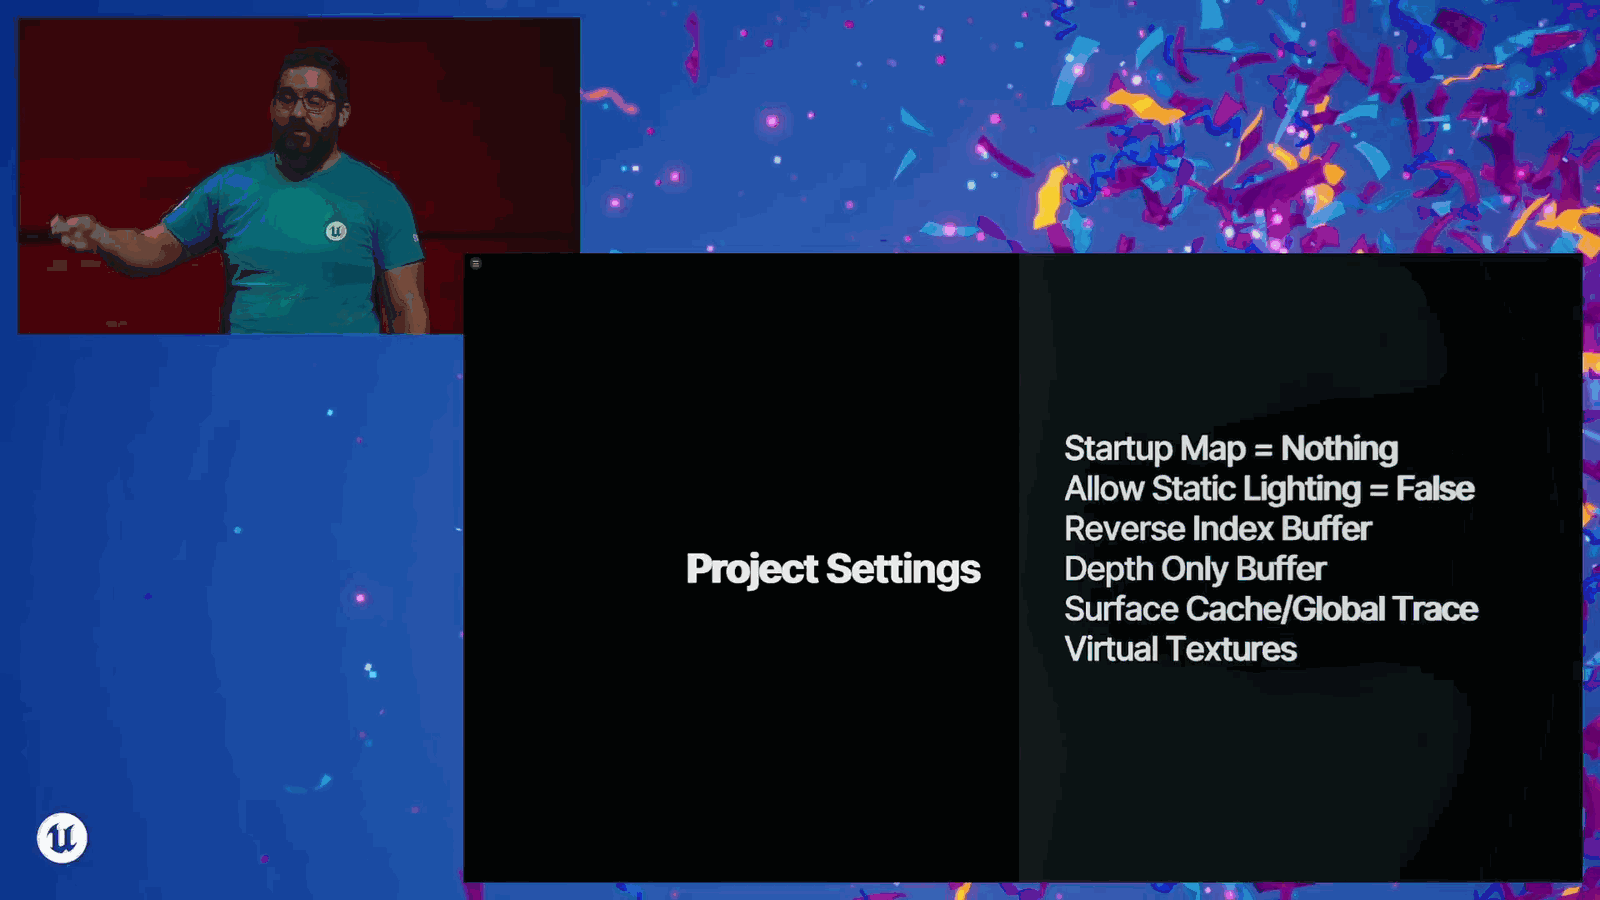
Reverse index. If we’re drawing stuff with a negative scale, don’t do stuff with a negative scale, please. So we can turn that one off. And then if we’re using Nanite, Nanite is going to do a lot of the stuff that it needs to do, so we don’t need a depth-only buffer. And this will save us static mesh memory, especially as we start using Nanite resolution geometry. We’ve got millions of triangles; those things can get pretty sizable. And then if we are using Lumen for software ray tracing, we want to use surface cache sampling for our real-time rendering.
Slide 11 — 00:02:56

📌 要点汇总
- 使用软件光线追踪时,将采用全局追踪以提高效率
- 启用虚拟纹理以优化性能
- 本部分内容主要聚焦于虚拟纹理的实现与应用
- 引擎中存在多种虚拟化特性,需明确讨论重点
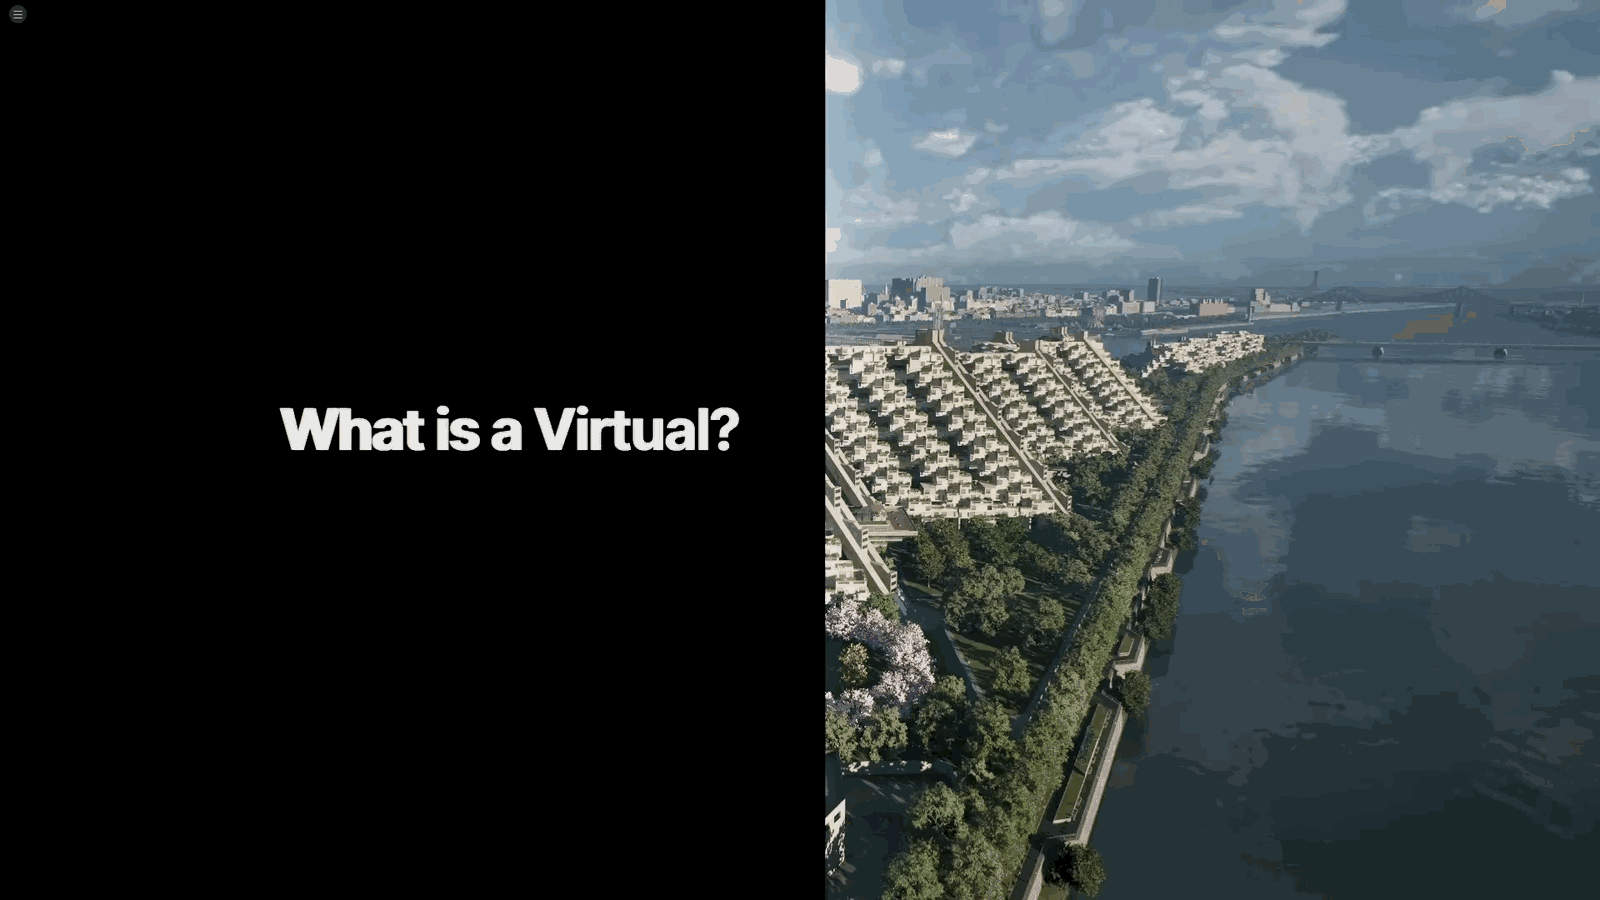
Projects and if we’re using software ray tracing, we’re going to use global tracing for efficiency. And of course, we will set virtual textures to enable. Right. So just to head this off, because again, I kind of tricked you a little bit. I’m mostly going to be talking about virtual textures, but what does that mean, right? I feel like there are a lot of virtualized features in the engine, and we just
Slide 12 — 00:03:22
📌 要点汇总
- 强调理解虚拟化技术的重要性
- 虚拟化是理解这些功能高效性的关键
- 应充分利用这些功能以提升性能
Of course, past the virtual part, and it’s really important to understand what virtualization is in order to understand what these features are doing and why they are so efficient, and why we should be taking full advantage.
Slide 13 — 00:03:35

📌 要点汇总
- 虚拟化是指创建一个精简版本,仅存储和使用所需的部分
- 无需关注其余部分,节省内存和存储资源
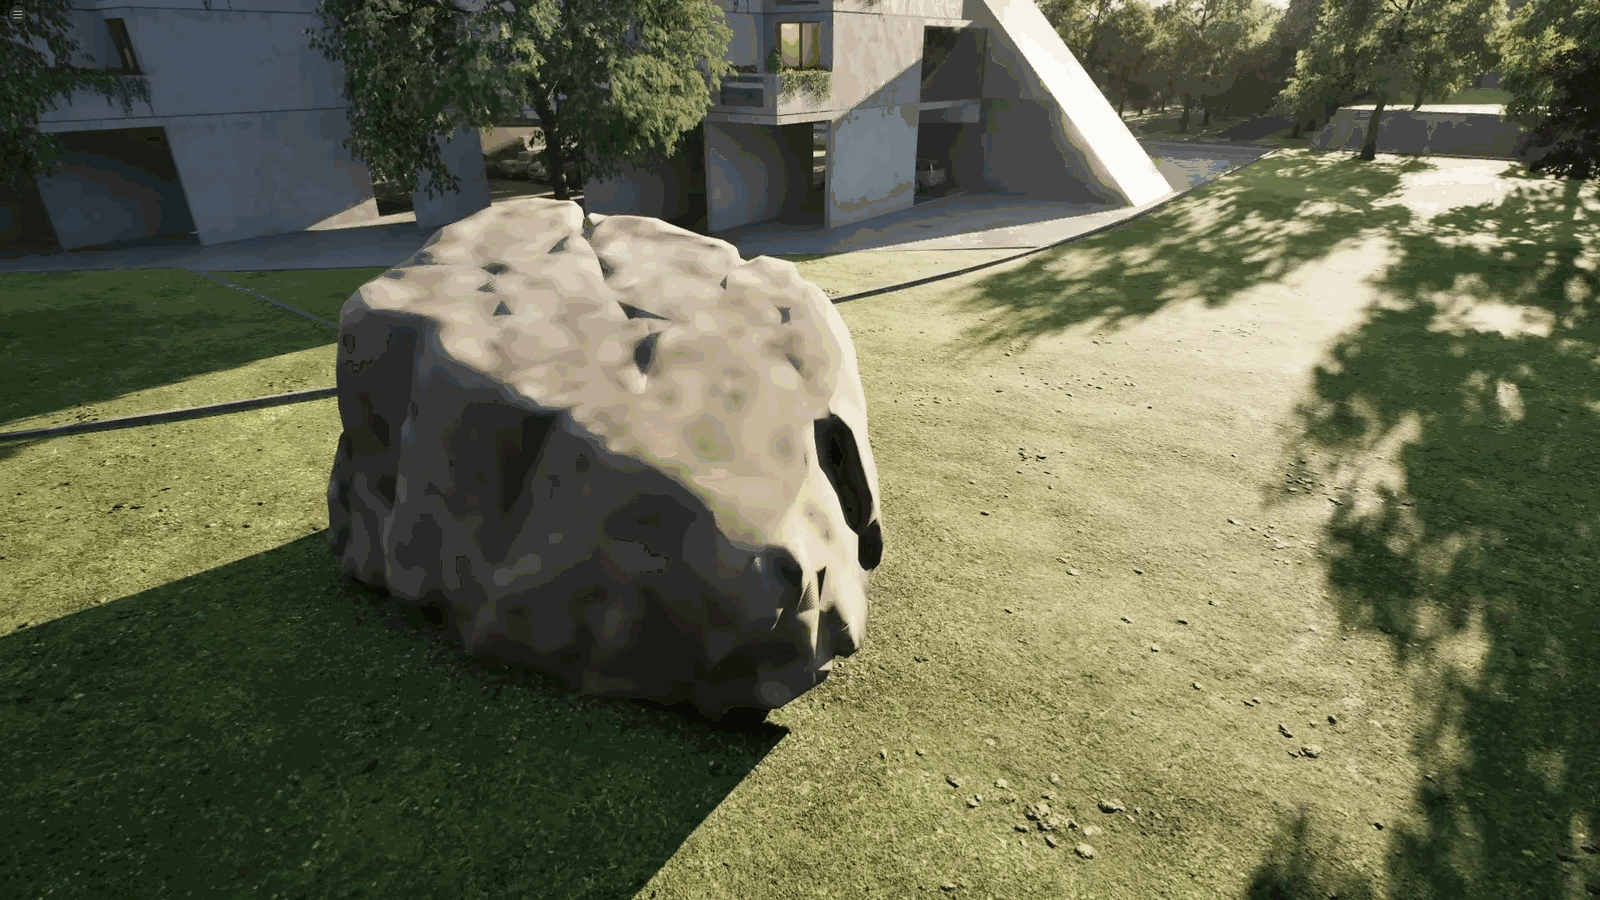
- 以书为例,只保留当前需要的内容,其余部分不占用资源
So, generally speaking, virtualization just means creating a sparse version of something, so that we’re only storing and using the bits of the thing that we need in working memory, and not really worrying about the rest. That is the tech art answer. So imagine we have a book, right?
Slide 14 — 00:03:51
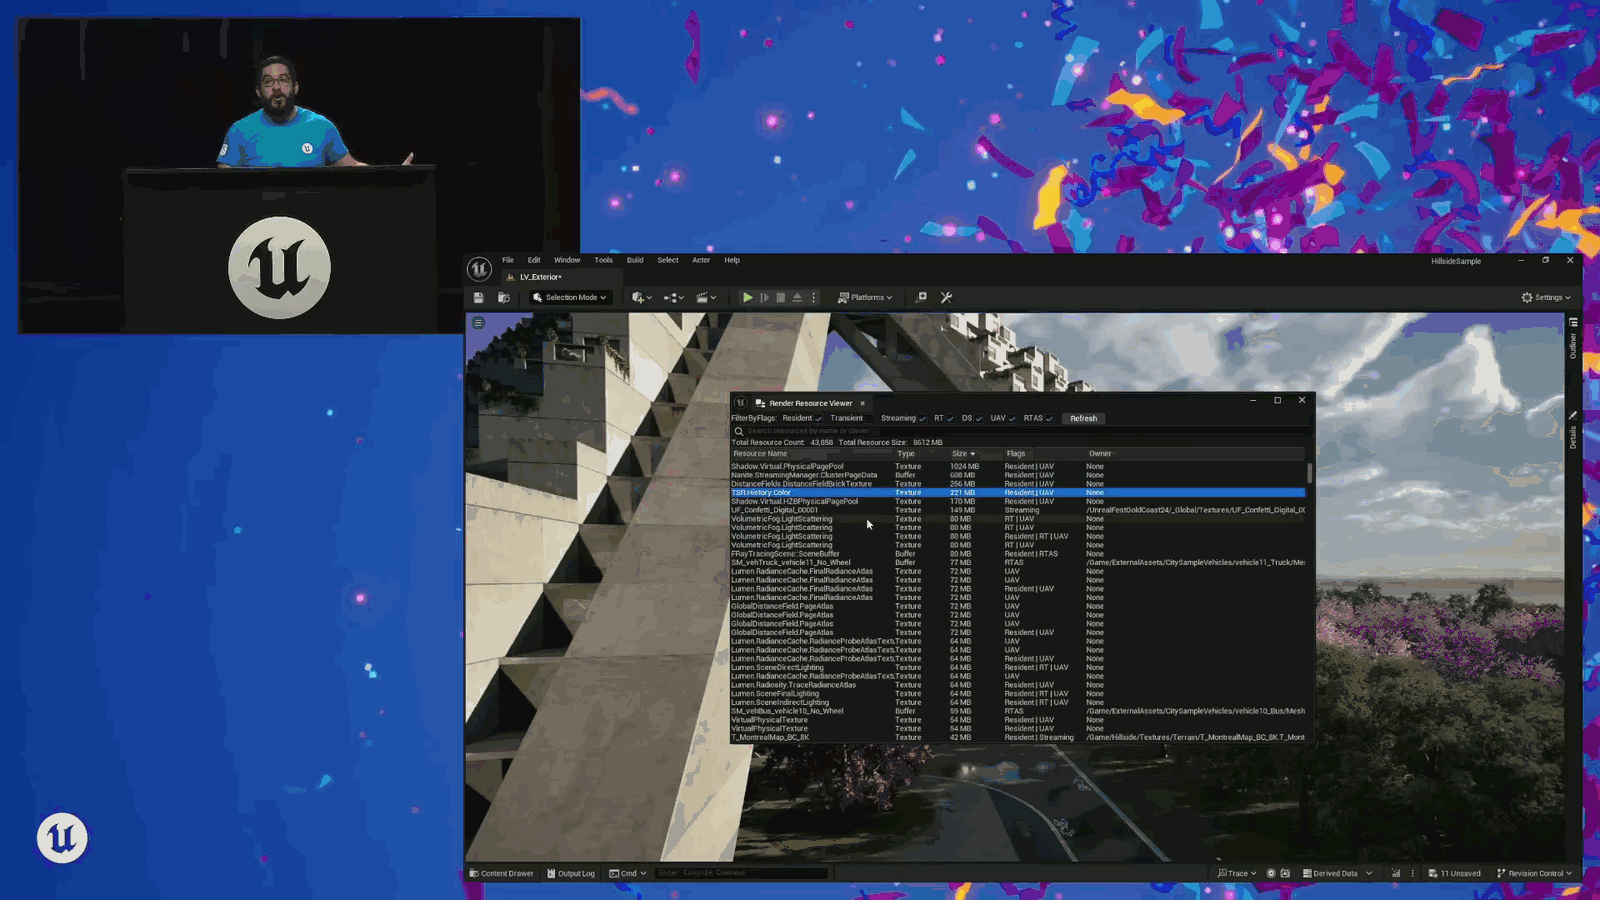
📌 要点汇总
- 书籍包含多页内容,但无需一次性加载所有页面到工作内存
- 仅需关注当前显示的页面,其余页面按需加载
- 优化内存使用,提升书本阅读器性能
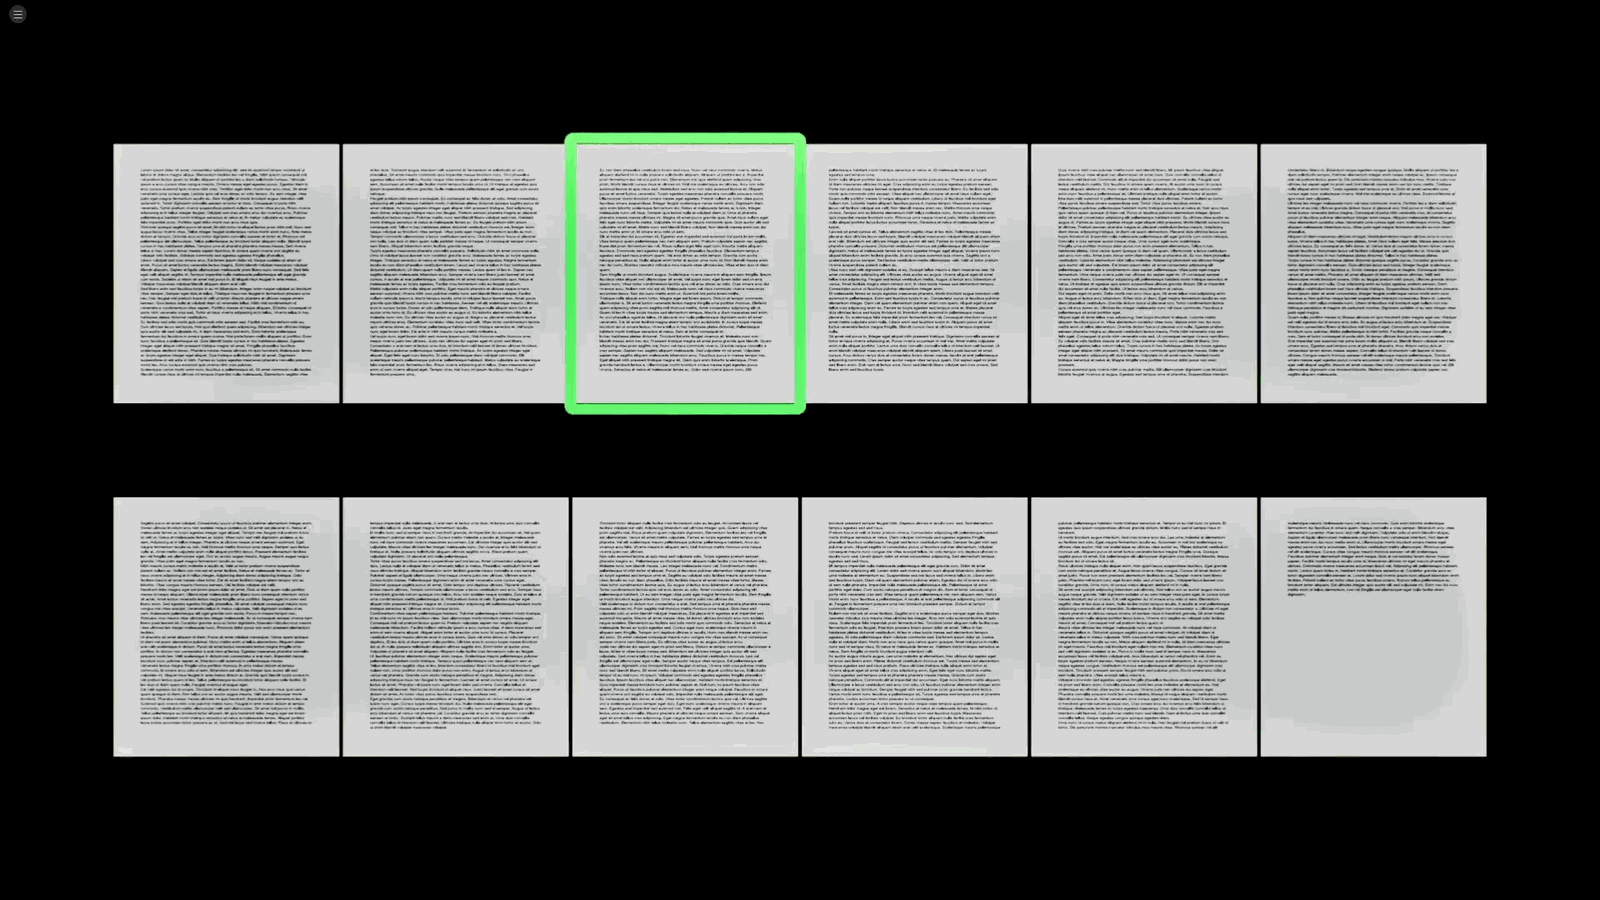
We’ve got our book, and the book has pages in it, and we know what, we know all of these pages, right? But we don’t want to take all of these pages and all of the text on all of these pages and load it into working memory. If we are just making a book reader, right? We know what page the viewer is looking at, and we don’t really care about the rest of the pages, right? We can pull those into memory as we.
Slide 15 — 00:04:14
📌 要点汇总
- 需要提供当前页面两侧页面的信息,但分辨率可较低
- 若页面位于书末,无需提供后续页面信息,可降低分辨率
- 通过此方法实现更高效的数据存储结构
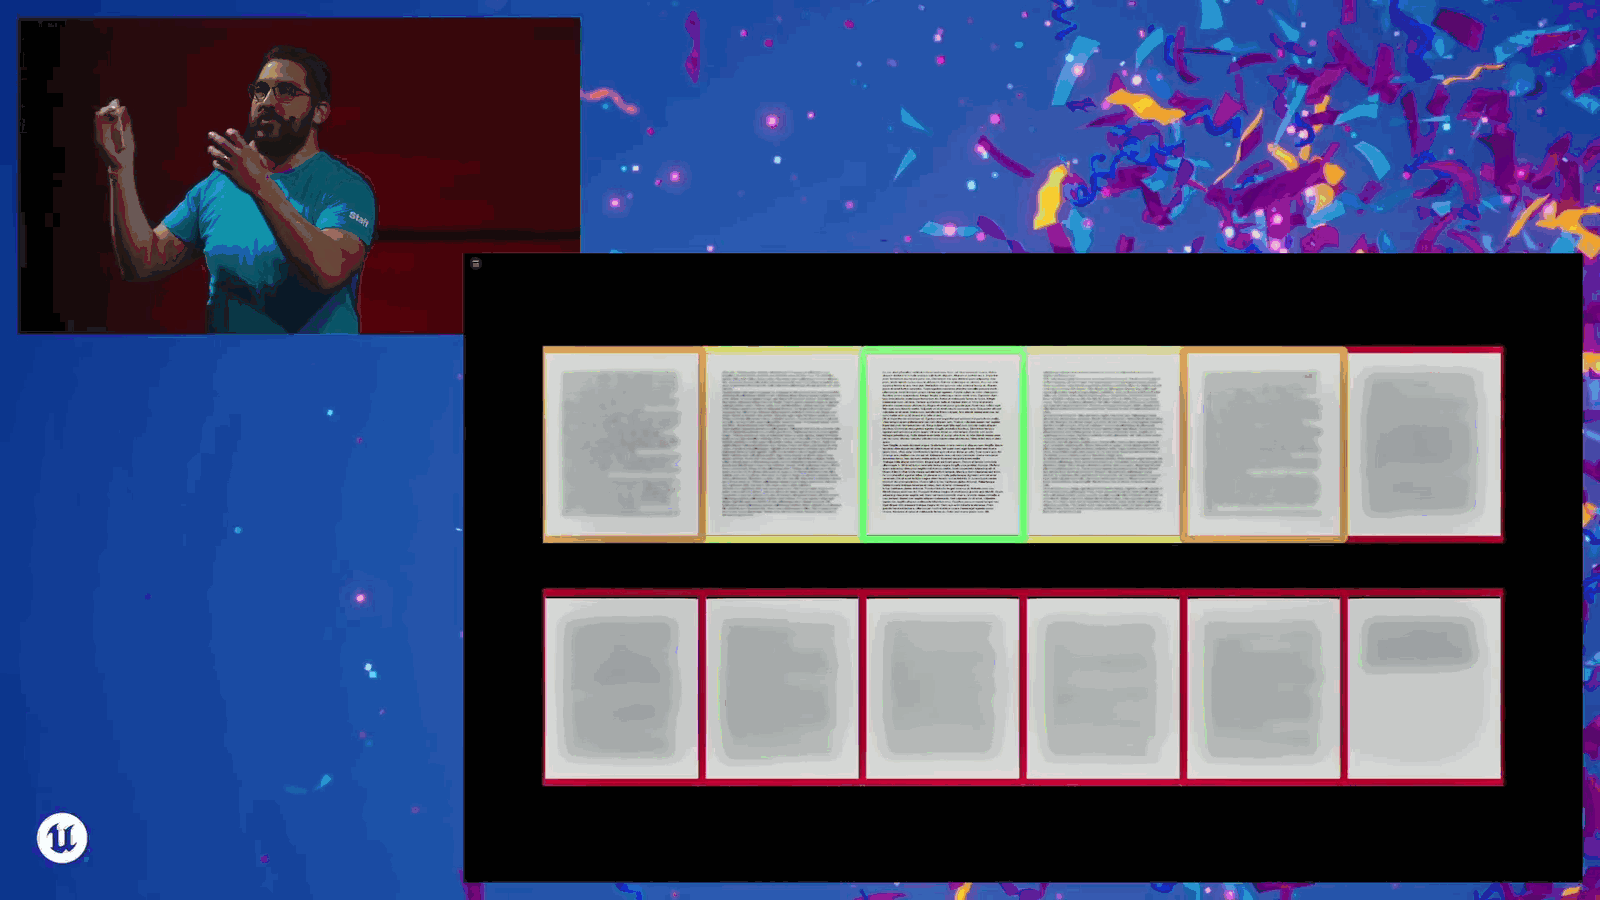
Need them, but maybe they’re going to scroll fast through the book. So maybe we need some information about the pages on either side of the one that the viewer is looking at, but maybe not at a high resolution. And then, if the page is all the way at the end of the book, we don’t really need any information about those pages, so we can lower their resolution. And now we have a more efficient data structure for storing the.
Slide 16 — 00:04:39
📌 要点汇总
- 虚拟化技术通过展示书籍相关内容来实现功能
- 虚拟化在游戏行业和实时领域具有广泛应用
- 该技术的目的是满足实时交互需求
Relevant parts of the book and displaying them to the user. That’s effectively what virtualization is doing. And there, the why? Why did we— and when I say “we” here, I’m not just talking about Epic Games. I’m talking about the games industry. Everybody working in real time.
Slide 17 — 00:04:56
📌 要点汇总
- 早期图形处理只需关注纹理、网格和其他基础元素
- 随着图形功能的提升,资产复杂度显著增加
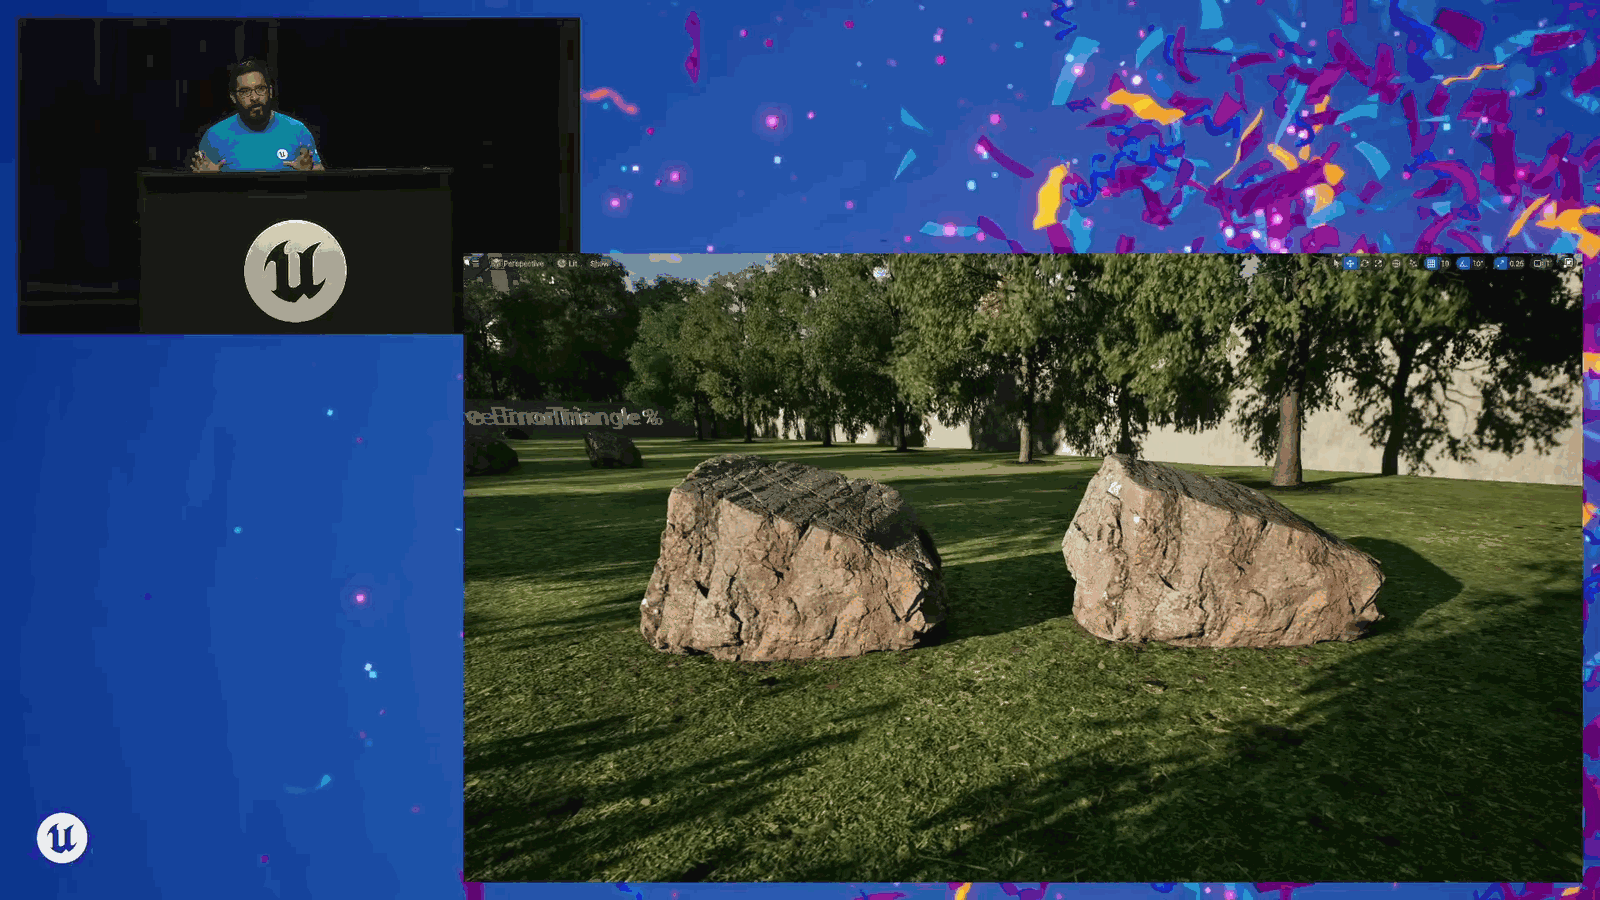
- 虚拟化成为应对复杂图形需求的必要手段
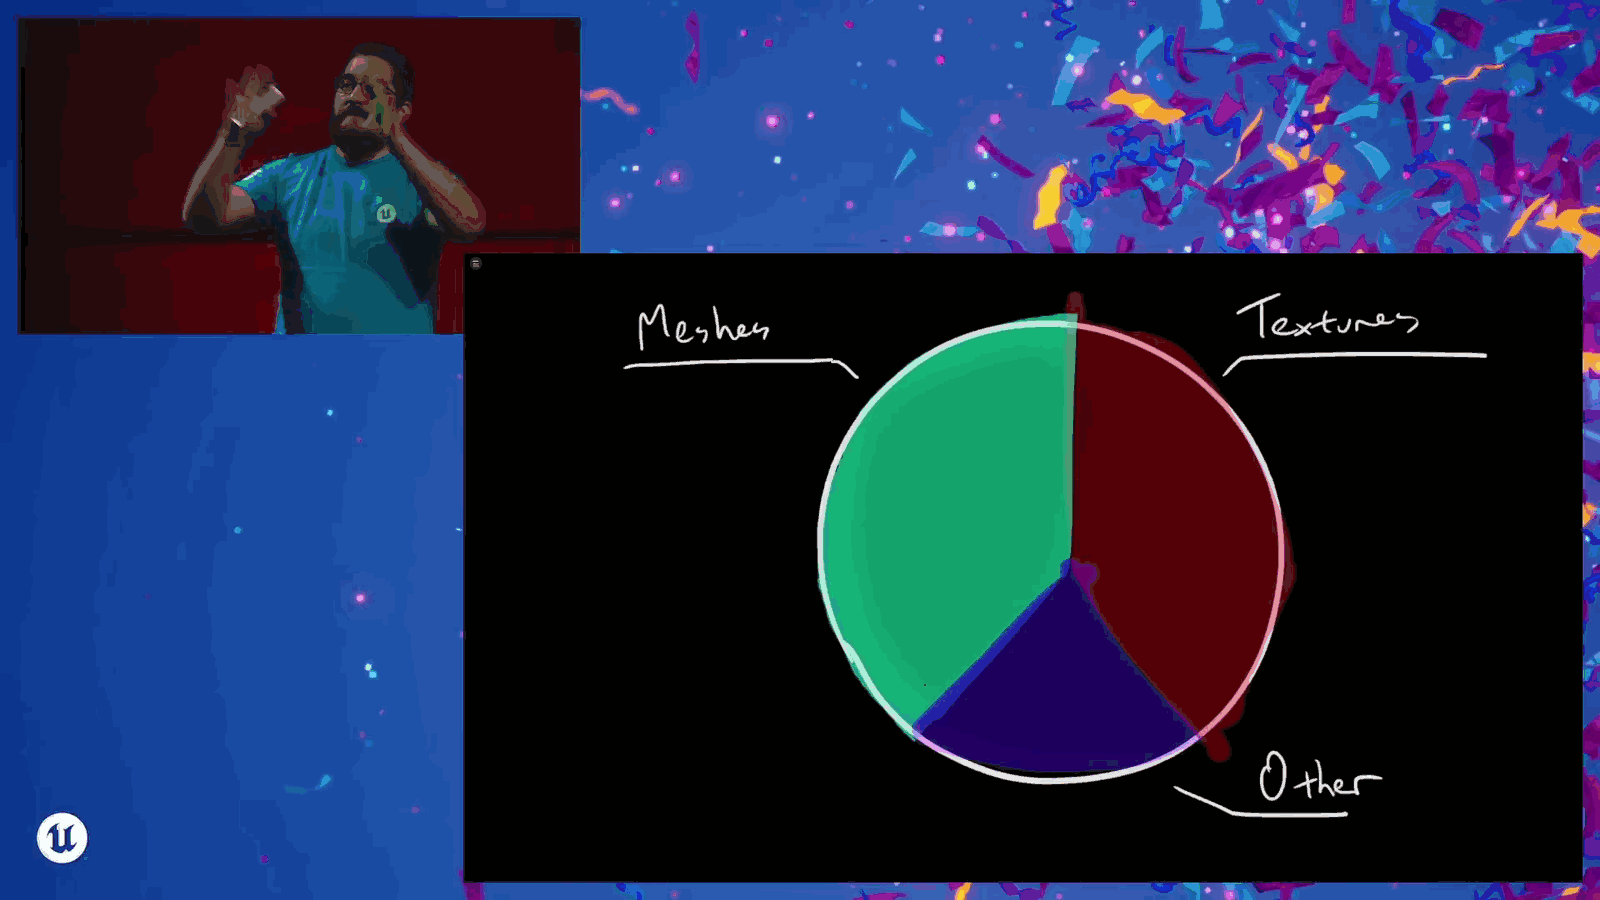
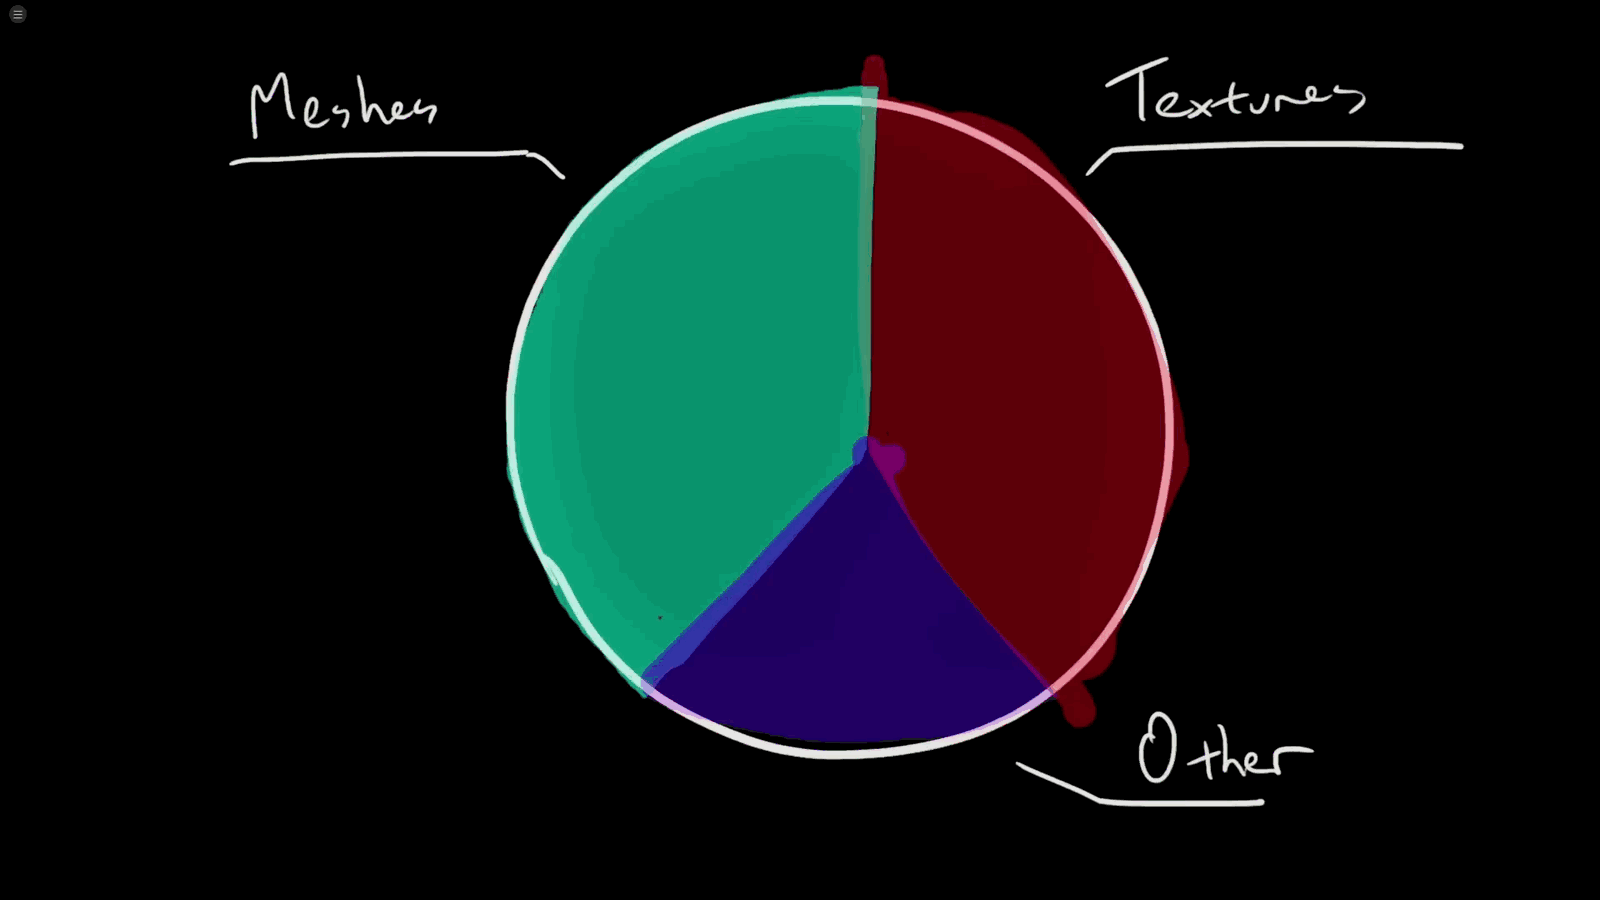
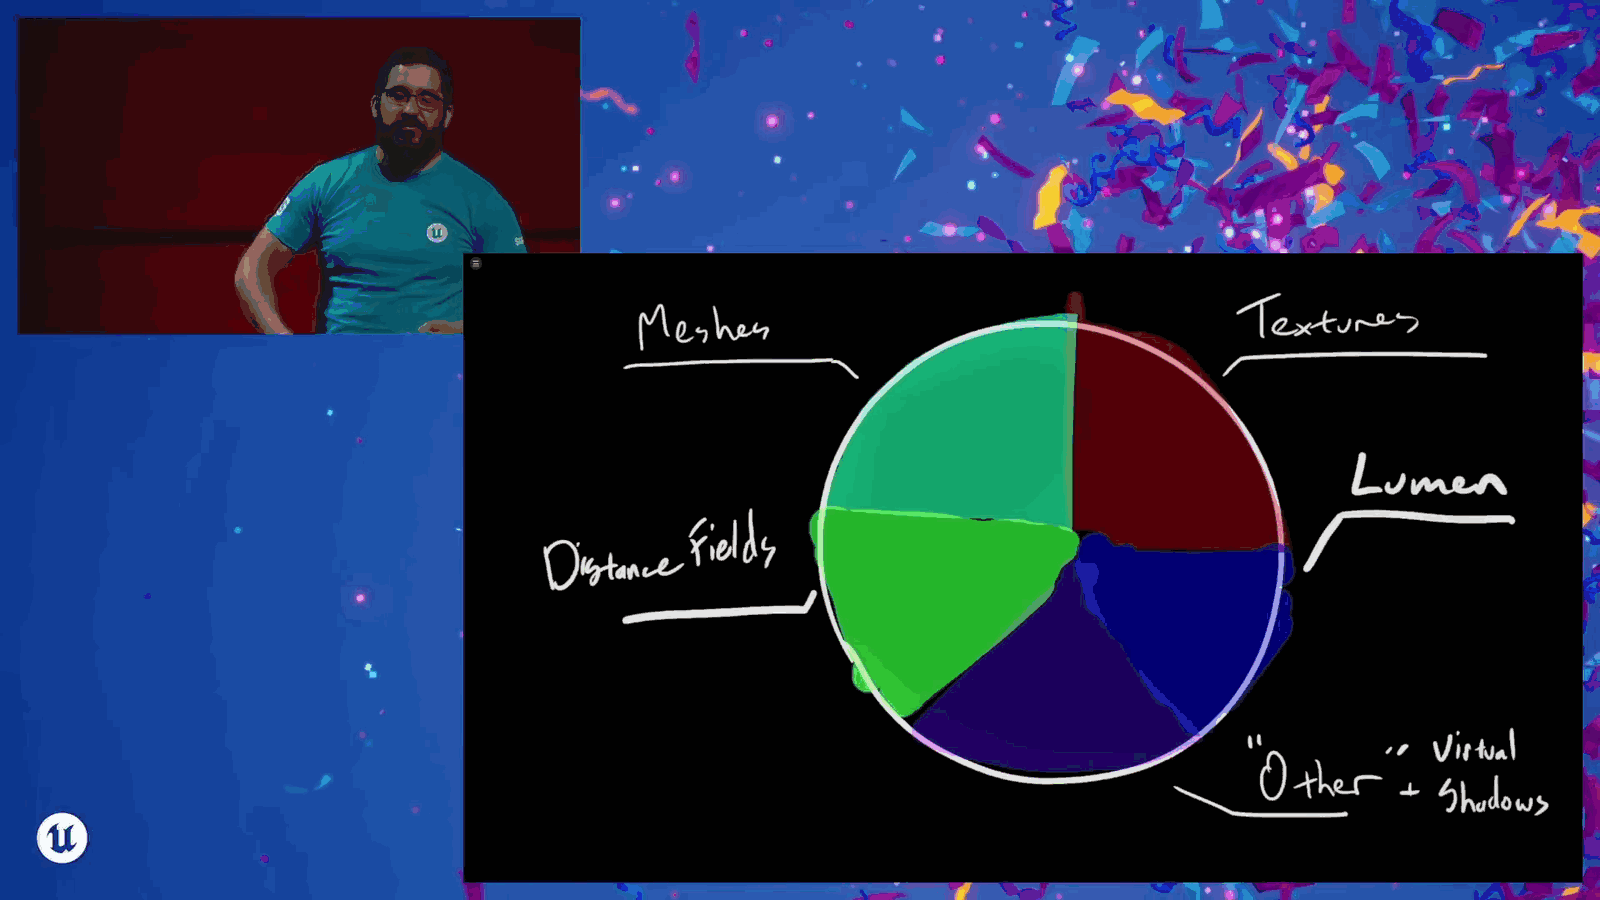
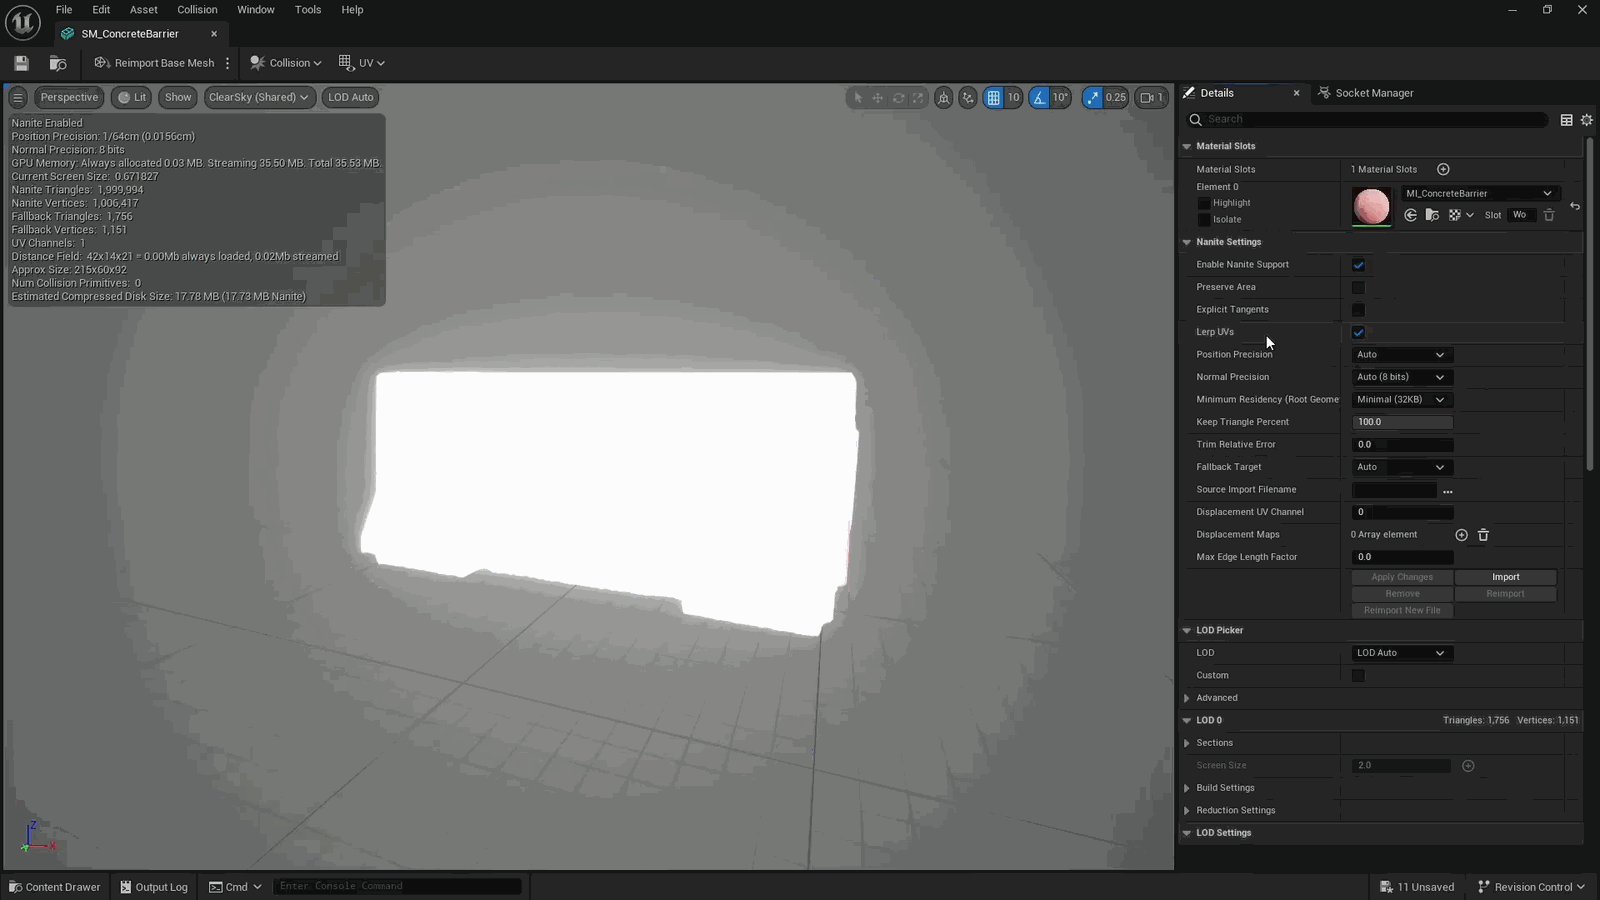
Graphics as a whole. Why did we need to virtualize stuff? Well, back in the day, we really only had like three things that we had to worry about: right, textures, meshes, and other. And then as we started getting more advanced with our graphics features, as the assets that we started.
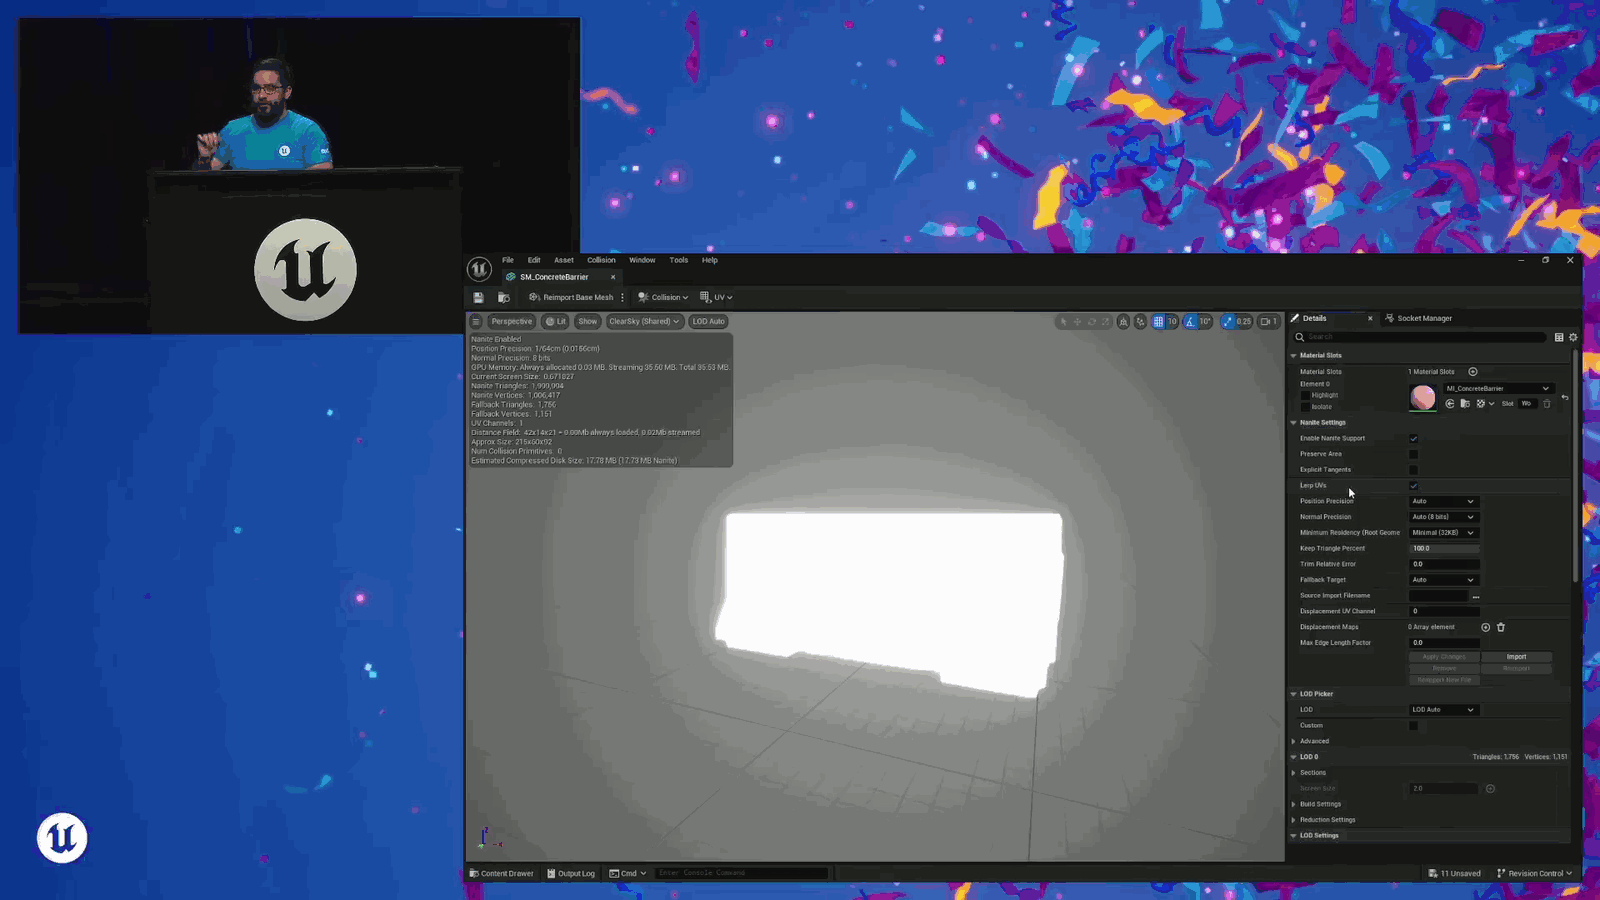
Slide 18 — 00:05:10
📌 要点汇总
- VRAM需求增长速度超过内存容量提升速度
- 新功能(如Distance fields、Lumen、虚拟阴影地图等)进一步增加内存压力
- 需要寻找更高效的内存管理方案以满足性能需求
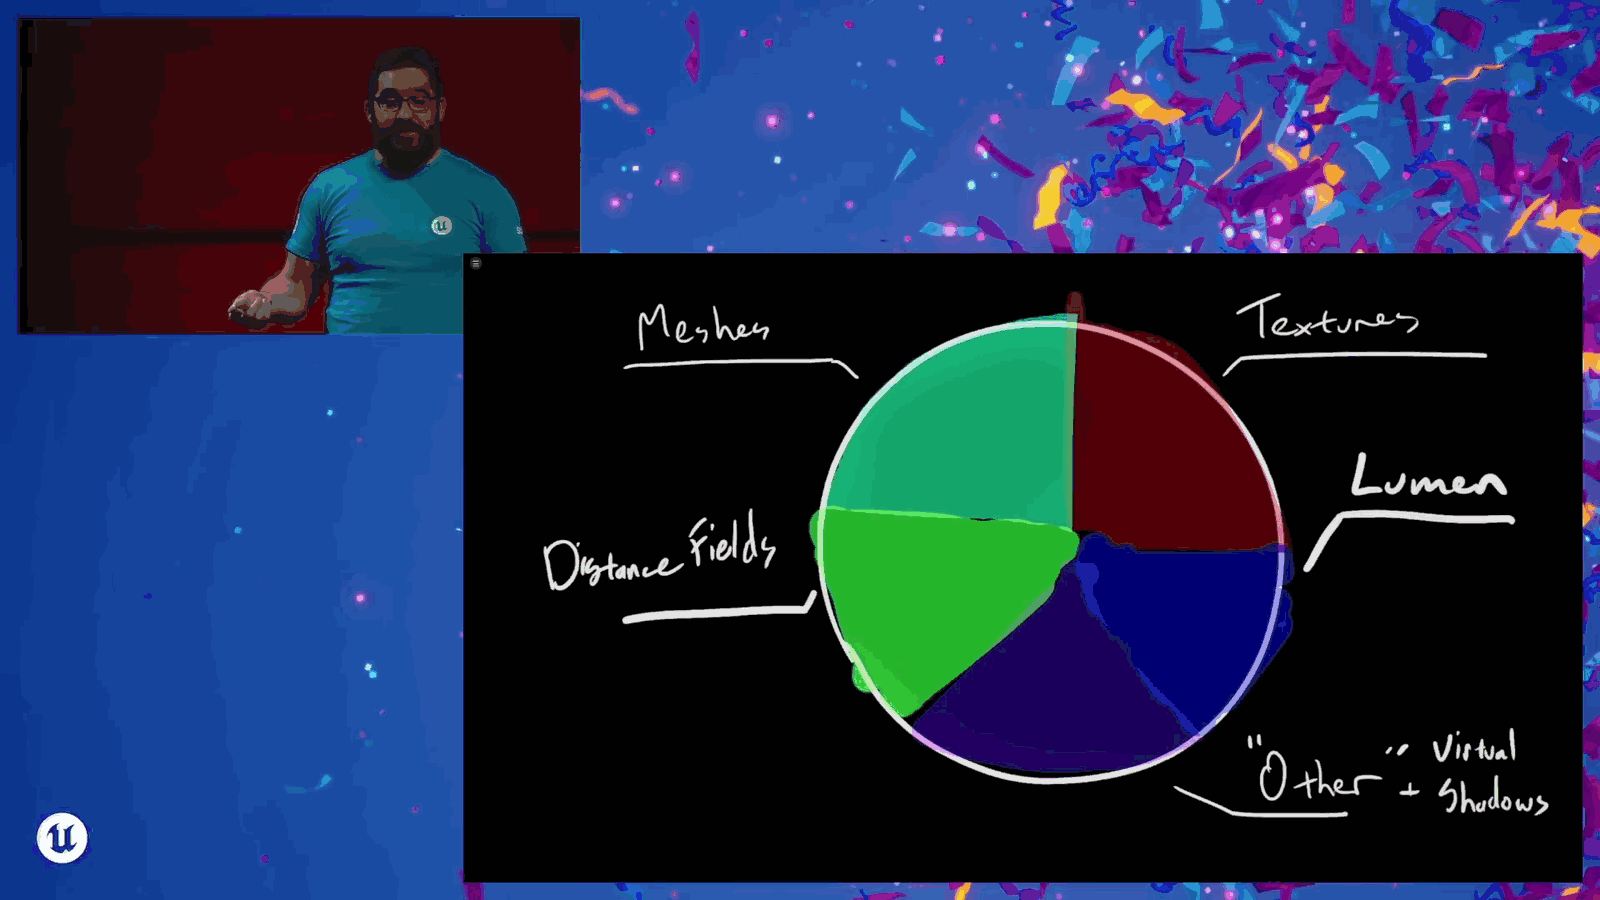
Started generating, started getting bigger. We needed more. We needed more room on the VRAM in memory. But it turns out that memory sizes have not been increasing at the same rate as our demands on them. And then, of course, we’re also adding new features, right? Distance fields, Lumen, virtual shadow maps, runtime virtual textures. All of these features are.
Slide 19 — 00:05:32
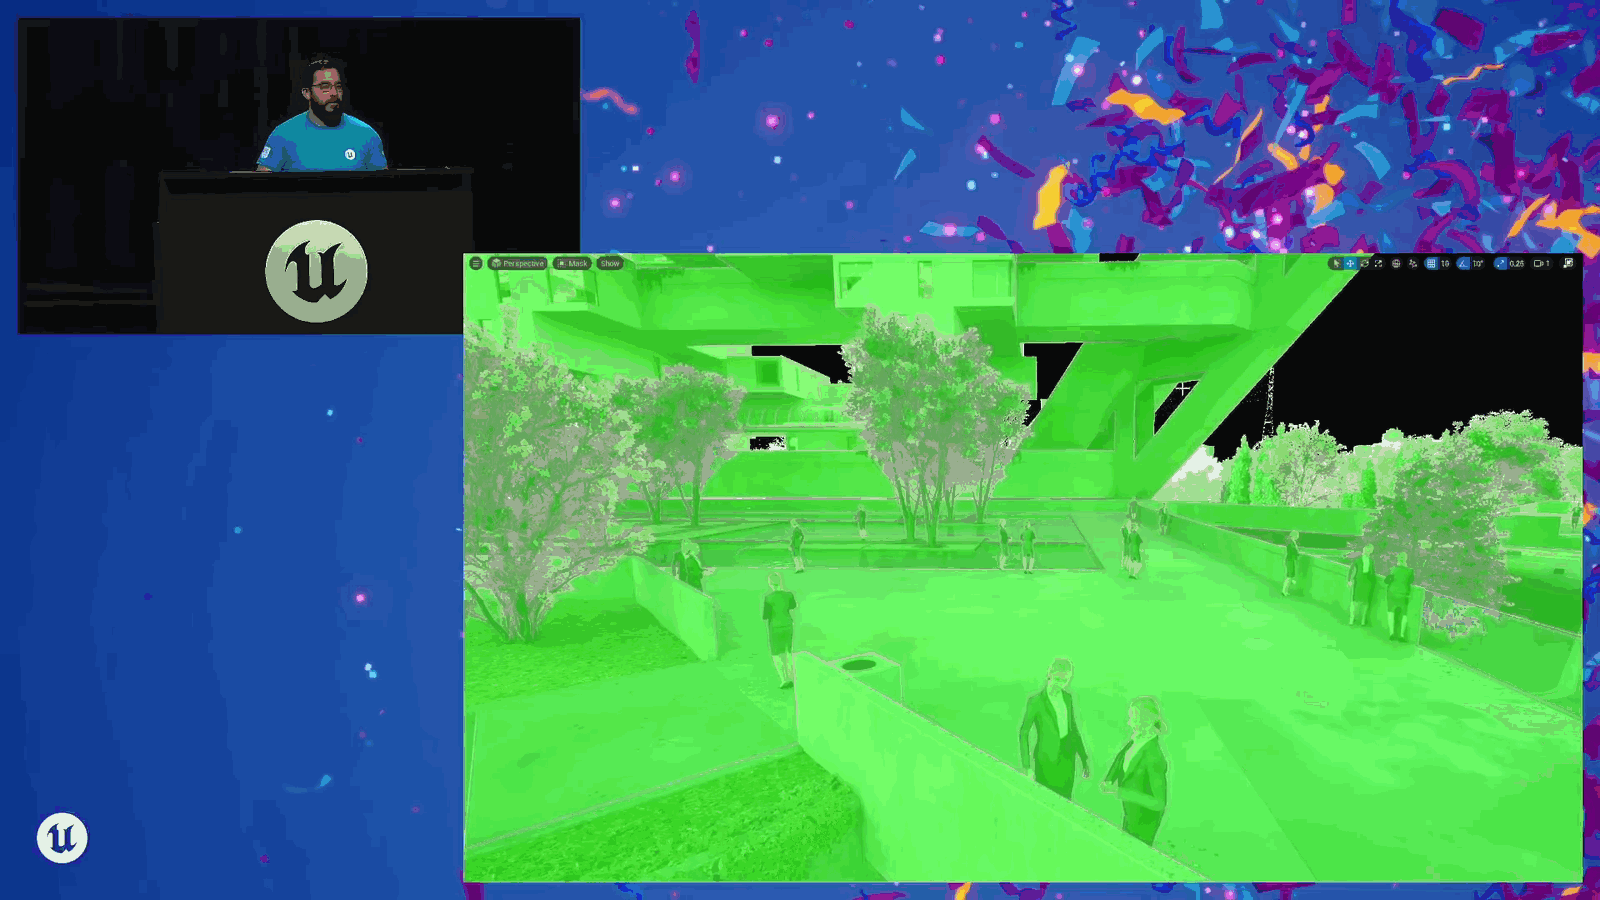
📌 要点汇总
- 虚拟视频内存需求增长超过资源供给,需虚拟化以提高内存使用效率
- 文理(textures)是主要内存消耗源,因此对其进行了虚拟化处理
Placing demands on a resource that isn’t growing as quickly as the amount of virtual video memory, and so we needed to virtualize it so we can make more efficient use of the memory that we have available. Right, efficiency. So the biggest offender was textures. So we virtualized our textures.
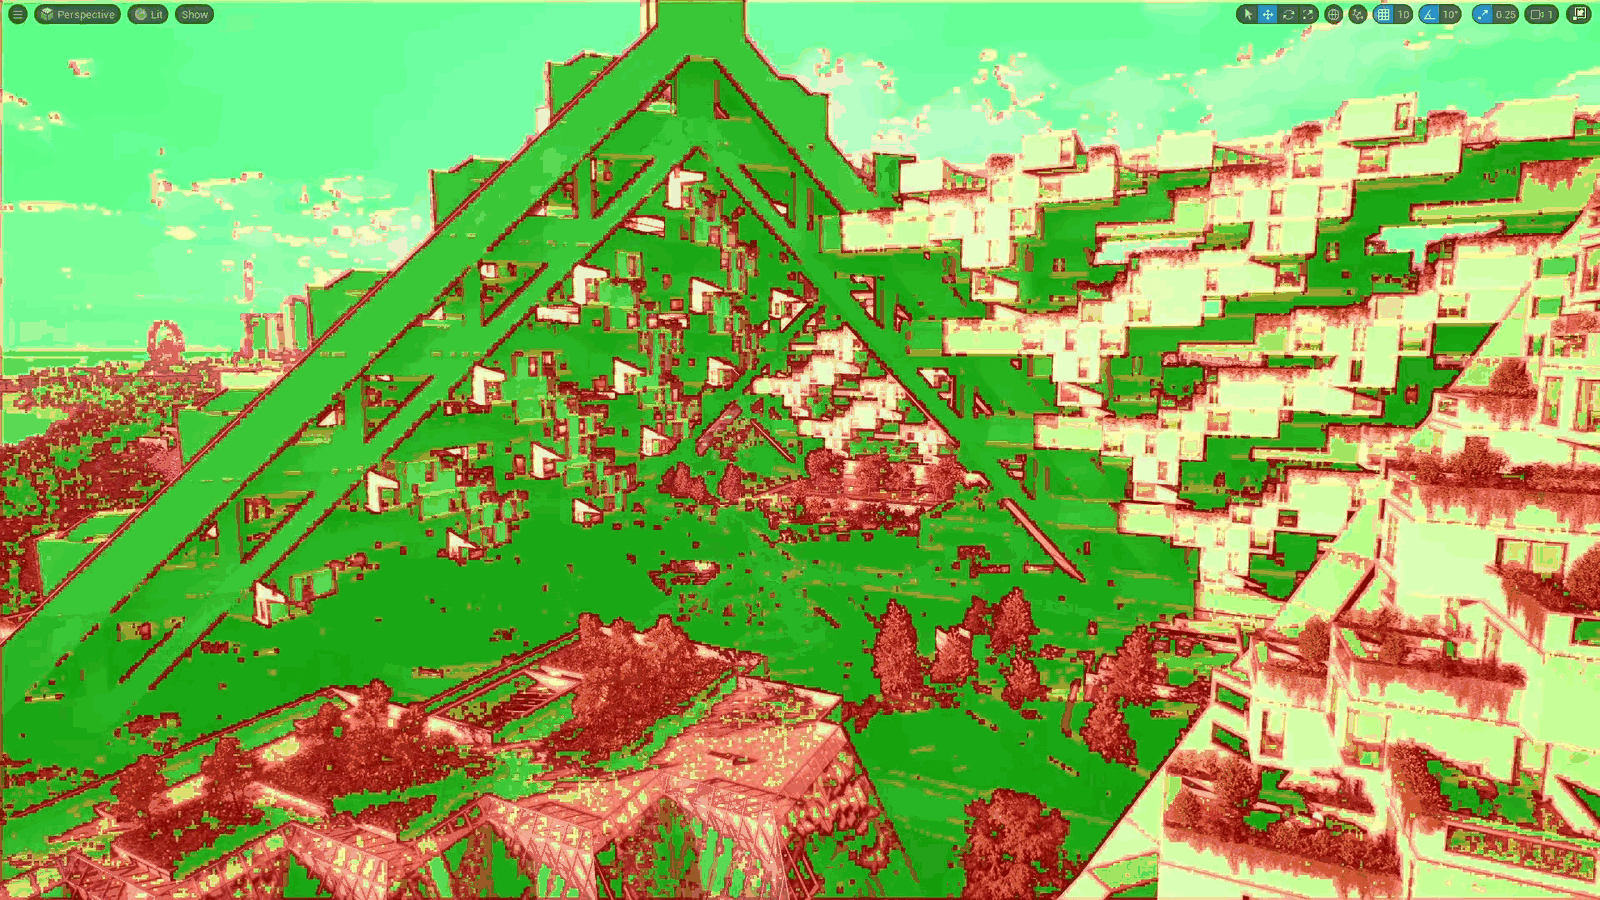
Slide 20 — 00:05:51
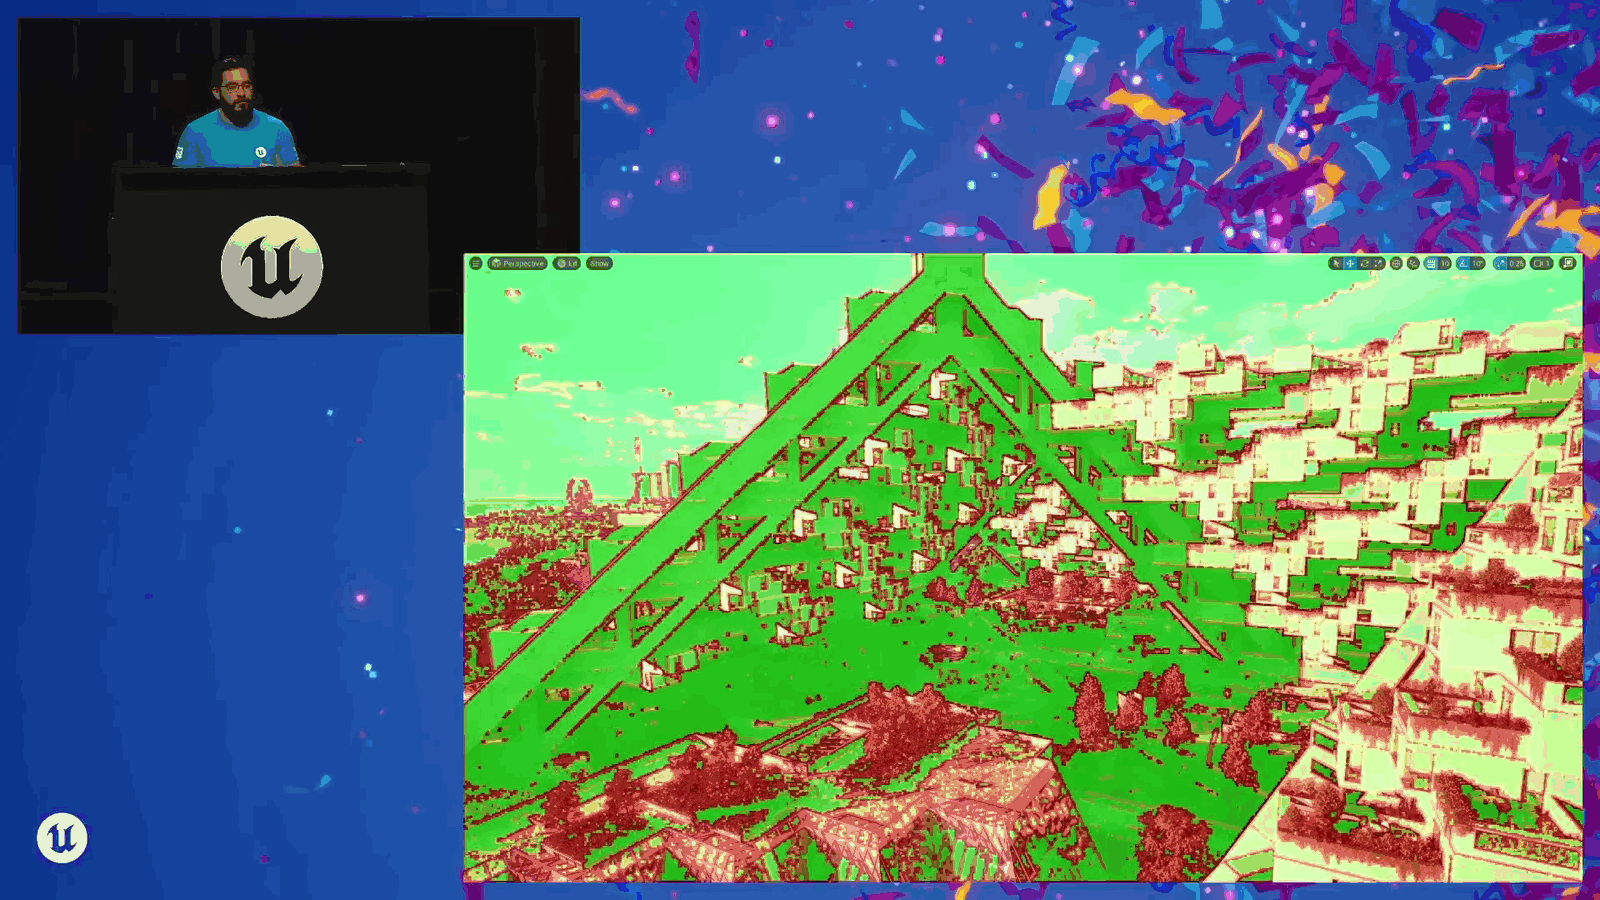
📌 要点汇总
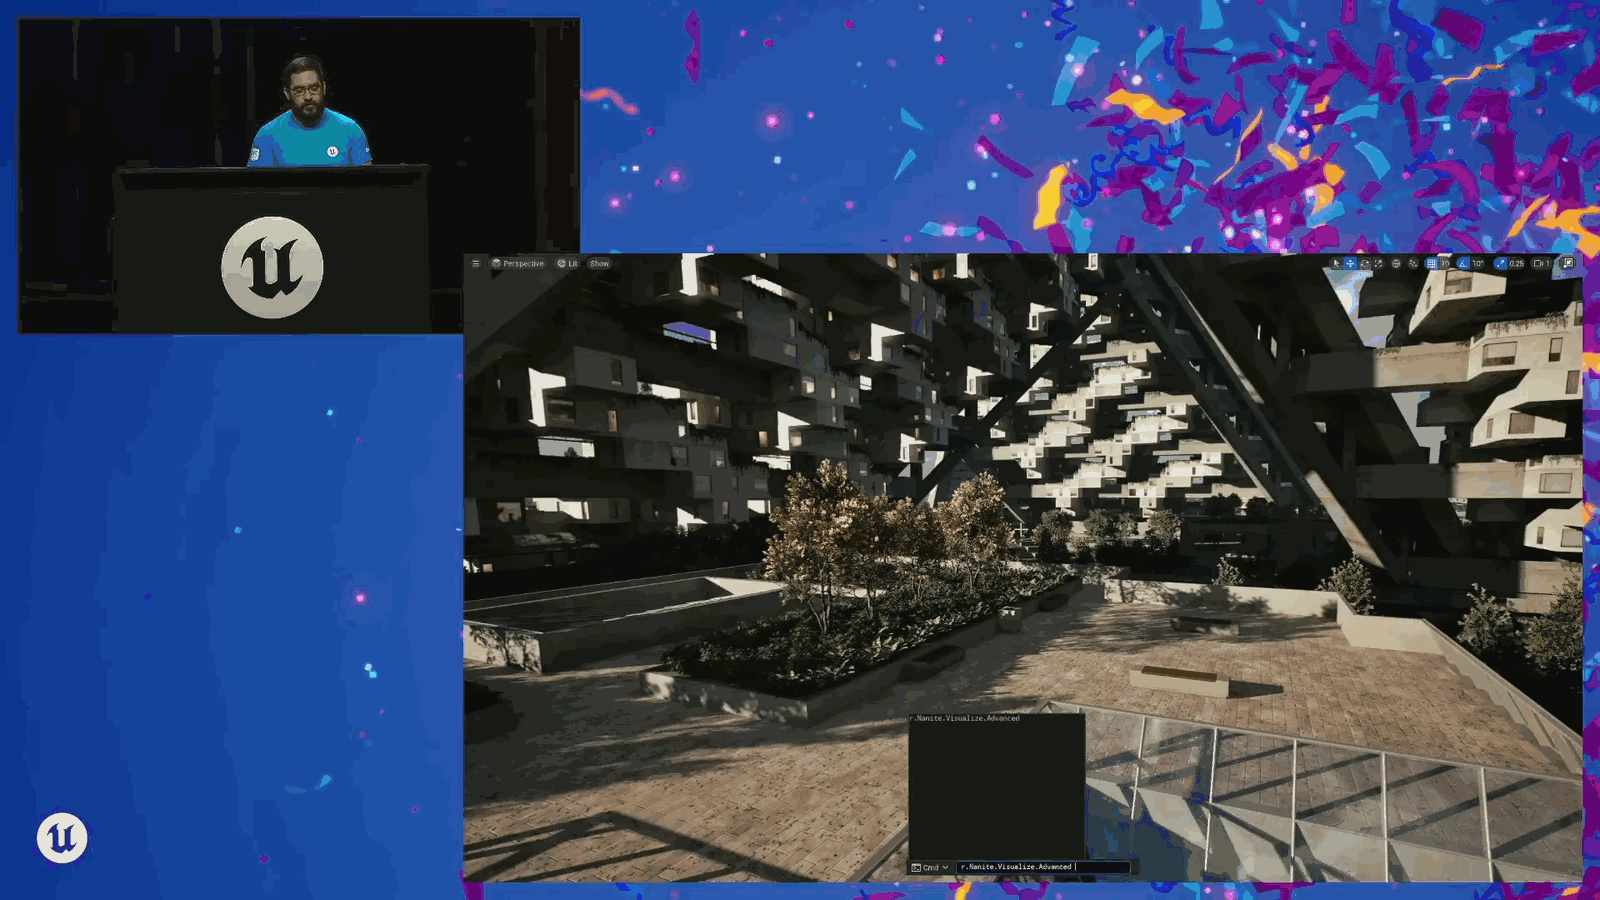
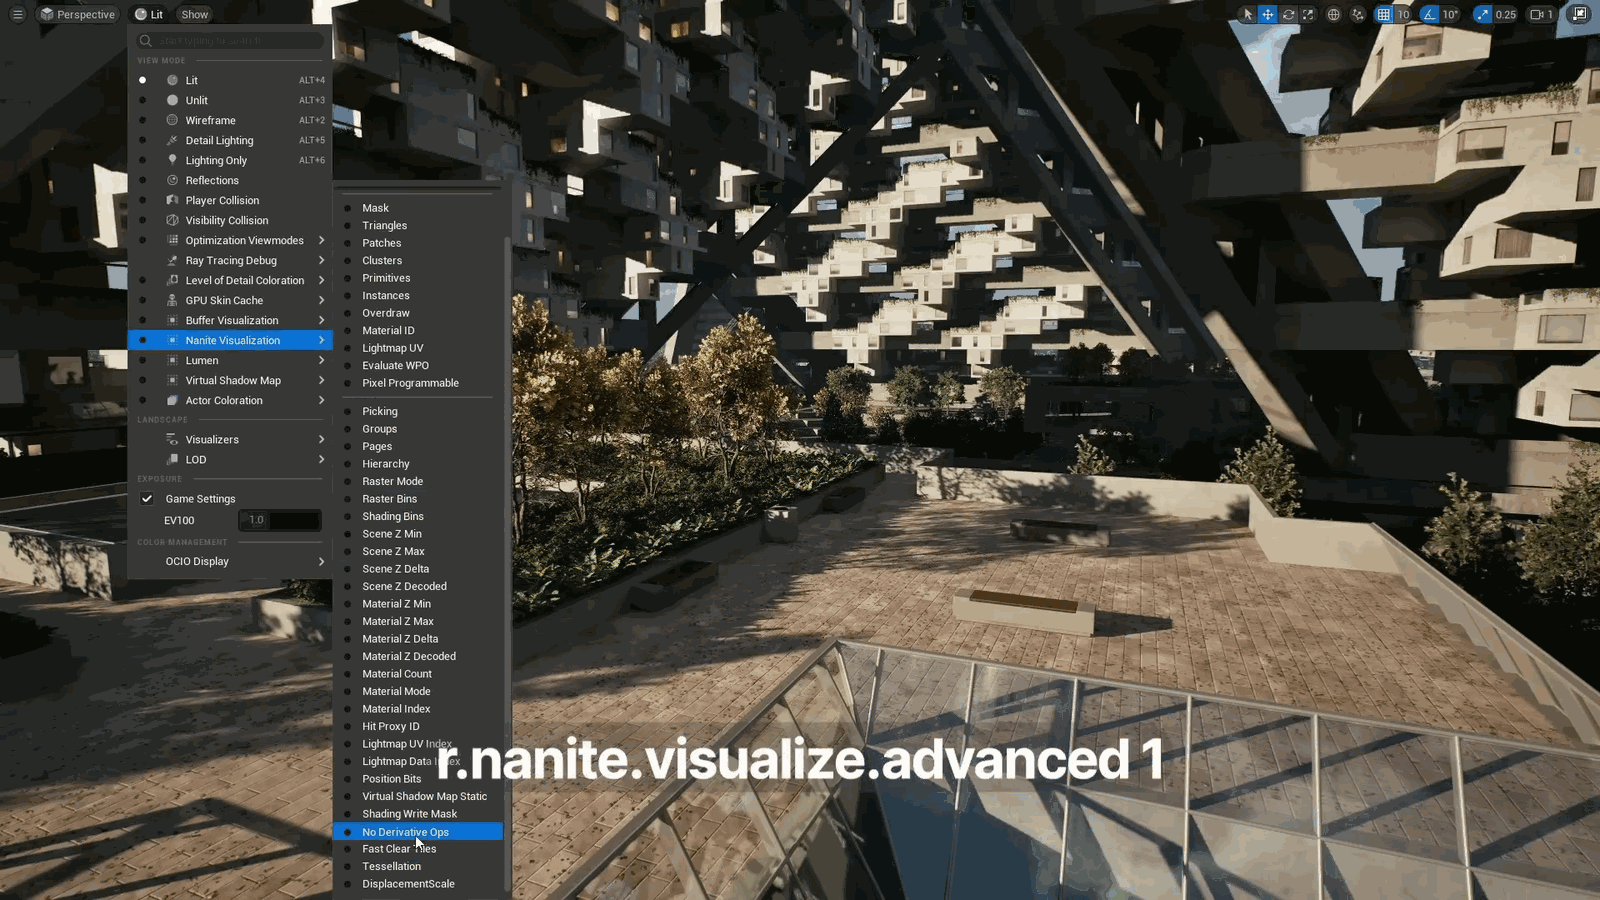
- 虚拟纹理功能已在引擎中存在多年,最早可追溯至2022年
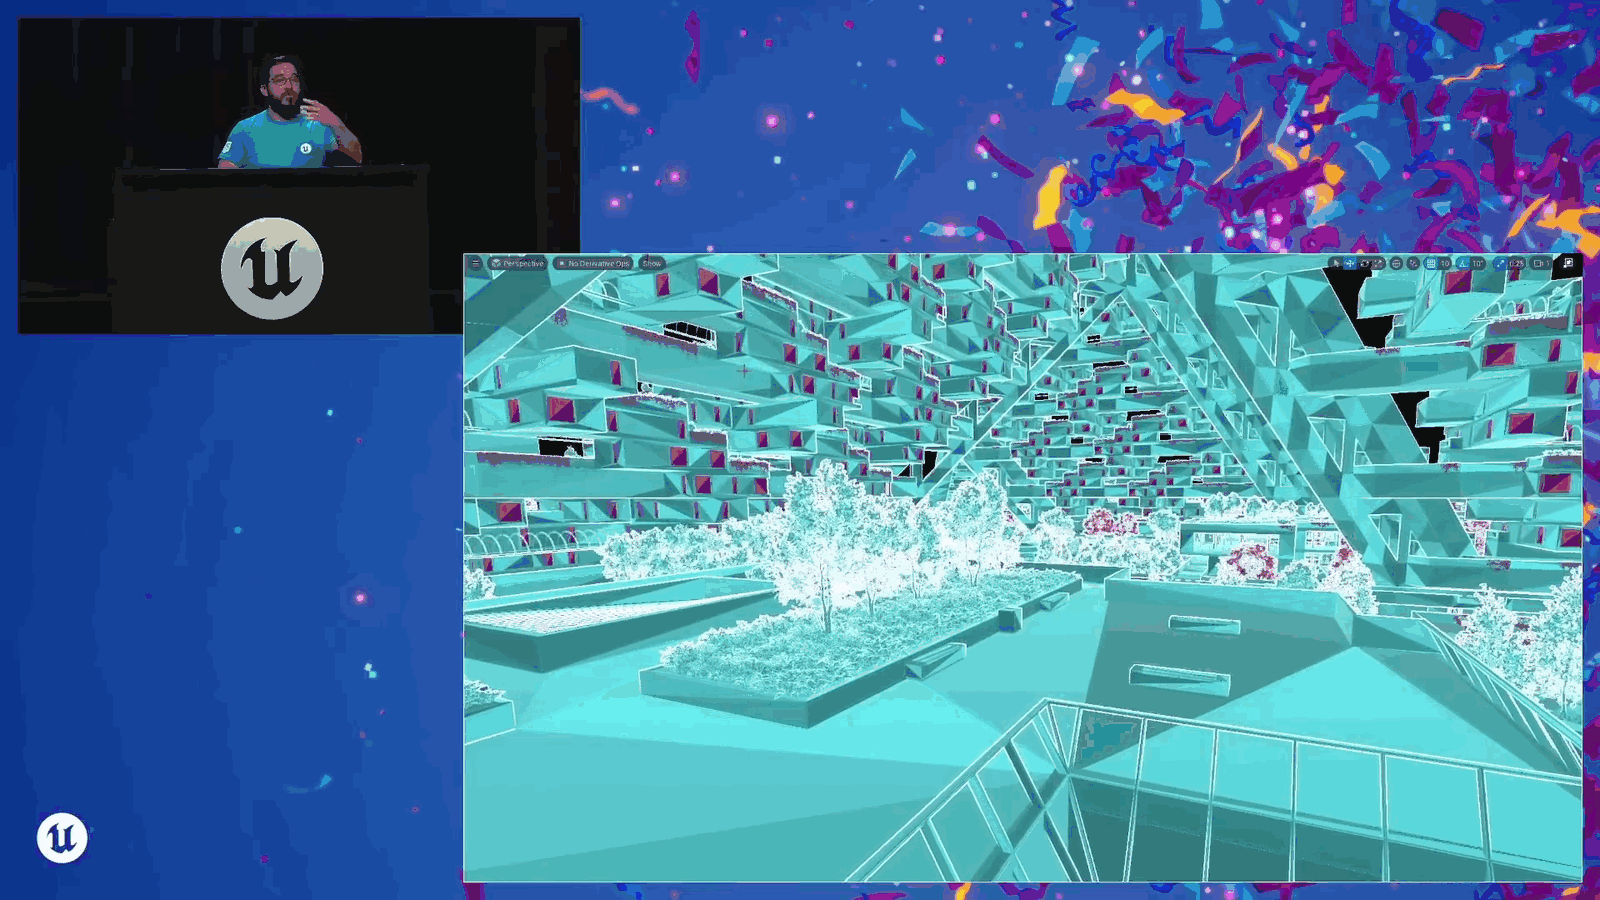
- 该功能并非默认启用,需手动选择启用
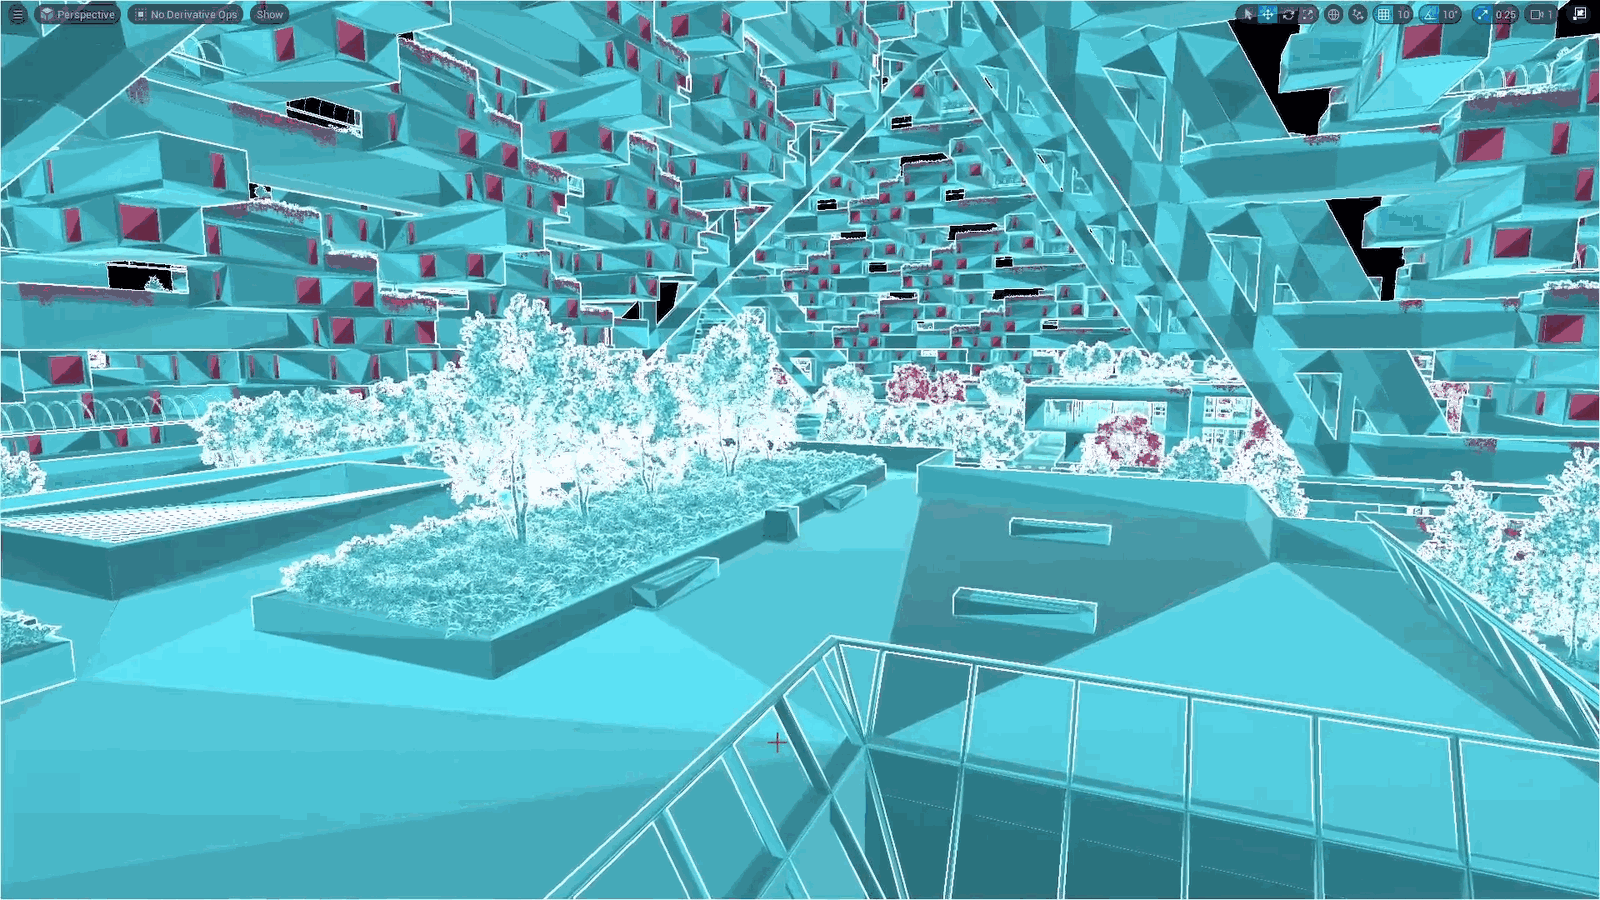
- 启用后需要额外配置以实现高效使用
So that leads me to virtual textures. We’ve had these in the engine for quite a while. I think going back to about four hundred and twenty-two, but they are not a default feature. You have to opt into these. It is a project setting, and there’s a little bit of extra work that we have to do to utilize these efficiently.
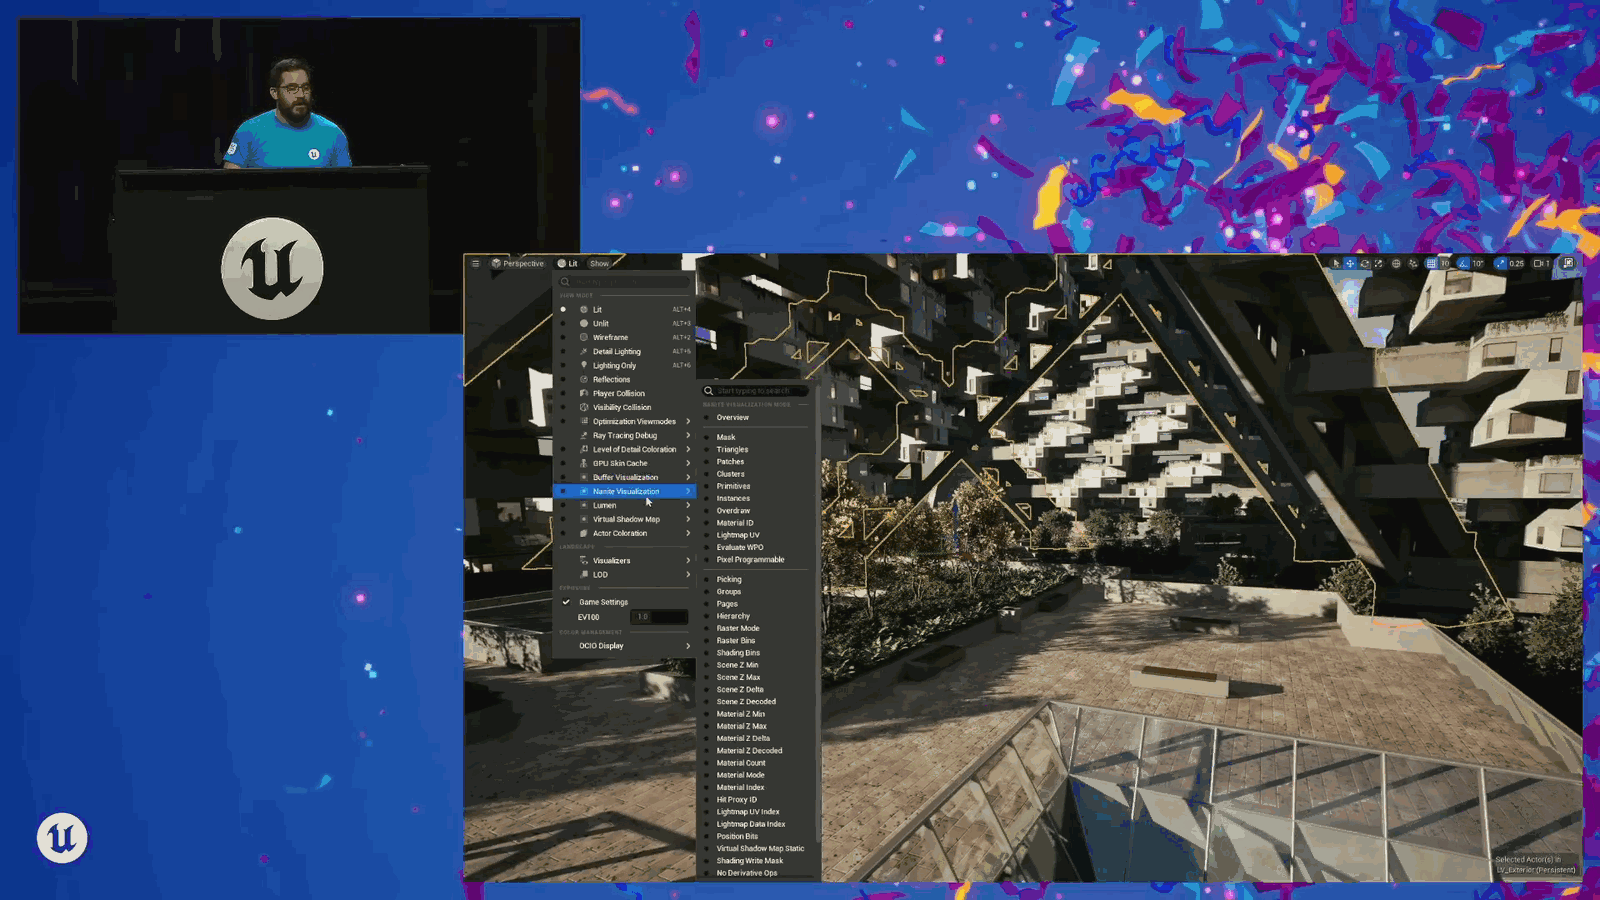
Slide 21 — 00:06:07
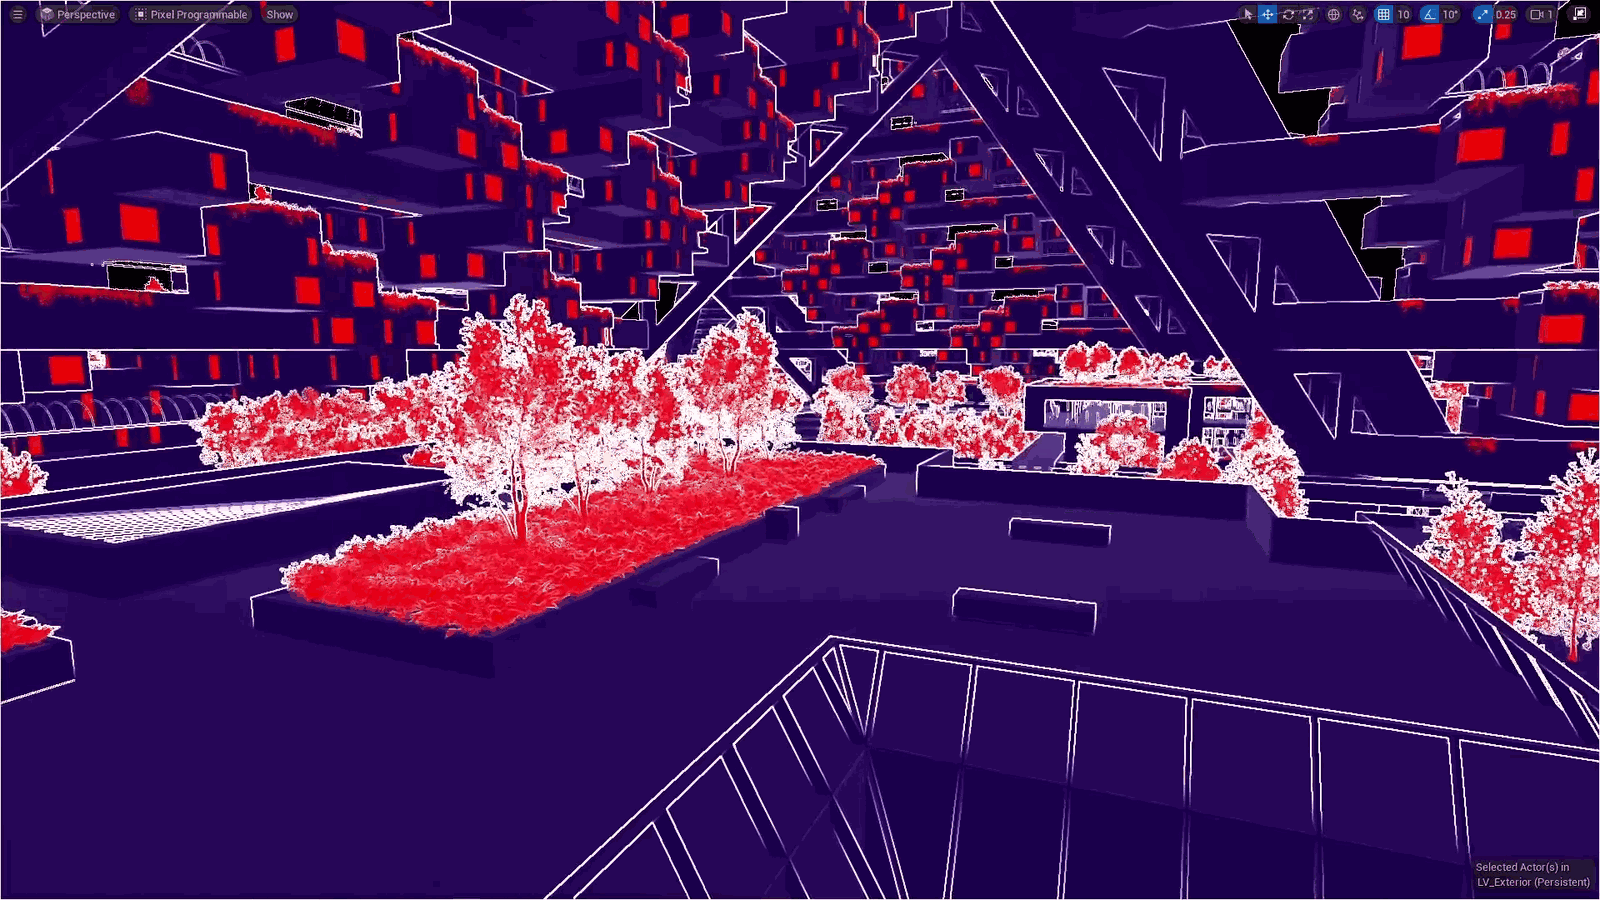
📌 要点汇总
- 通过纹理生成页表,实现纹理不同mip层级的流式加载
- 使用反馈通道确定所需mip层级,提升渲染效率
- 可视化辅助说明纹理流式加载机制
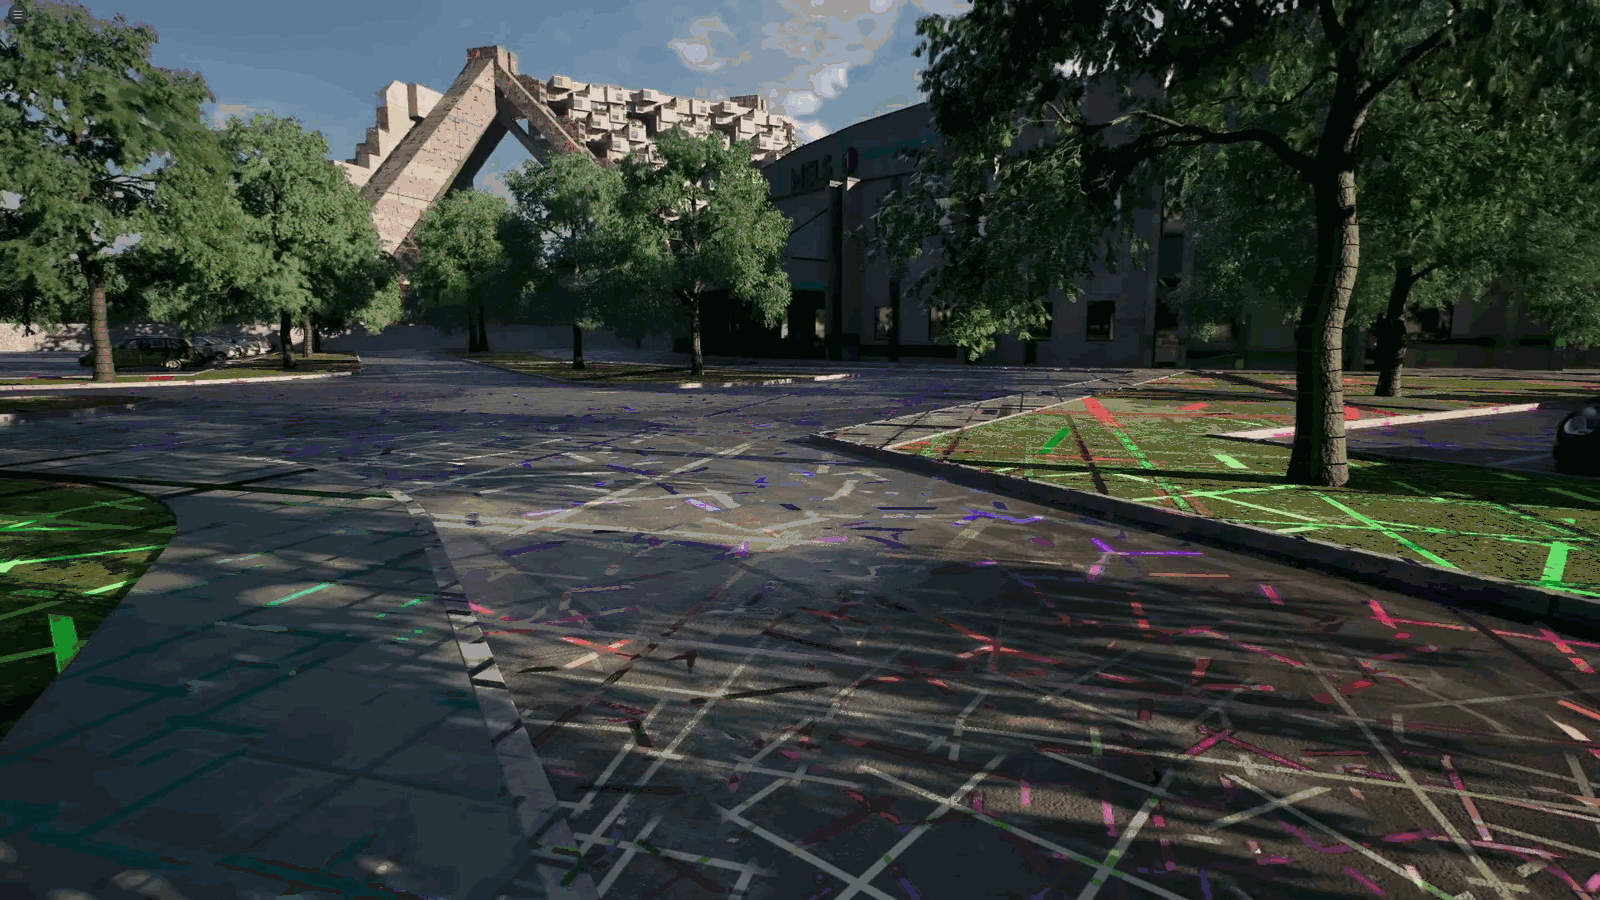
But basically, all we’re doing is we create a page table out of a texture, and we’re able to stream in parts of a texture at different mip levels, depending on what we need. We have a feedback pass that tells us what mip level we need for these, and I’ve got a little visual.
Slide 22 — 00:06:24
📌 要点汇总
- 使用 RVT Borders 1 来辅助可视化不同分辨率的瓦片
- 部分纹理在特定分辨率下无法完全显示
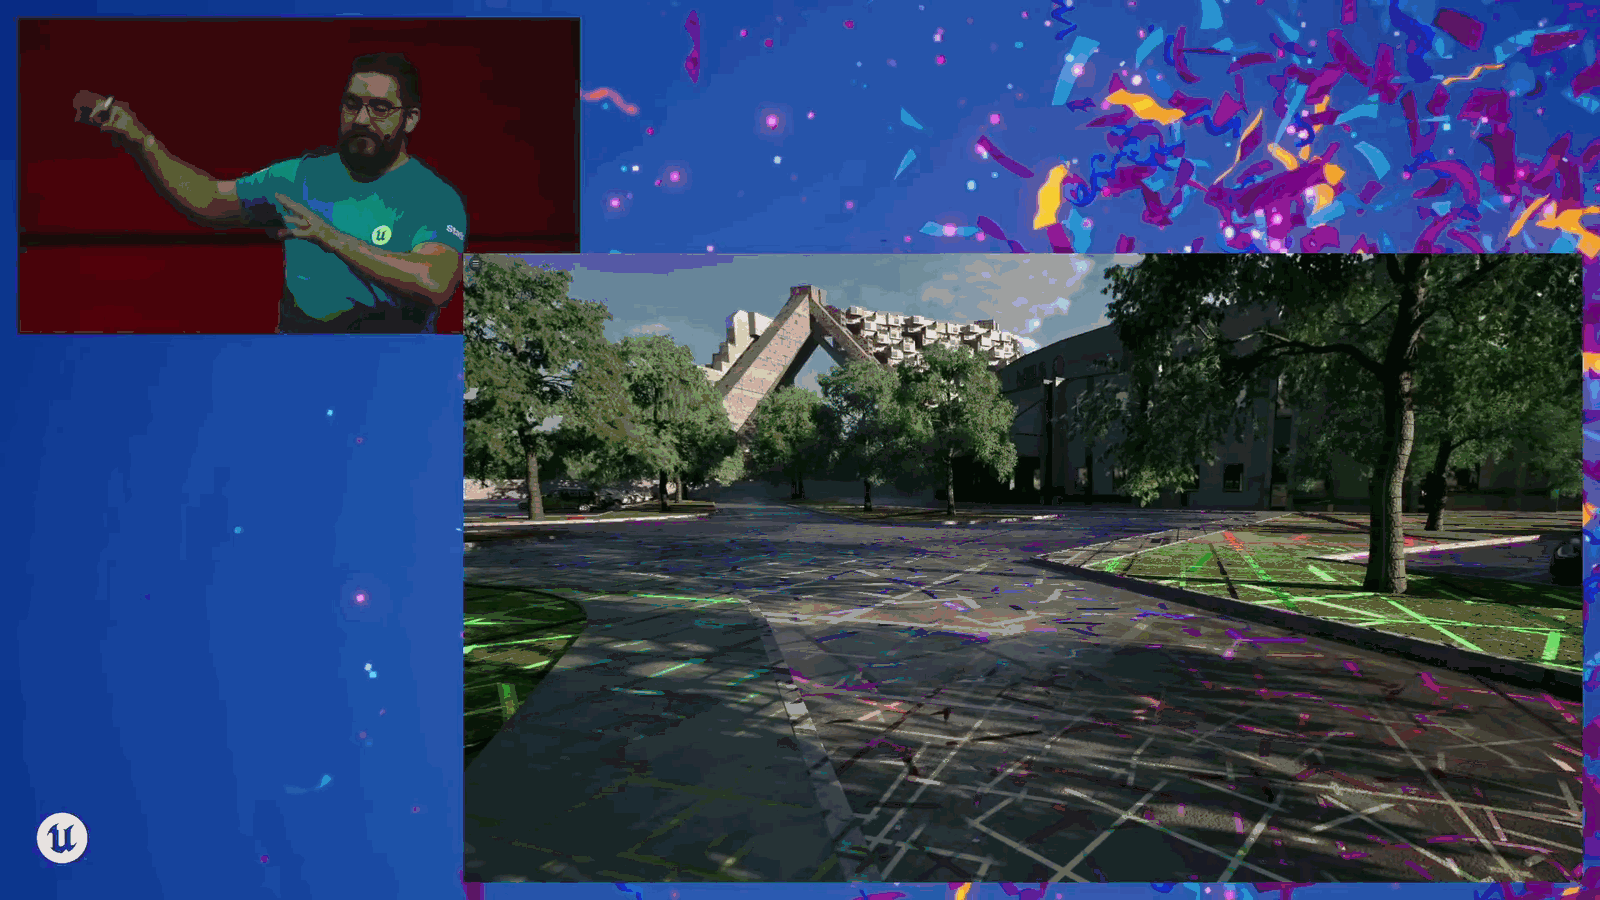
Here, this is using RVT Borders 1 just to help me visualize. Oh, these are all of the different tiles at all the different resolutions, so that you can see, even some parts of a texture are not totally visible at any given time.
Slide 23 — 00:06:39
📌 要点汇总
- 介绍了虚拟纹理技术的优势,并以 hillside 样例项目为例进行说明
- 项目为建筑可视化和线性设计领域应用
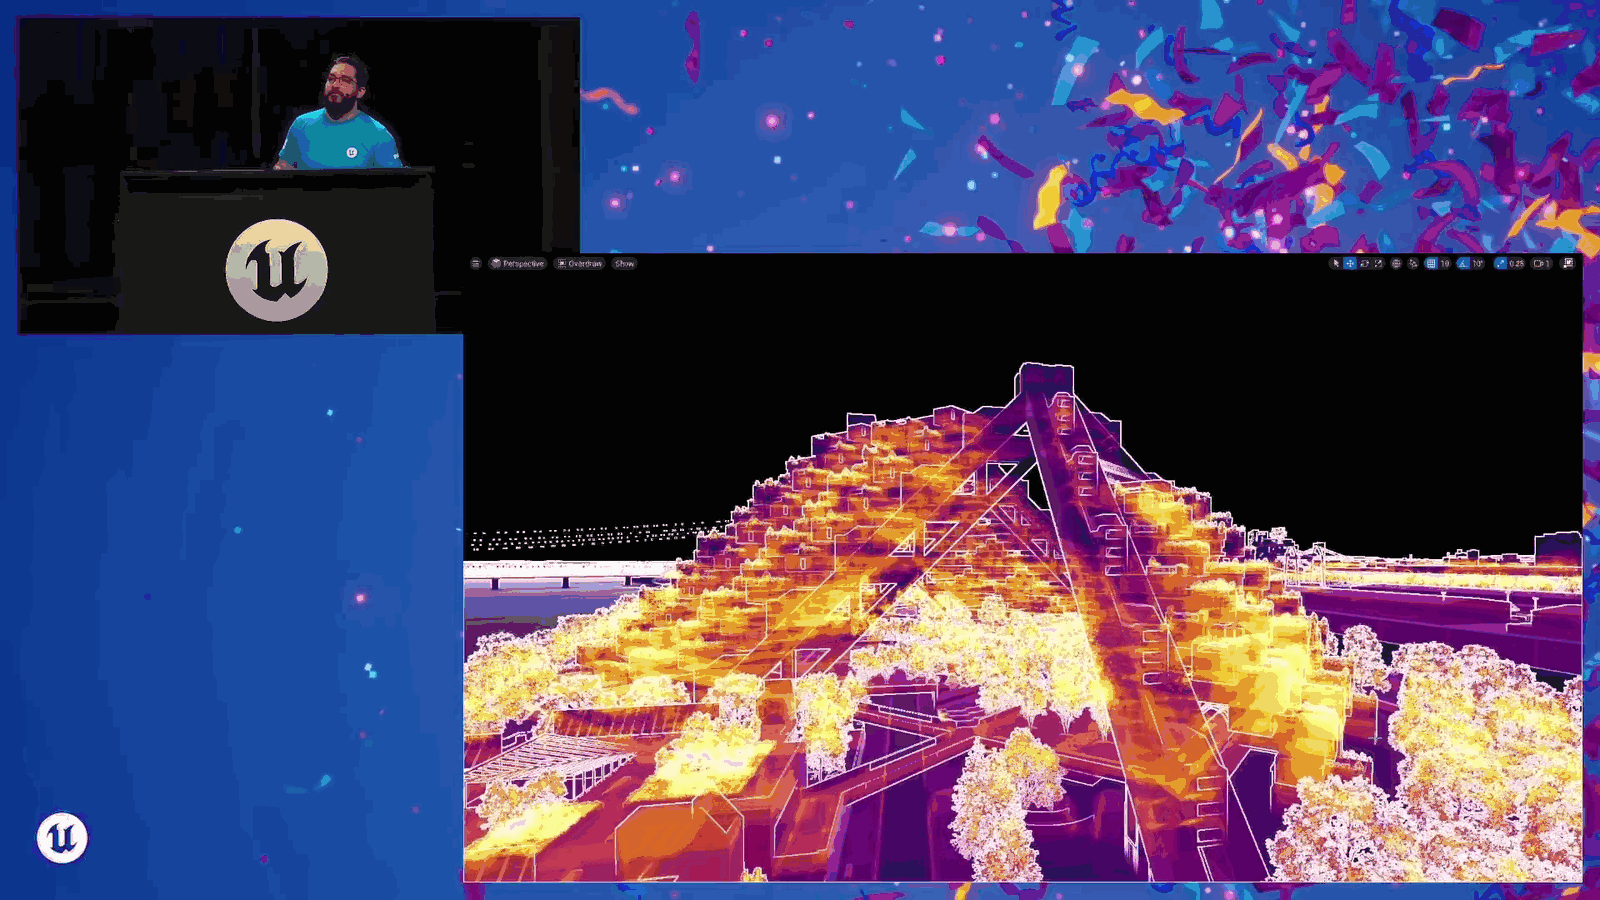
- 通过具体案例展示虚拟纹理的实际效果和价值
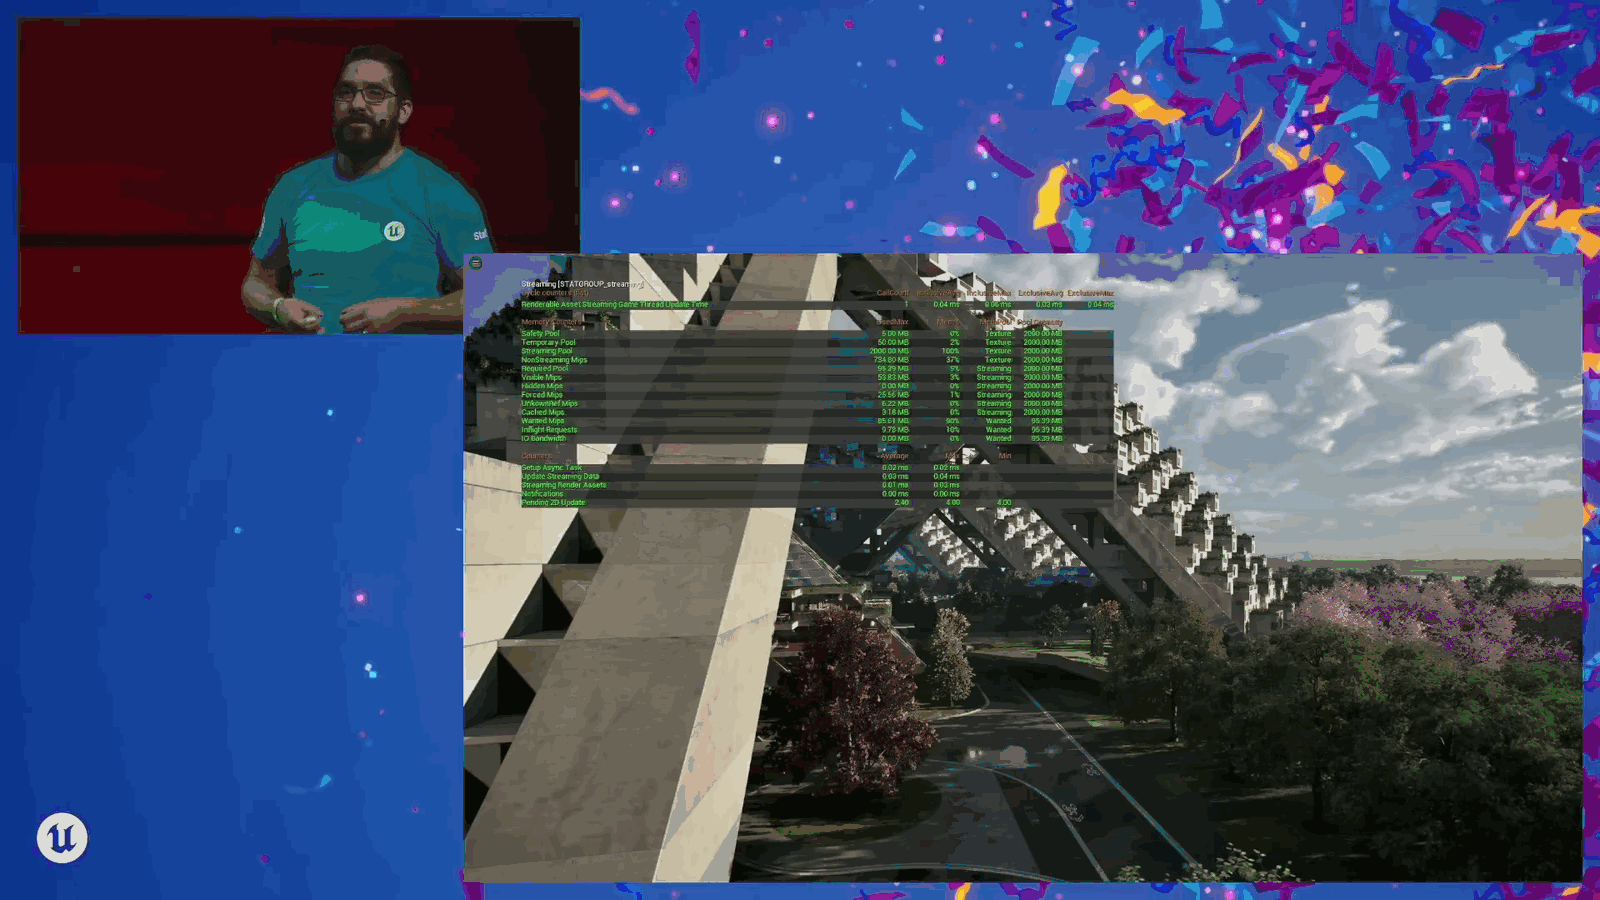
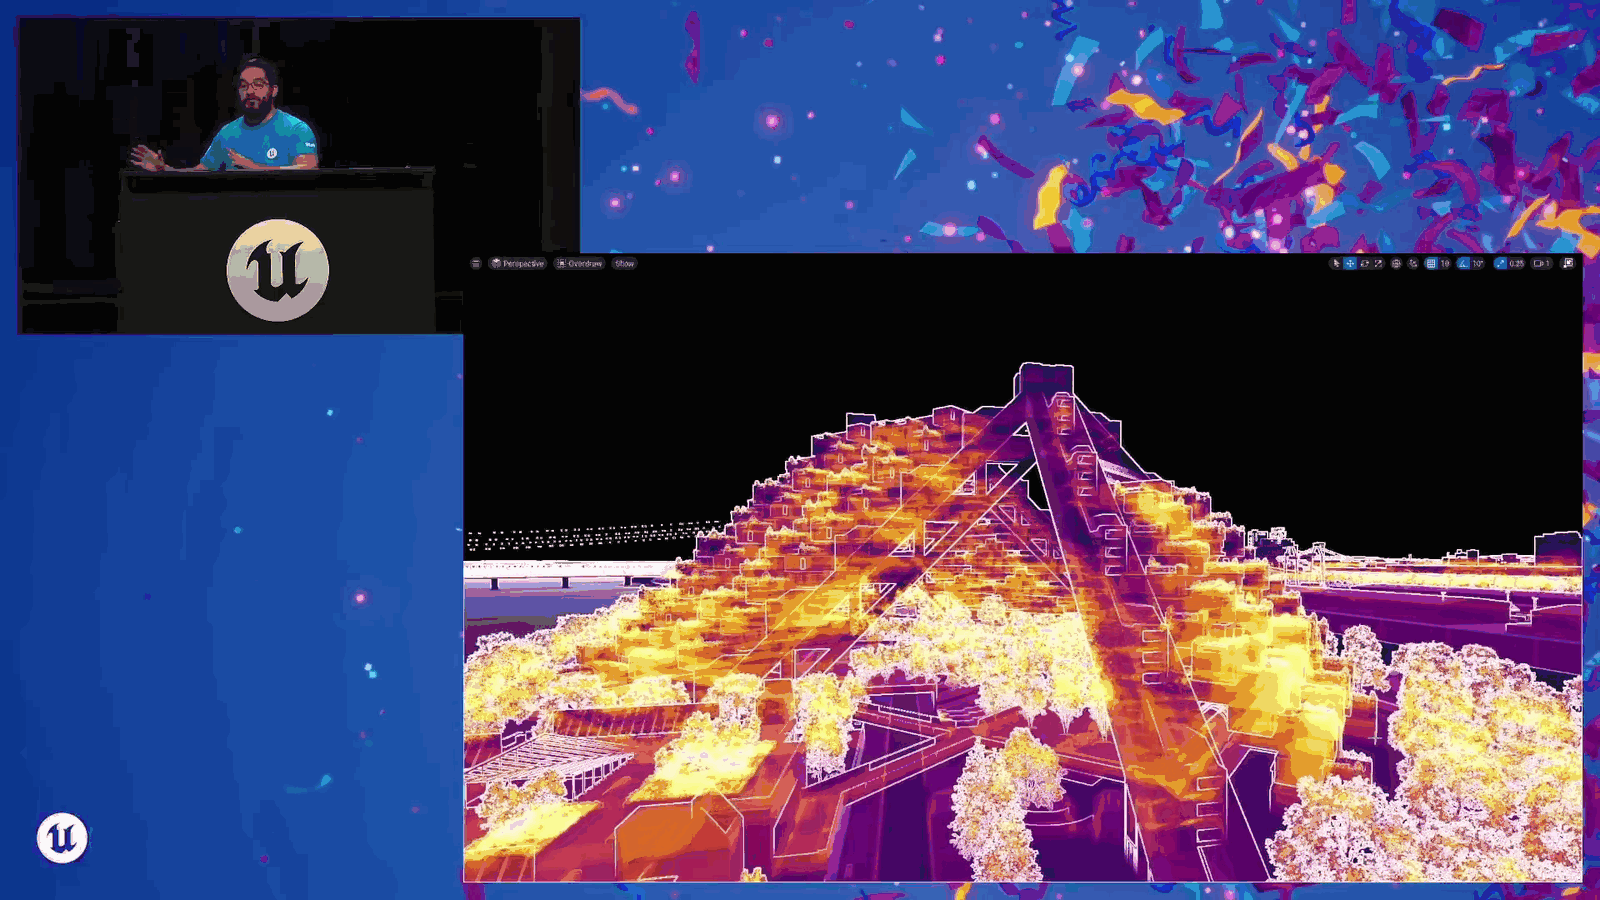
And to give you a sense of the benefits of virtual texturing, I want to take a look at the project that we’ve got here. This is the hillside sample. It is an architectural visualization and linear.
Slide 24 — 00:06:48
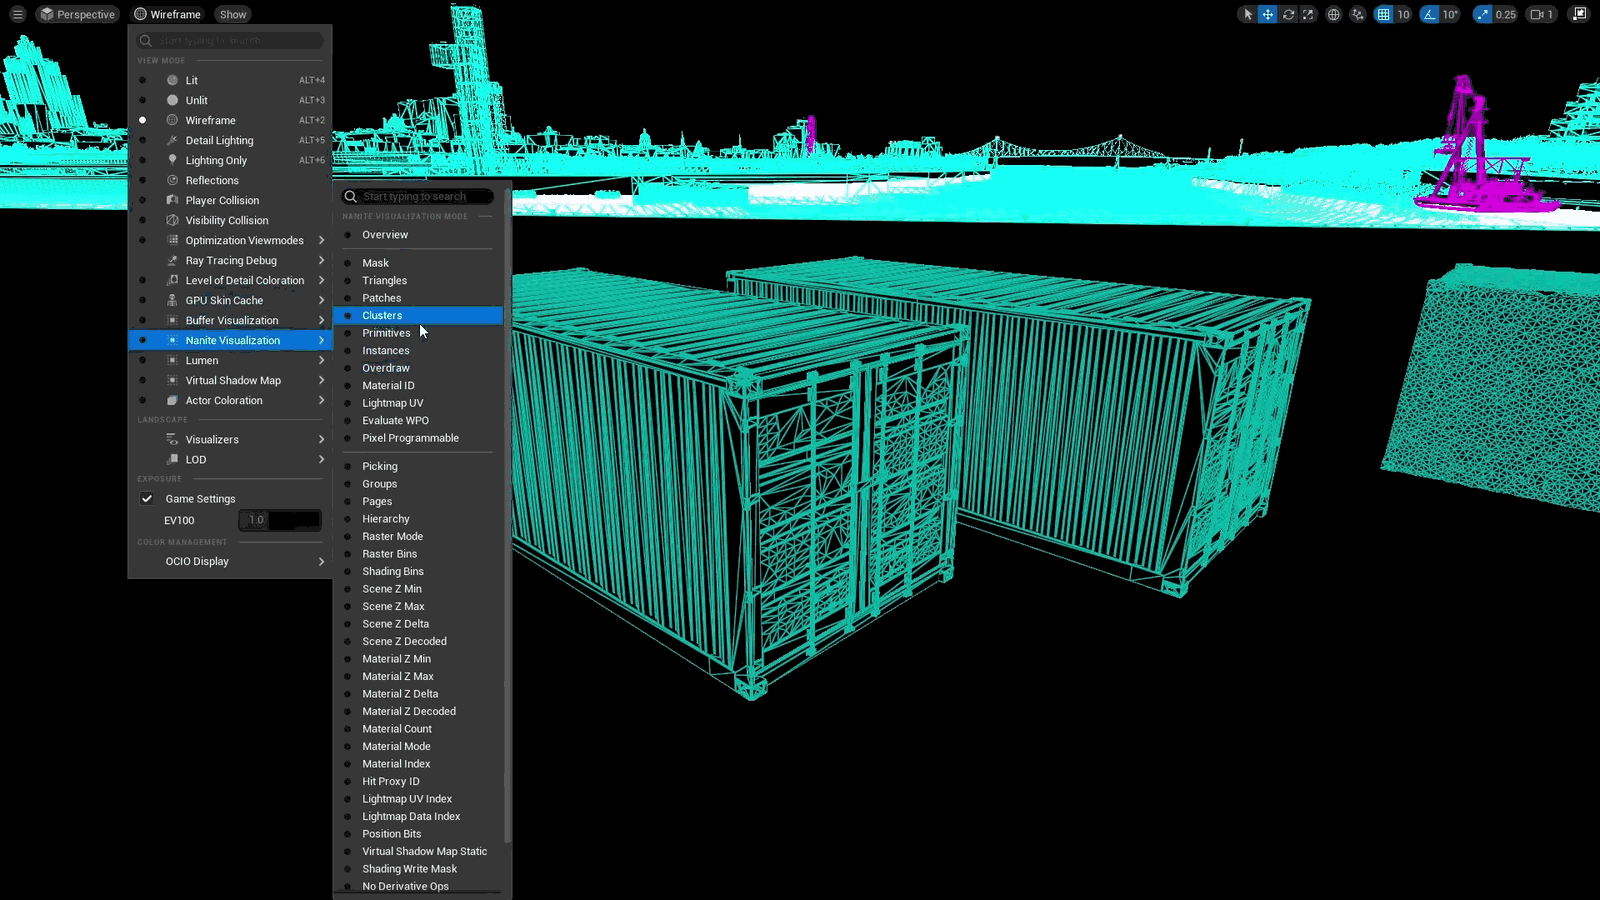
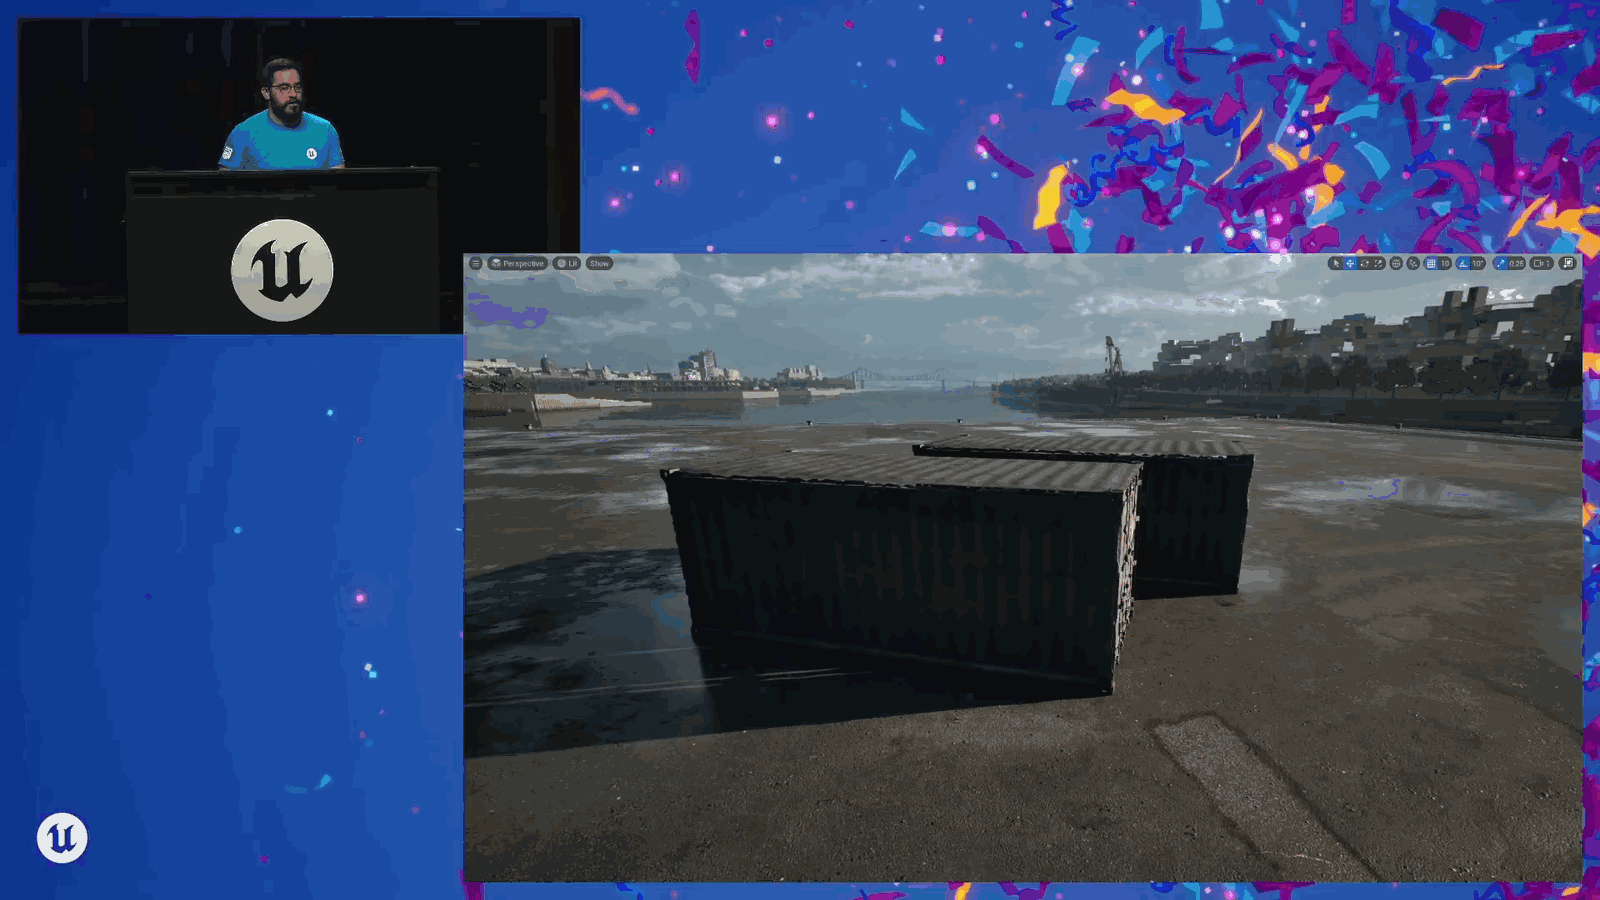
📌 要点汇总
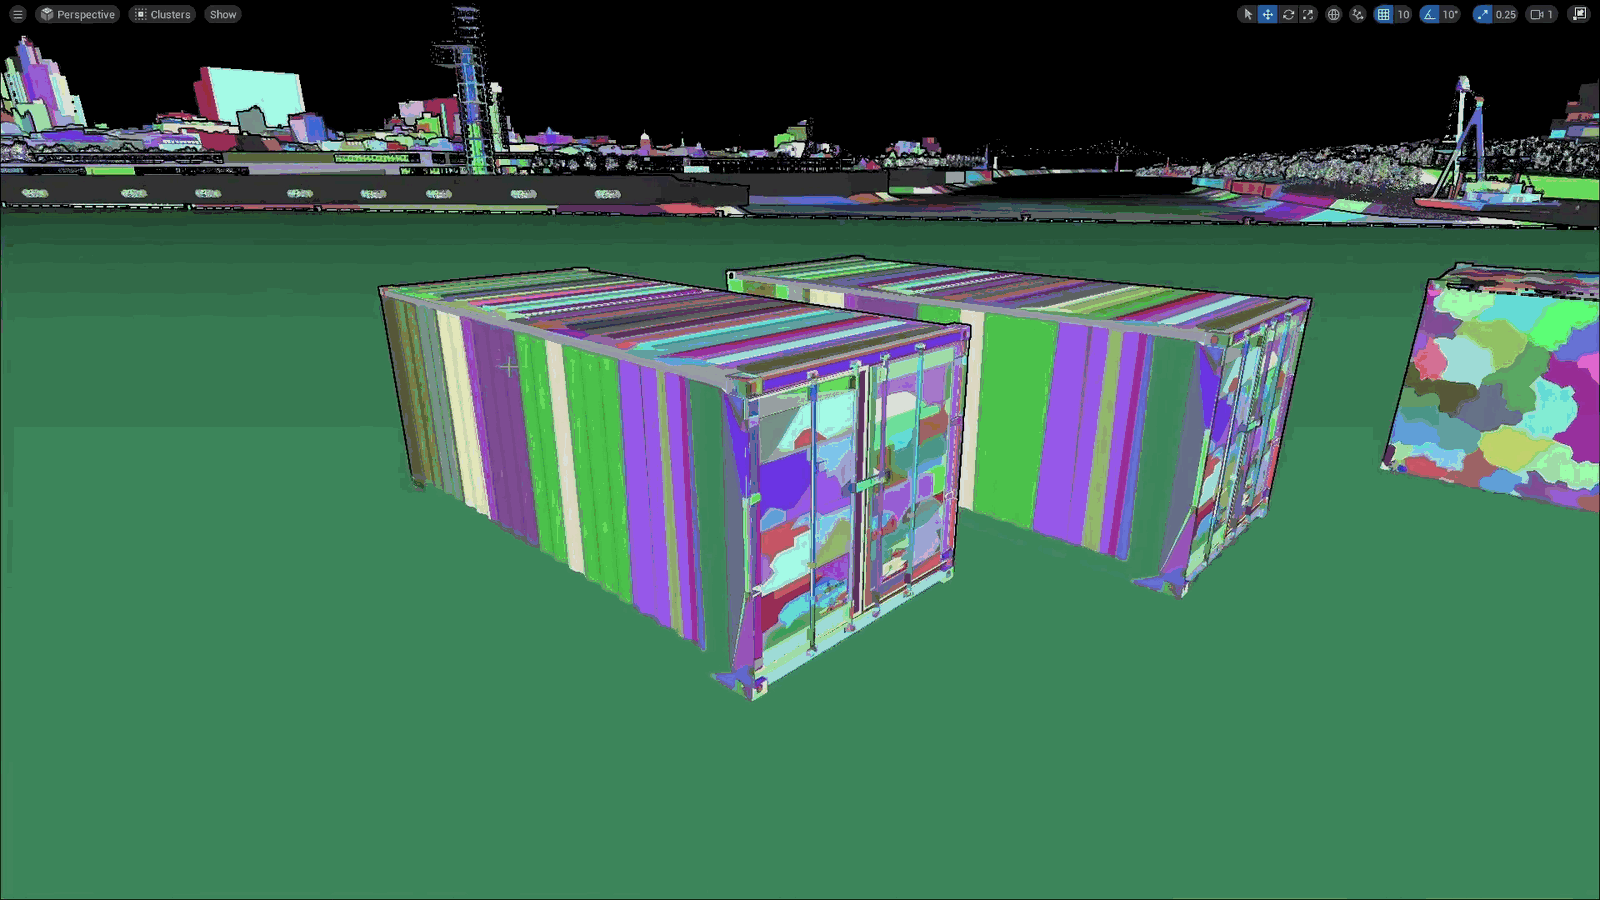
- 内容项目不用于游戏或实时渲染
- 默认使用虚拟纹理技术
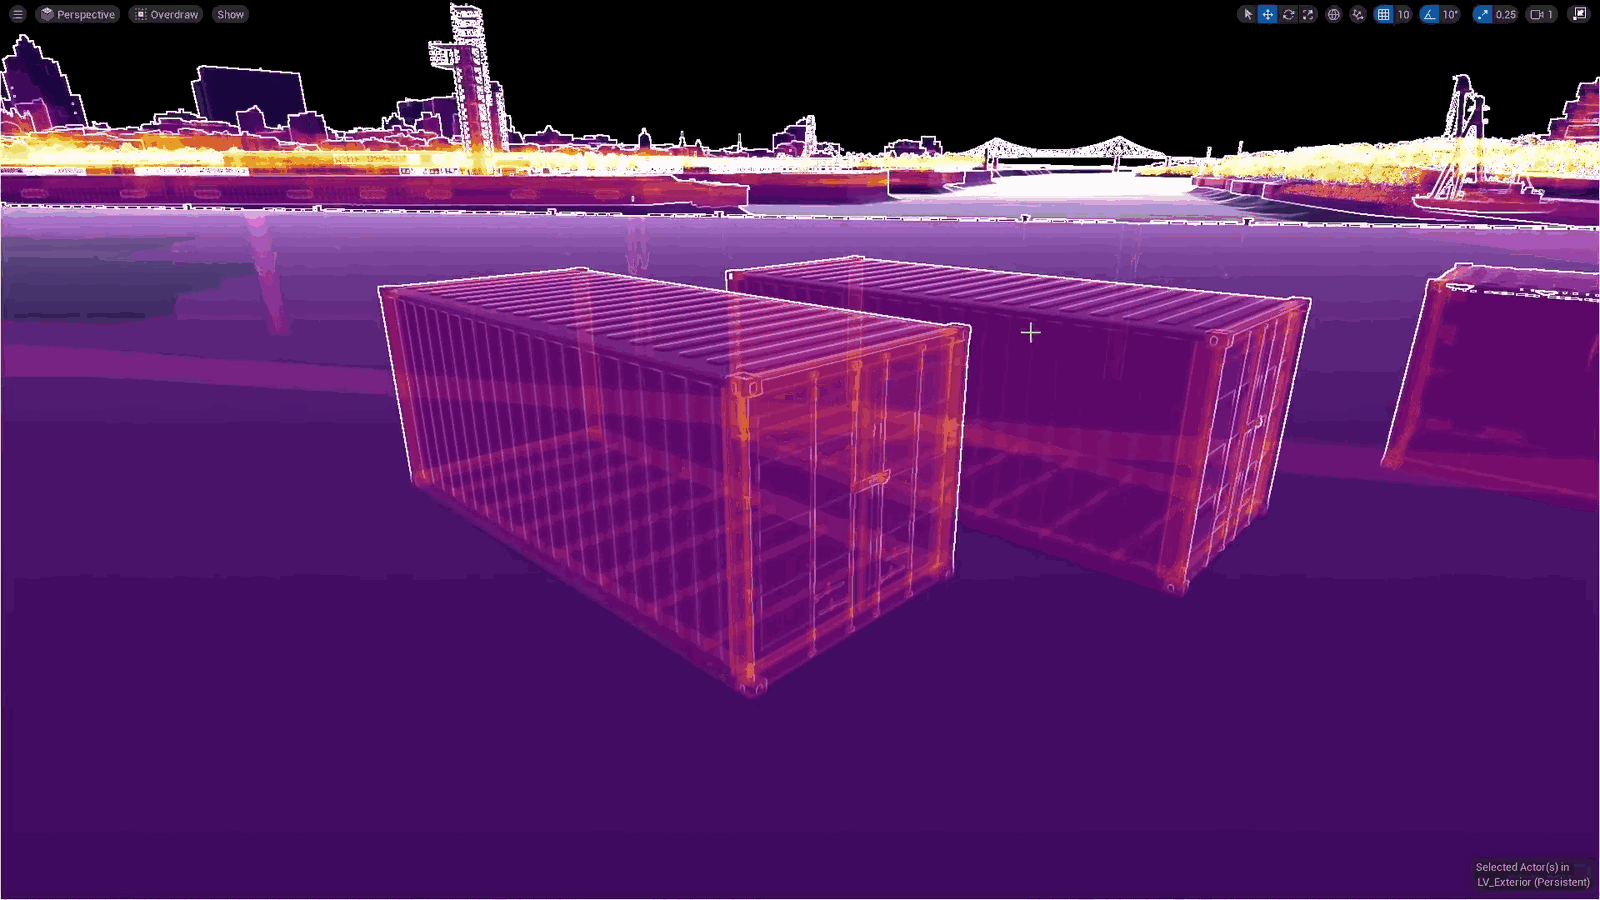
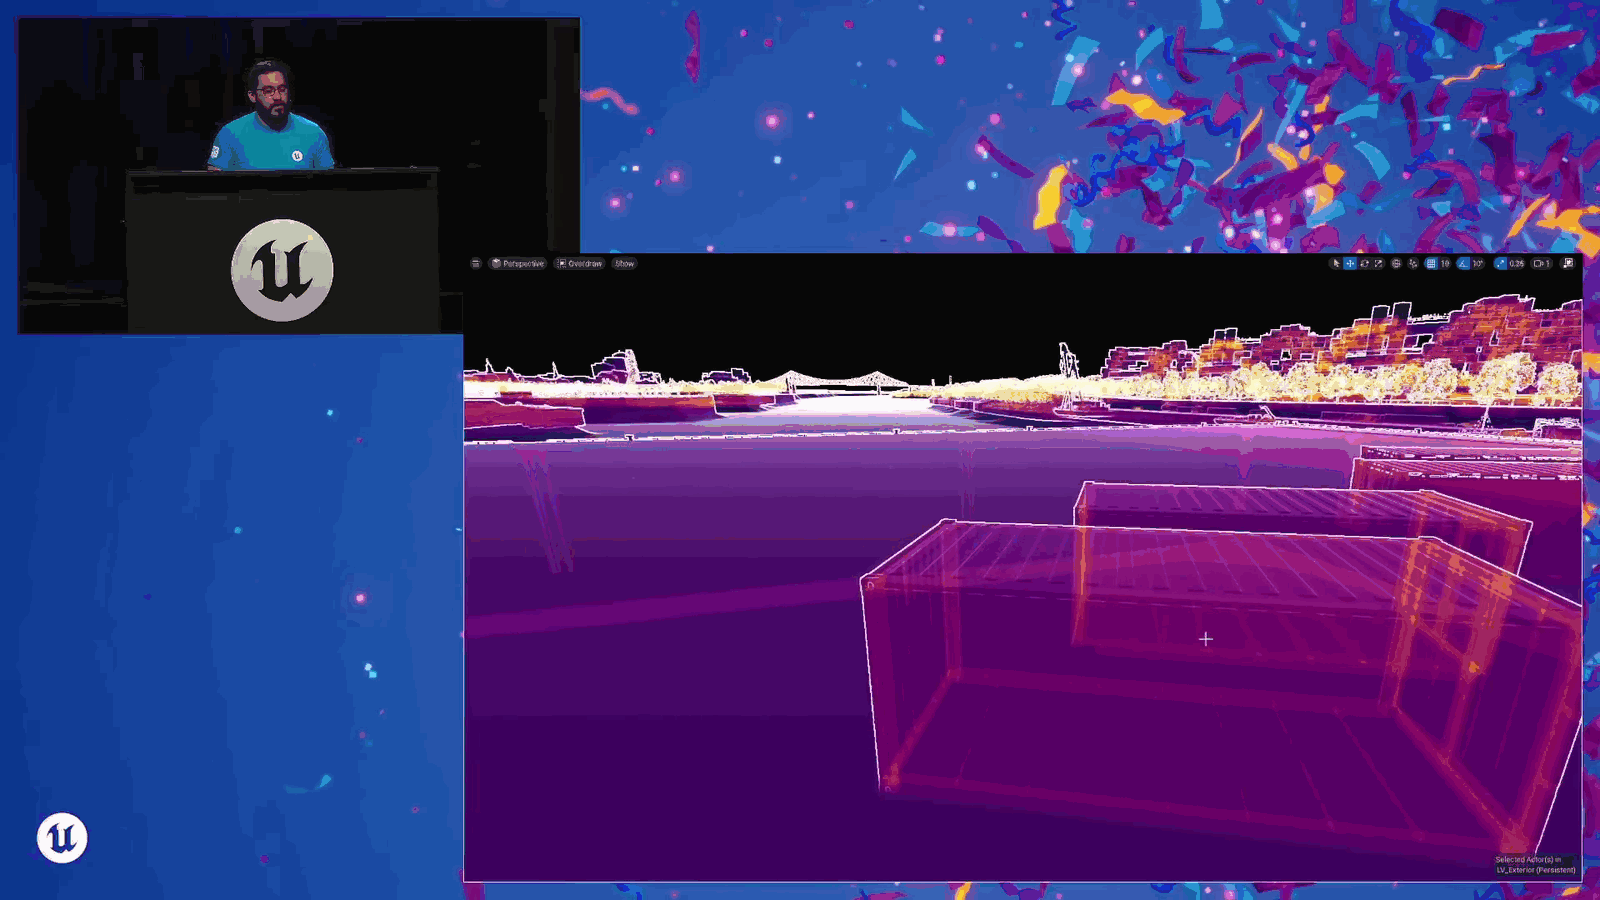
- 状态流技术用于管理纹理资源
- 默认流池大小为 2,000 兆字节
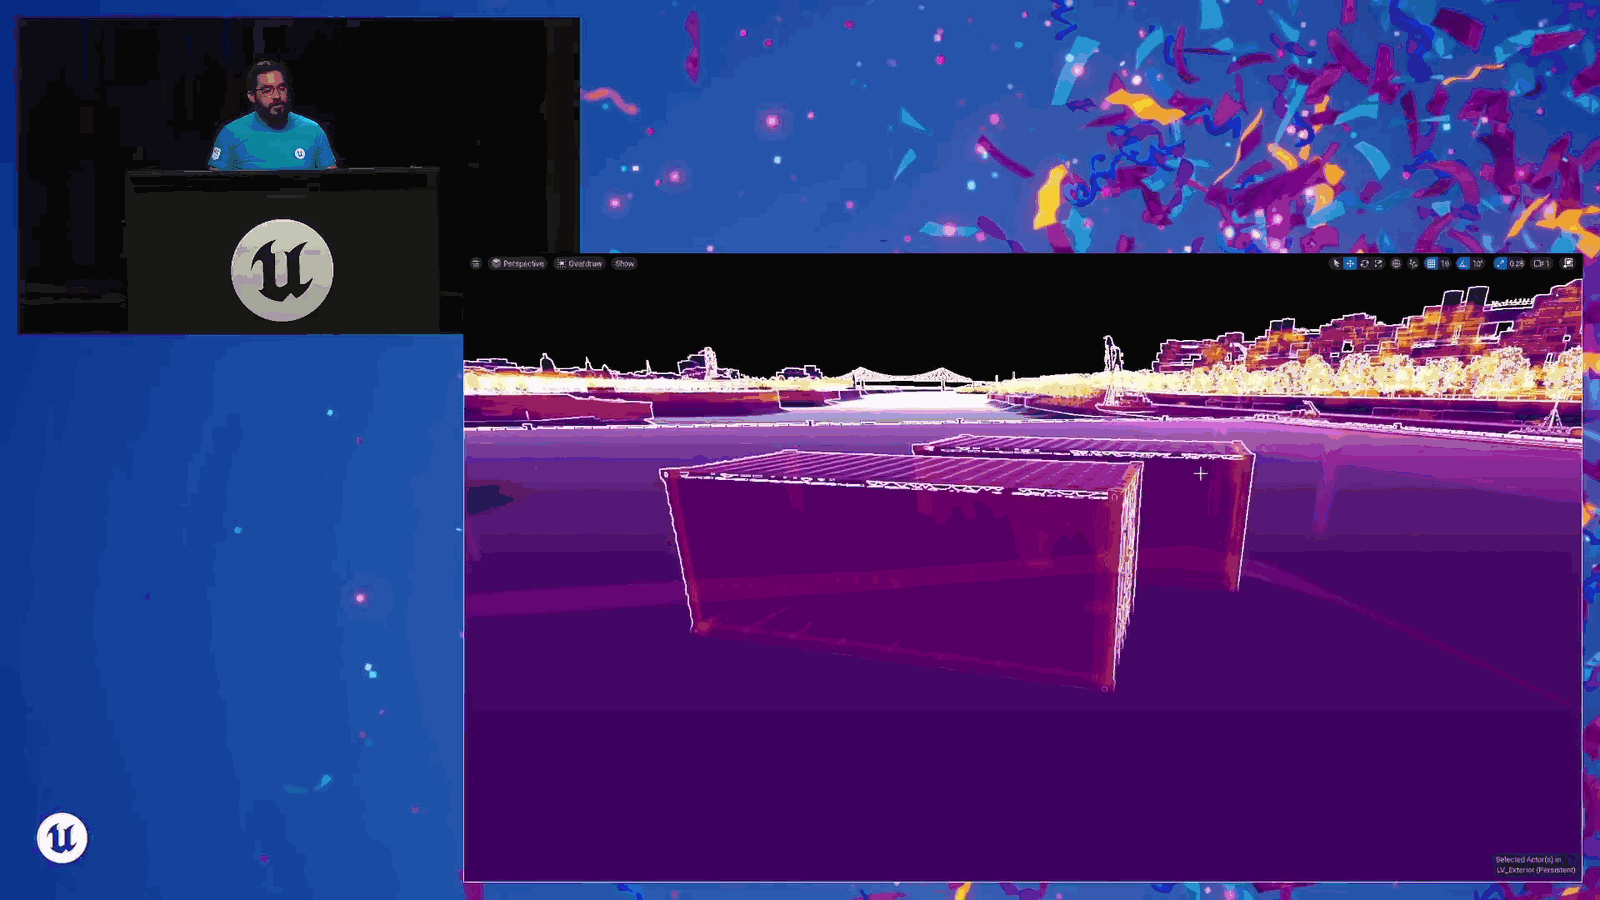
- 需要根据实际需求调整流池大小
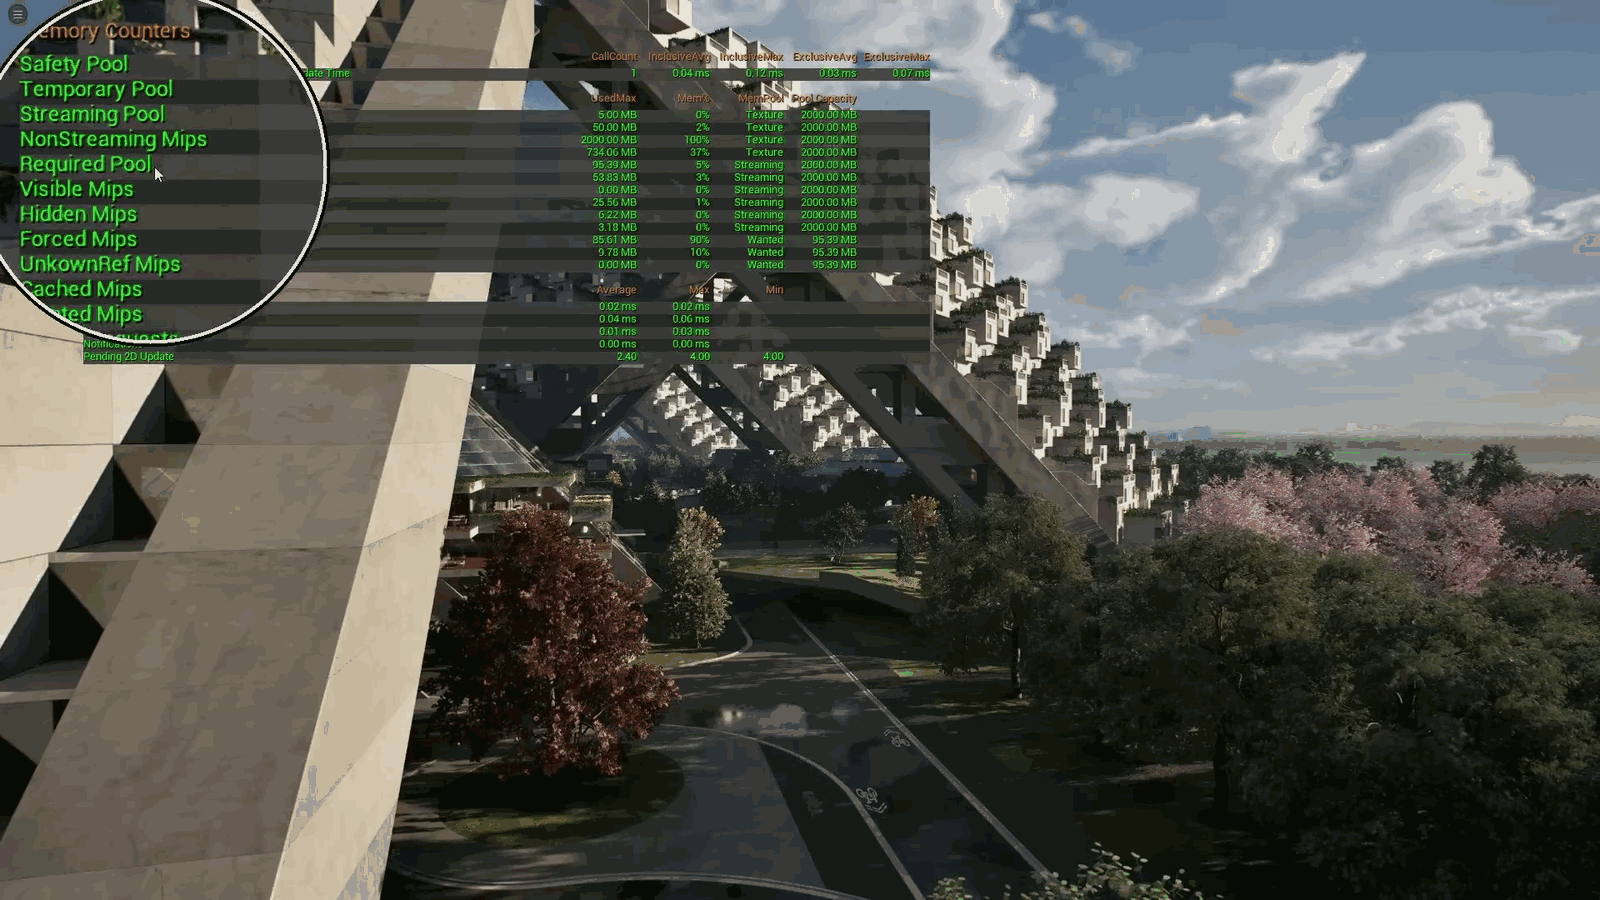
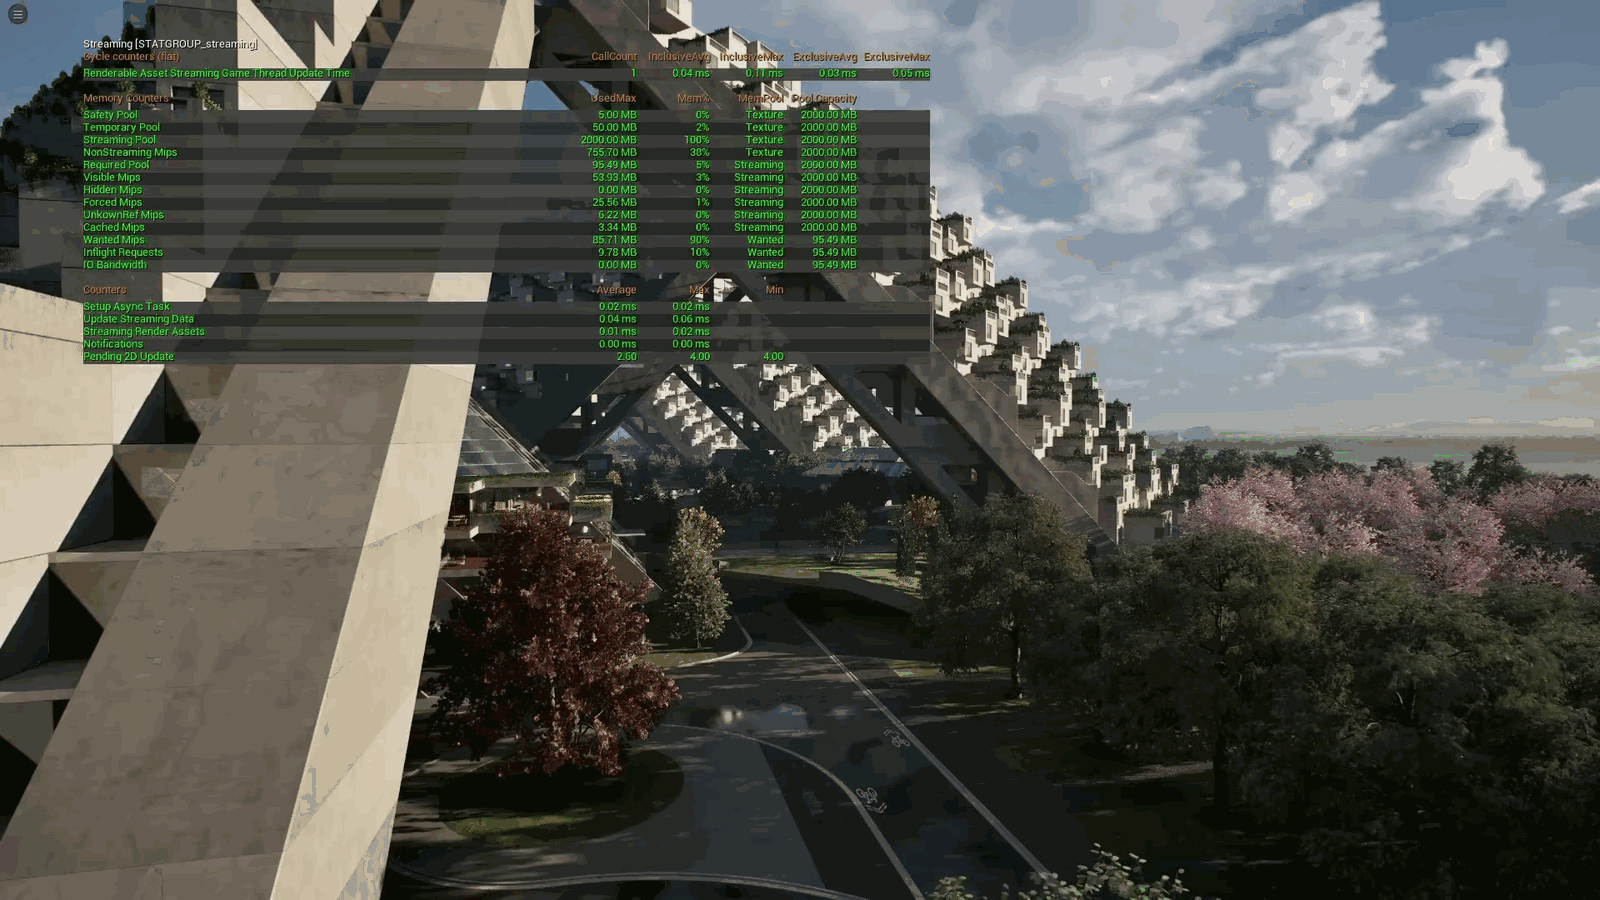
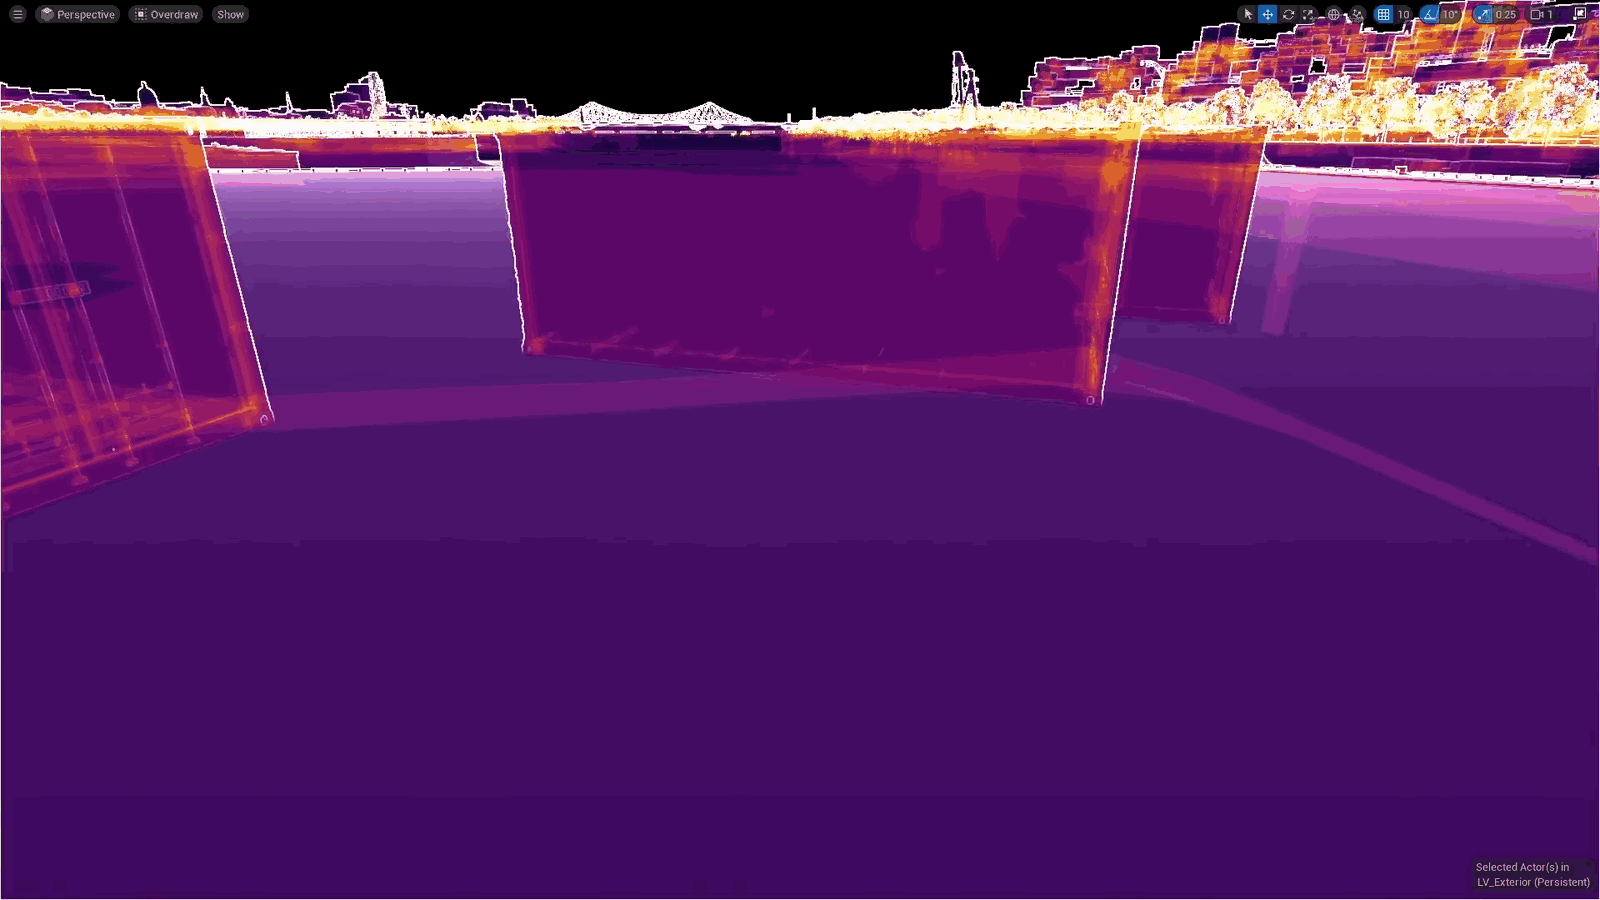
Content project. It’s not for games. It’s not for real-time rendering. But importantly, it is virtual-textured by default. And I want to look at it. So we’ve got stat streaming here, and I will zoom in on this. So stat streaming. Right, we’ve got our streaming pool. This is the default value of 2,000 megabytes. But you’ll look at the required pool. This is how many streaming, non-virtually streamed textures that we need to load into memory into that 2,000 megabyte.
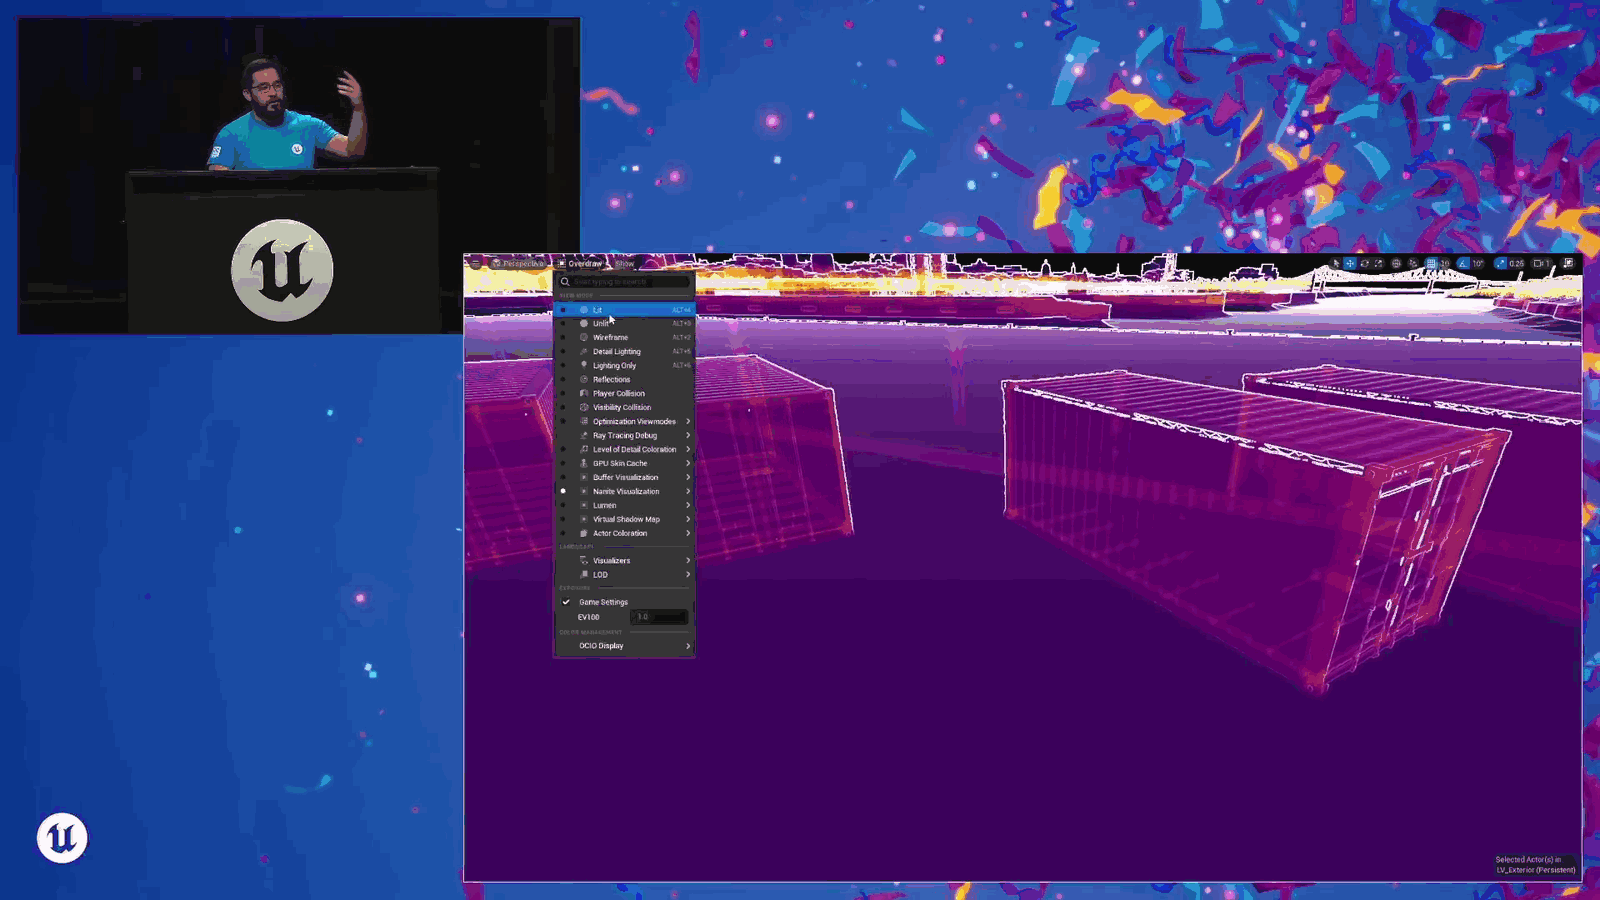
Slide 25 — 00:07:15
📌 要点汇总
- 虚拟纹理内存使用约500MB,包含多种压缩类型和页表
- 单个池大小为95MB,看似不大但整体占用较高
- 不同压缩类型的物理内存总和显著增加内存需求
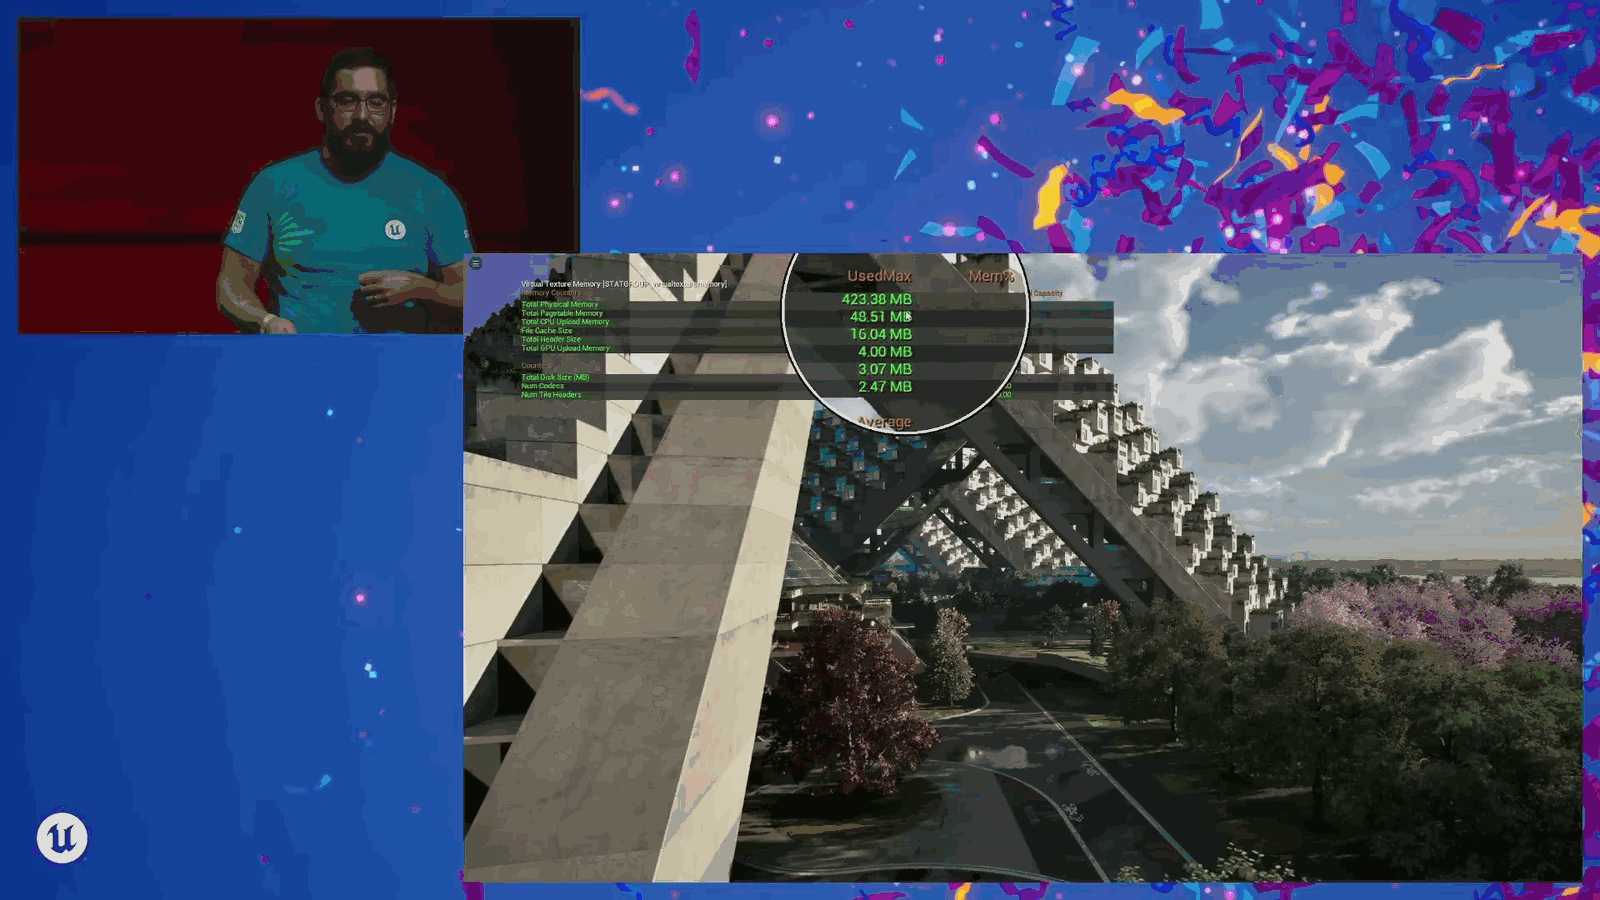
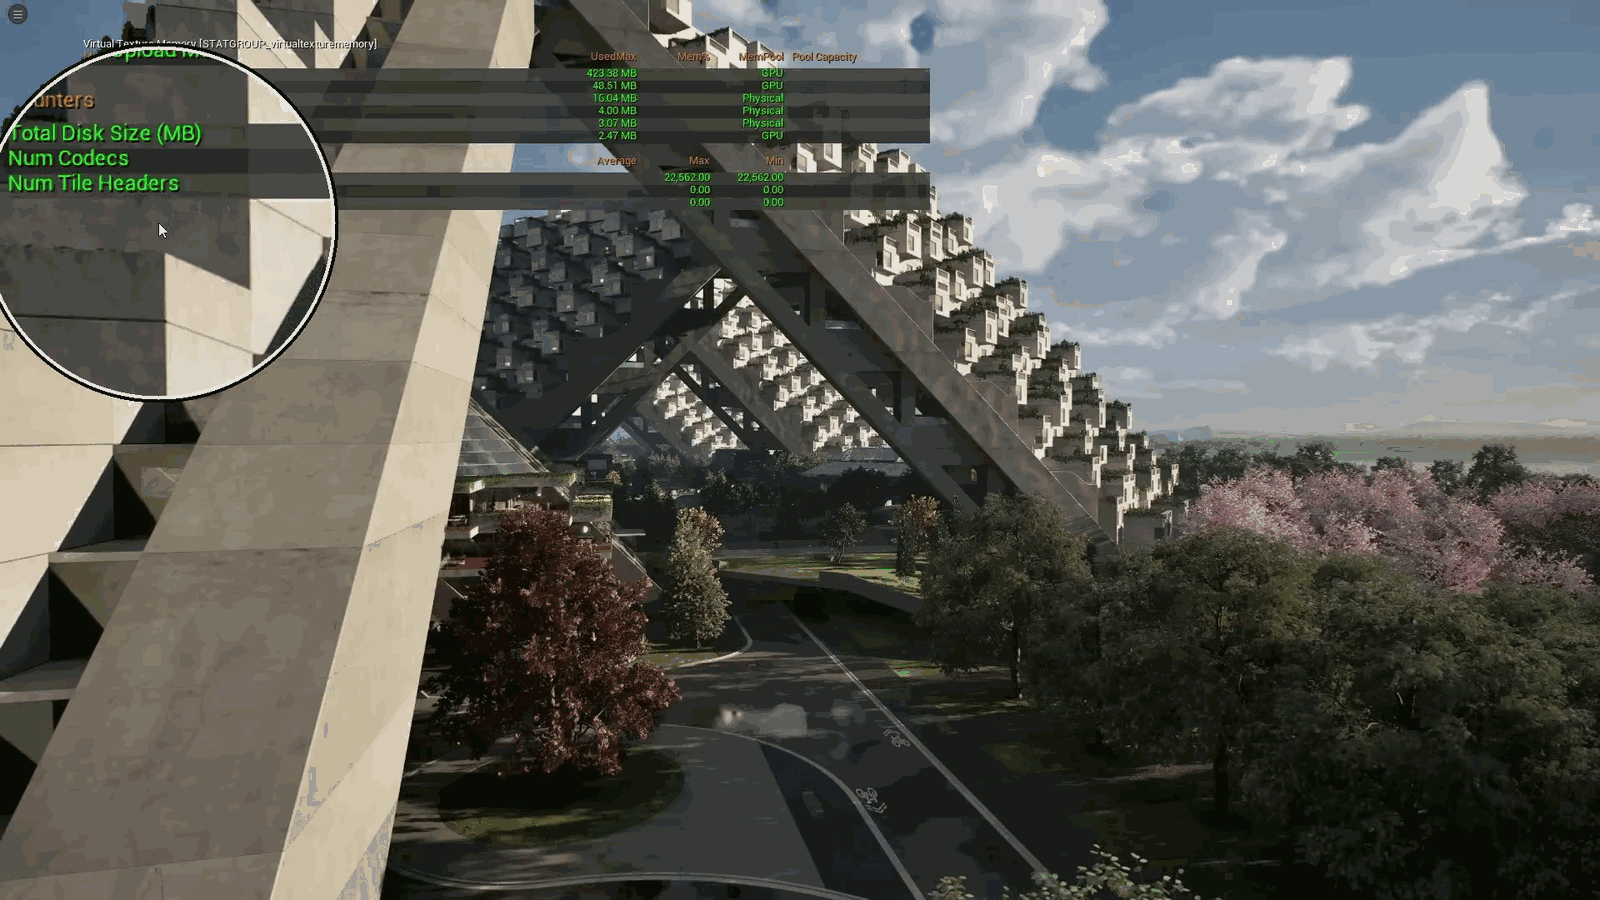
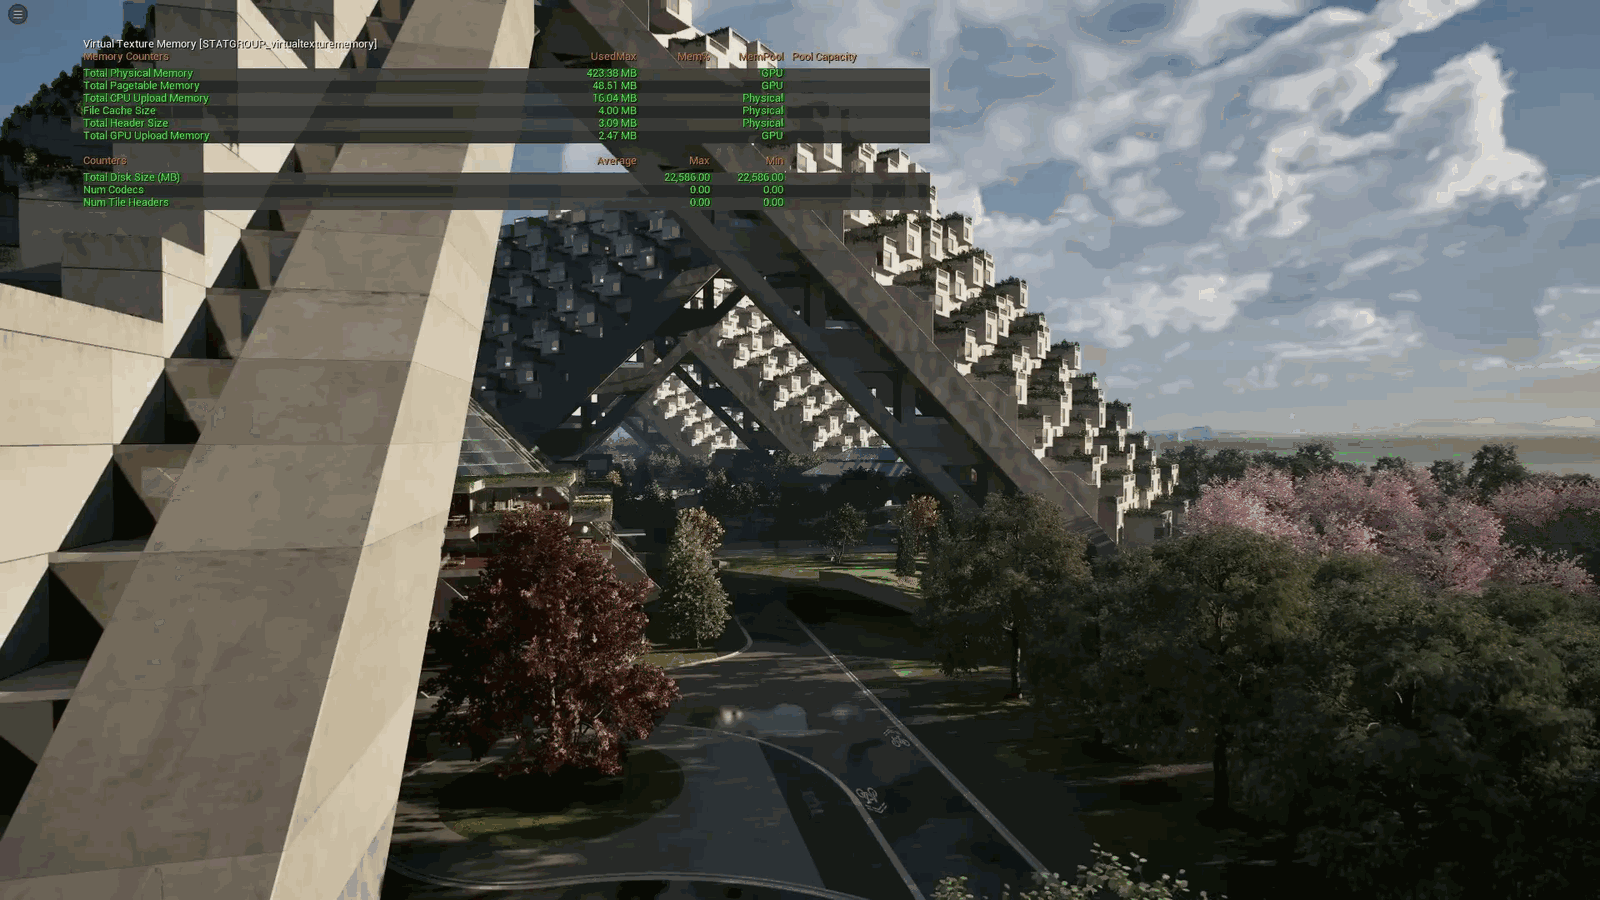
Pool, and that is ninety-five megabytes, which is not a lot, right? But then we go look at stat virtual texture memory, and if we combine the total physical memory, which is all of the different compression types, and the page table, which is how we look up all of those different compression types, we’re using about five hundred megabytes.
Slide 26 — 00:07:34
📌 要点汇总
- 该高分辨率场景所有纹理总大小为500MB
- 项目中虚拟纹理的mip零级总磁盘大小为22GB
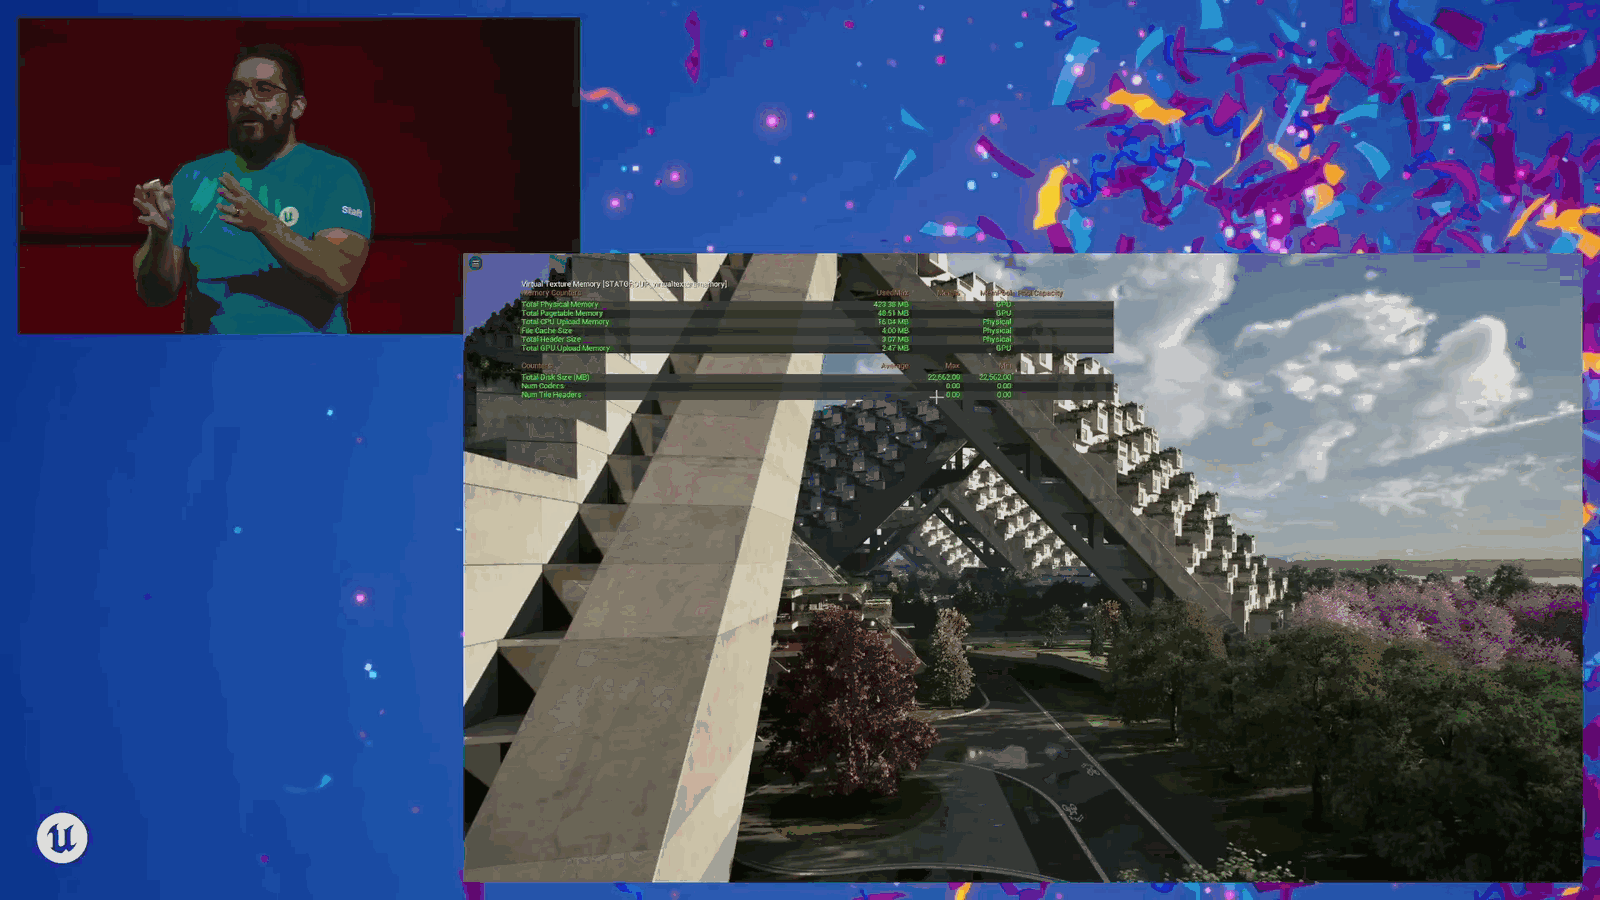
Which is wild, right? Five hundred megabytes for all of the textures in this very high-resolution scene, and if we go look at the total disk size, this is mip zero of all of the virtual textures in the project: twenty-two gigabytes.
Slide 27 — 00:07:49
📌 要点汇总
- 通过高效使用虚拟纹理技术,避免了因内存不足导致的崩溃问题
- 实现了纹理数据的流式加载,有效降低内存占用
- 提升了大型场景渲染的稳定性和性能表现
So, through through the efficient use of virtual texturing, we’re able to take what could have been an out of memory crash if we didn’t stream any of these textures, and we’re getting it down. We’re using.
Slide 28 — 00:08:01
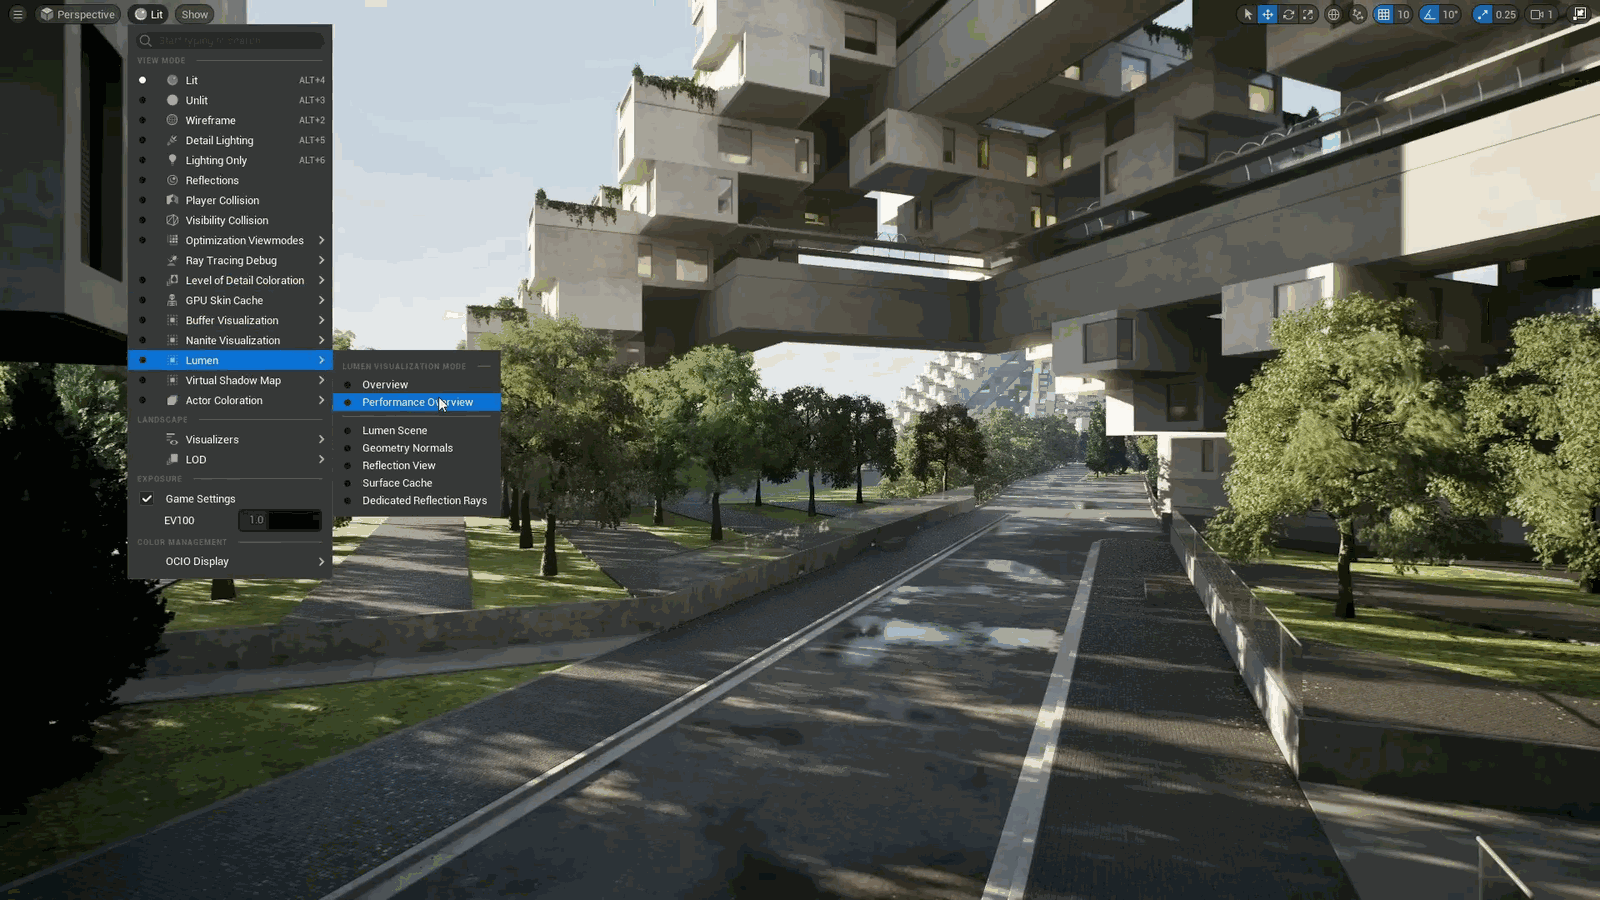
📌 要点汇总
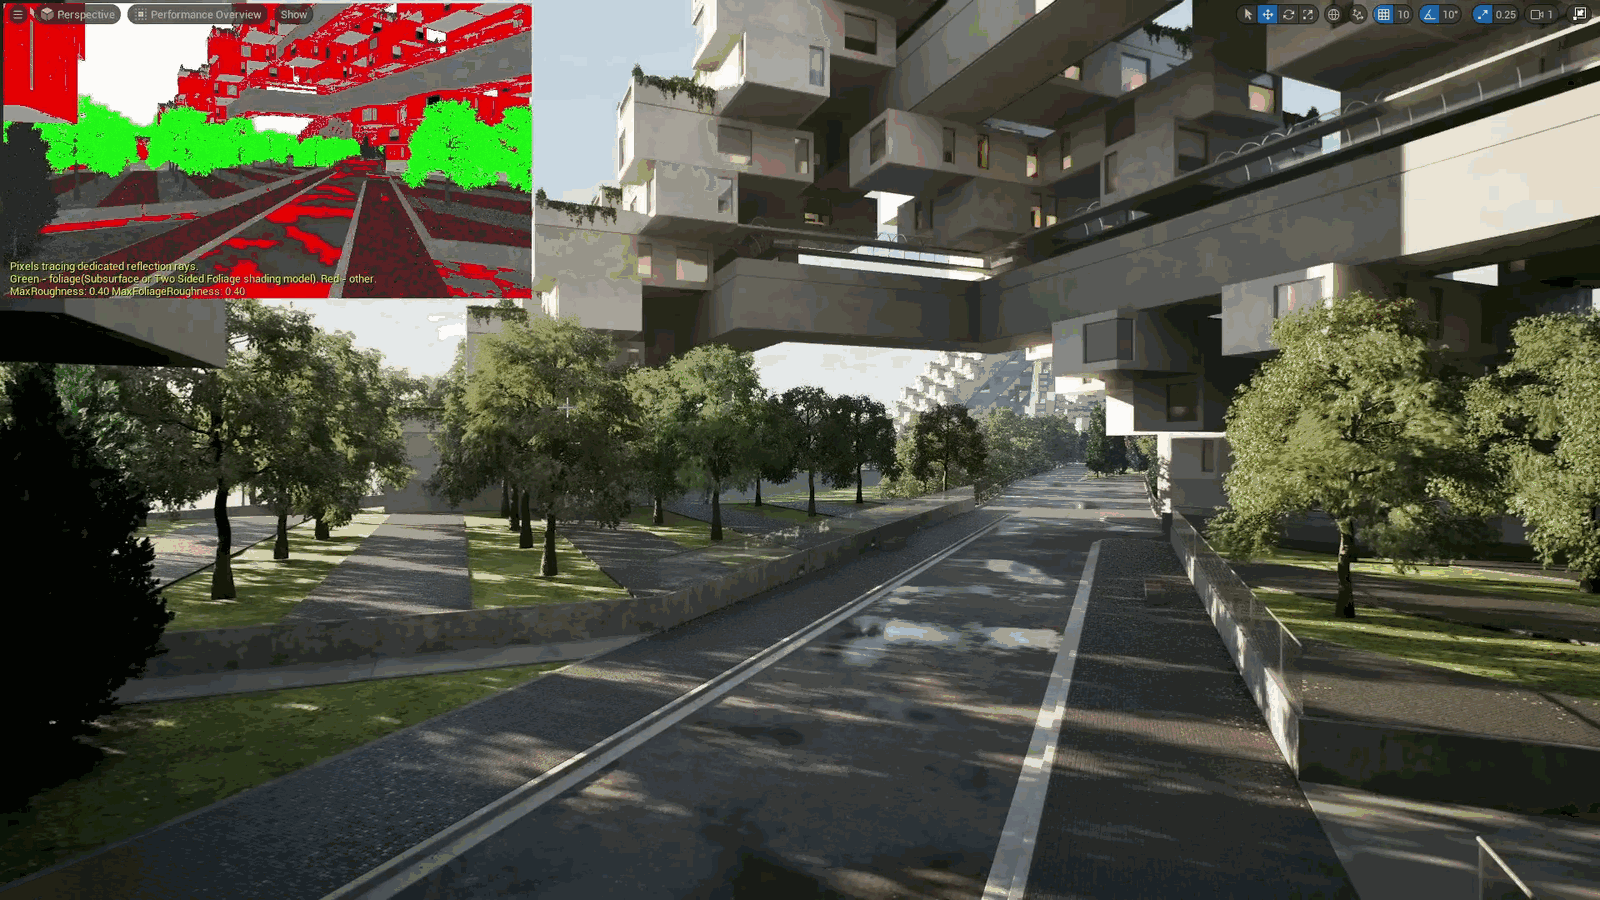
- 仅需500MB内存即可渲染整个场景,令人惊讶
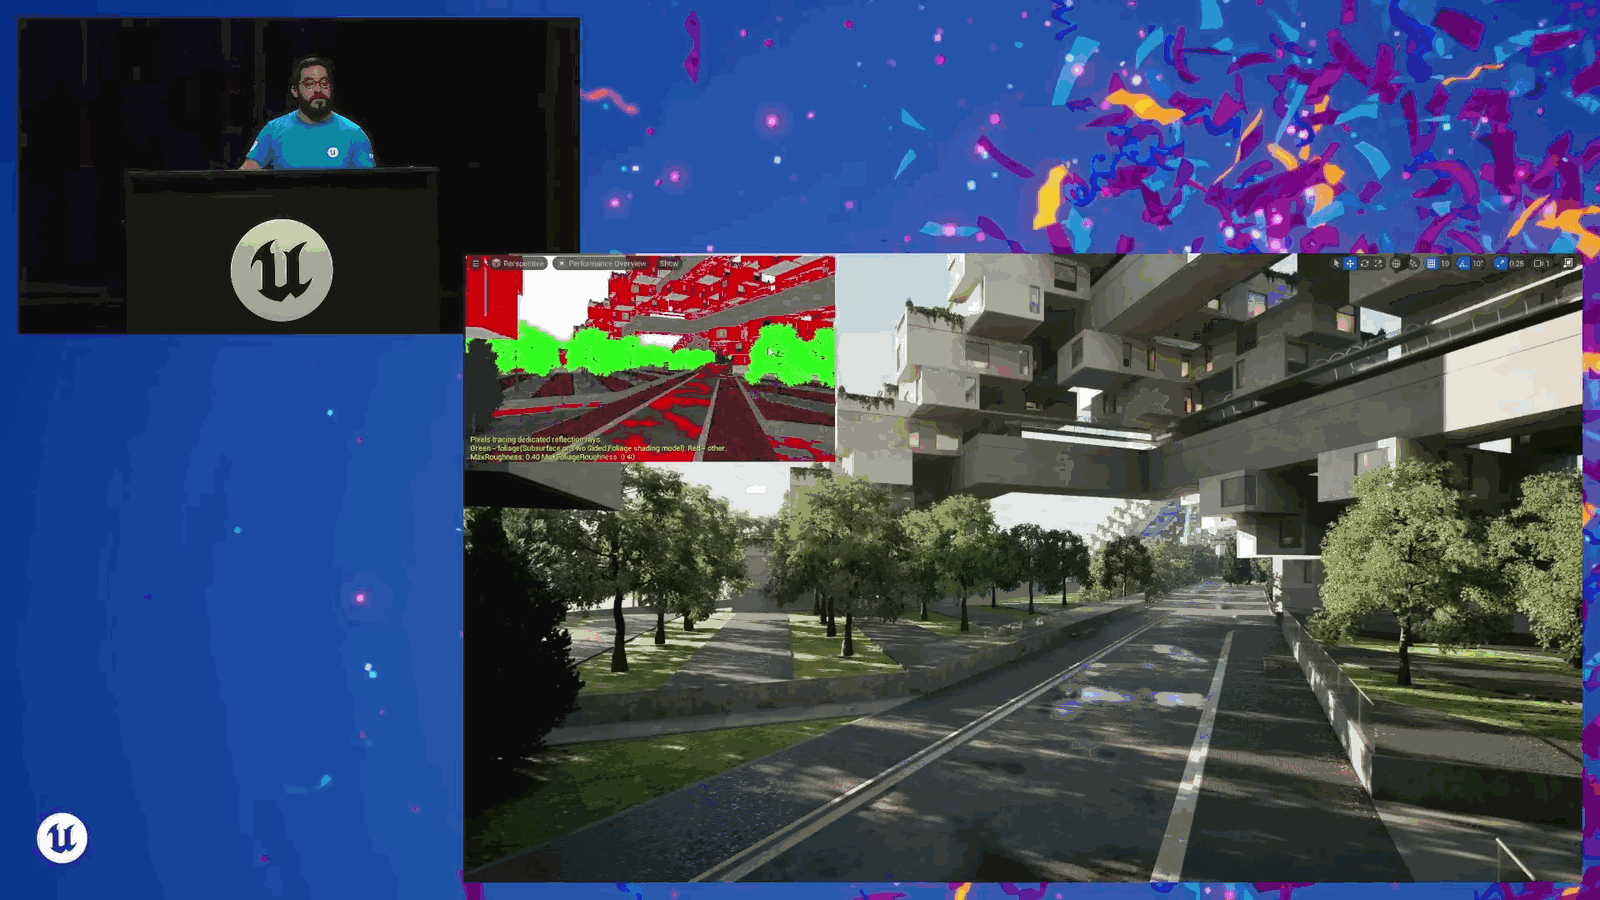
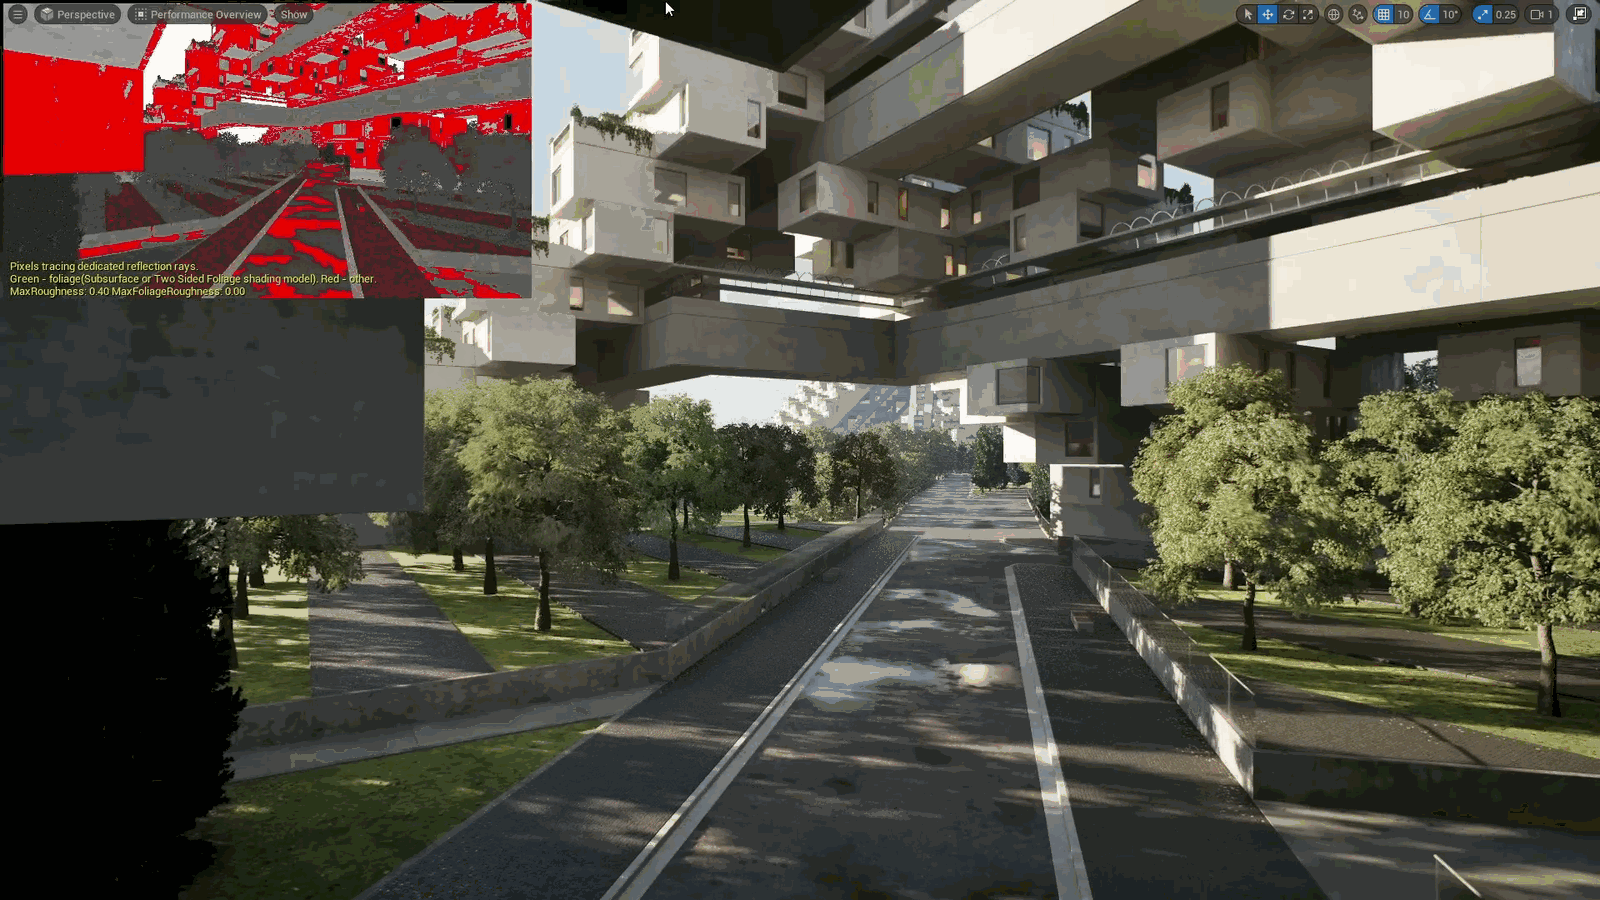
- 引擎中虚拟纹理的两种实现方式:流式虚拟纹理和运行时虚拟纹理
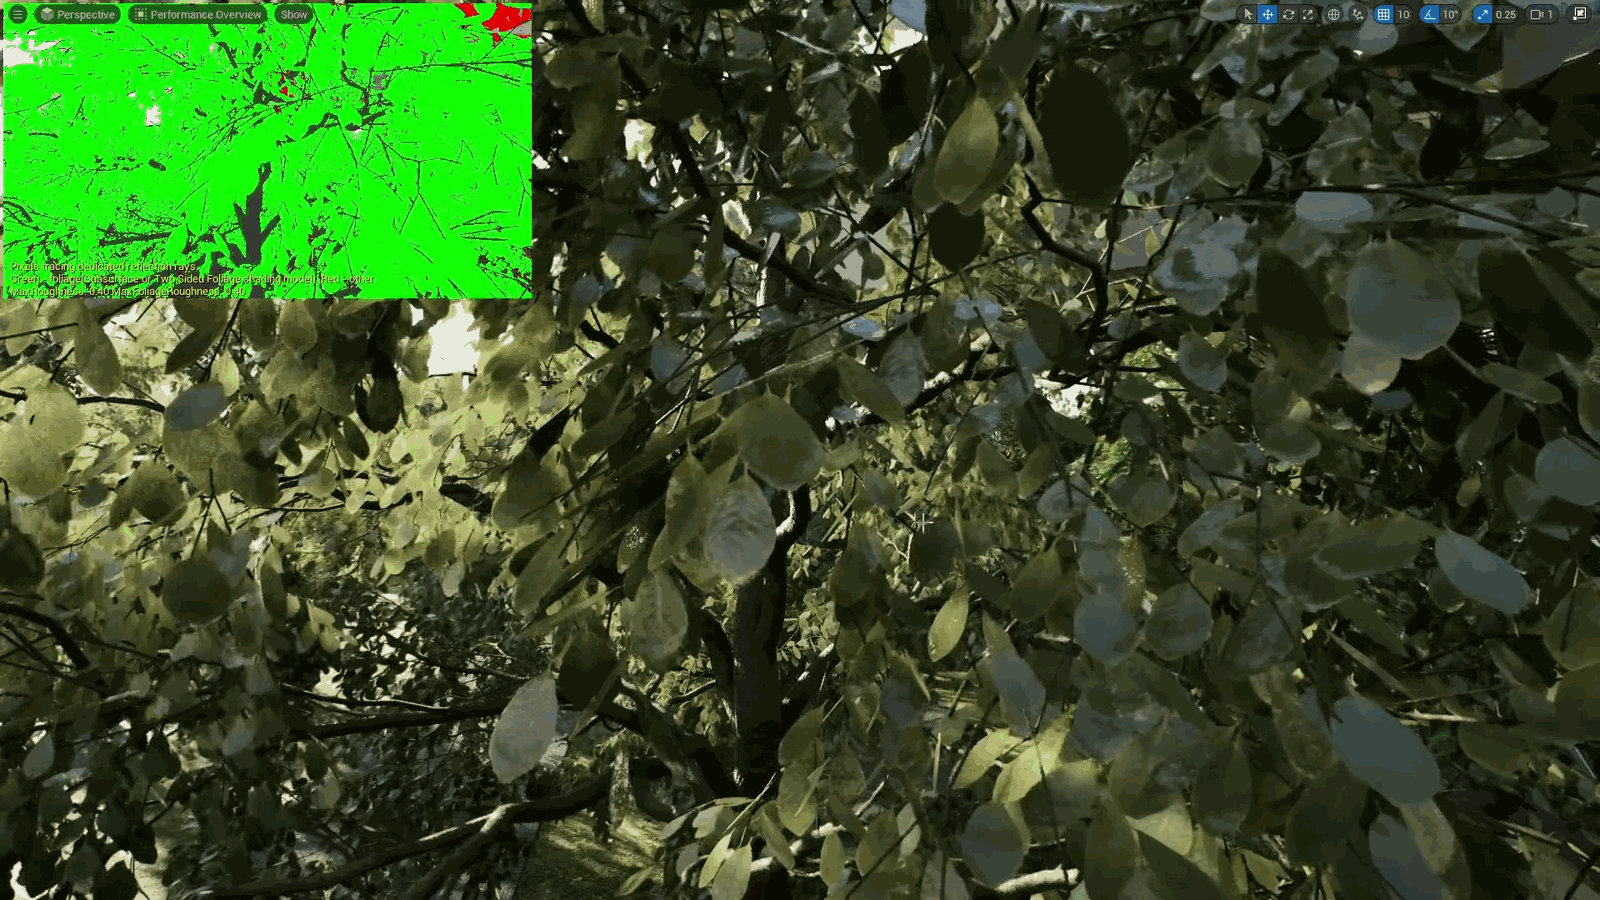
- 流式虚拟纹理有助于节省内存
Only 500 megabytes to draw this entire scene, which is wild to me. So there are two options for virtual texturing in the engine: streaming virtual textures and runtime virtual textures. What we like to say is that streaming virtual textures save you memory.
Slide 29 — 00:08:17
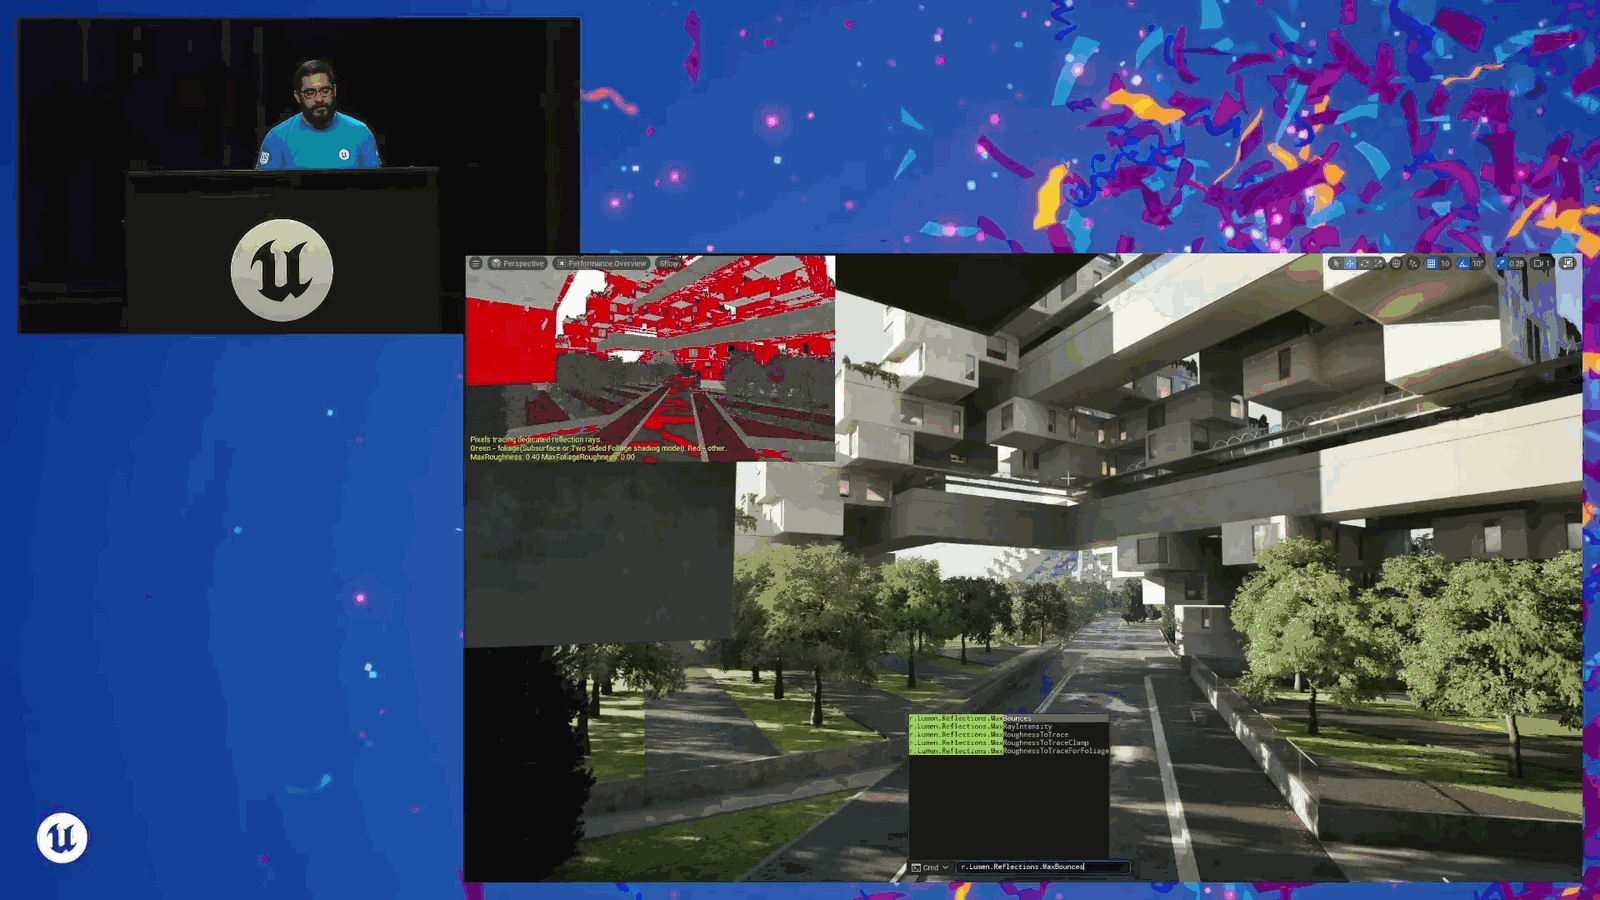
📌 要点汇总
- 运行时虚拟纹理在性能成本下节省性能,但增加内存消耗
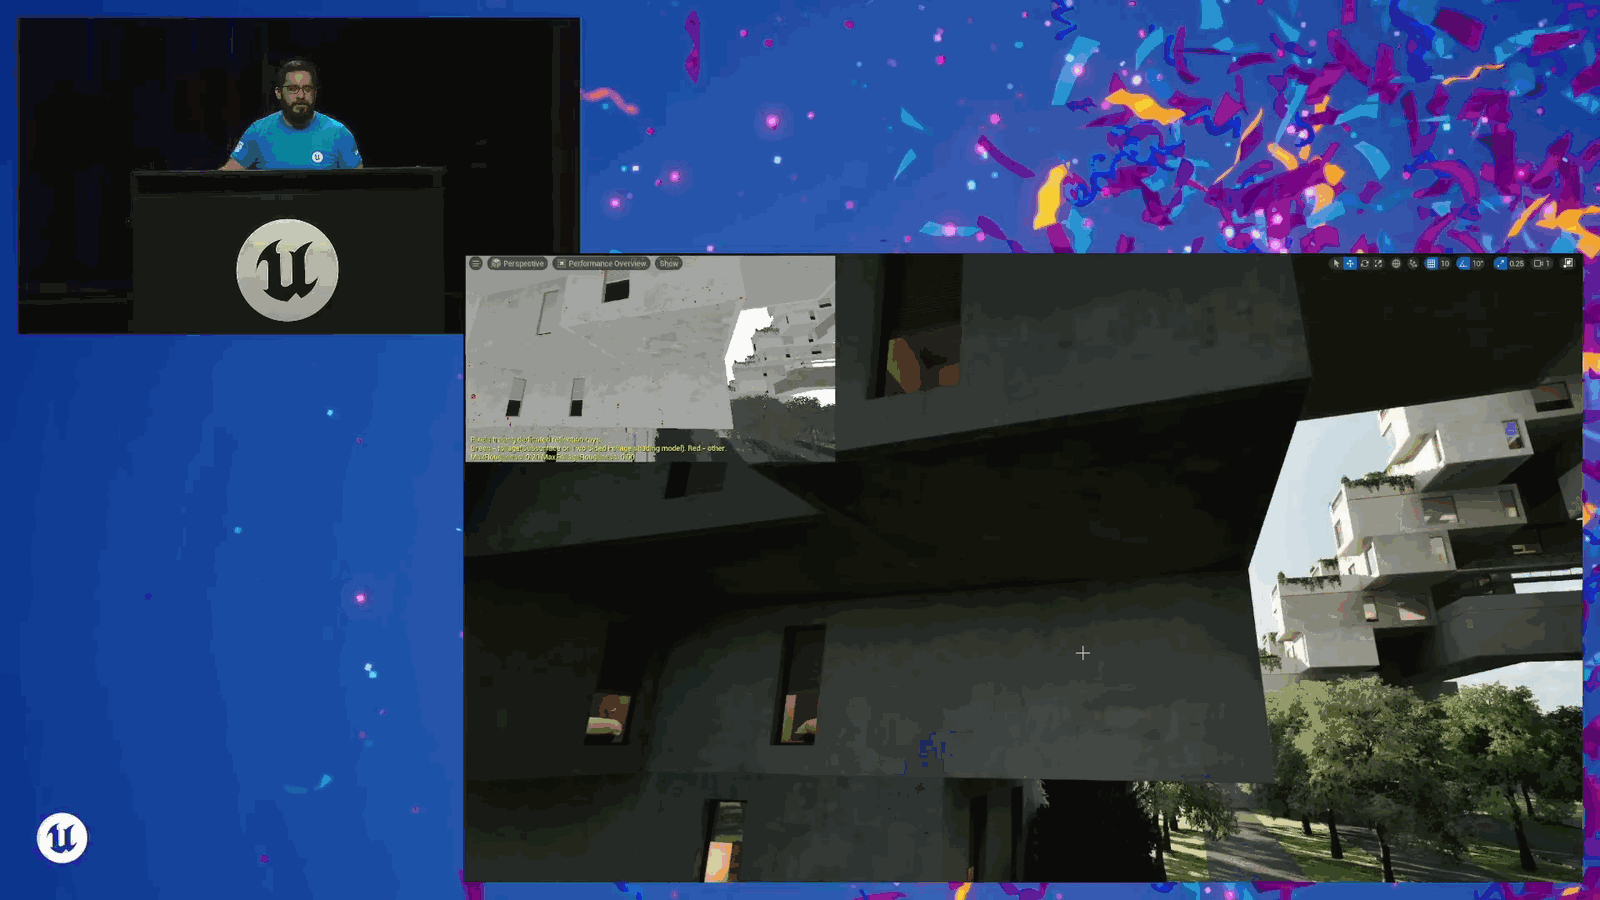
- 运行时虚拟纹理在地形设置中较为常见
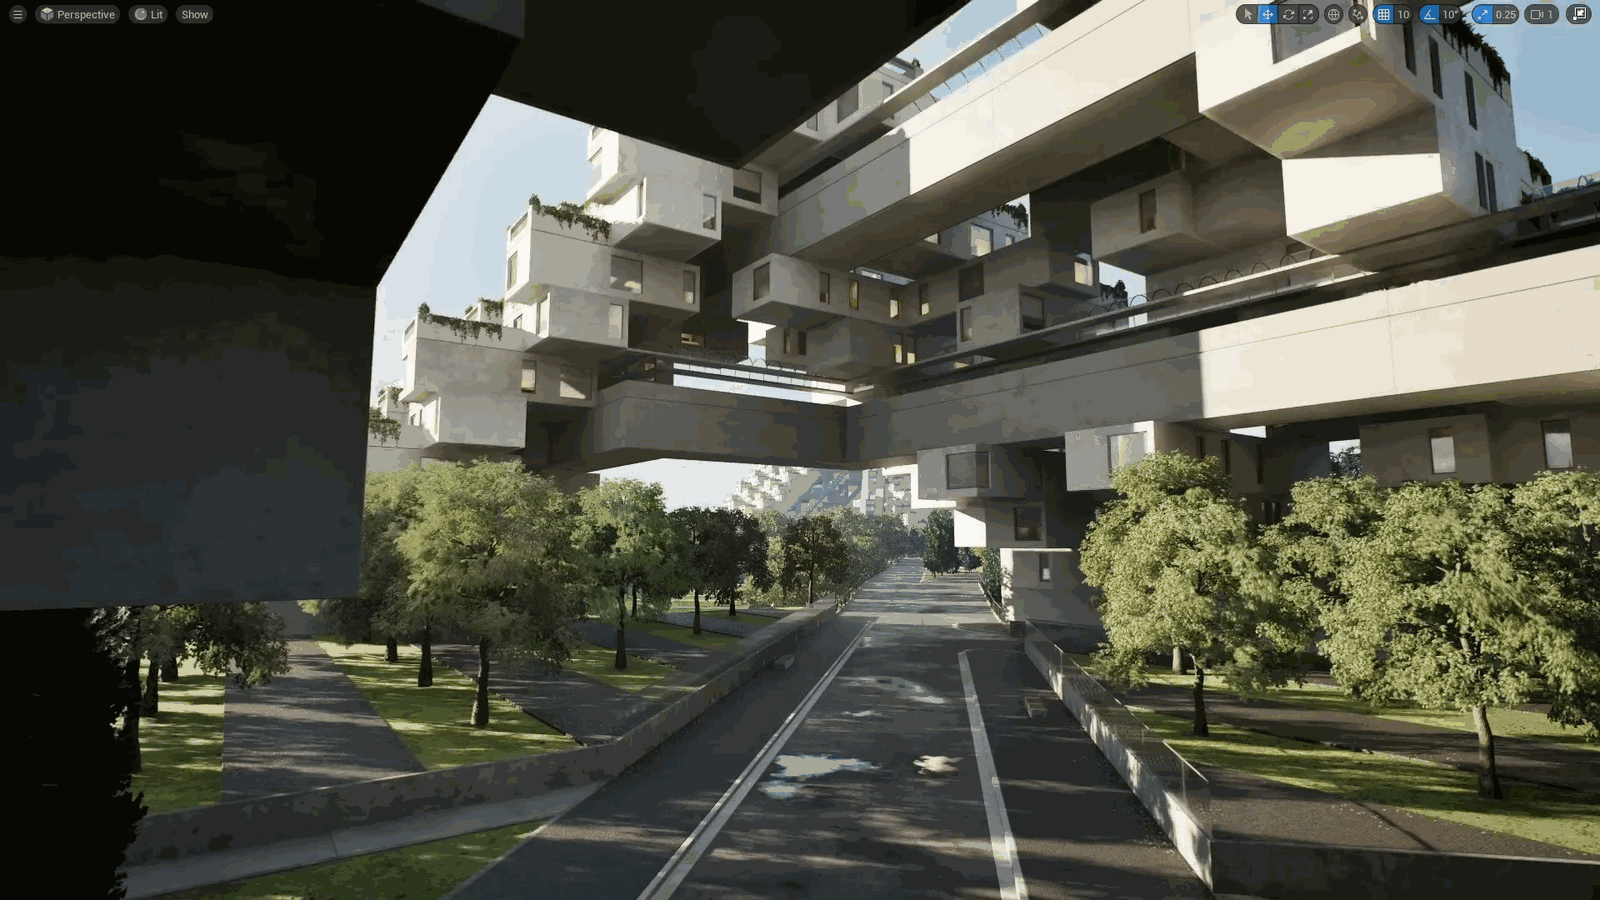
- 将展示实际案例说明其工作方式
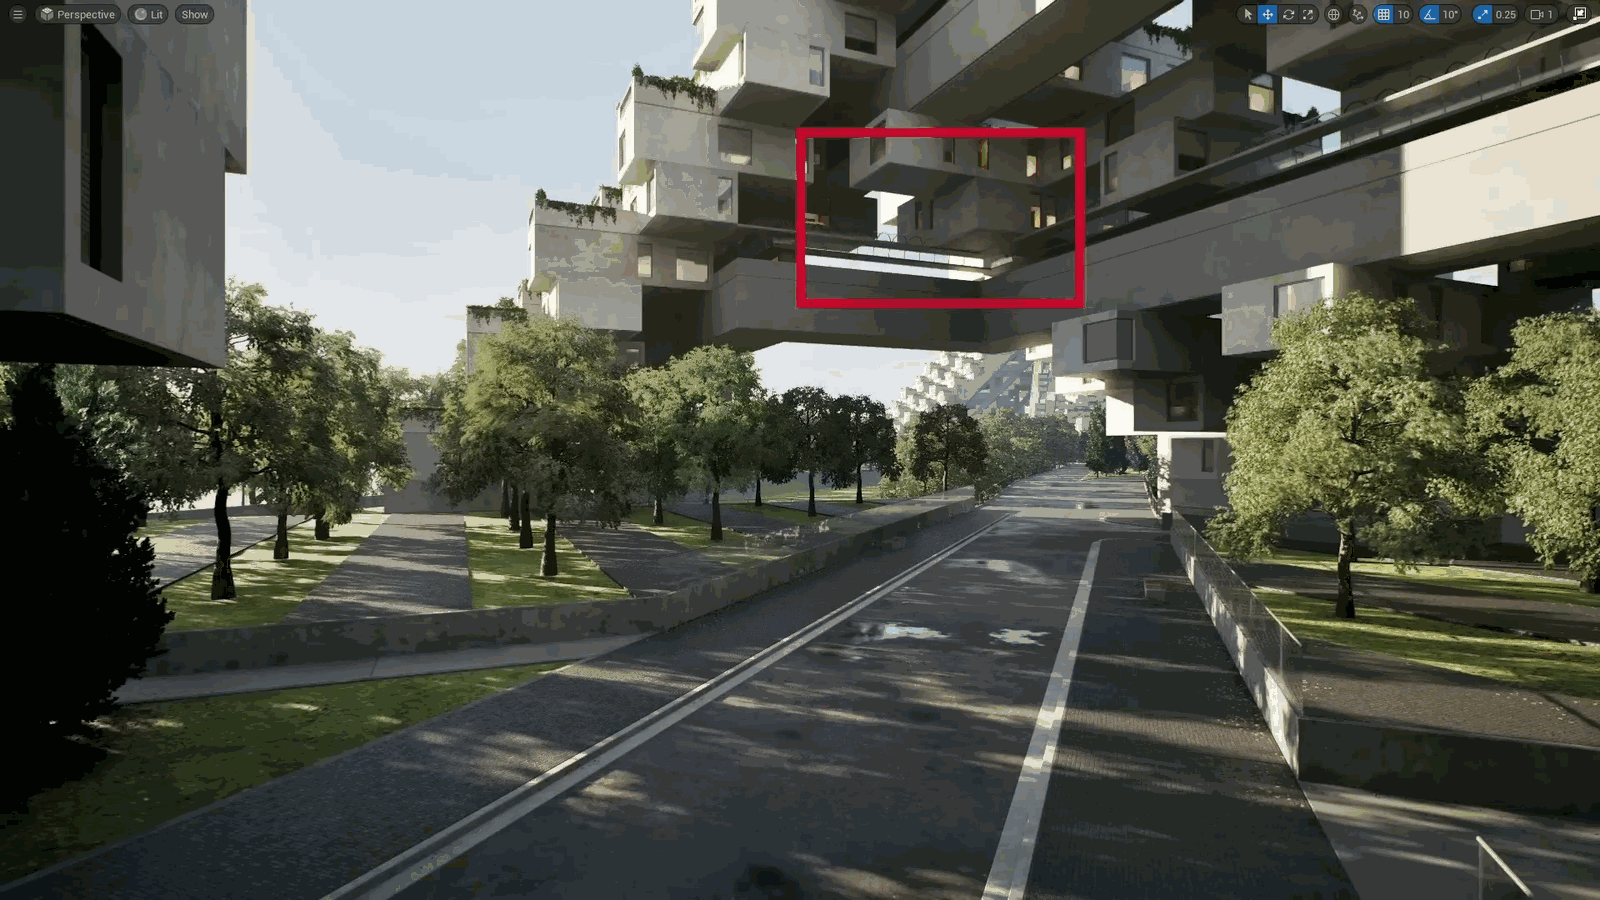
At the marginal cost of performance, and runtime virtual textures save you performance at the cost of memory. And we’re probably more familiar with runtime virtual textures because we’ve set them up on our landscape. I’ve got a couple of examples to show you how they work in practice.
Slide 30 — 00:08:30
📌 要点汇总
- 演示视频已在YouTube发布,因此不讨论运行时细节
- 今天重点讲解流媒体,因其目前使用率较低
- 流媒体技术可能显得复杂,但实际只需在主机上配置少量内容
- 虚拟机流媒体功能可由客户机自动完成,无需过多干预
Videos about them up on YouTube already, so I’m not going to talk about runtime. I’m only going to focus on streaming today because this is the one that I think is underutilized right now. Because I feel like it’s a little scary, it’s a little different, so I want to demystify it. So all we really have to do, if we are streaming our virtual machine, is set up a few things on the host and then let the guest do the rest.
Slide 31 — 00:08:49
📌 要点汇总
- 在项目设置中启用虚拟纹理功能
- 在纹理资源中进行相关配置
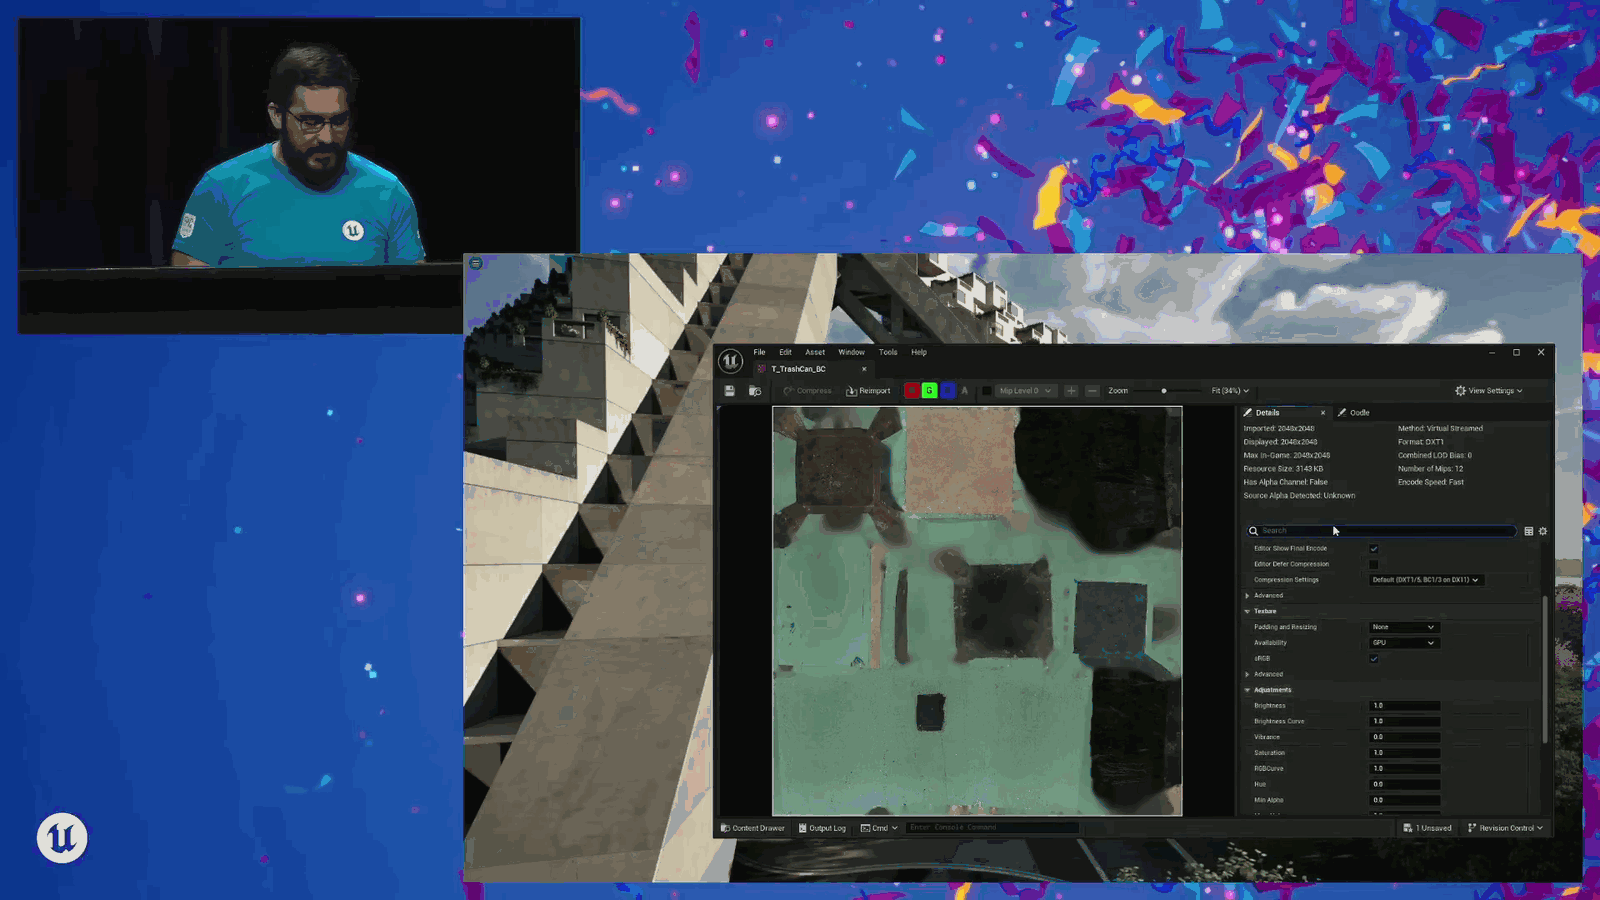
If we want to do a virtual texture, we enable it in our project settings, of course, and then in our texture asset.
Slide 32 — 00:08:57
📌 要点汇总
- 可以启用虚拟纹理流技术,操作简单
- 该纹理为2K分辨率,但虚拟纹理并非仅用于高分辨率
- 存在关于虚拟纹理的误解,类似Nanite的误解
- 需要继续进行后续工作,不可掉以轻心
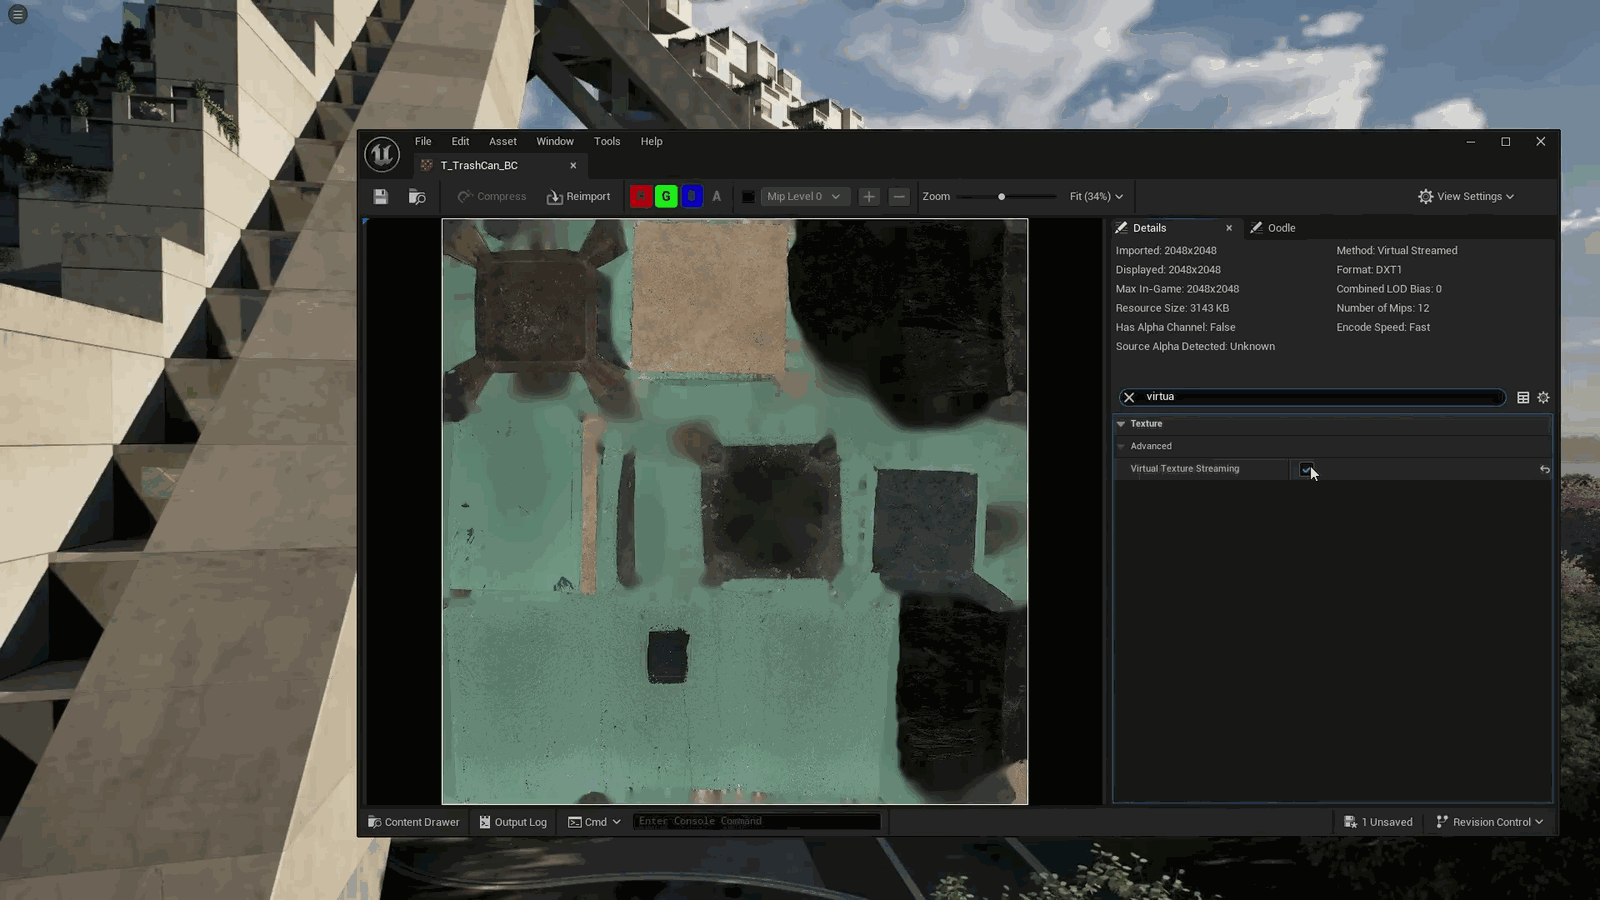
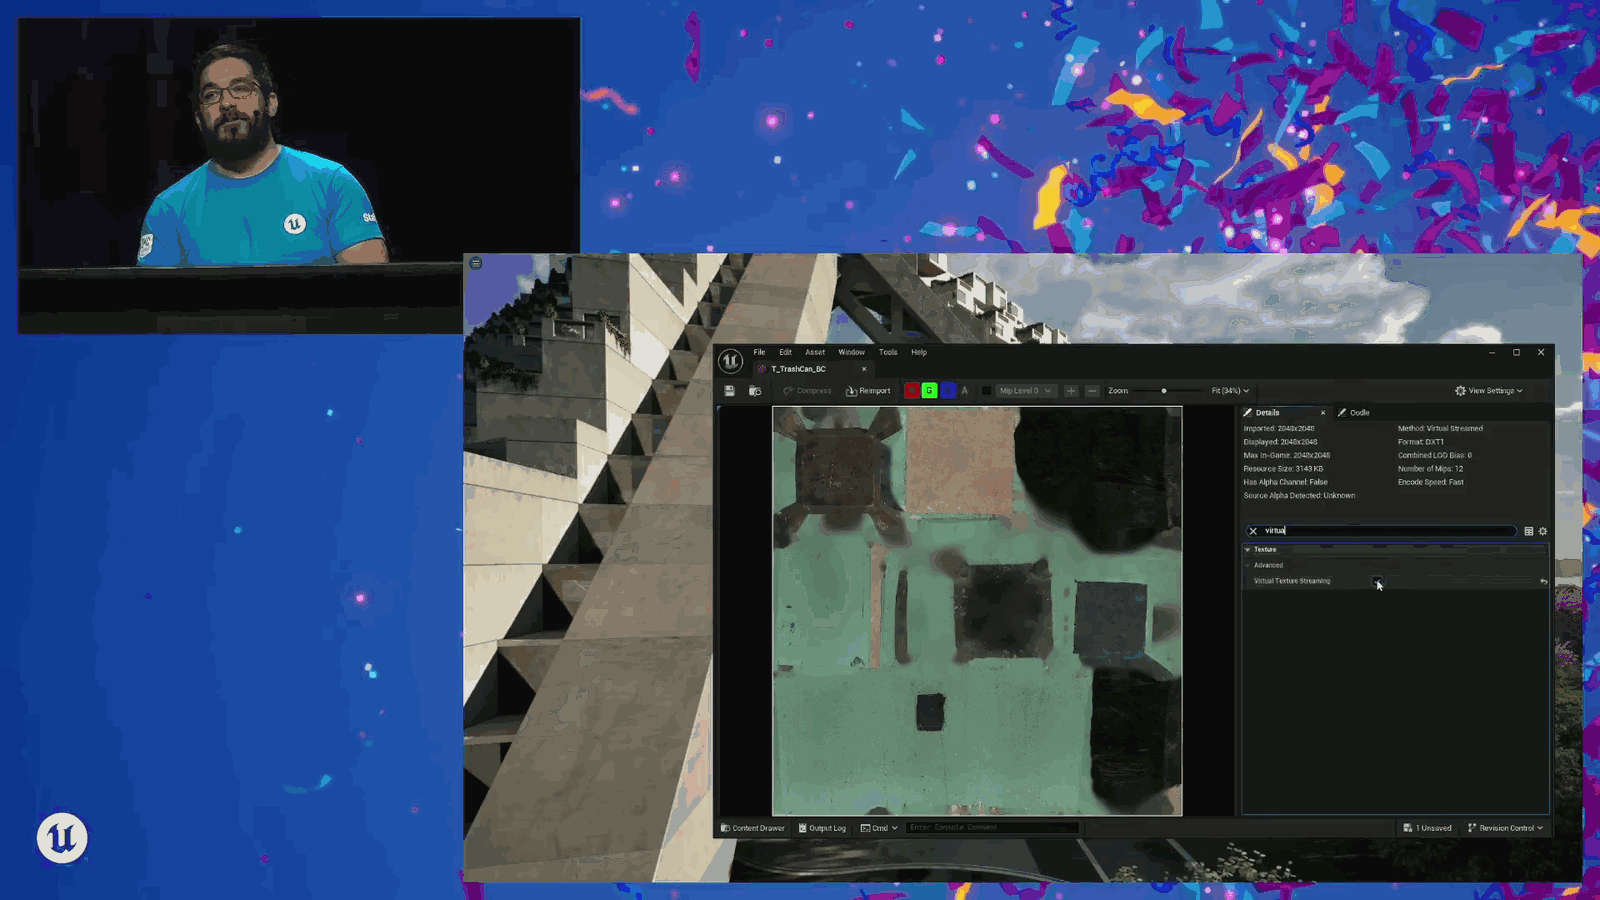
We can go to virtual, and we can turn on virtual texture streaming. Great, we’re done. Easy peasy. Thanks for coming out, everybody. No, stick around. There’s a little bit more work that we have to do, and one of the things I wanted to highlight in this section here is that this is a 2K texture. And one of the misconceptions that I think people have about virtual textures is, much like Nanite, we all thought, oh, it’s only for high resolution.
Slide 33 — 00:09:21
📌 要点汇总
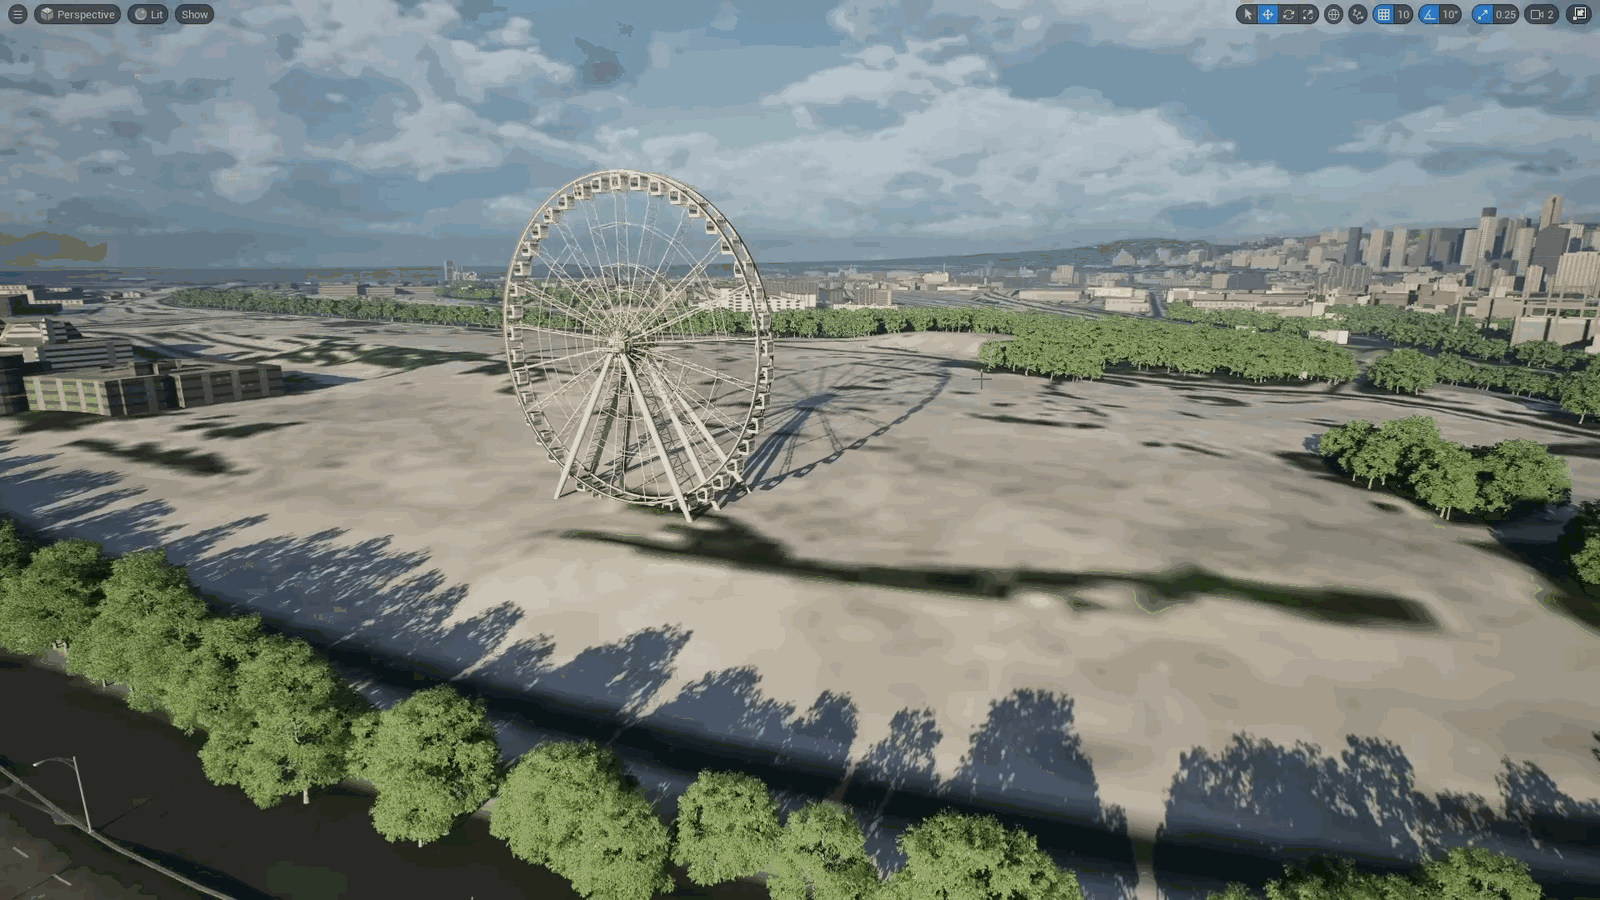
- Nanite 可以处理任意数量的三角形,无需担心几何复杂度
- 虚拟纹理技术可流式传输小于 4K 的纹理,不限于高分辨率纹理
- 虚拟纹理对高分辨率和低分辨率纹理都具有高效性
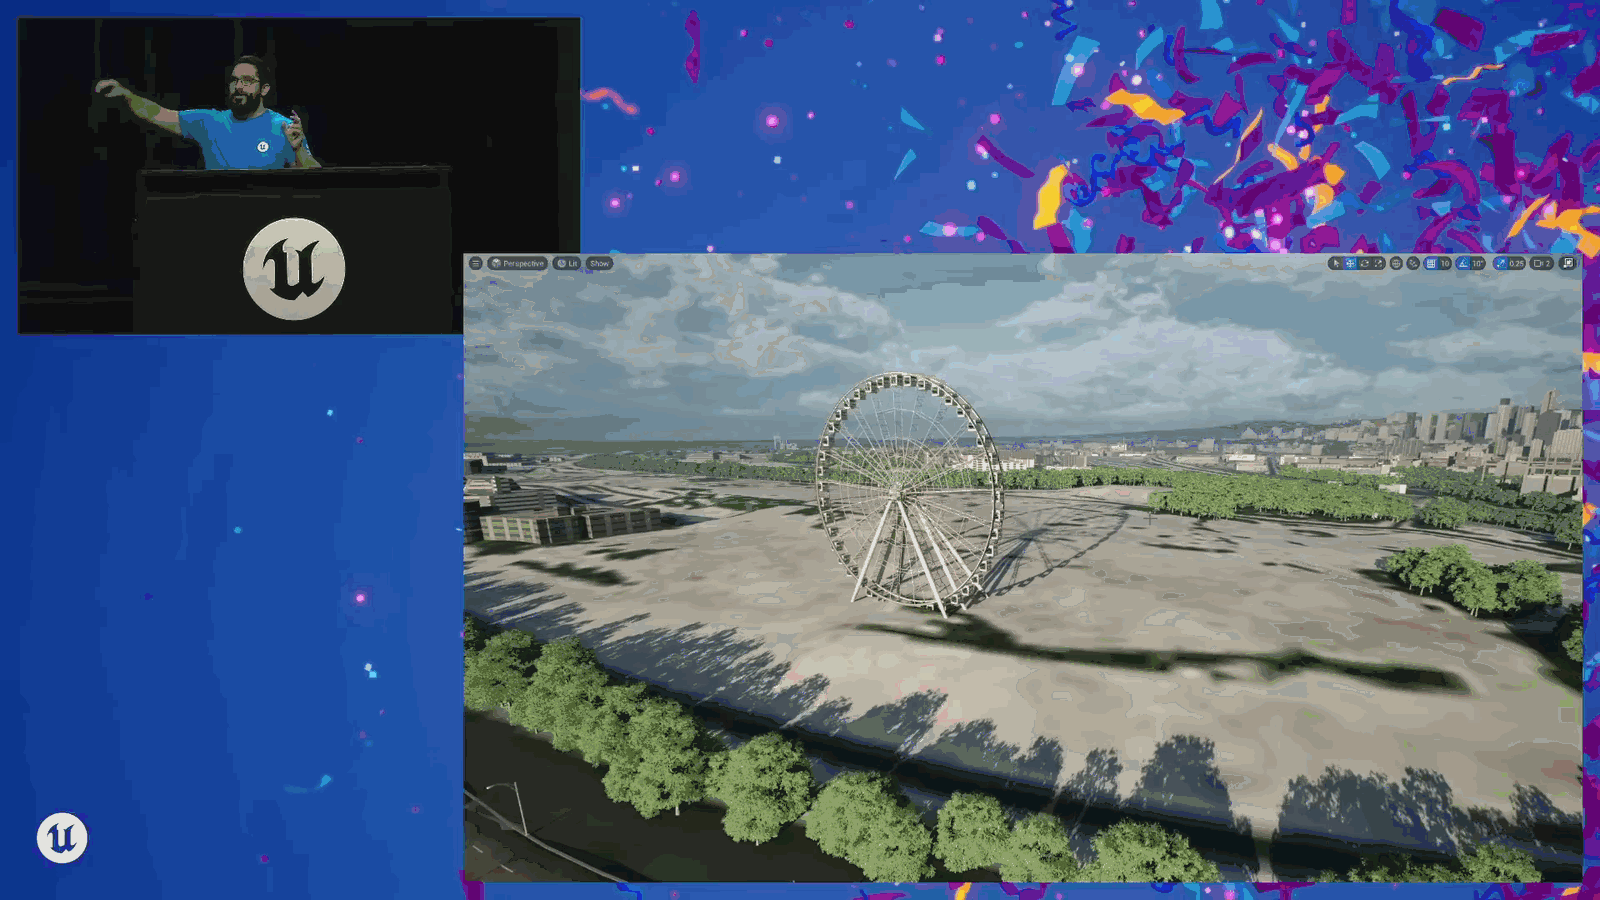
- 使用虚拟纹理时需对材质进行小幅修改以实现最佳效果
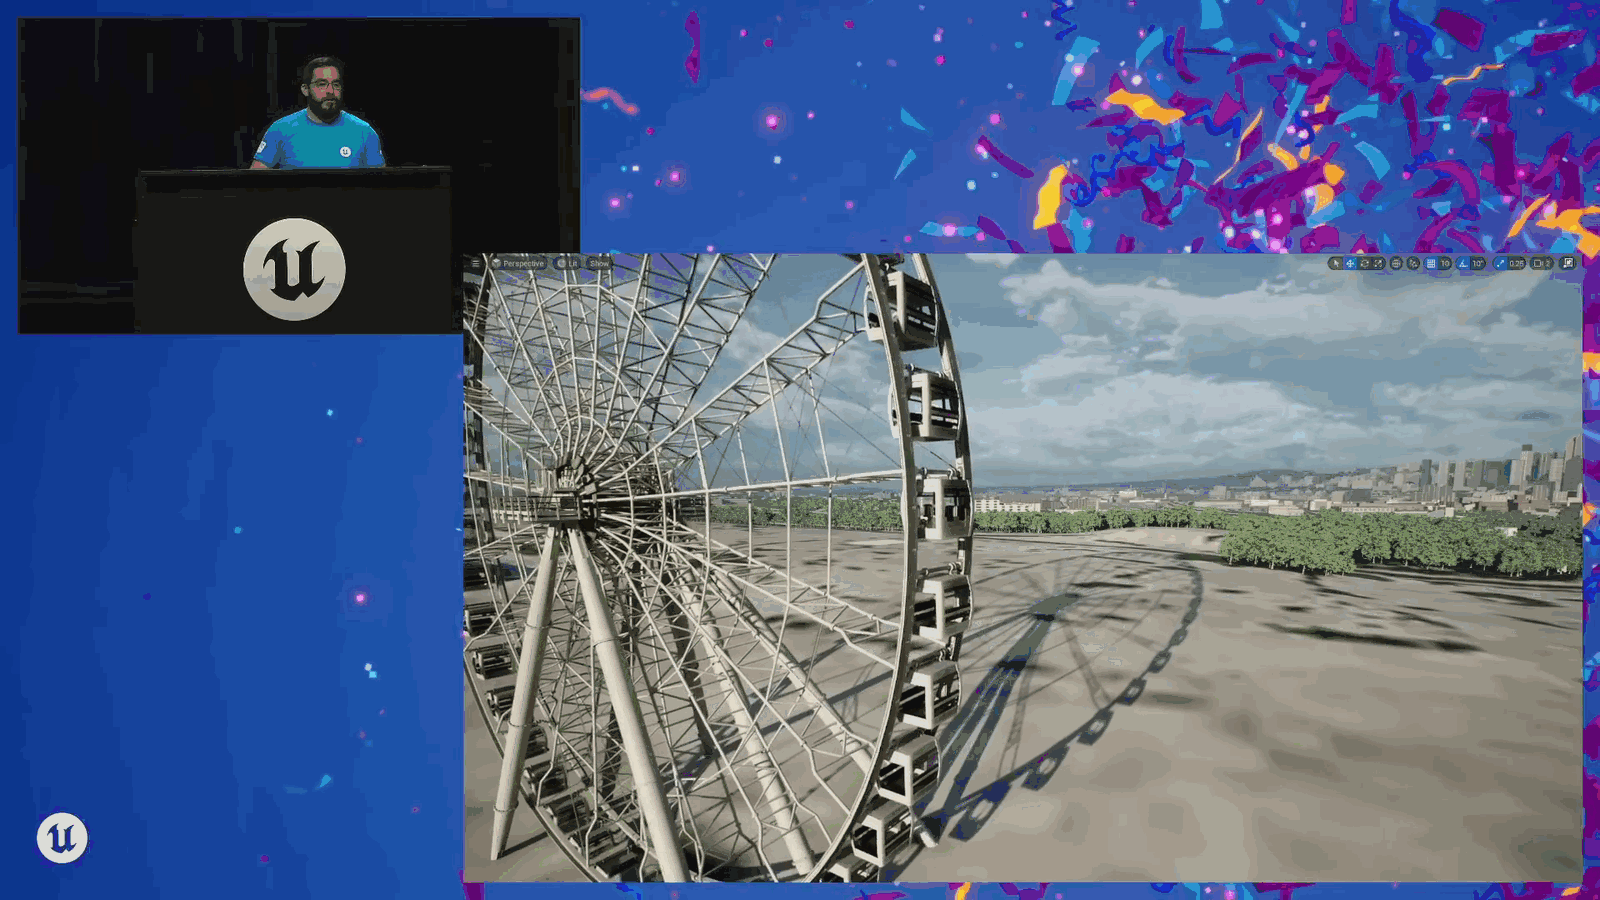
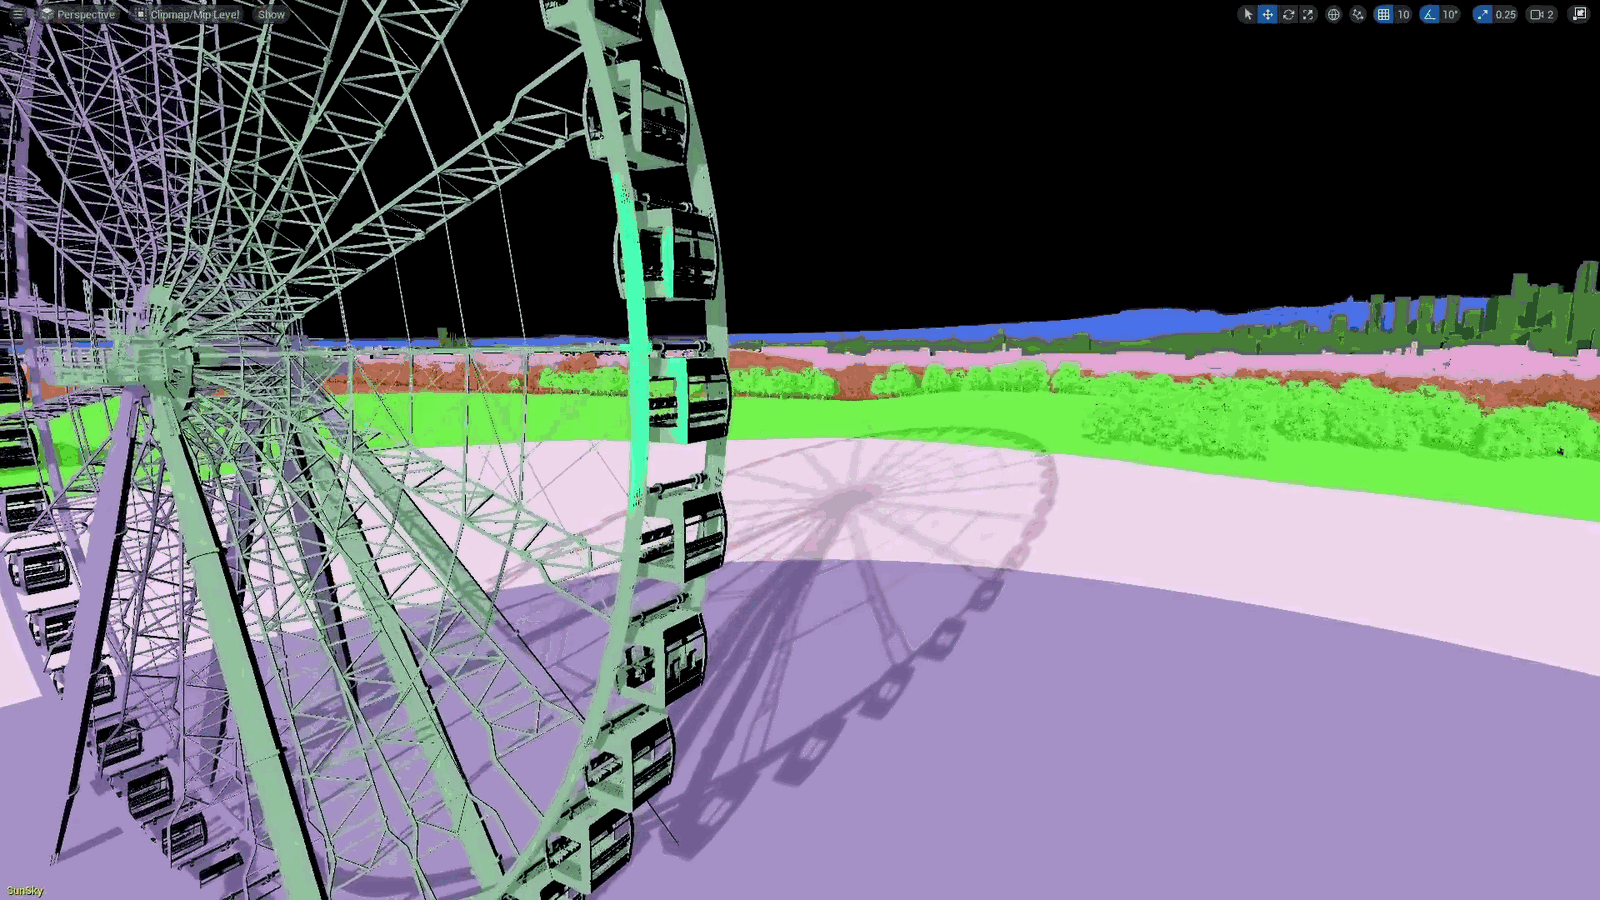
Geometry, and then at Unreal Fest New Orleans, I had to get up and say, “If it can be Nanite, it should be Nanite.” I don’t care how many triangles it is. Similarly, with virtual texturing, you can stream textures smaller than 4K. It’s not just for high-resolution textures. Does it make it easier to use high-resolution textures? Yes. It also is efficient for lower-resolution textures as well. But there’s a little tricky thing that you have to do when you are using virtual textures, and you have to modify your materials a little bit, so even though I check virtual texture streaming.
Slide 34 — 00:09:54
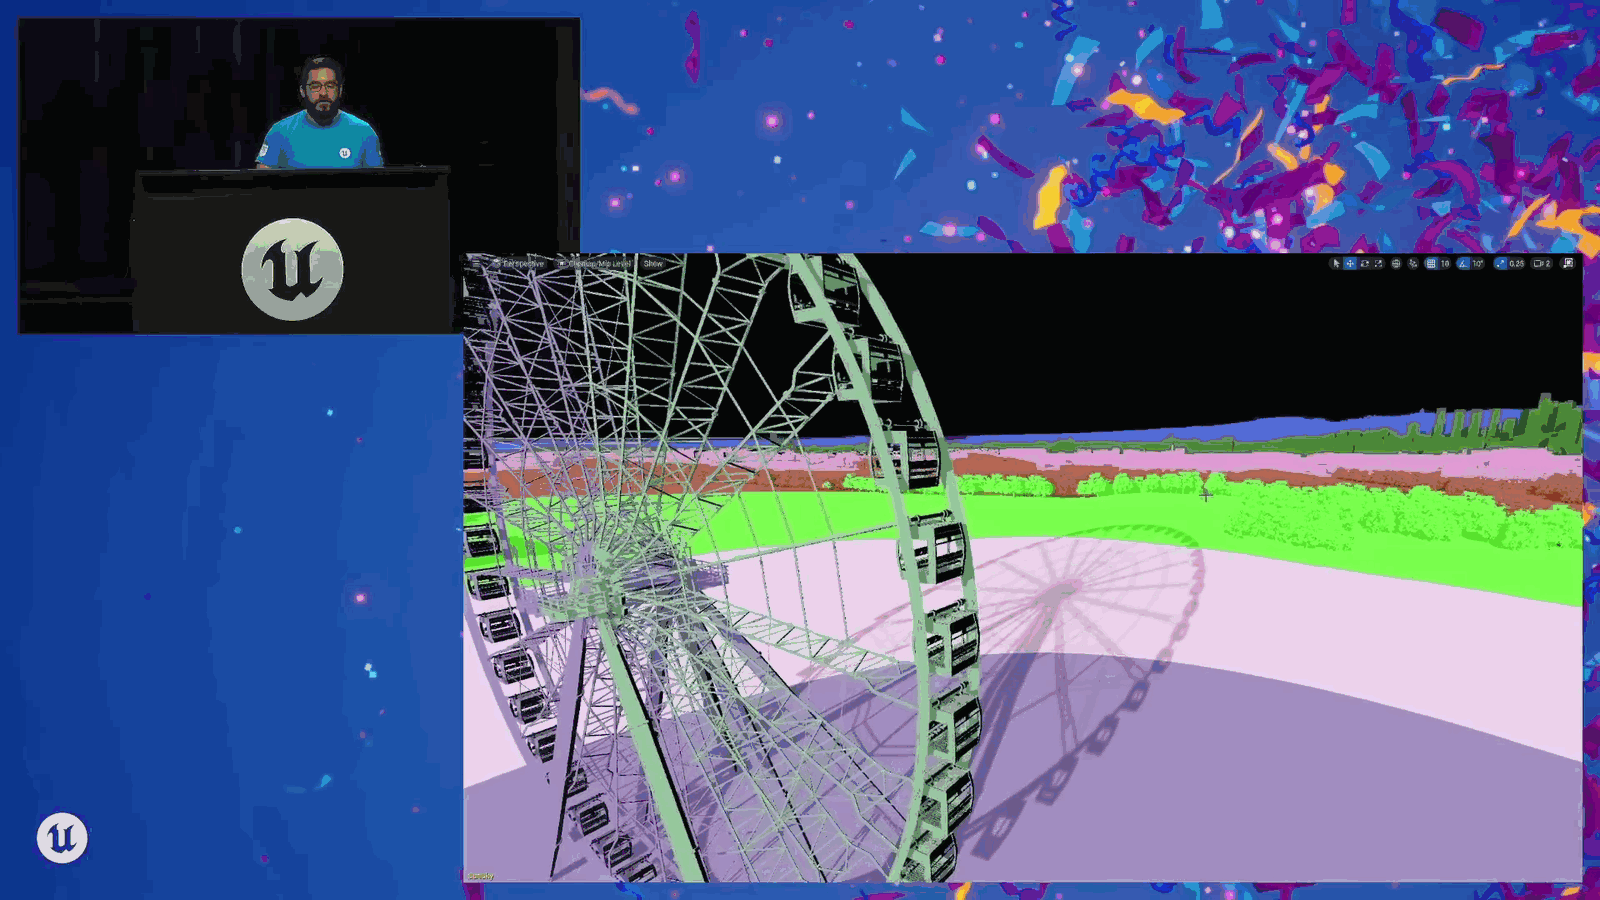
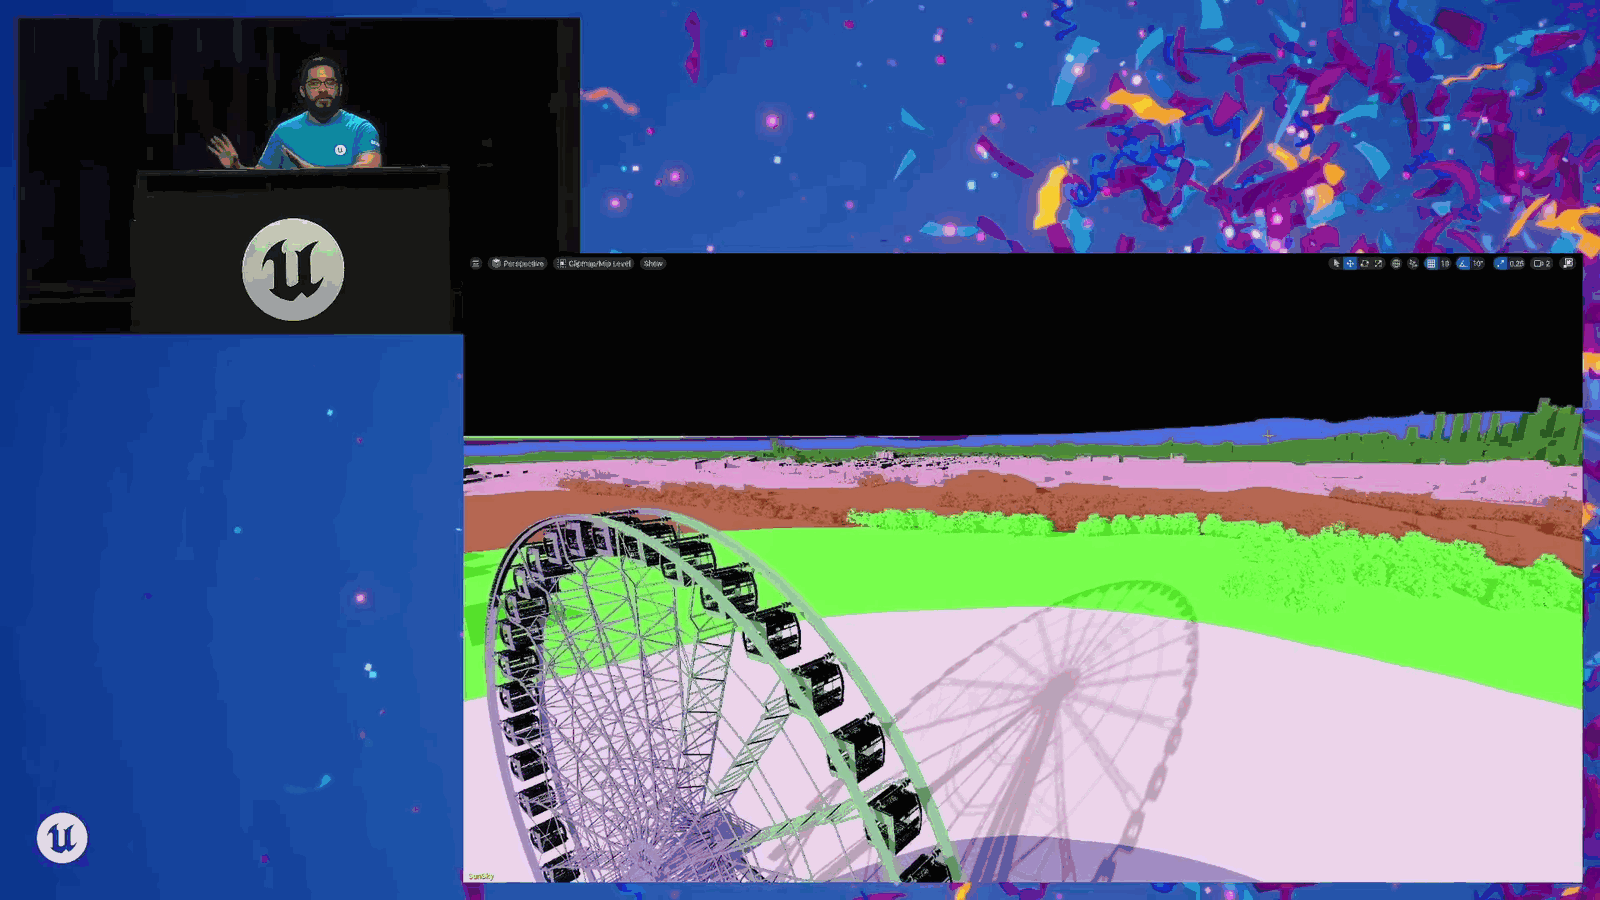
📌 要点汇总
- 使用虚拟纹理(virtual textures)作为山体材质的默认设置
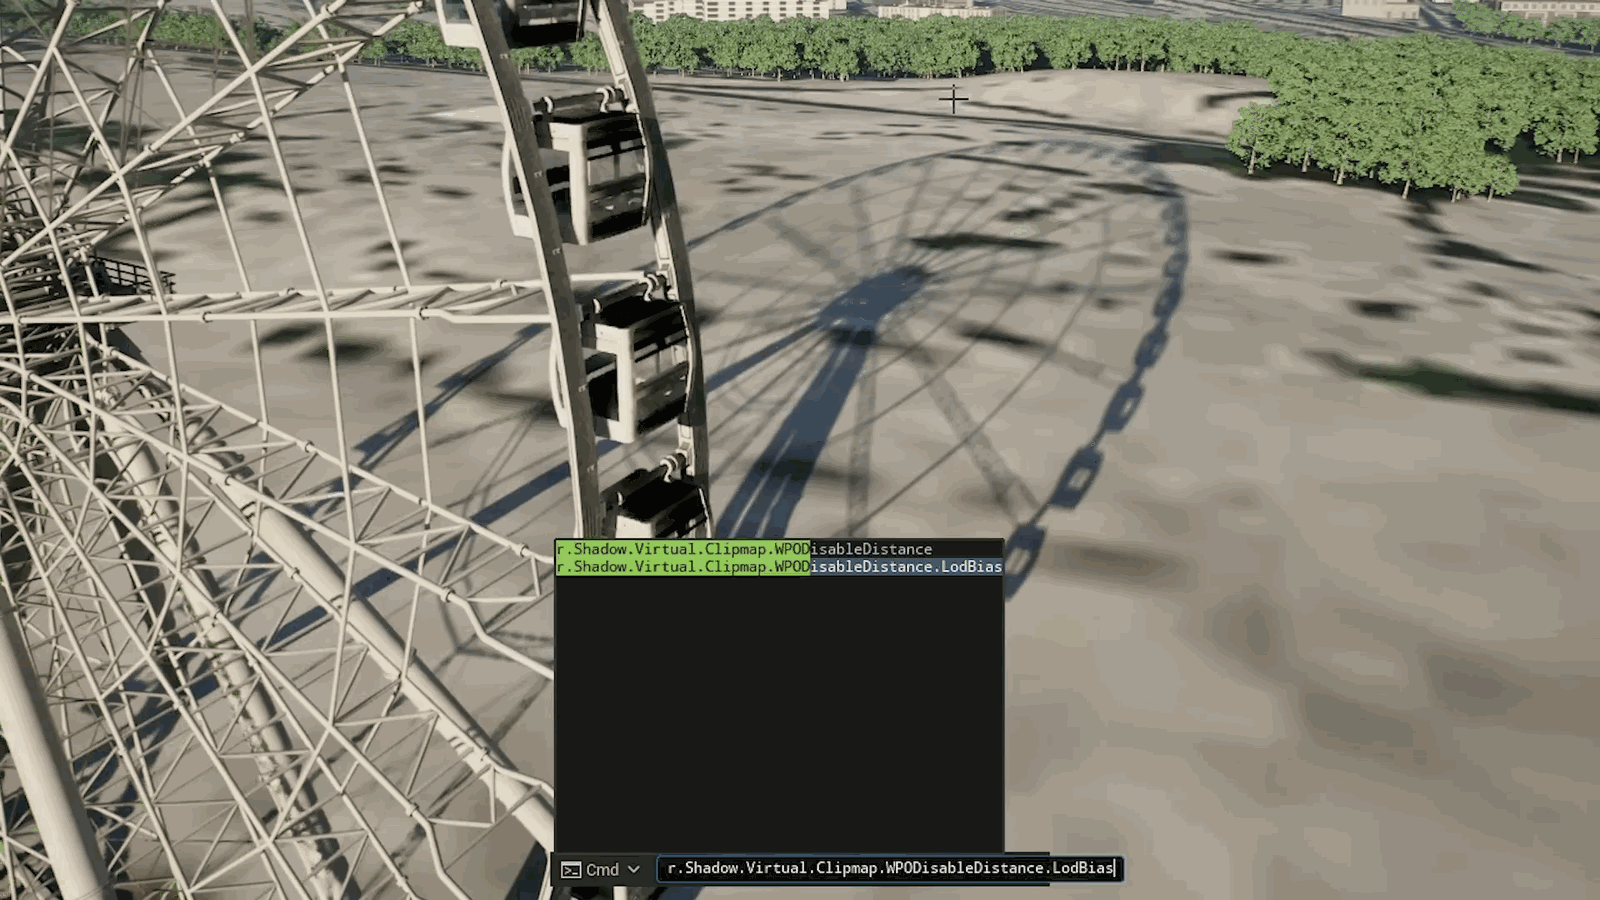
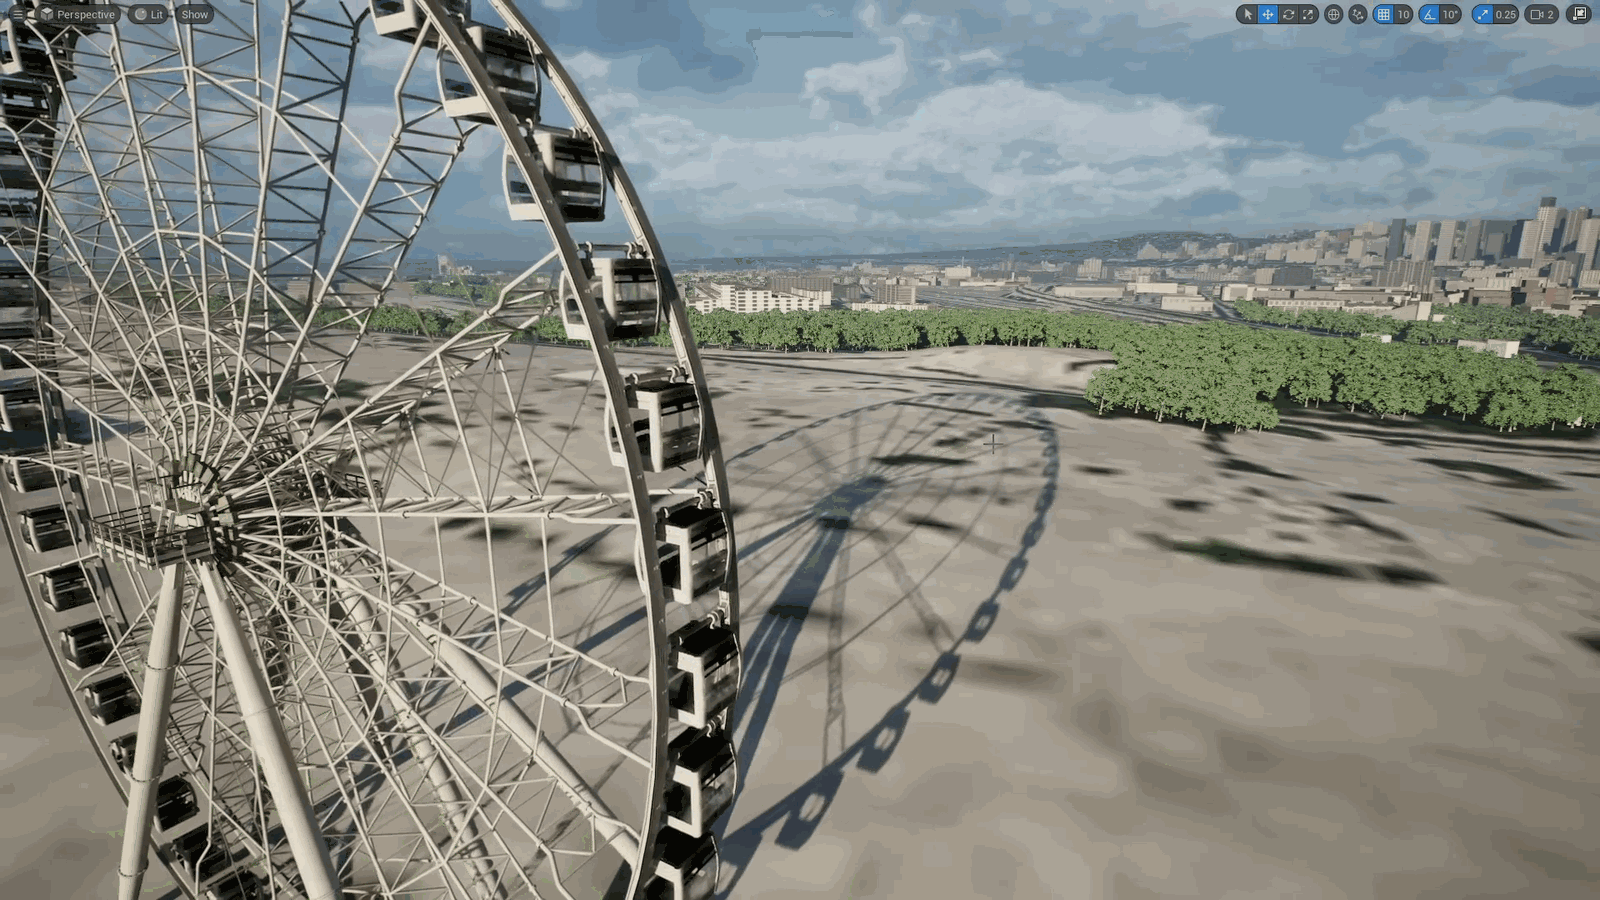
- 该材质不支持非虚拟纹理选项
- 纹理资源处理只是工作的一部分,后续还需处理材质设置
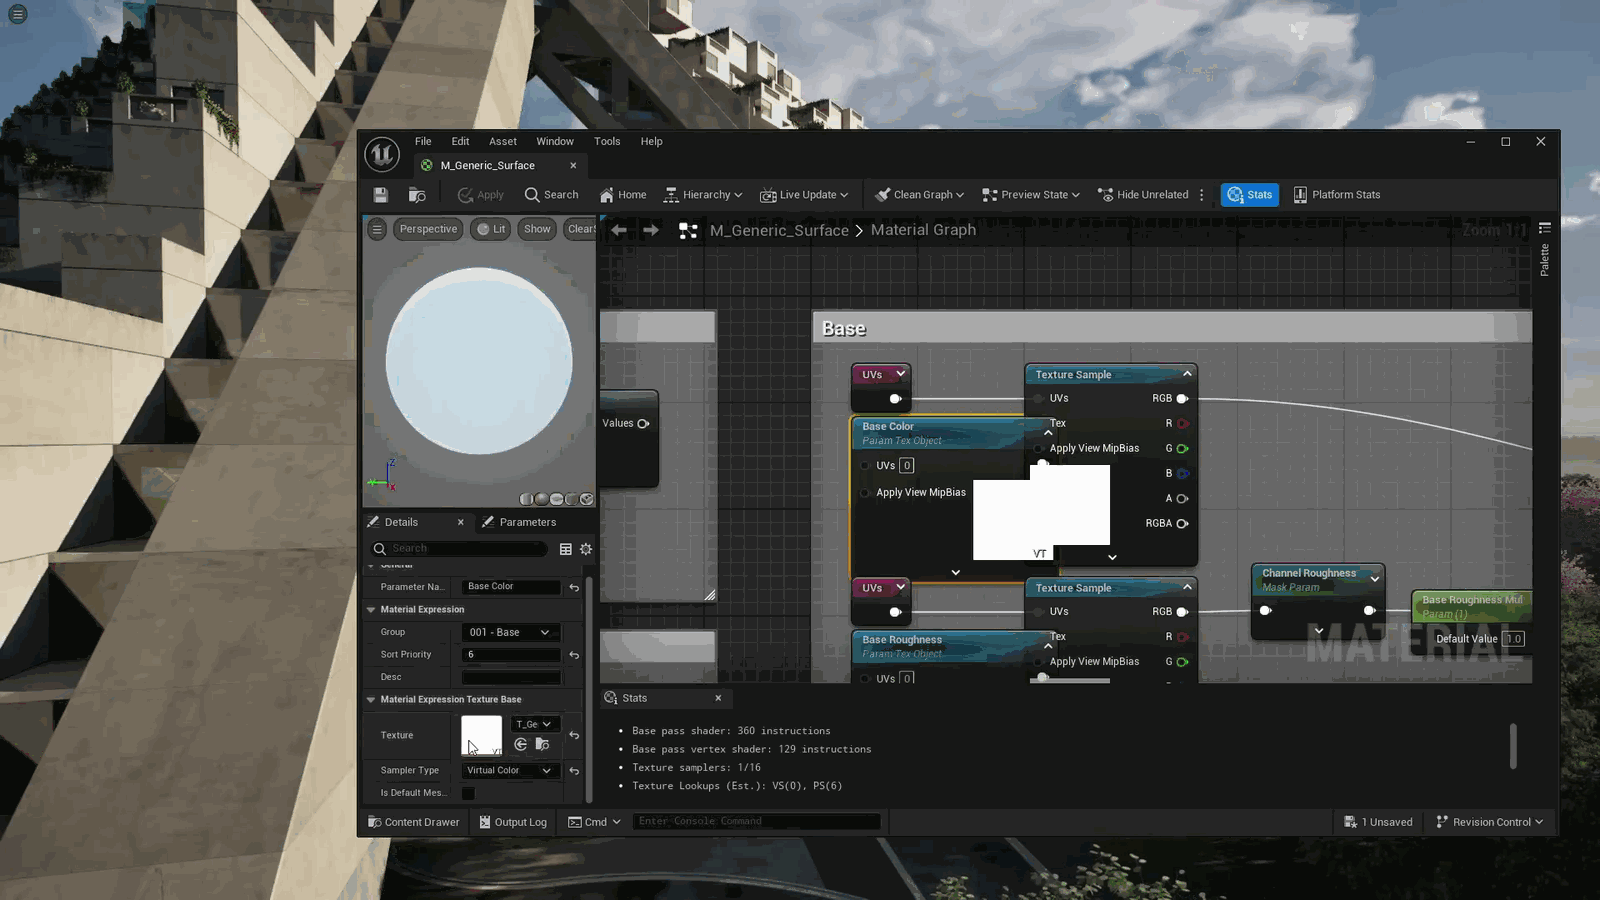
On the texture asset doesn’t mean my work is done. I next have to go to the material, and this is the default material for the hillside. And what it uses for all of its texture parameters is virtual textures. There is no option to use non-virtual textures in this material because the…
Slide 35 — 00:10:15
📌 要点汇总
- 虚拟纹理的采样器类型需设置为虚拟采样器类型
- 虚拟纹理仅支持虚拟颜色、灰度、透明度等属性
- 使用虚拟纹理时需考虑这些限制对项目构建的影响
- 该设置可能增加开发复杂度和工作量
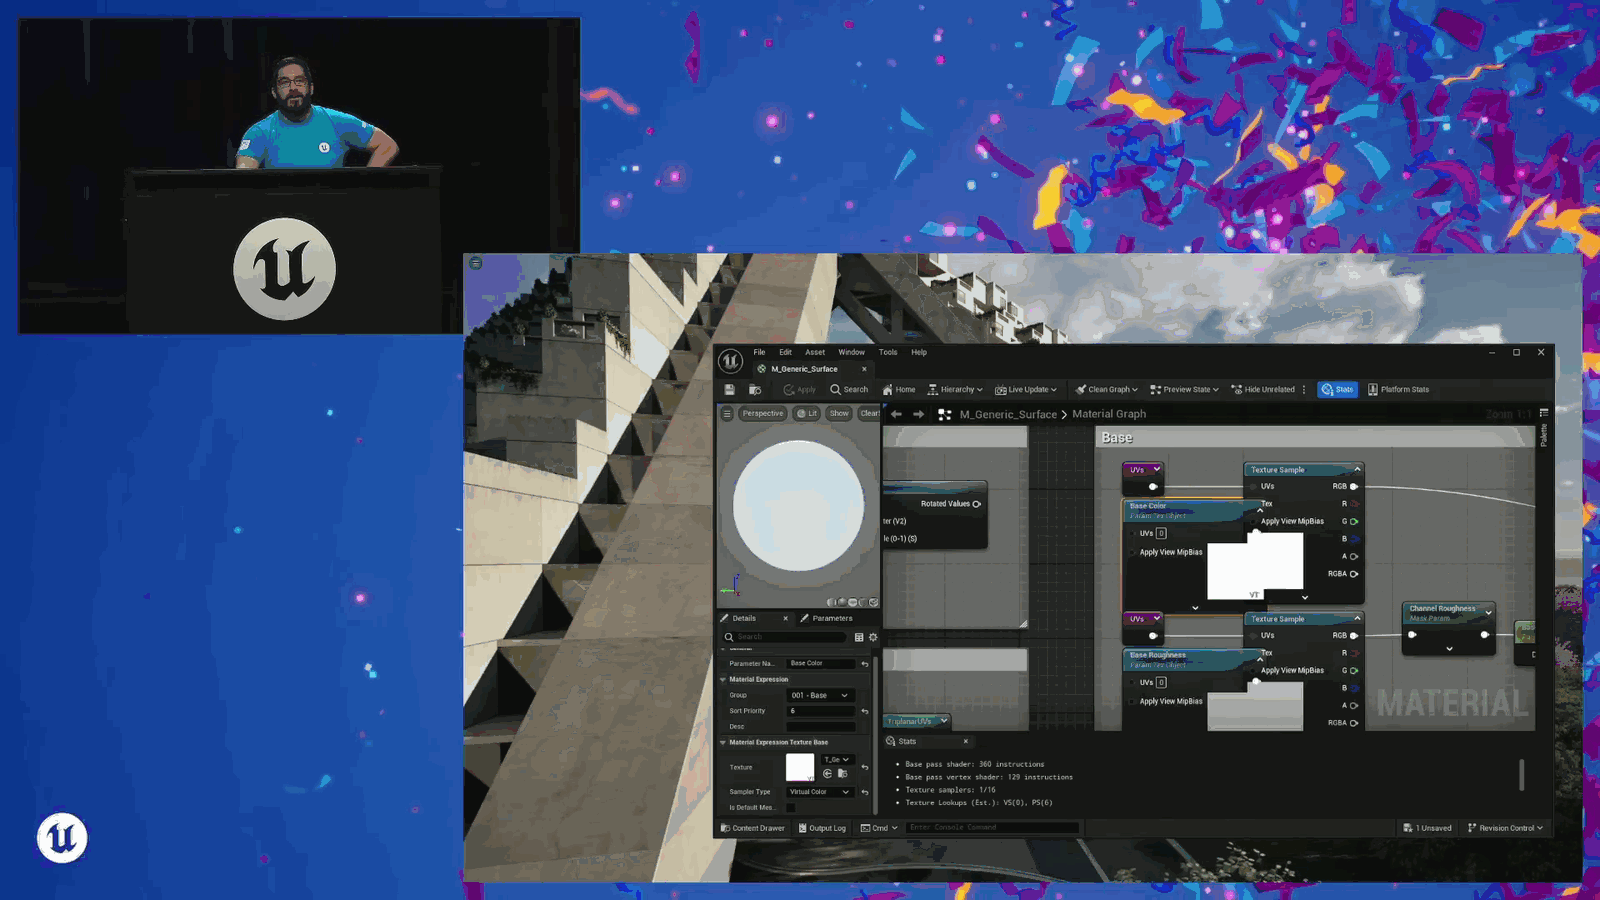
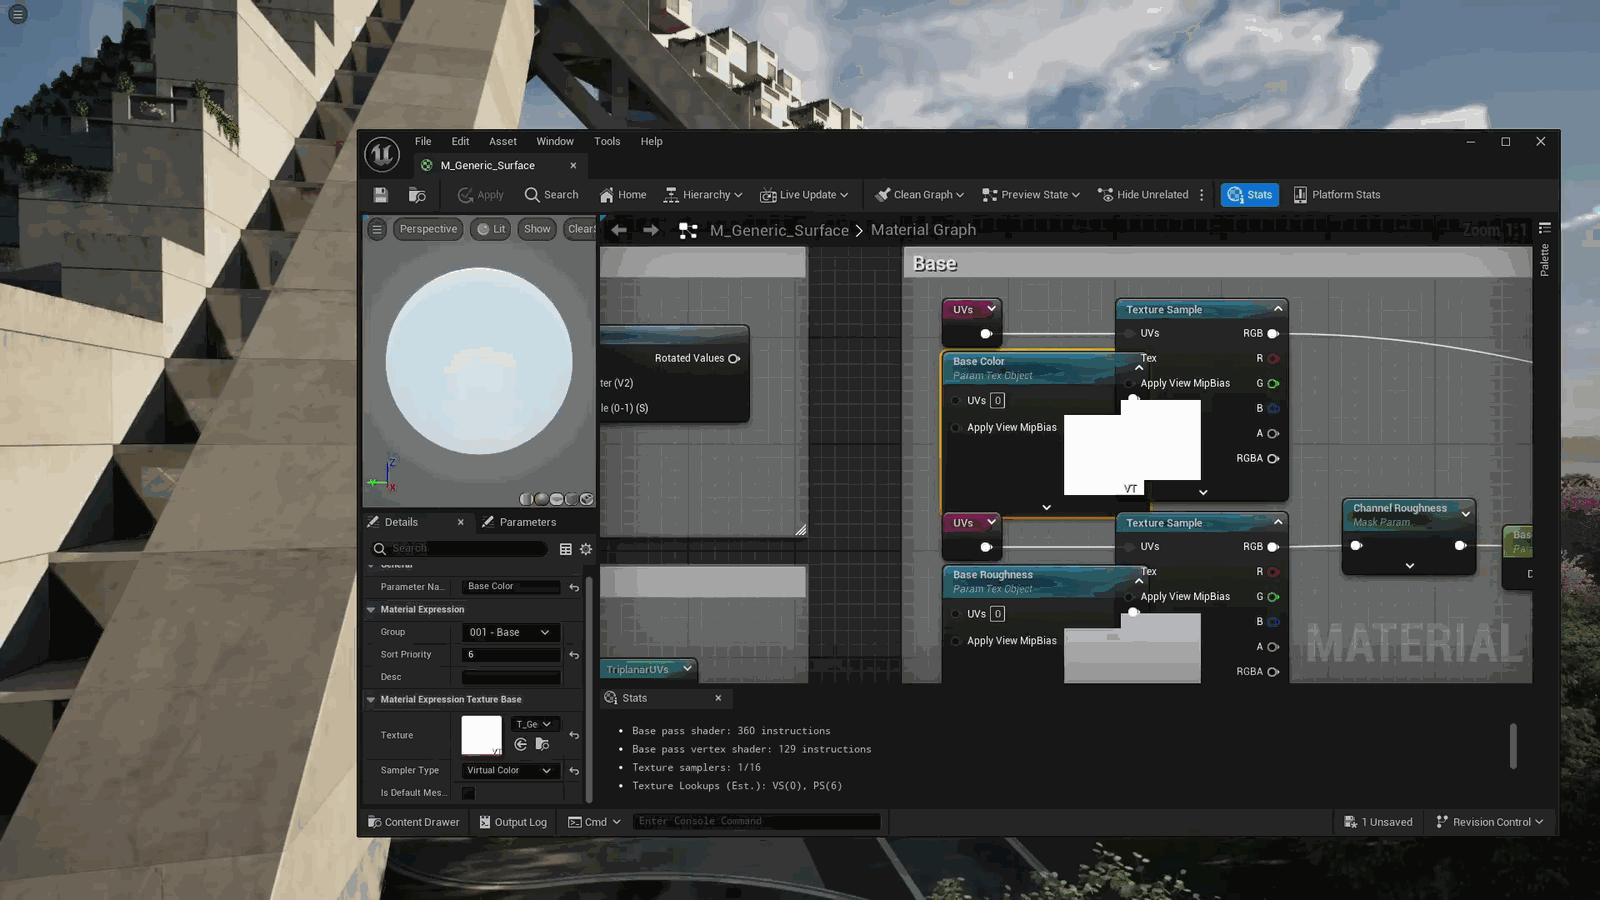
Sampler type is set to a virtual sampler type. So if you use a virtual texture, now you can only have virtual color, virtual grayscale, virtual alpha, and so on and so forth. This is something you need to think about when building your projects. I’ll talk about that in a second. But you’re looking at this and thinking, Matt, that looks like an awful lot of work. You have to go into all.
Slide 36 — 00:10:34
📌 要点汇总
- 用户对当前纹理设置流程表示不满,认为效率低下
- 需要手动右键设置值并更新所有材质的采样器类型
- 用户身份为技术美术师,强调对效率的重视
- 当前工作流程存在重复和繁琐的操作步骤
My textures. I have to right-click, set the value, and then I have to go into all my materials and update all my sampler types. And I thought you were a tech artist and you were all about efficiency. Well, I am.
Slide 37 — 00:10:43
📌 要点汇总
- 演示包含两组纹理和两种材质
- 用于展示不同材质在视觉效果上的差异
- 可能用于材质对比或渲染测试
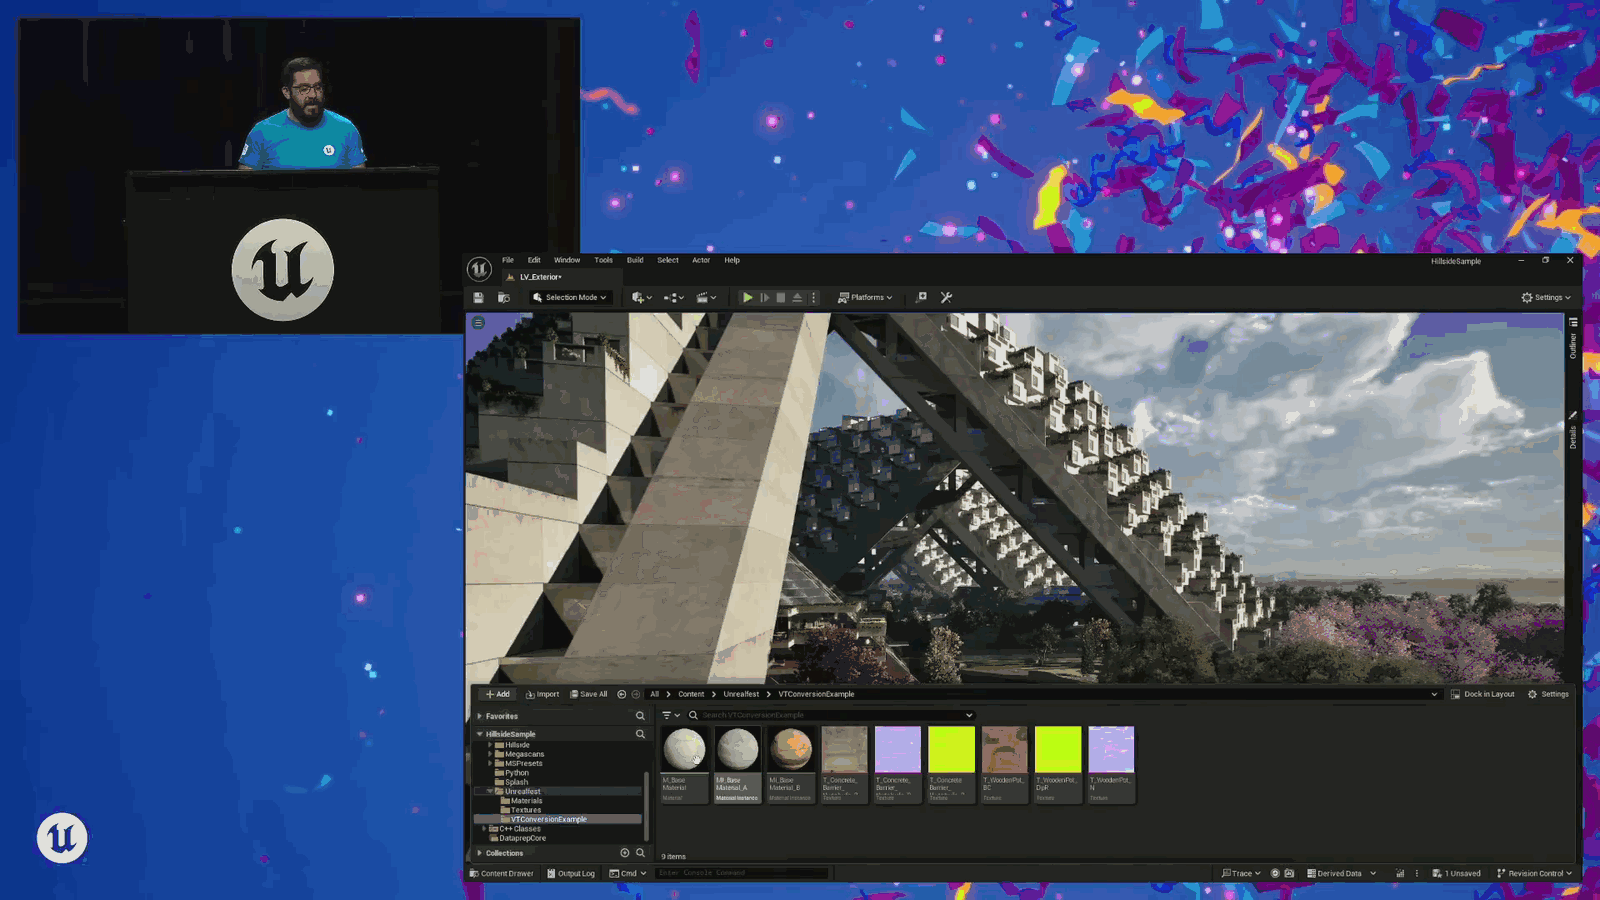
So I’ve got a little demo here where I’ve got two sets of textures and two materials.
Slide 38 — 00:10:50
📌 要点汇总
- 使用两种不同材质实例并共享基础材质
- 演示将纹理转换为虚拟纹理的过程
- 修改采样器类型会导致其他纹理也需要修改
- 转换为虚拟纹理后,系统会自动查找并更新所有引用
- 自动处理采样器类型和纹理使用位置,提升效率
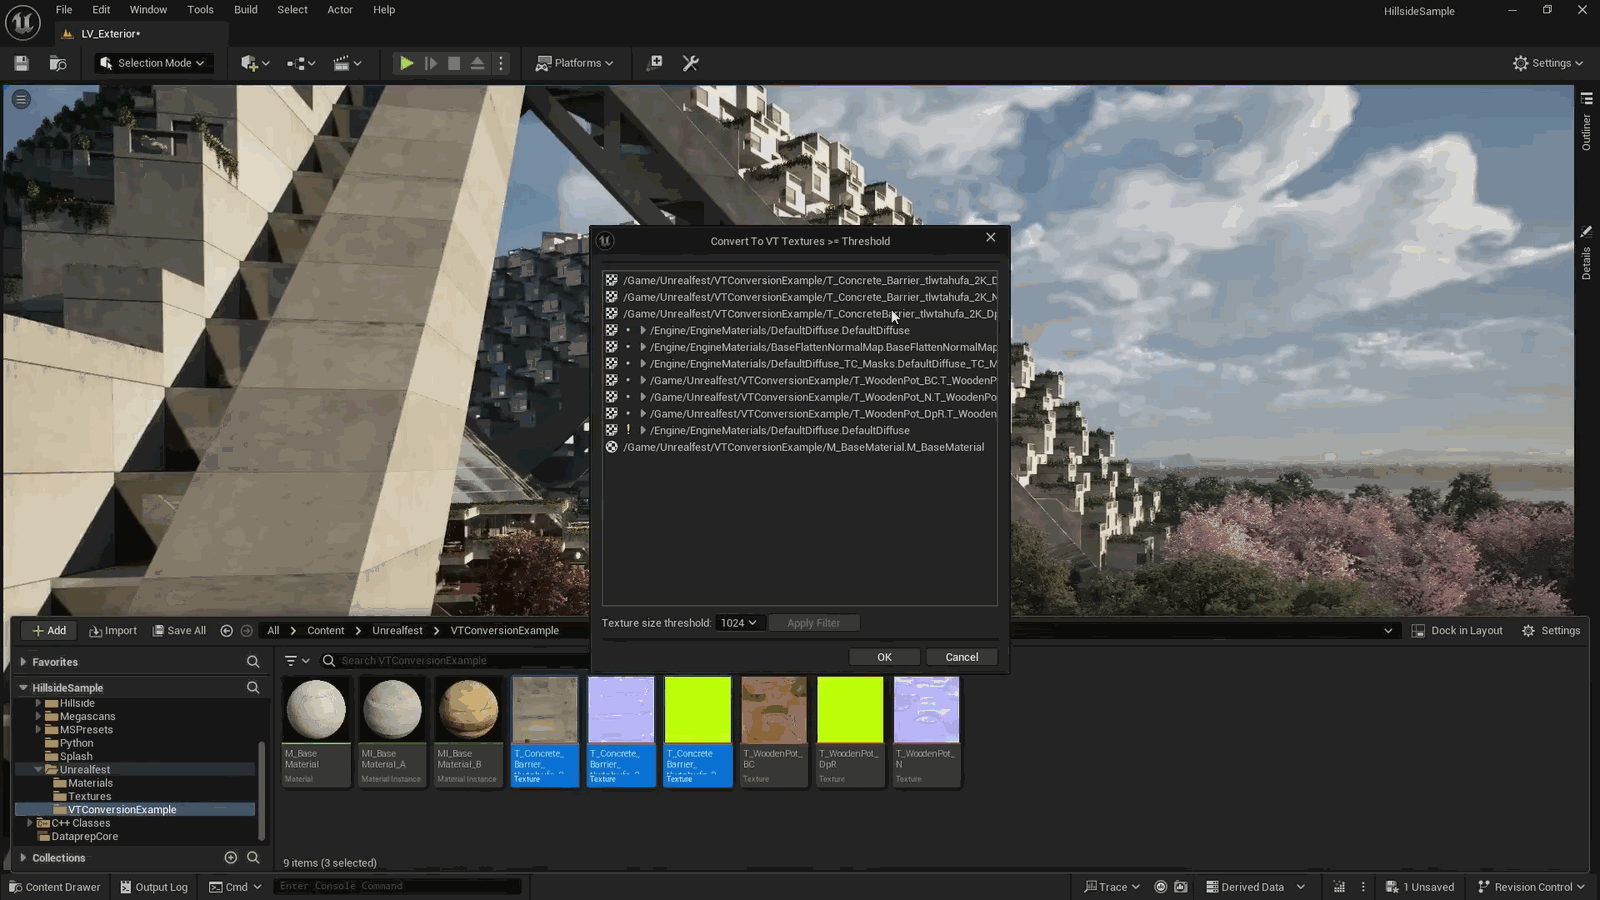
Used in these two different material instances, and they share a base material. And what I want to demo here is I want to turn these textures into virtual textures. But if I then change the sampler type of the parameters that reference these textures, I then have to change all of the other textures that are being used in that parameter. And again, this sounds like an efficiency nightmare. So don’t worry about it, because all we have to do is say “convert to virtual texture,” and it’s going to go up and find all the references for these textures. Change the sampler types, and then find where all of the textures are used.
Slide 39 — 00:11:24
📌 要点汇总
- 可以设置纹理参数引用的大小阈值
- 不建议使用低于 128 的分辨率
- 可将所有纹理设置为虚拟类型以优化性能
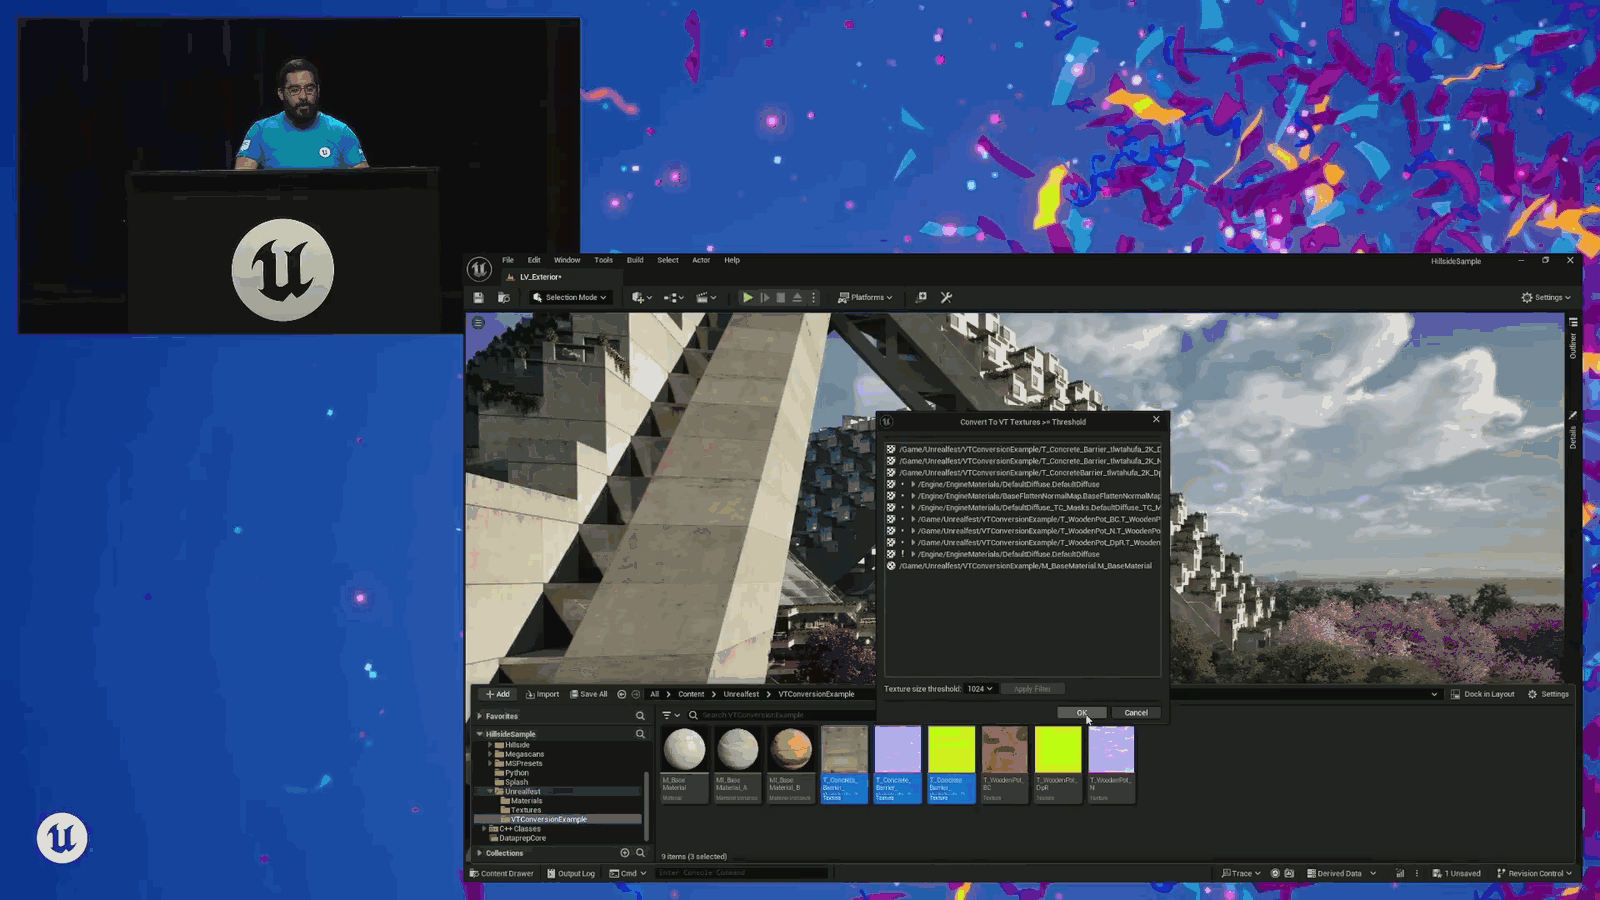
The textures that parameter references, and change those as well. You can set the size threshold. Maybe you don’t want to do a 512. You definitely don’t want to do anything lower than 128. So we can filter these, and I can say, okay, I want all of these to be virtual.
Slide 40 — 00:11:38
📌 要点汇总
- 点击确认后,其他资源会自动转换为虚拟纹理,无需手动操作。
- 自动转换简化了工作流程,提升了效率。
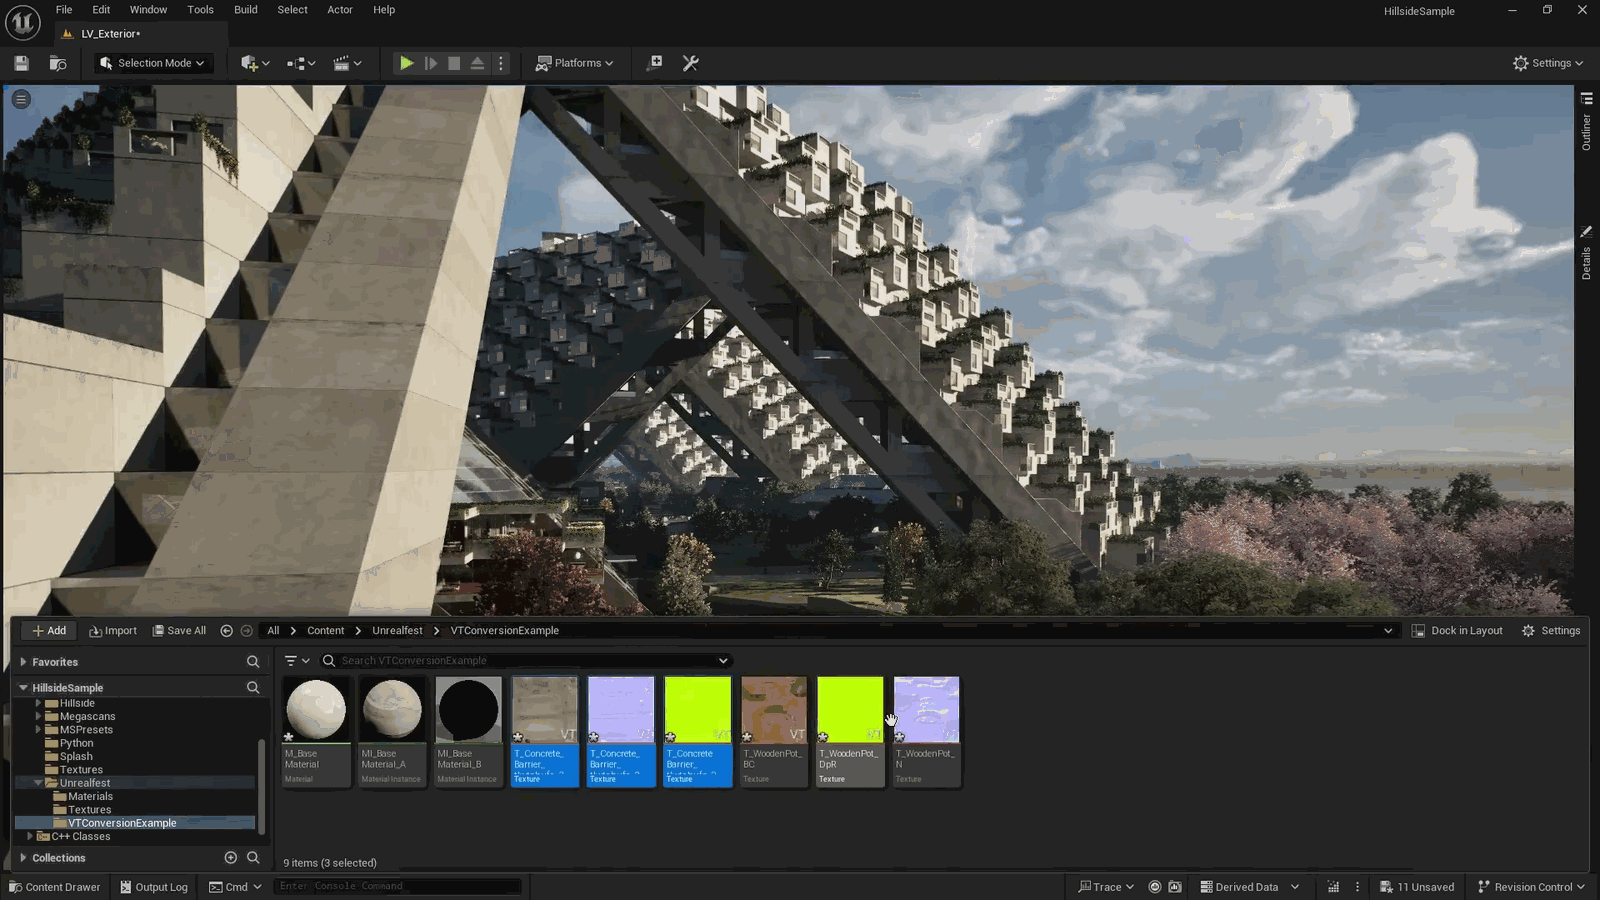
I hit OK. I let that convert, and you see, without ever having to touch the other assets here, they are also converted into virtual textures as well. It makes things a little easier on you, but.
Slide 41 — 00:11:52
📌 要点汇总
- 从项目初期就应考虑虚拟纹理技术的实现
- 提前规划可减少后期开发中的技术障碍
- 虚拟纹理技术需要整体架构支持
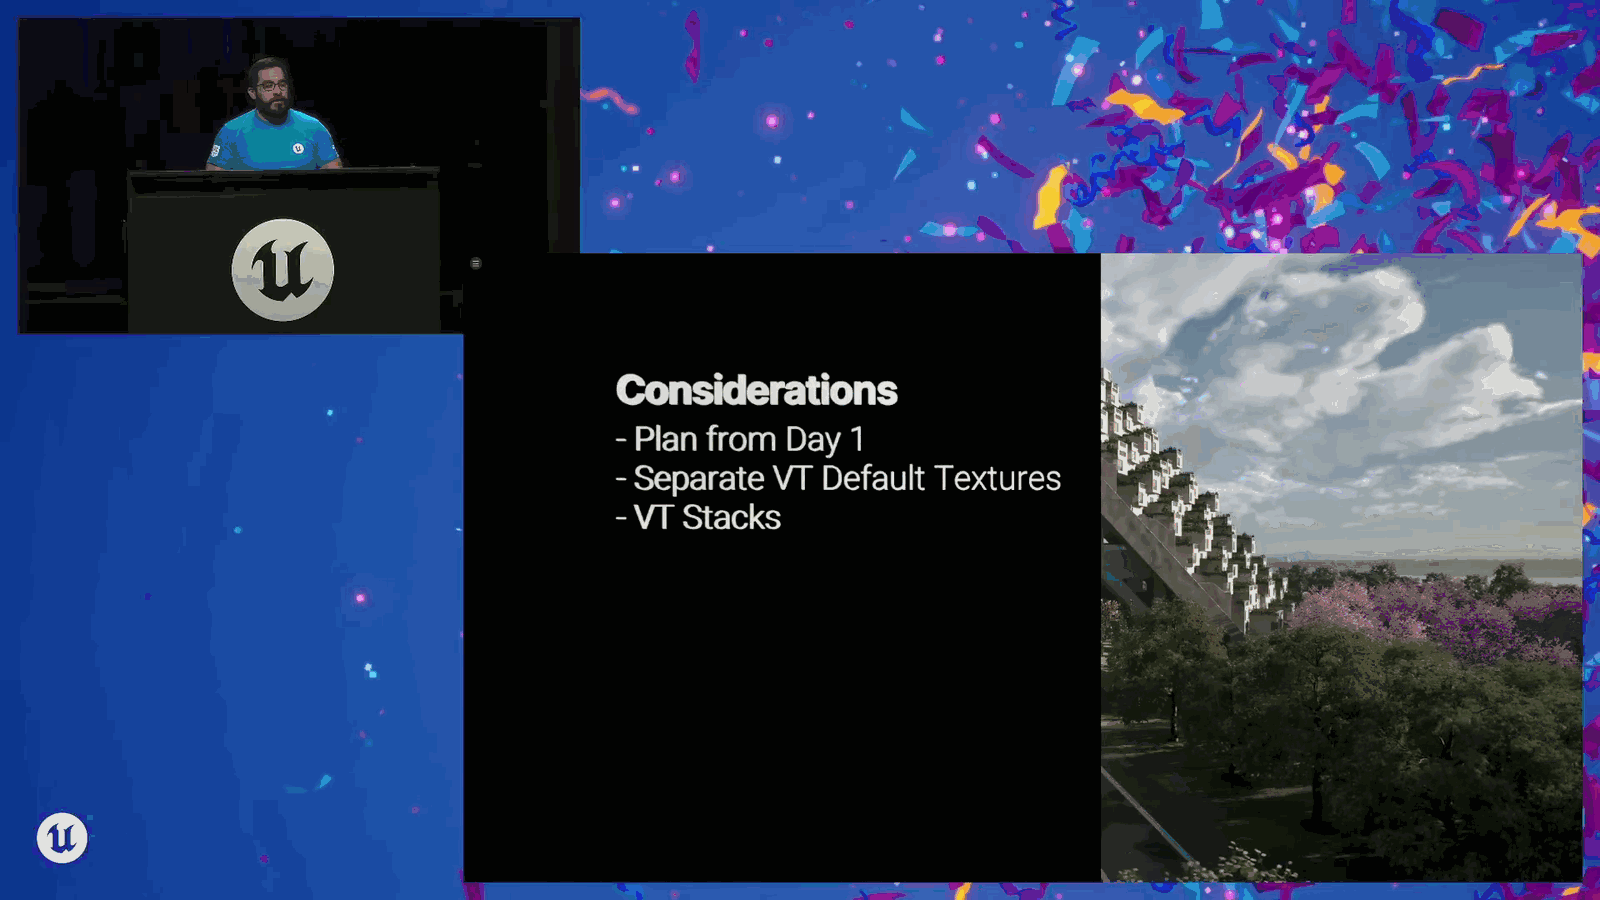
There are some things I want you to consider as you’re building out your projects for virtual texturing. It is a little better if you plan on it from day one. Going in, all right, we’re going to do this.
Slide 42 — 00:12:01
📌 要点汇总
- 避免转换后处理步骤,防止遗漏问题
- 需为虚拟纹理和采样器类型准备独立默认纹理
- 材质中需引用默认虚拟颜色、灰度、法线等纹理
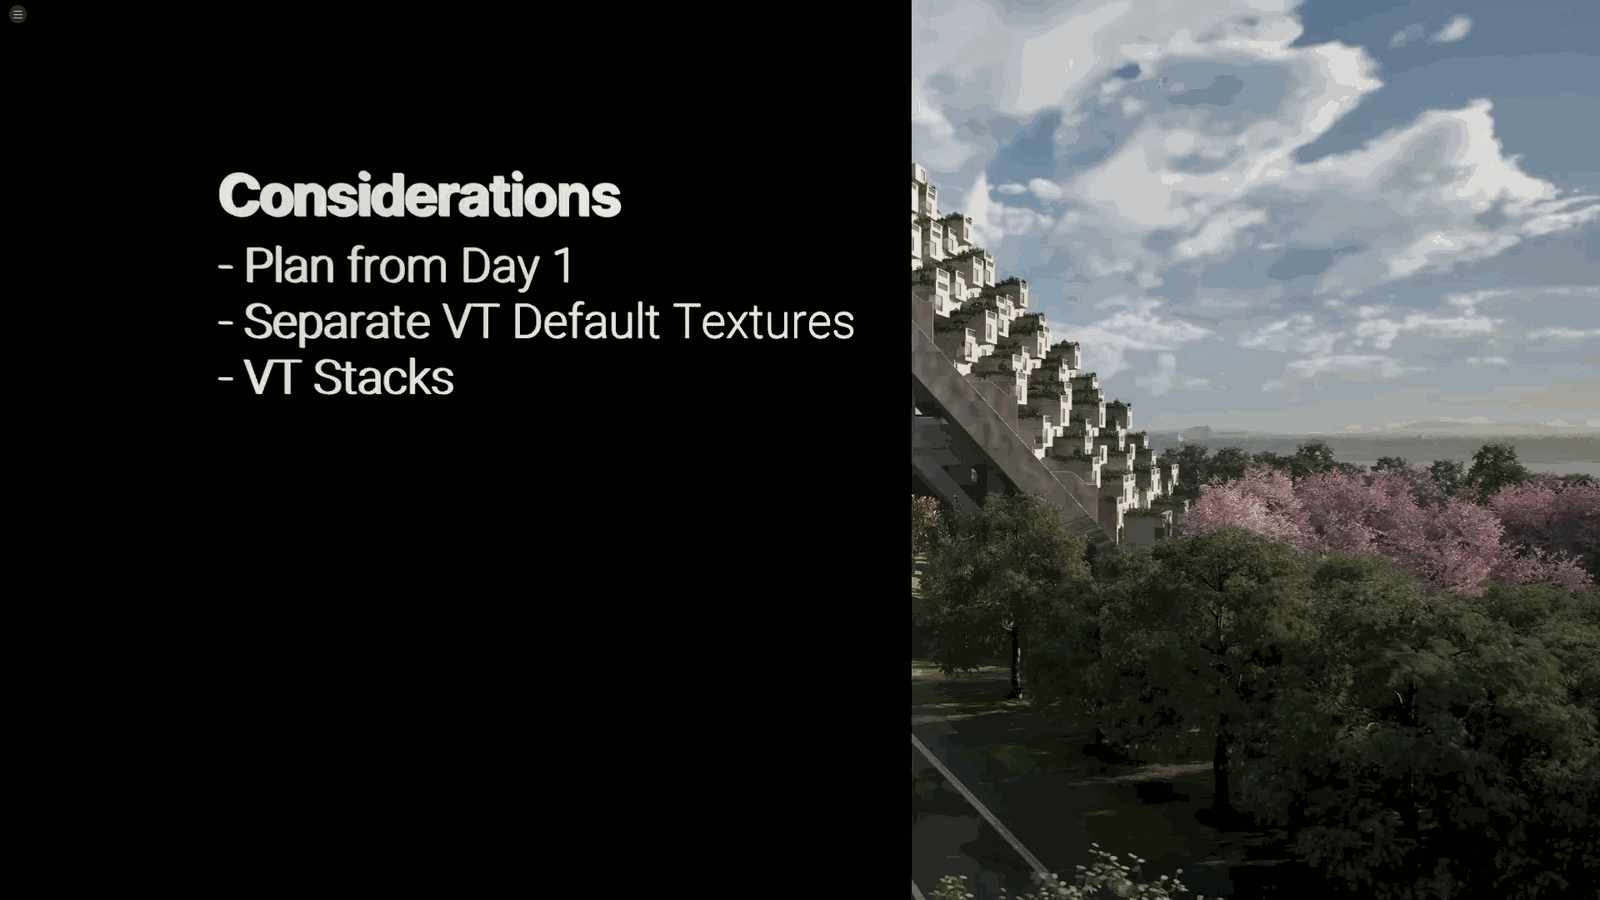
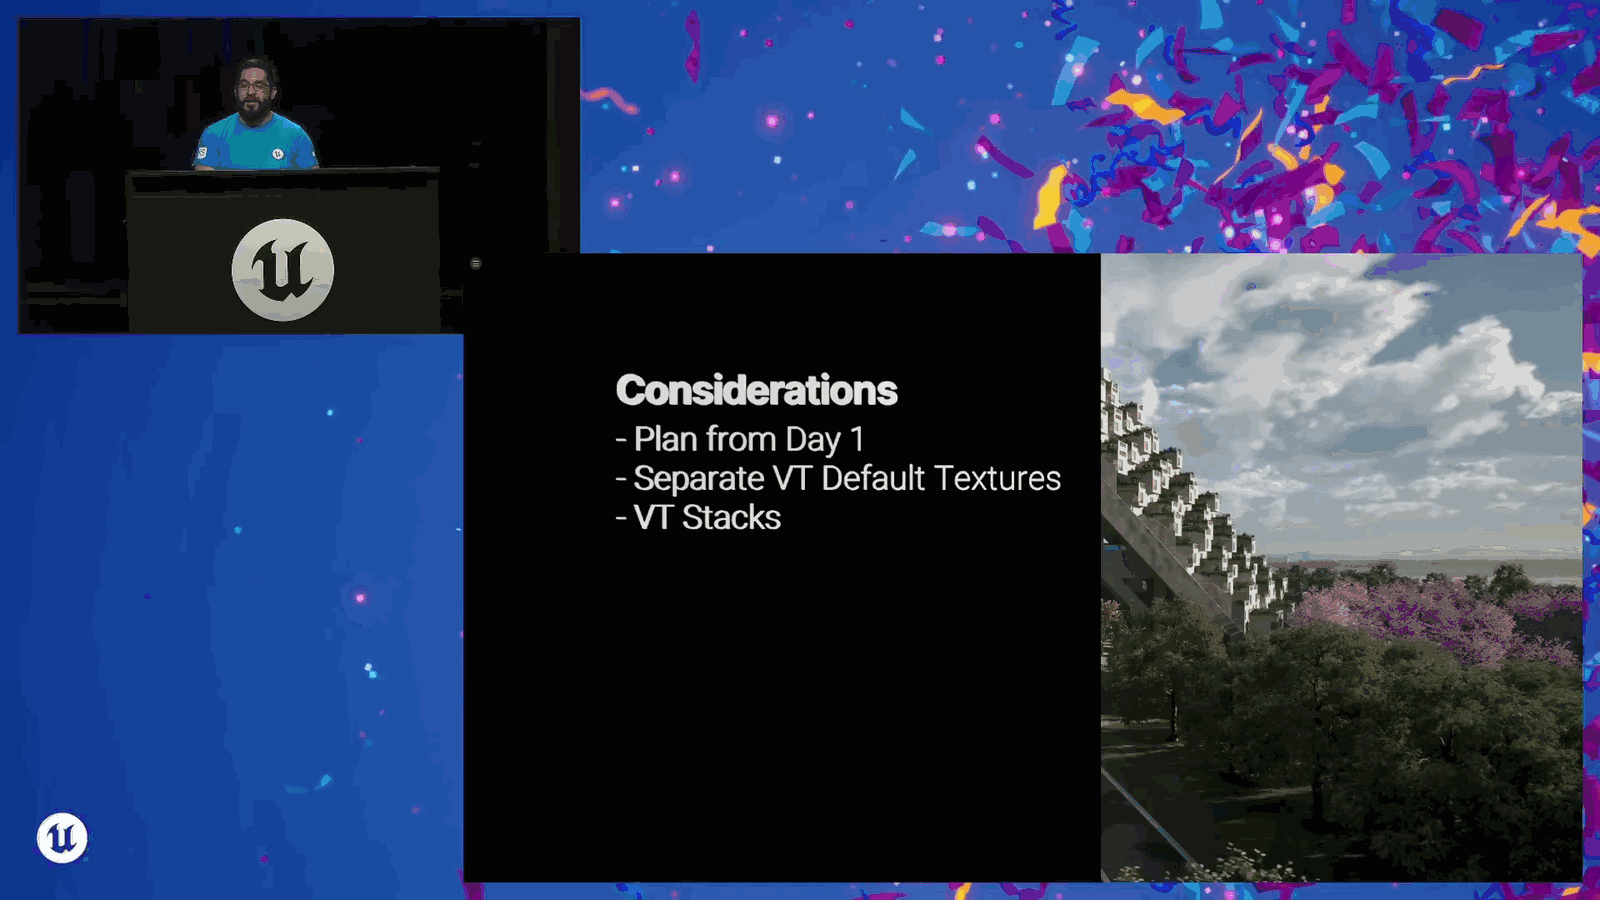
This is how we’re going to do it. Then you don’t have to do this kind of post-conversion step, which you might miss something. You do have to make sure that you have separate default textures for virtual textures, or for all the virtual sampler types. So you want a default virtual color, default virtual grayscale, default virtual normal, and so on and so forth, so that you can reference those in your material.
Slide 43 — 00:12:14
(该幻灯片时间段内未检测到语音内容)
Slide 44 — 00:12:21
📌 要点汇总
- 避免在父材质中硬引用所有纹理
- 引入虚拟纹理堆栈(virtual texture stacks)概念以优化资源管理
And not have hard references to textures in all of your your parent materials. And the other sort of construction consideration I want you to make is this concept called virtual texture stacks, which is basically.
Slide 45 — 00:12:32
📌 要点汇总
- 材料中的唯一UV组合决定了纹理映射方式
- 示例材料使用了UV零和双倍平铺的纹理样本
- 法线贴图使用了UV零的坐标映射
- 不同UV设置会影响材质表现和渲染效果
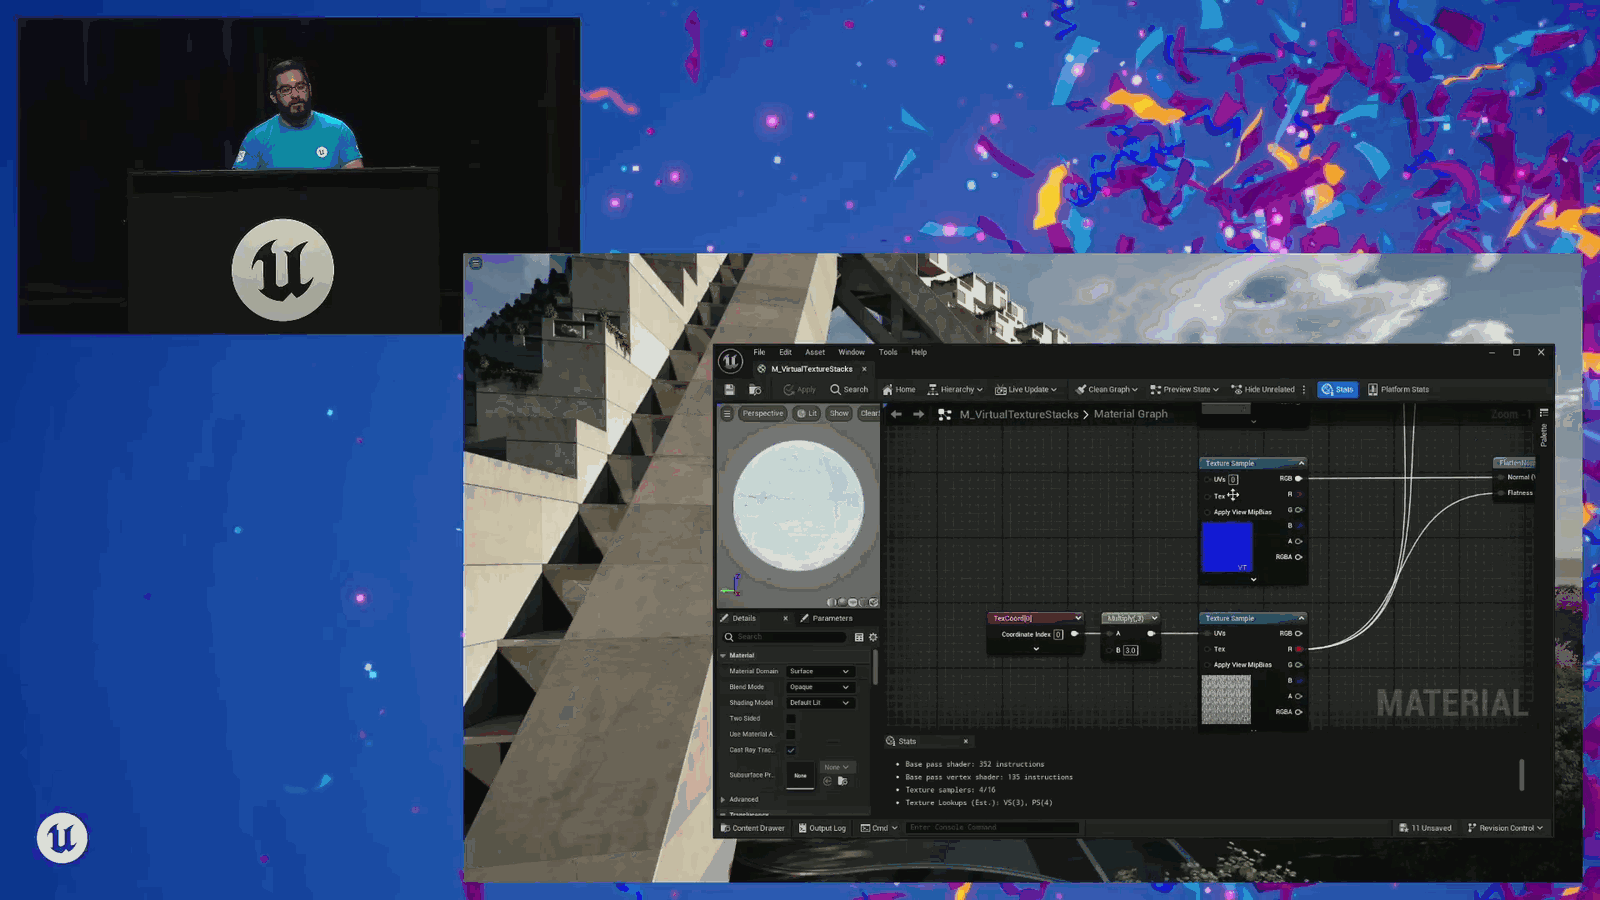
Basically, the unique UV combinations within a material. So, I’ve got a little demo material here, and I’ve got a texture sample that’s using UV zero. I’ve got another texture sample that uses double tiling. I’ve got my normal map that’s using UV zero.
Slide 46 — 00:12:47
📌 要点汇总
- 使用三倍纹理平铺的混合纹理
- 最终映射到虚拟纹理堆栈的第三个位置
- 存在三种不同的 UV 组合方式
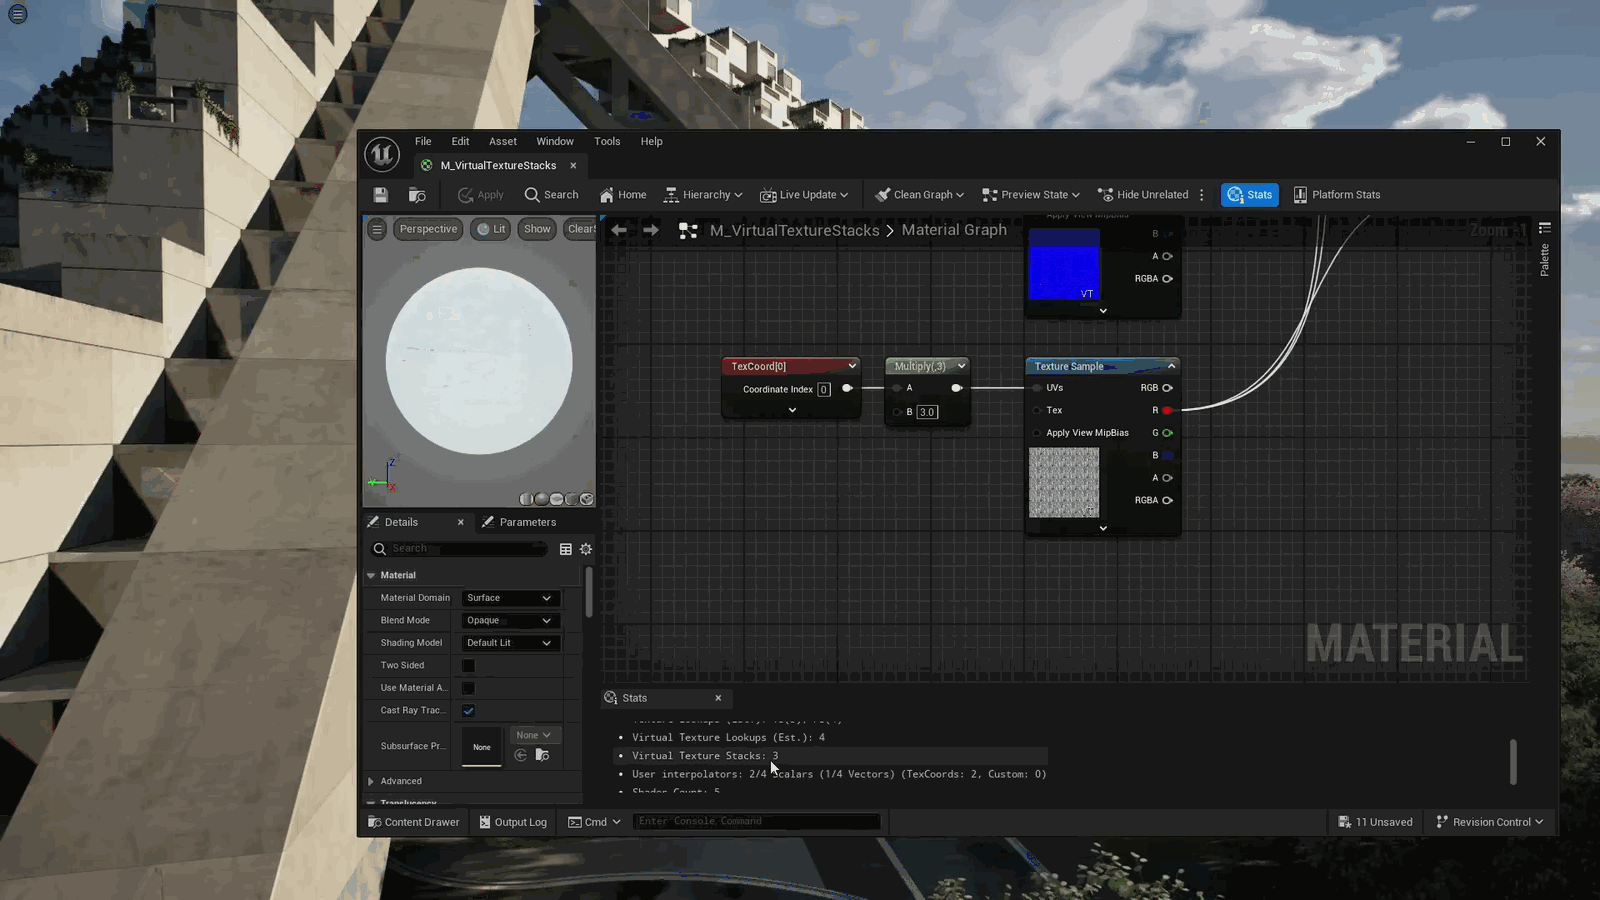
And I’ve got this other blend texture that’s using a three x tiling. What this ultimately ends up in is the virtual texture stack’s number three. There are three different UV combinations with.
Slide 47 — 00:12:59
📌 要点汇总
- 需要对每种虚拟纹理堆栈进行评估以获取材料反馈
- 举例说明评估过程中的具体操作方法
- 强调评估在材料优化中的重要性
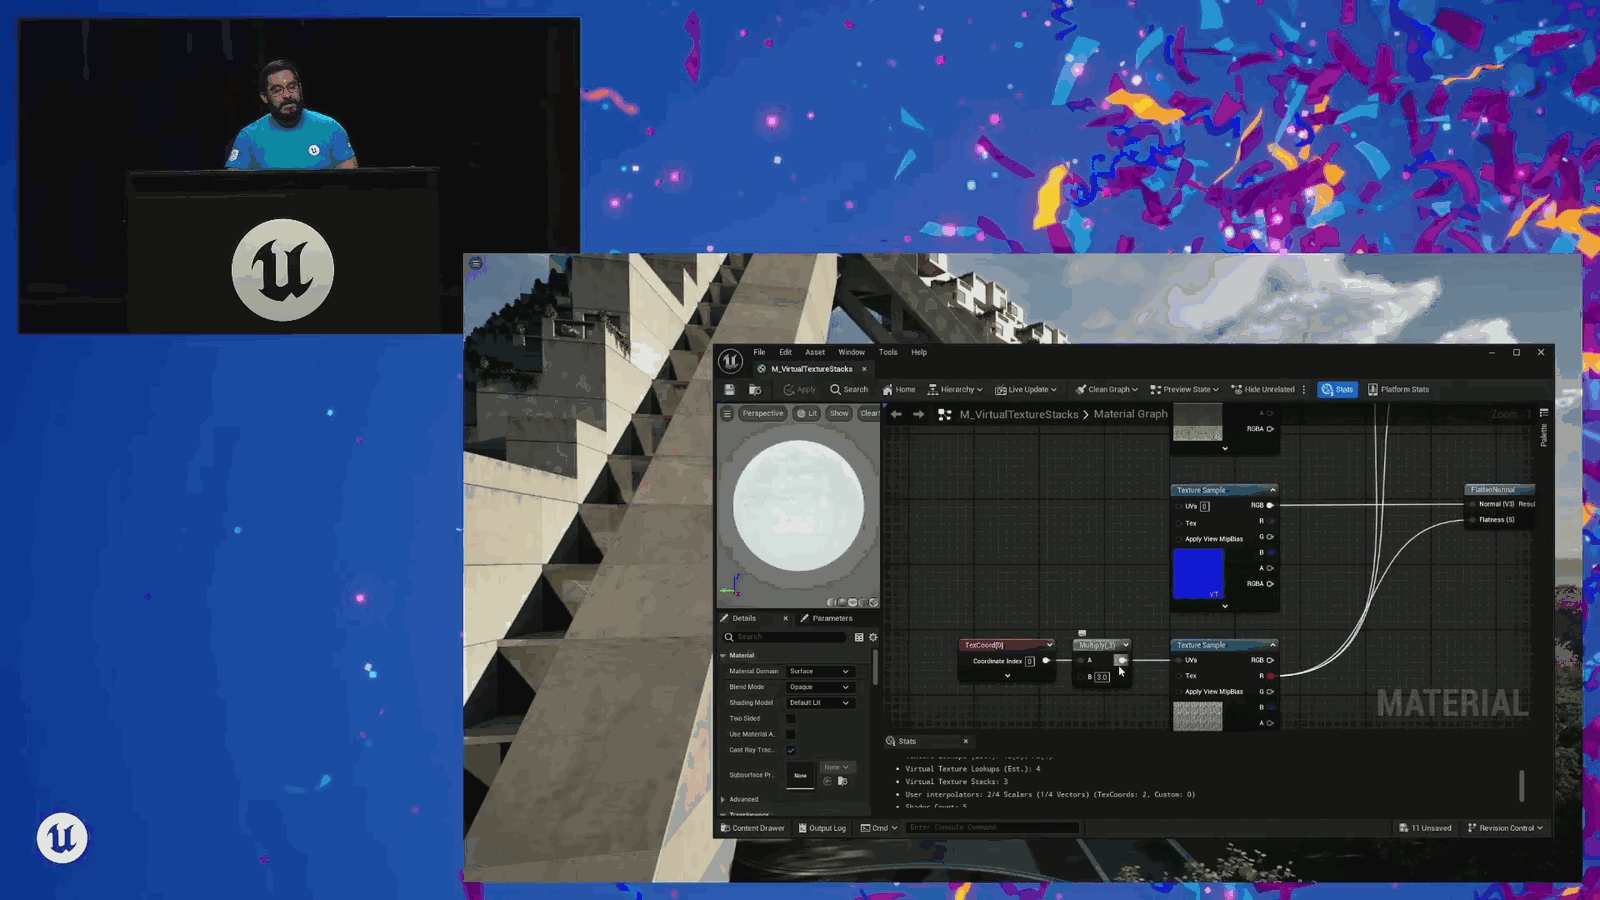
Within the material, and in order to get the feedback that we need about this material, we have to evaluate that for each of these different virtual texture stacks. But the nice thing is that if I, for example,
Slide 48 — 00:13:09
📌 要点汇总
- 将相同的 UV 信息应用到法线贴图上,不会增加虚拟纹理堆栈数量
- 复制粘贴该操作至其他位置,同样不会增加虚拟纹理堆栈数量
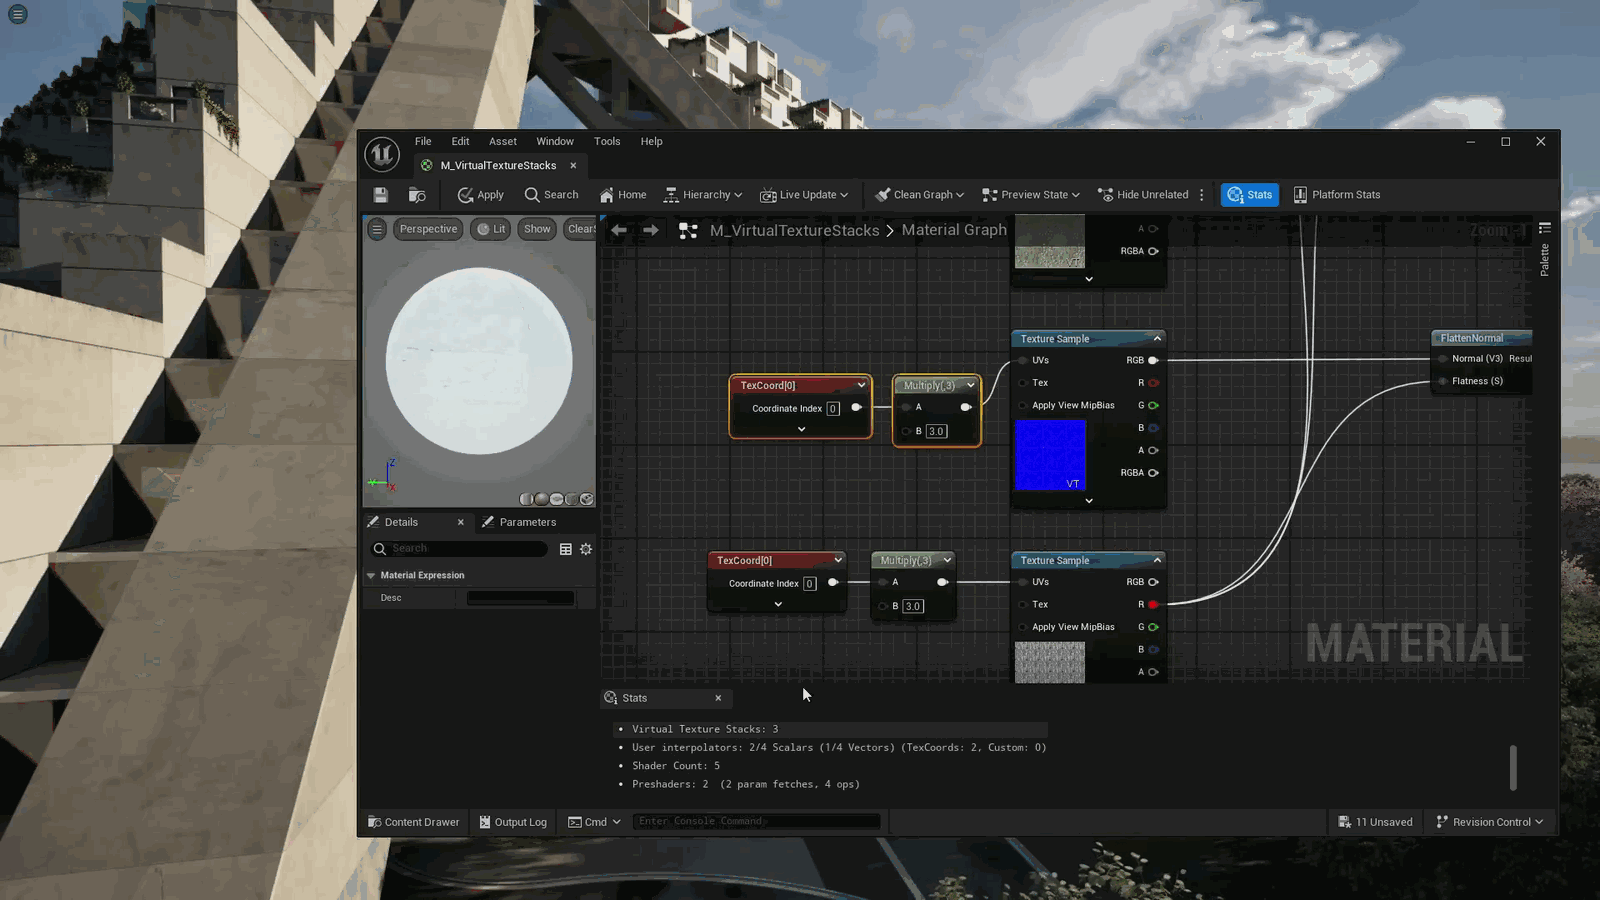
Plug the same UV thing into my normals. It doesn’t increase my number of virtual texture stacks. And similarly, if I copy and paste this up here, it’s the same thing. It also does not increase the number of virtual texture stacks.
Slide 49 — 00:13:23
📌 要点汇总
- 使用4倍瓷砖会增加堆栈数量,需在构建材料时注意
- 堆栈数量增加可能影响性能和资源管理
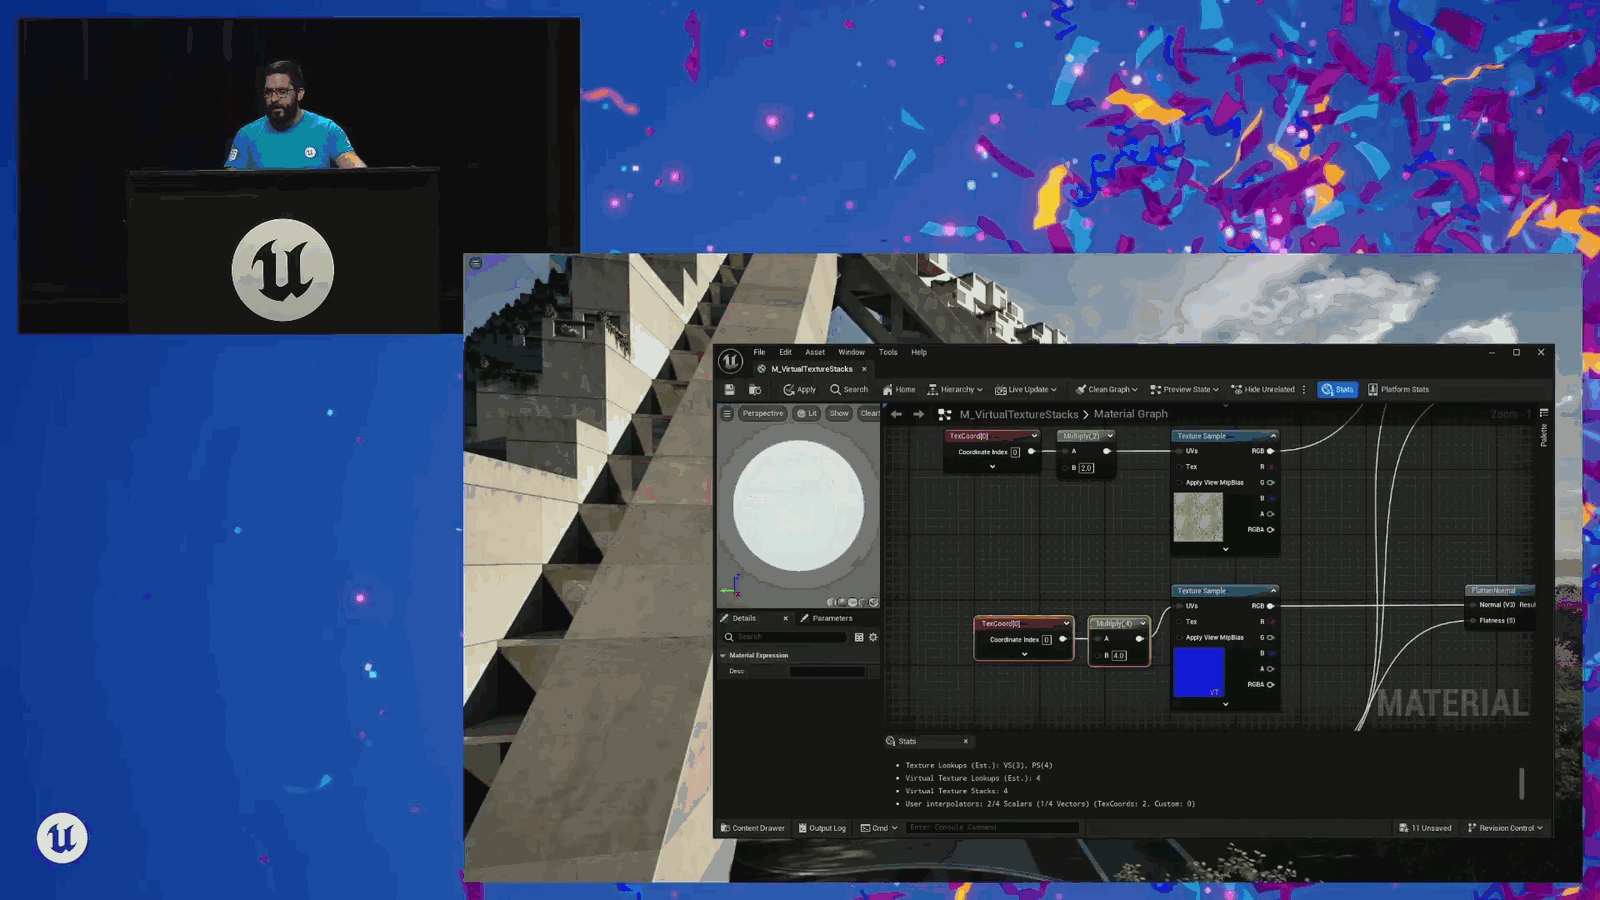
But then, if I want to tile my normal 4x, that will increase my number of stacks. So, a thing to keep in mind as you’re building out your materials.
Slide 50 — 00:13:33
📌 要点汇总
- 流式虚拟纹理通过牺牲性能来节省内存
- CPU 需要计算哪些 mips 和 tiles 需要上传到 GPU
- 流式虚拟纹理存在 CPU 和 GPU 两方面的性能成本
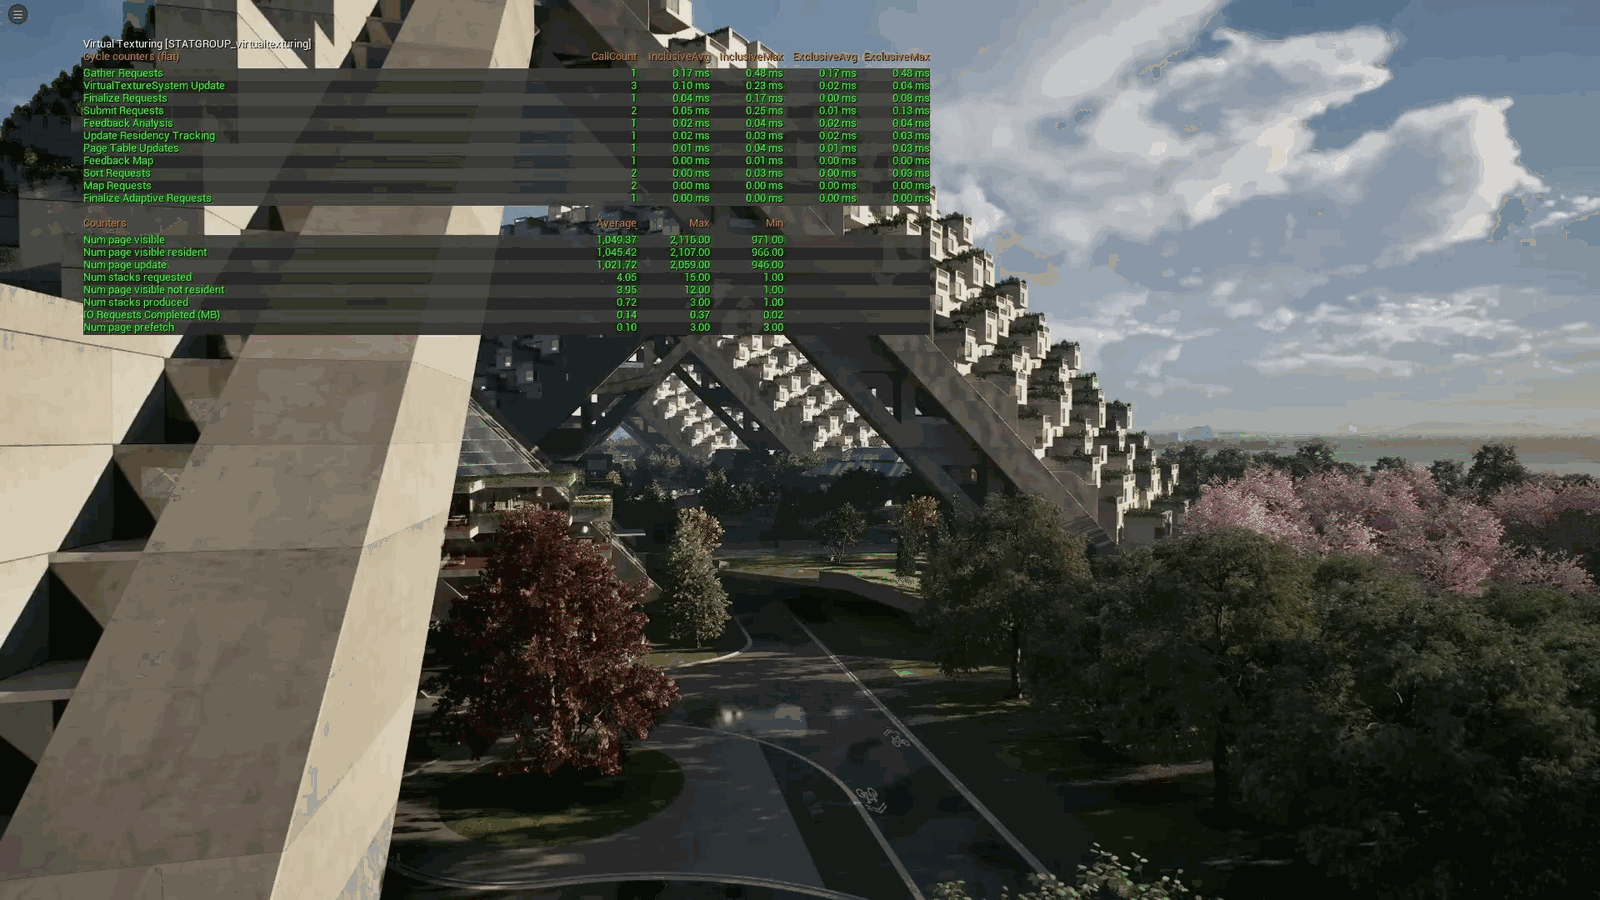
So when I say that streaming virtual textures save you memory at the cost of performance, there are two sides to this. There is a CPU cost and there is a GPU cost. On the CPU side, we need to do a little bit of work to figure out which mips and tiles need to be uploaded to the GPU.
Slide 51 — 00:13:49
📌 要点汇总
- GPU上传操作在非主线程执行,减少对游戏线程的影响
- 成本并未达到极端水平,大部分工作已优化处理
- 异步处理有助于提升整体性能表现
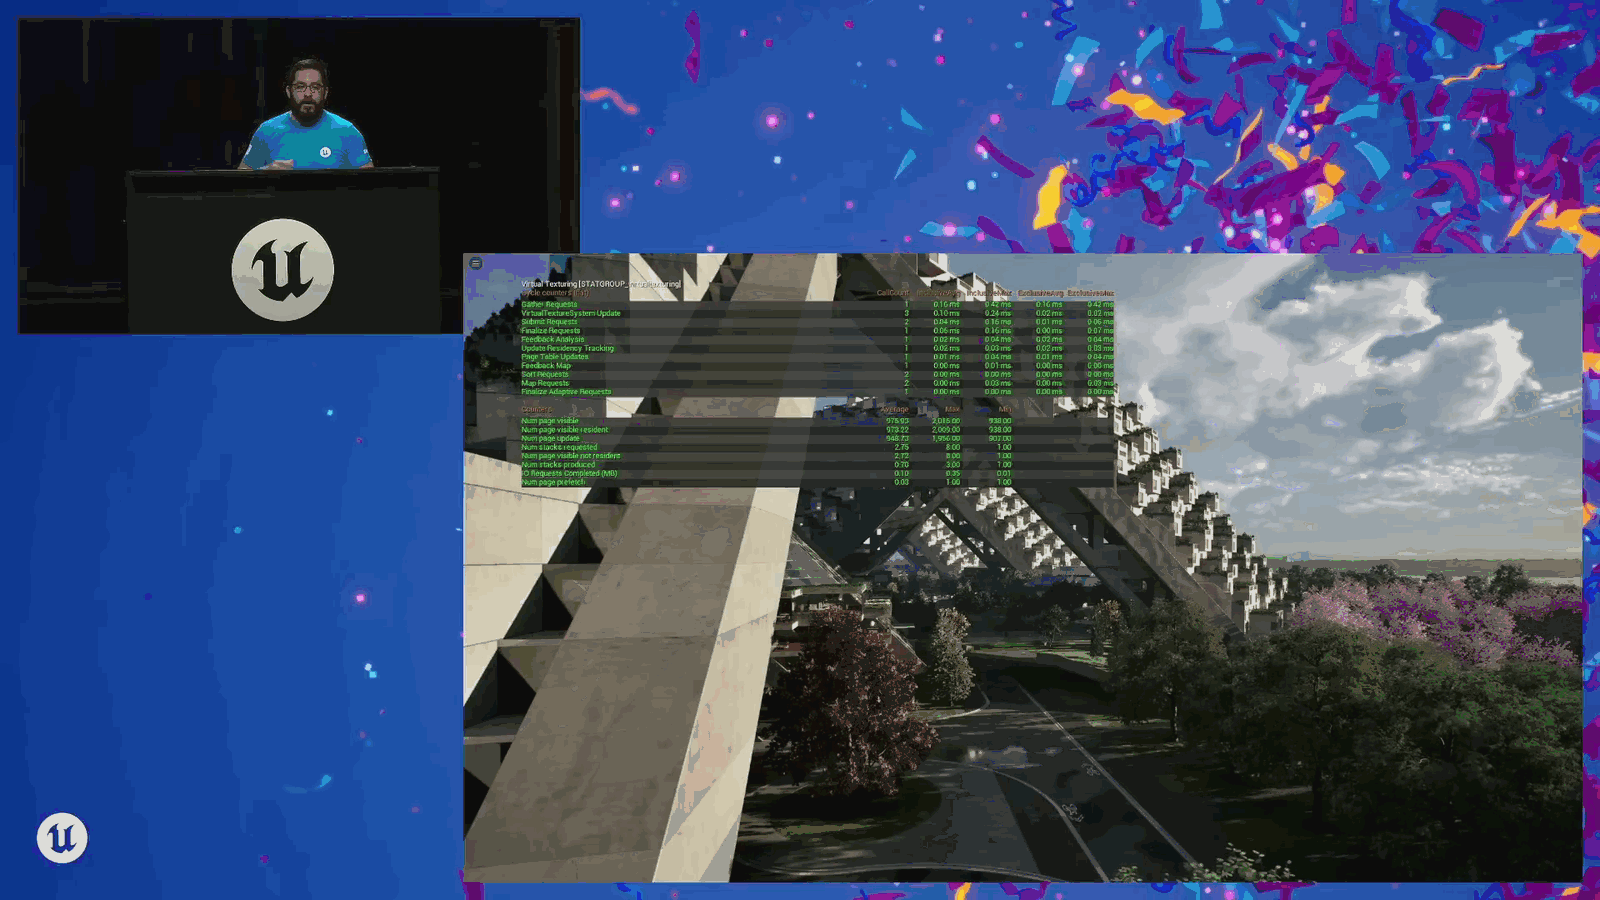
Right. That’s hey. What page are we looking at? However, this cost isn’t really all that extreme, and a lot of this work is handled off the main thread. It’s not handled on the game thread. One of them is going to be uploading stuff to the GPU.
Slide 52 — 00:14:01
📌 要点汇总
- 存在控制变量 R.VT.MaxUploadsPerFrame,影响运行时和流式虚拟纹理
- 运行时虚拟纹理受该变量限制,需合理设置以优化性能
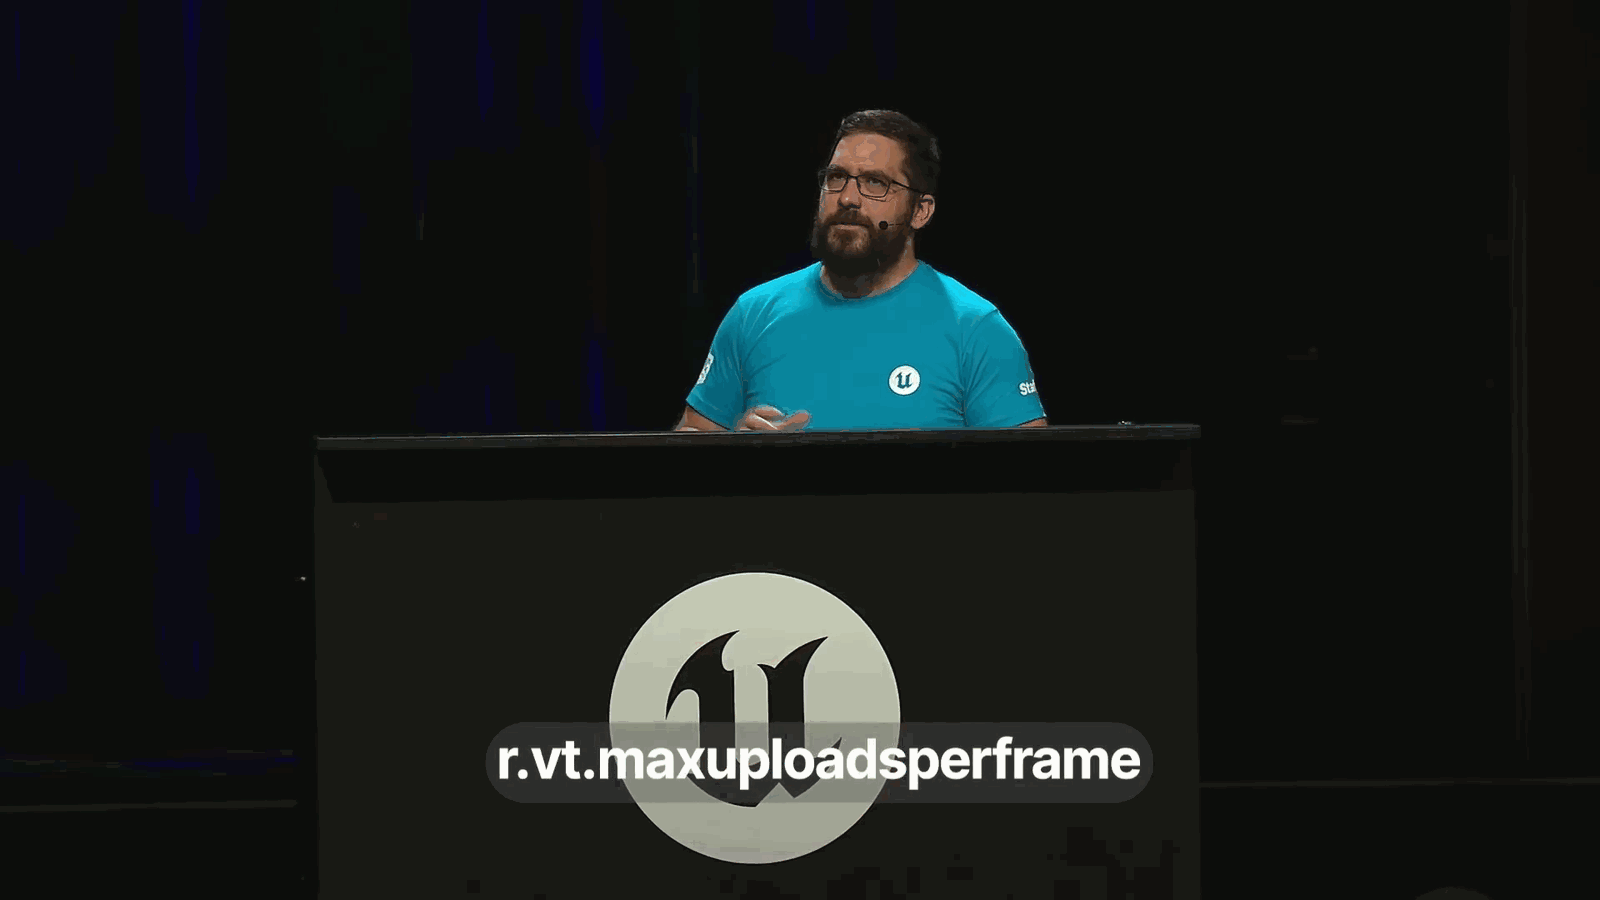
There are some console variables to control that. There is R.VT.MaxUploadsPerFrame, and that will affect both runtime and streaming virtual textures. But with runtime virtual textures.
Slide 53 — 00:14:14
📌 要点汇总
- 上传量需控制在合理范围以避免过度渲染景观素材
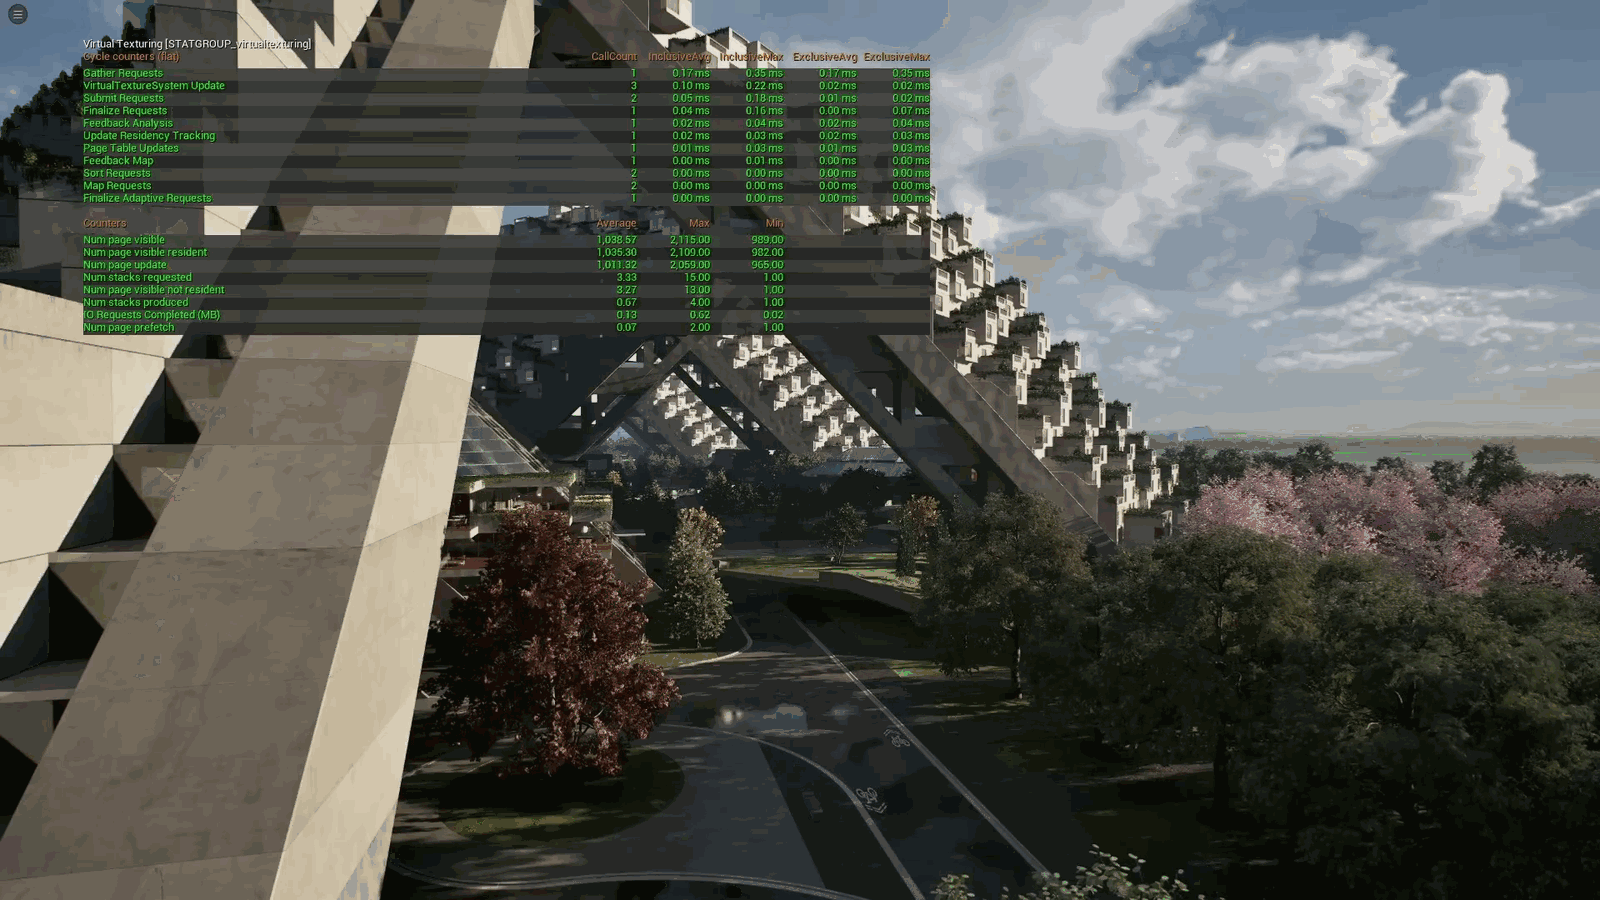
We want to keep our uploads fairly low because if we have too many uploads, then we’re rendering our landscape material too.
Slide 54 — 00:14:21
📌 要点汇总
- 运行时虚拟纹理上传与流式虚拟纹理上传需分离以避免性能损失
- 使用 R.VT.Max 控制每帧上传次数以优化性能
- CPU 端的开销需合理控制以确保整体性能表现
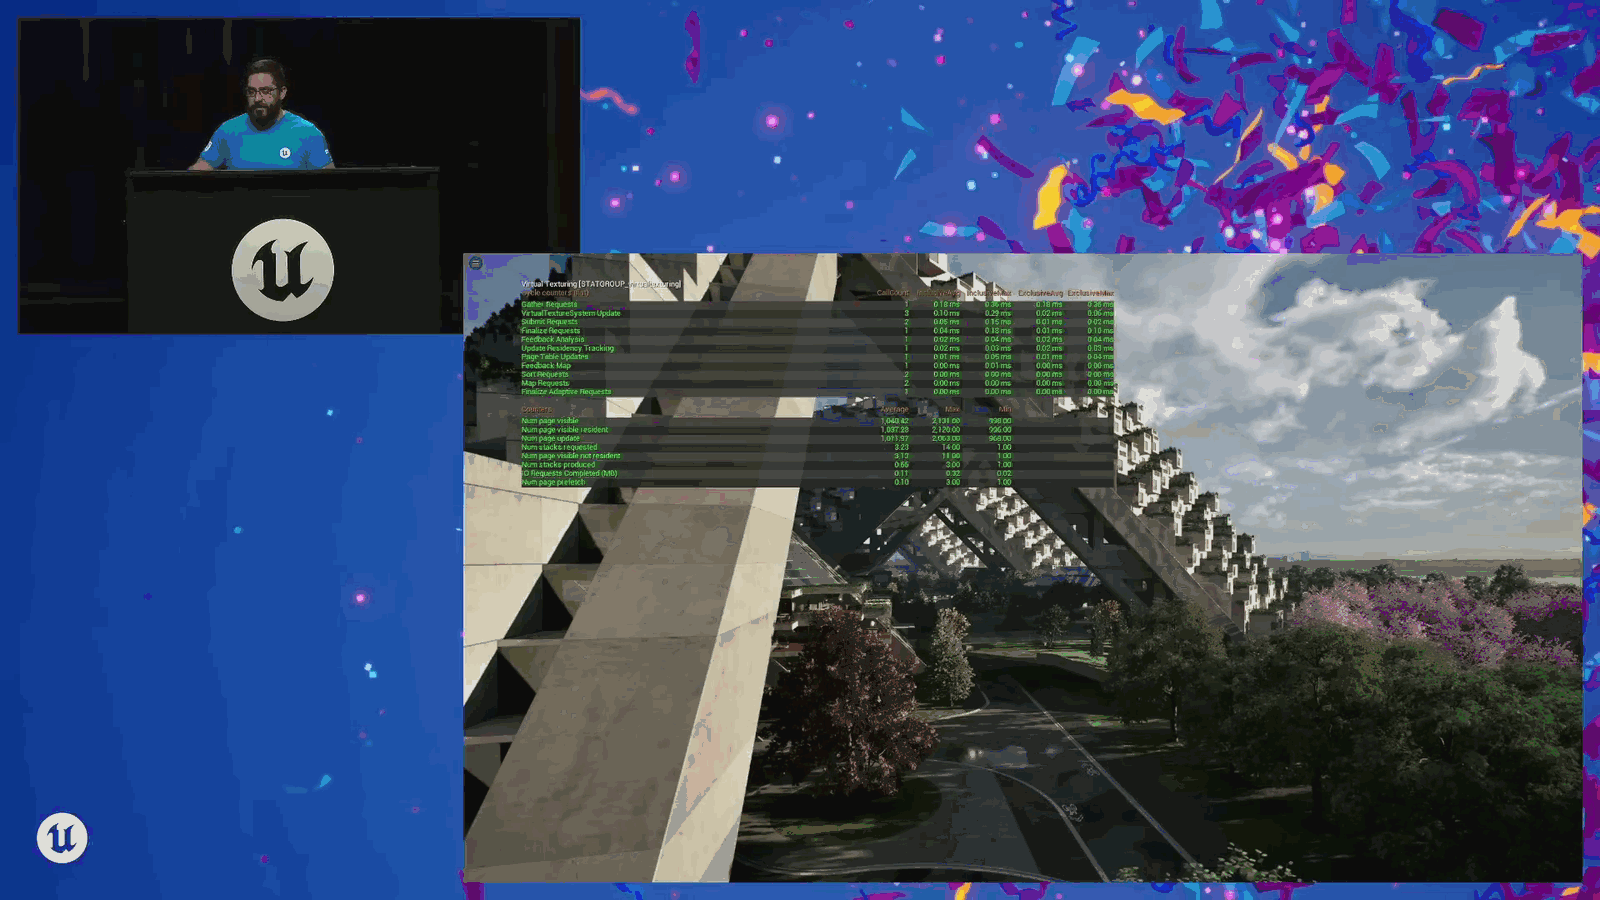
Times, and we lose our performance gains there. So we can separate runtime virtual texture uploads from streaming virtual texture uploads with R. VT. Max uploads per frame. Streaming. Again, the C vars from this are all going to be in the links at the end of the show. Don’t worry about writing them down. So that’s kind of the cost on the CPU side. It is fair.
Slide 55 — 00:14:41
📌 要点汇总
- 使用虚拟纹理在GPU端会带来额外的成本
- 需要权衡虚拟纹理带来的性能优势与额外开销
On the GPU side, obviously, I have to talk about this. There is an additional cost to using virtual textures.
Slide 56 — 00:14:48
📌 要点汇总
- 需要先采样页表以确定所有图块在内存中的实际存储位置
- 增加了一层交互和额外的采样步骤
- 需要留意这一额外开销,但可能不会造成重大影响
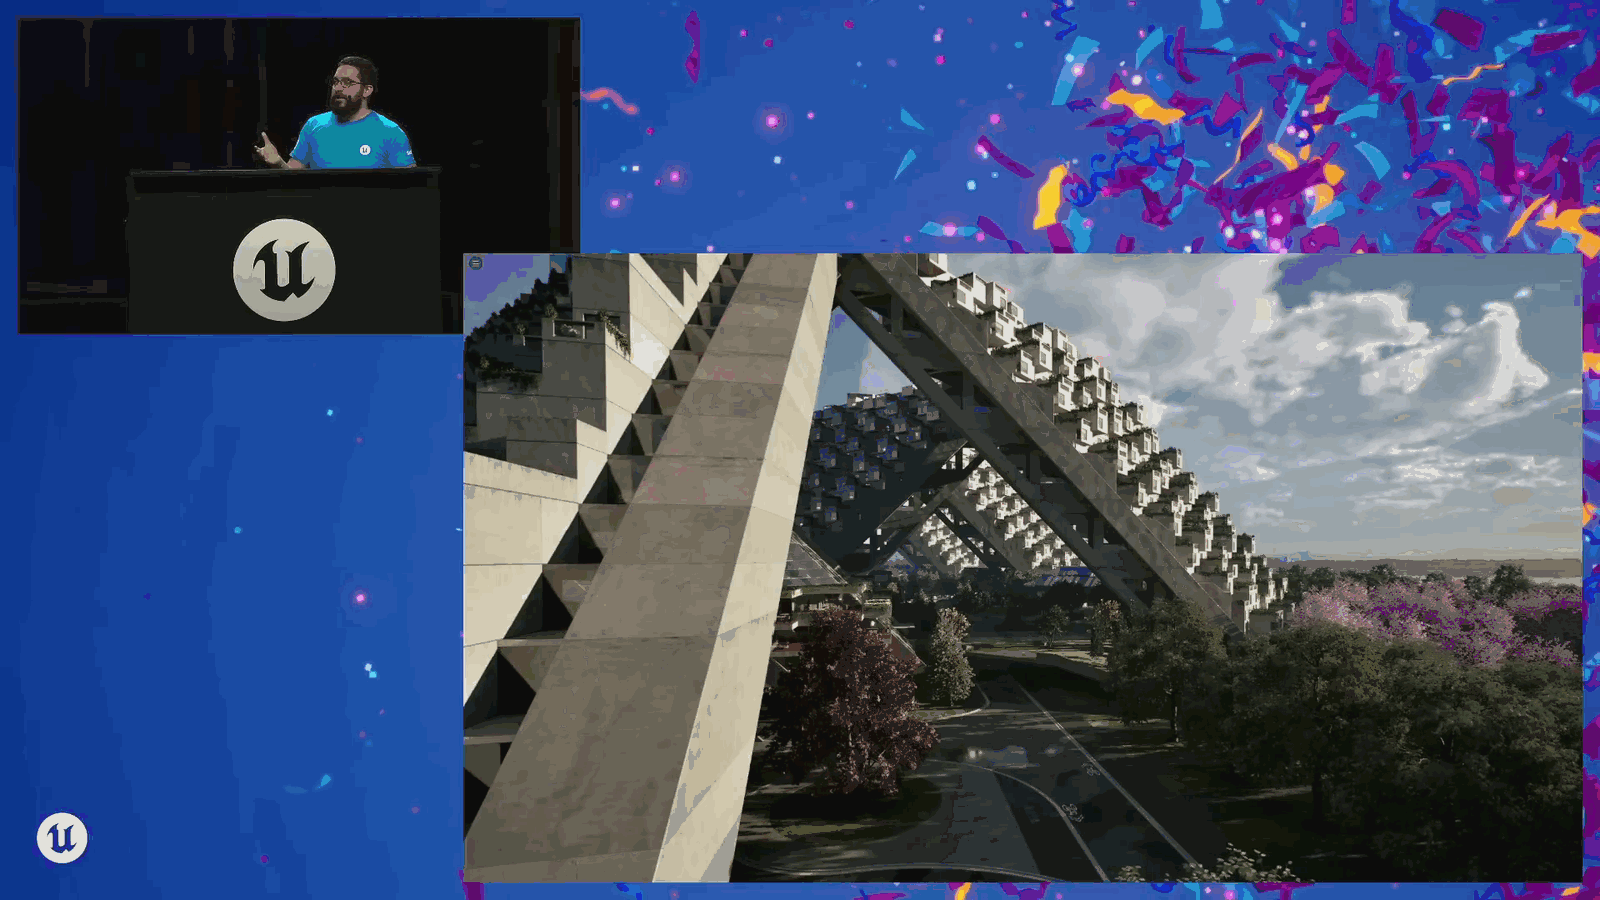
The short of it is that we have to first sample the page table to figure out where in memory all of our tiles are actually stored. So there’s like a little layer of interaction, a little bit of an extra sample. So it does. You do have to keep that in mind. Not necessarily going to be a huge issue if we’ve
Slide 57 — 00:15:07
📌 要点汇总
- 使用虚拟纹理流图进行多次查找可能形成复杂的查找链
- 默认材质中的常规纹理采样与虚拟纹理查找方式不同
- 多级虚拟纹理查找可能影响性能和实现复杂度
Just got a bunch of regular texture samples in our default material, but if you’re using a virtual texture flow map to look up another virtual texture, and then use that to look up another virtual texture, and so on — this can create a chain of lookups that can be quite complex.
Slide 58 — 00:15:18
📌 要点汇总
- 强调性能问题需通过实际分析(profiling)来定位,而非直接假设
- 使用流式虚拟纹理(streaming virtual textures)不必然导致CPU性能差
- 建议通过测试和分析来确认问题根源
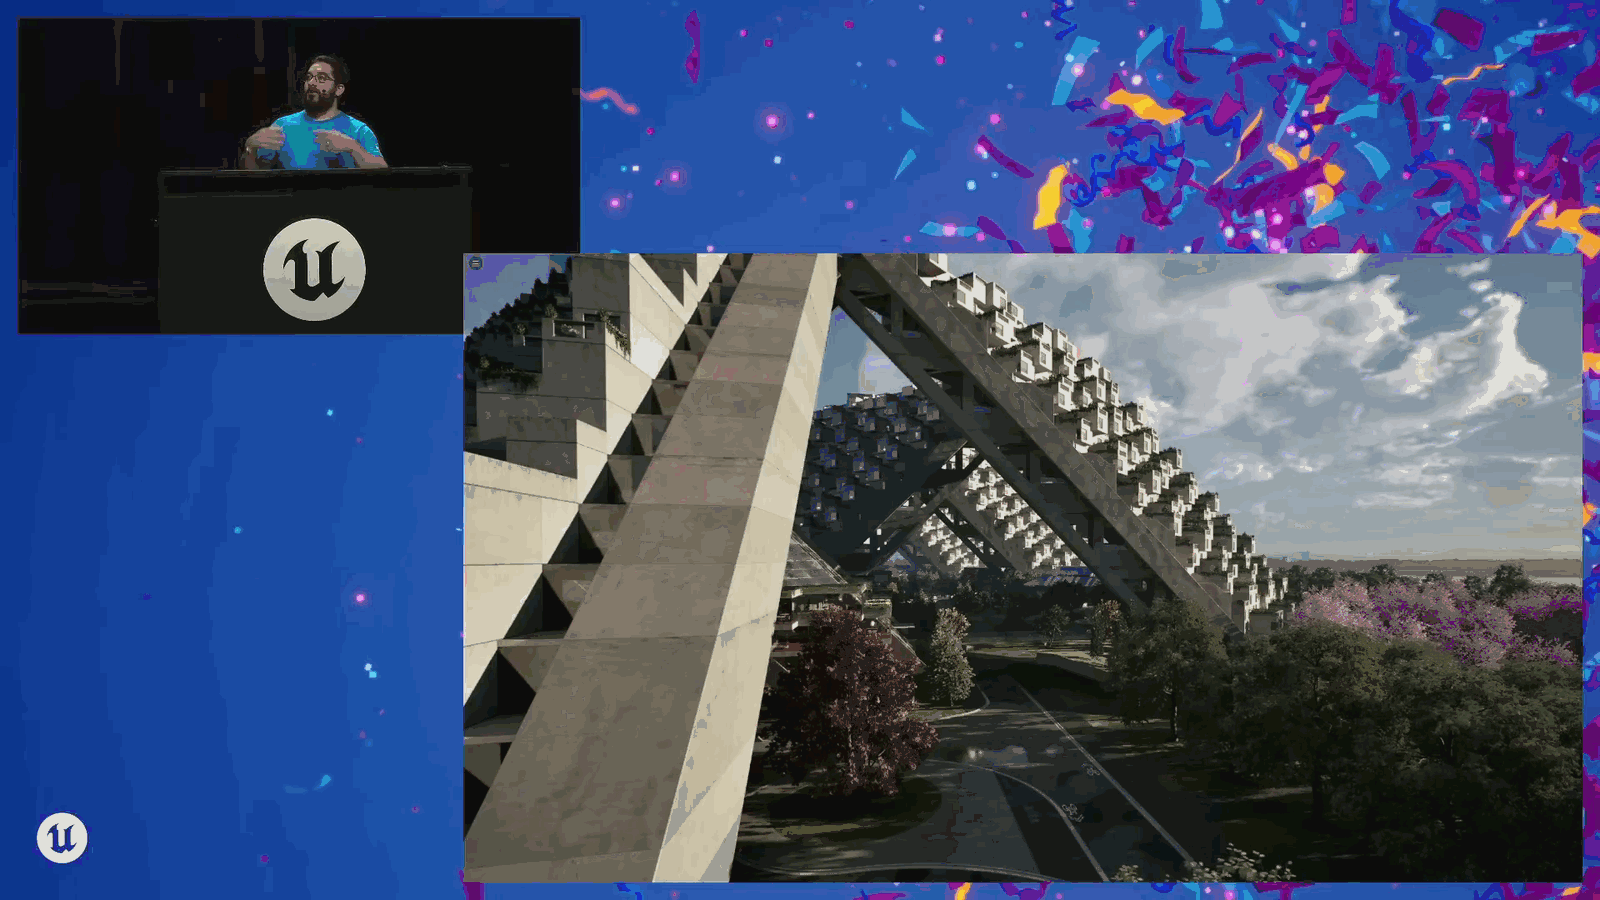
That can get a little squiggly, but again, I really want you to profile. Ultimately, at the end of the day, I want you to know what is causing the problem. Don’t immediately assume that oh, I’m using streaming virtual textures, so I’m going to have bad CPU. Profile. Try it out.
Slide 59 — 00:15:38
📌 要点汇总
- 项目经验是学习问题的最佳途径
- 虚拟纹理技术具有广泛应用前景
- 项目实践能揭示实际存在的问题
Learn. Learn from your project. Your project will tell you what the problem is. So virtual textures are great, and we’re going to use them in our projects.
Slide 60 — 00:15:46

📌 要点汇总
- 当前非虚拟流式纹理流池默认值为2000MB,但仅使用了100MB
- 需要通过优化手段充分利用现有资源
- 需要进行一些创造性的资源管理策略
But we have to do a little bit of creative accounting because I mentioned earlier, right? The default value for the non-virtually streamed texture streaming pool is two thousand megabytes, but we’re only using a hundred of those right now. So we’ve got to really find a way to optimize and make the most of what we have.
Slide 61 — 00:16:04
📌 要点汇总
- (过渡内容,无关键要点)
We’ve got a really big truck that is carrying not a lot of weight, right? So we got to move some stuff around.
Slide 62 — 00:16:12
📌 要点汇总
- R.streaming.pool.size 可能随着项目进展而减少
- 隐藏屏幕消息并降低数值可触发引擎警告
- 引擎会在左上角提示“streaming pool over budget”及具体占用的GB数
- 可定位到高水位标记位置以进行优化
And maybe as we’re building out our projects, R dot streaming dot pool size can come down because we don’t really need it. And in fact, if you hide screen messages and you lower that number, the engine will tell you if something is wrong. You’ll get that thing in the top left corner that’s like streaming pool over budget, x number of gigabytes. It’s going to tell you where that high water mark is.
Slide 63 — 00:16:33
📌 要点汇总
- (过渡内容,无关键要点)
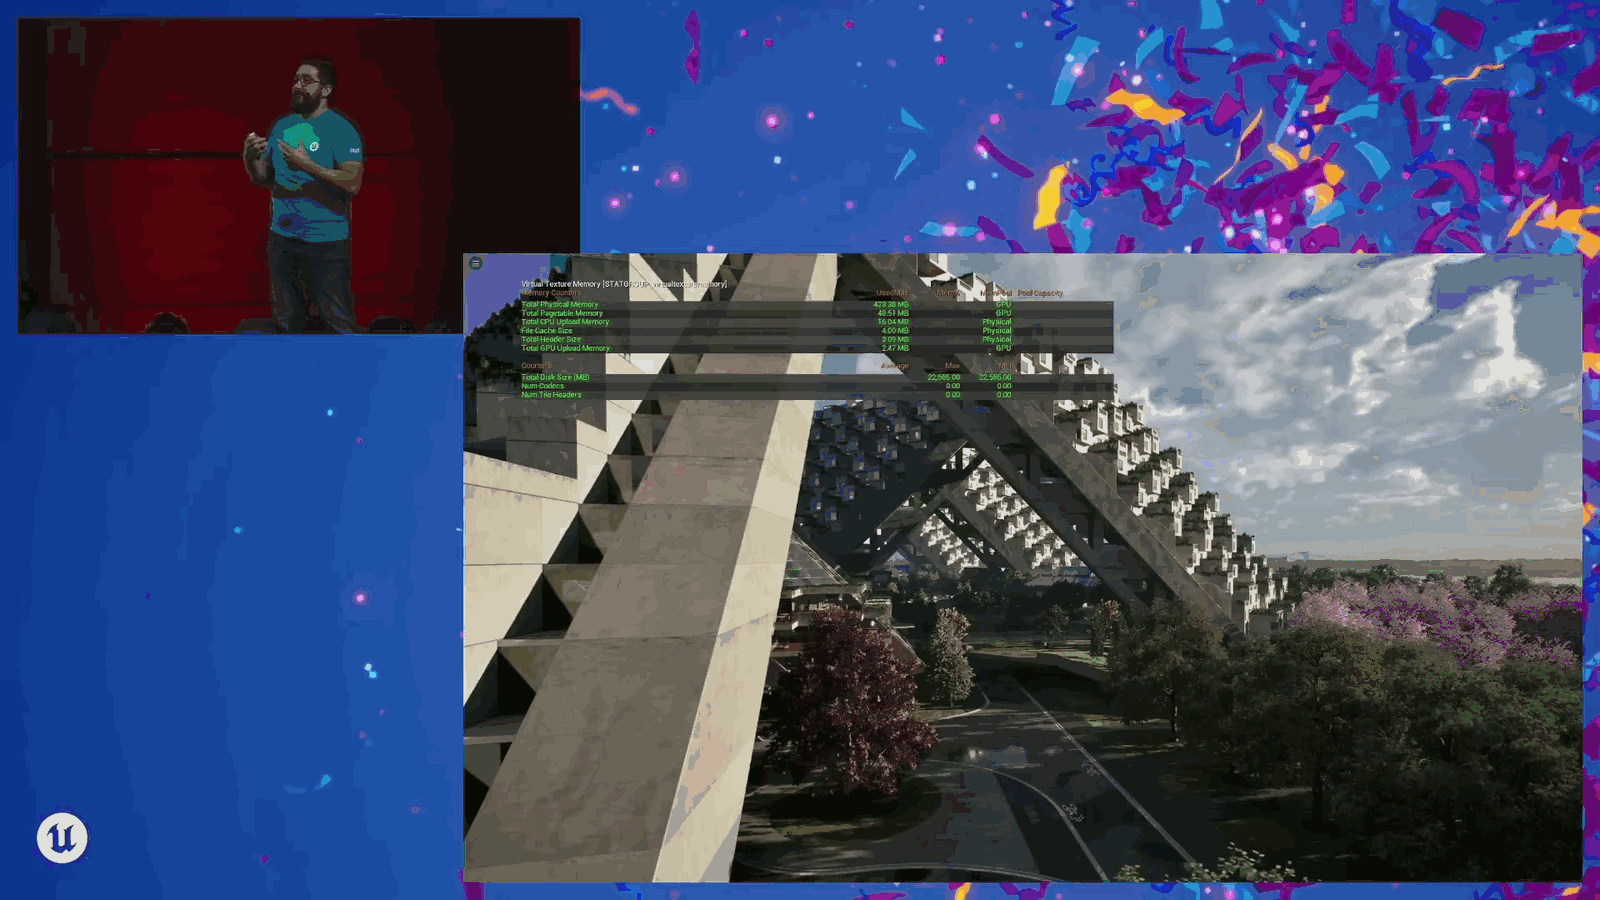
Testing things out. Similarly, with virtual texture memory, as of five four, we’ve got a fun little thing now that lets us figure out what those.
Slide 64 — 00:16:42
📌 要点汇总
- 虚拟纹理的水印处理复杂,因为不同压缩类型对应不同的资源池
- 每种压缩类型都有独立的资源池,而非统一管理所有纹理
Watermarks is, but the tricky thing with virtual textures is that each of the different compression types have their own pools. It’s not just one pool for all textures.
Slide 65 — 00:16:50
📌 要点汇总
- 不同的压缩格式(如 DXT5、BC4)使用不同的资源池
- 在 5.4 版本中进行了相关调整或改进
It’s a different pool for DXT5, BC4, and so on and so forth. And in 5.4, we
Slide 66 — 00:16:58
📌 要点汇总
- 新增了虚拟纹理池大小的项目设置选项
- 在5.4版本中飞行时会看到右下角的提示弹窗
- 提示用户前往项目设置中的虚拟纹理池设置
- 设置中包含用于记录高水位标记的临时池列表
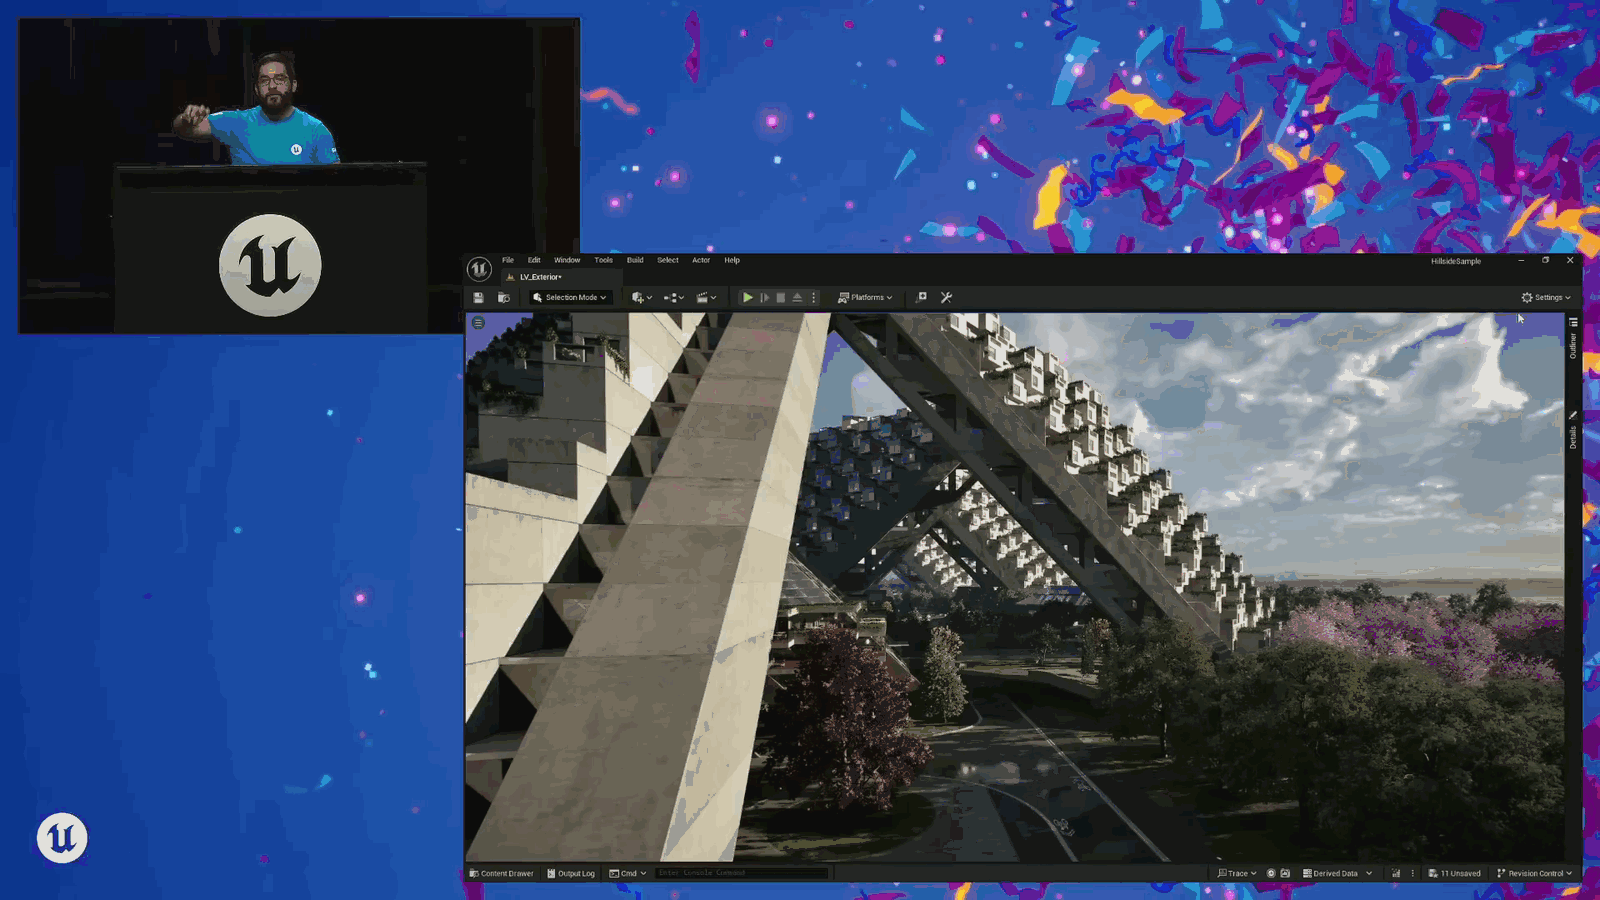
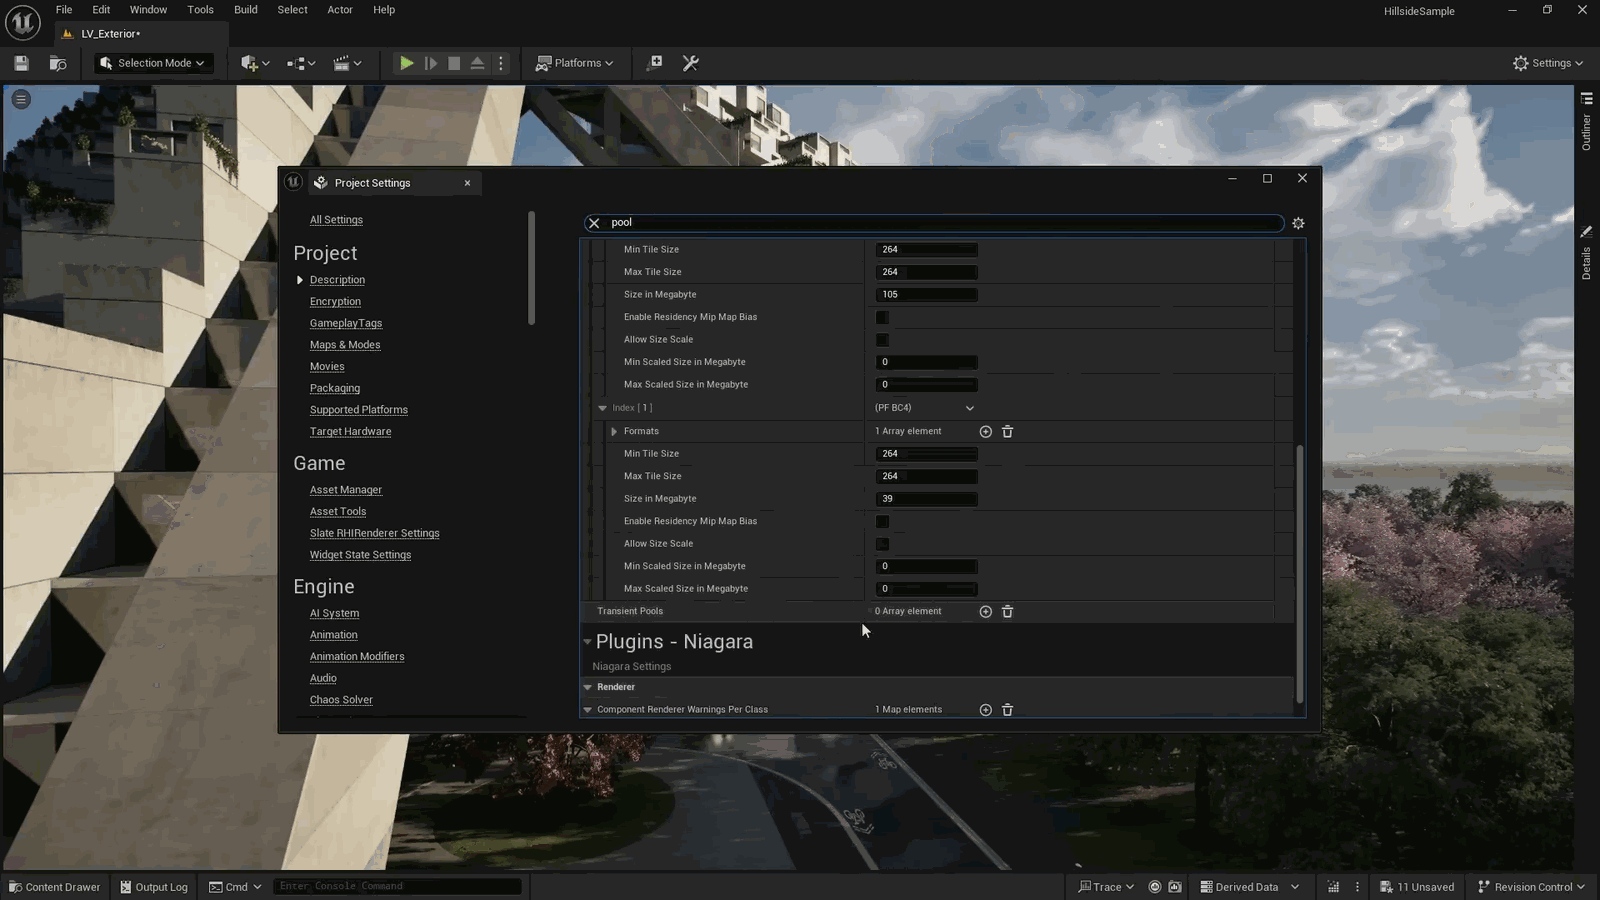
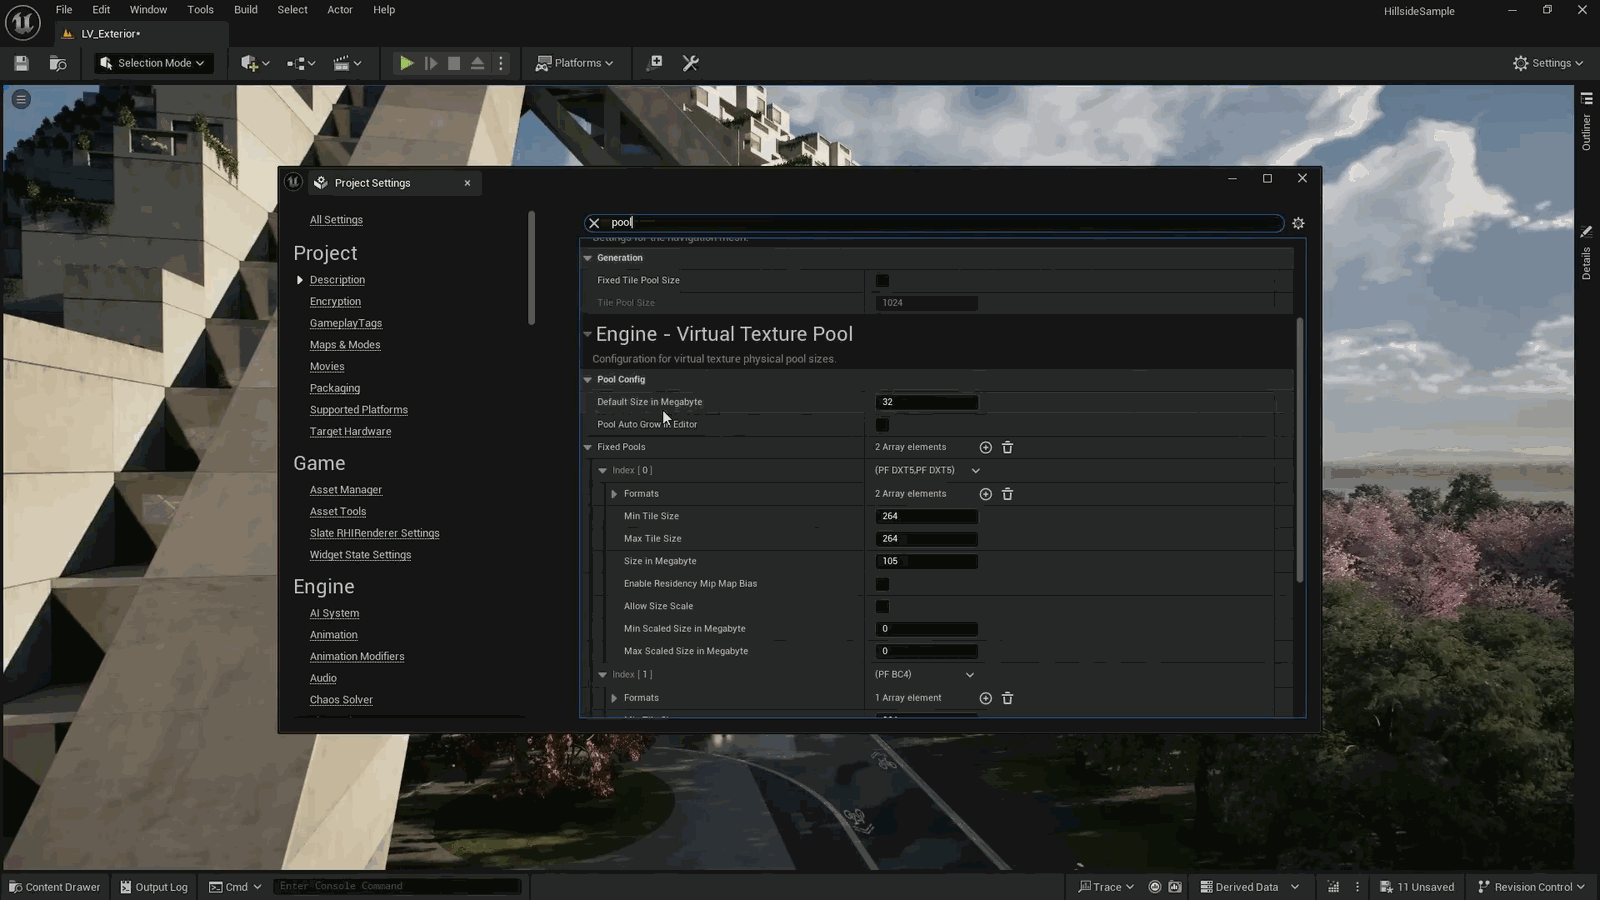
Added a fun new thing called, or we added a project setting for virtual texture pool sizes. And maybe you’ve seen this as you’re flying around in your updated 5.4 projects. You’ll see this like resizing virtual texture streaming pool in the bottom right corner, little toast pop up. So what that’s asking you to do is go into your project settings and go to the virtual texture pool settings, and it’s going to have this transient pool list down here, and that’s keeping track of the high water marks.
Slide 67 — 00:17:14
📌 要点汇总
- 提示用户将特定值复制到修复位置
- 涉及代码修复或配置调整操作
- 属于开发过程中的常见操作步骤
And it’s going to say, “Hey, copy these values into this fix.”
Slide 68 — 00:17:29
📌 要点汇总
- 会话期间的临时资源仅适用于当前会话
- 默认引擎 ini 文件中配置的是固定资源池
- DXT5 的高水位线用于基础颜色纹理
- 基础颜色纹理大小为 105 兆字节
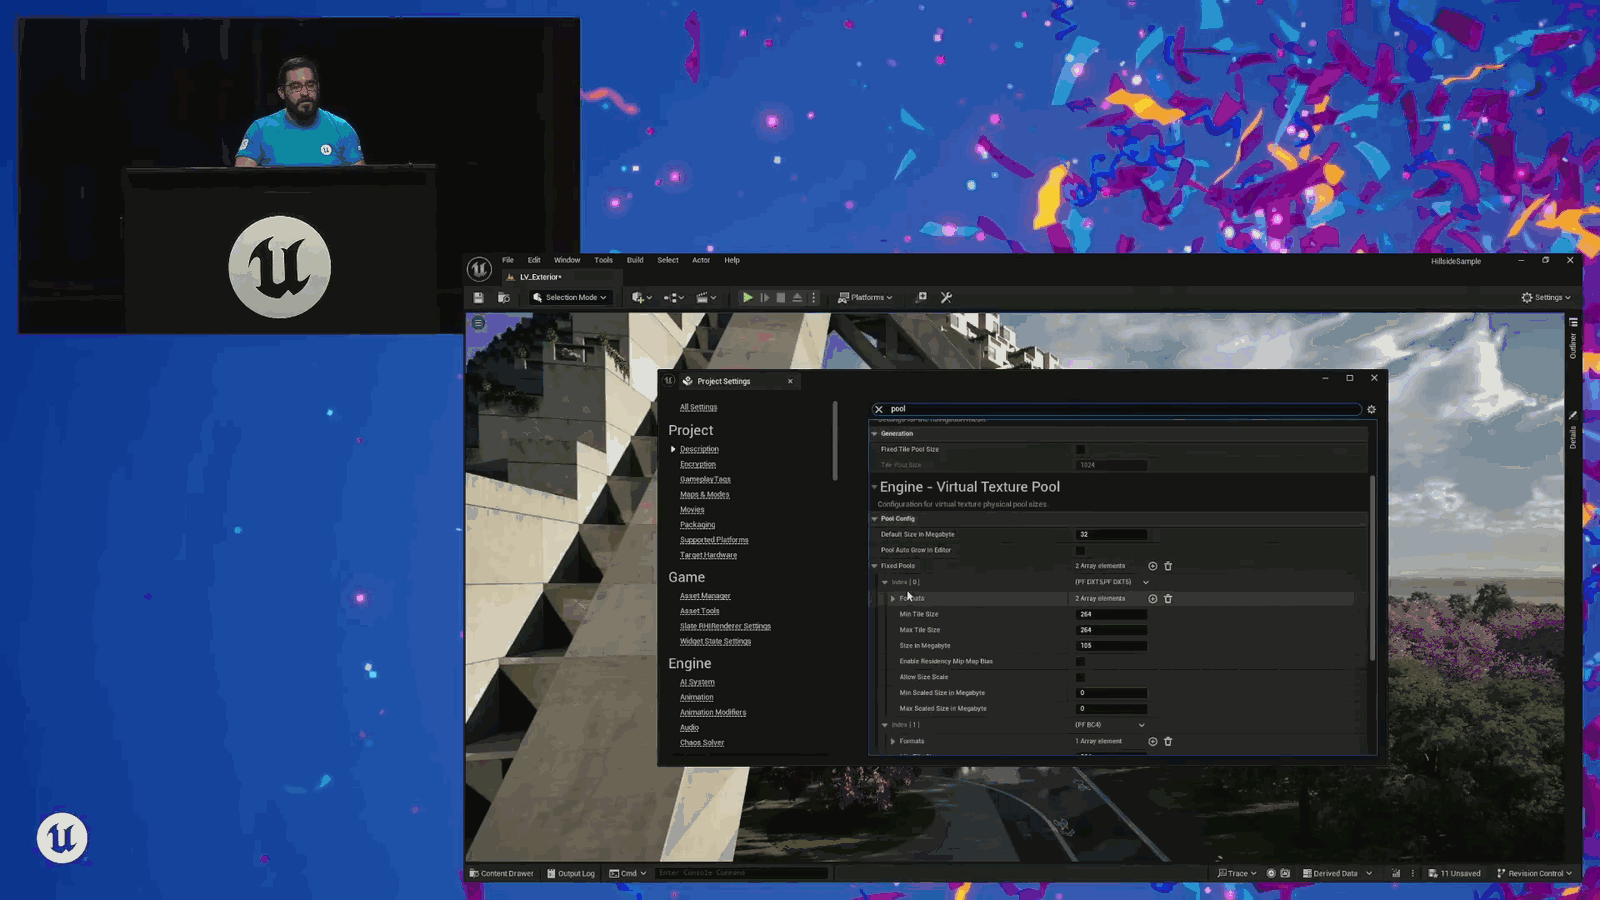
So transient—that’s only for that session. Fixed pool is the actual thing in your default engine ini. So you can see the high watermark for DXT five. That’s going to be like our base color textures. That was one hundred five megabytes?
Slide 69 — 00:17:41
📌 要点汇总
- 设置高水位标记为105兆字节
- BC4在约39兆字节时出现资源过载问题
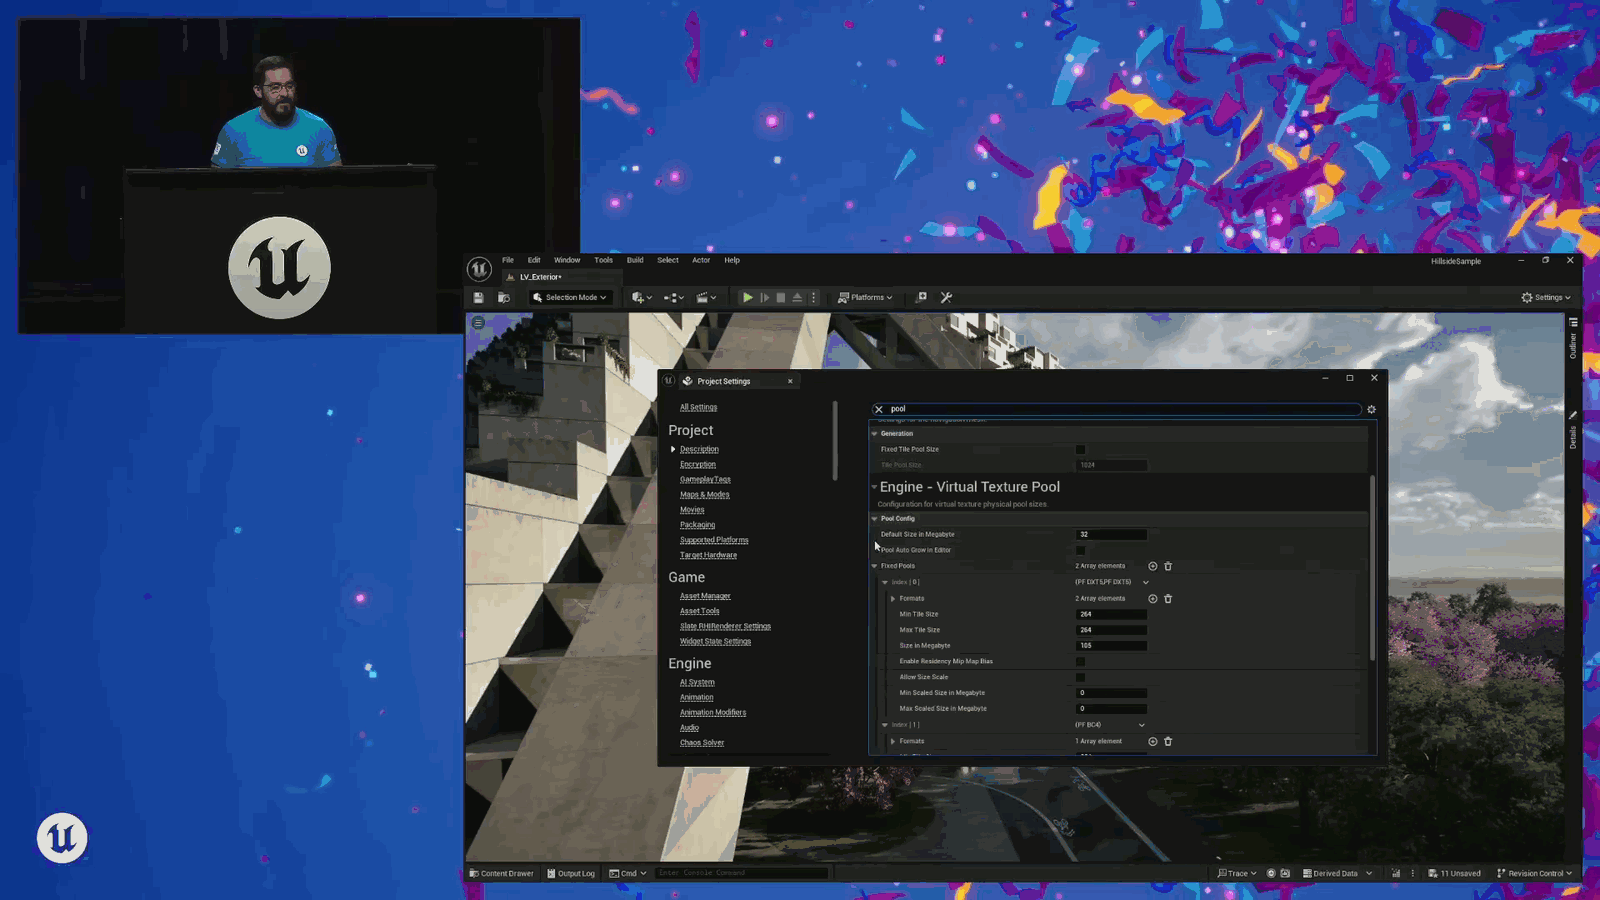
Okay, I’m going to set my high water mark to one hundred five megabytes. BC four, we got to about thirty nine megabytes before things got oversubscribed.
Slide 70 — 00:17:51
📌 要点汇总
- (过渡内容,无关键要点)
And so on and so forth. I, of course, have turned off pool auto grow in the editor because it does hitch a little bit every time it has to do that. I wanted to keep this presentation tight, and then there is a.
Slide 71 — 00:18:01
📌 要点汇总
- 默认大小以兆字节为单位
- 初始项目设置时需考虑高价值需求
- 需根据实际需求调整初始大小参数
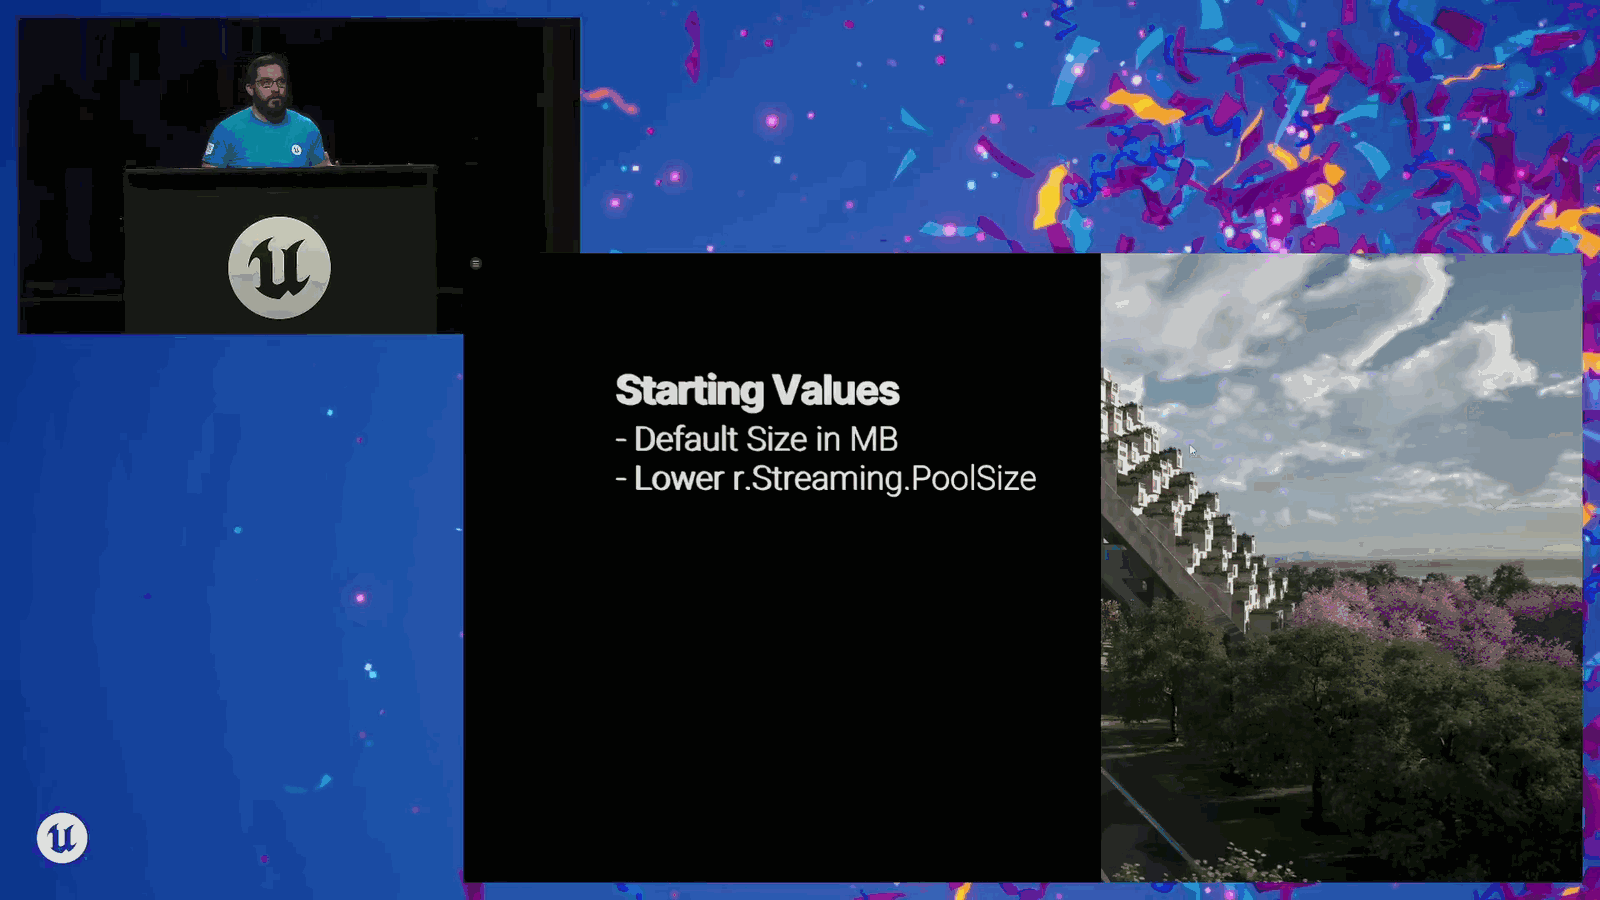
Default size in megabytes. So if you wanted to start out your project and have a really high value of.
Slide 72 — 00:18:06
📌 要点汇总
- 项目后期需严格控制内存使用以提高视频内存效率
- 过度使用内存可能影响性能和资源利用率
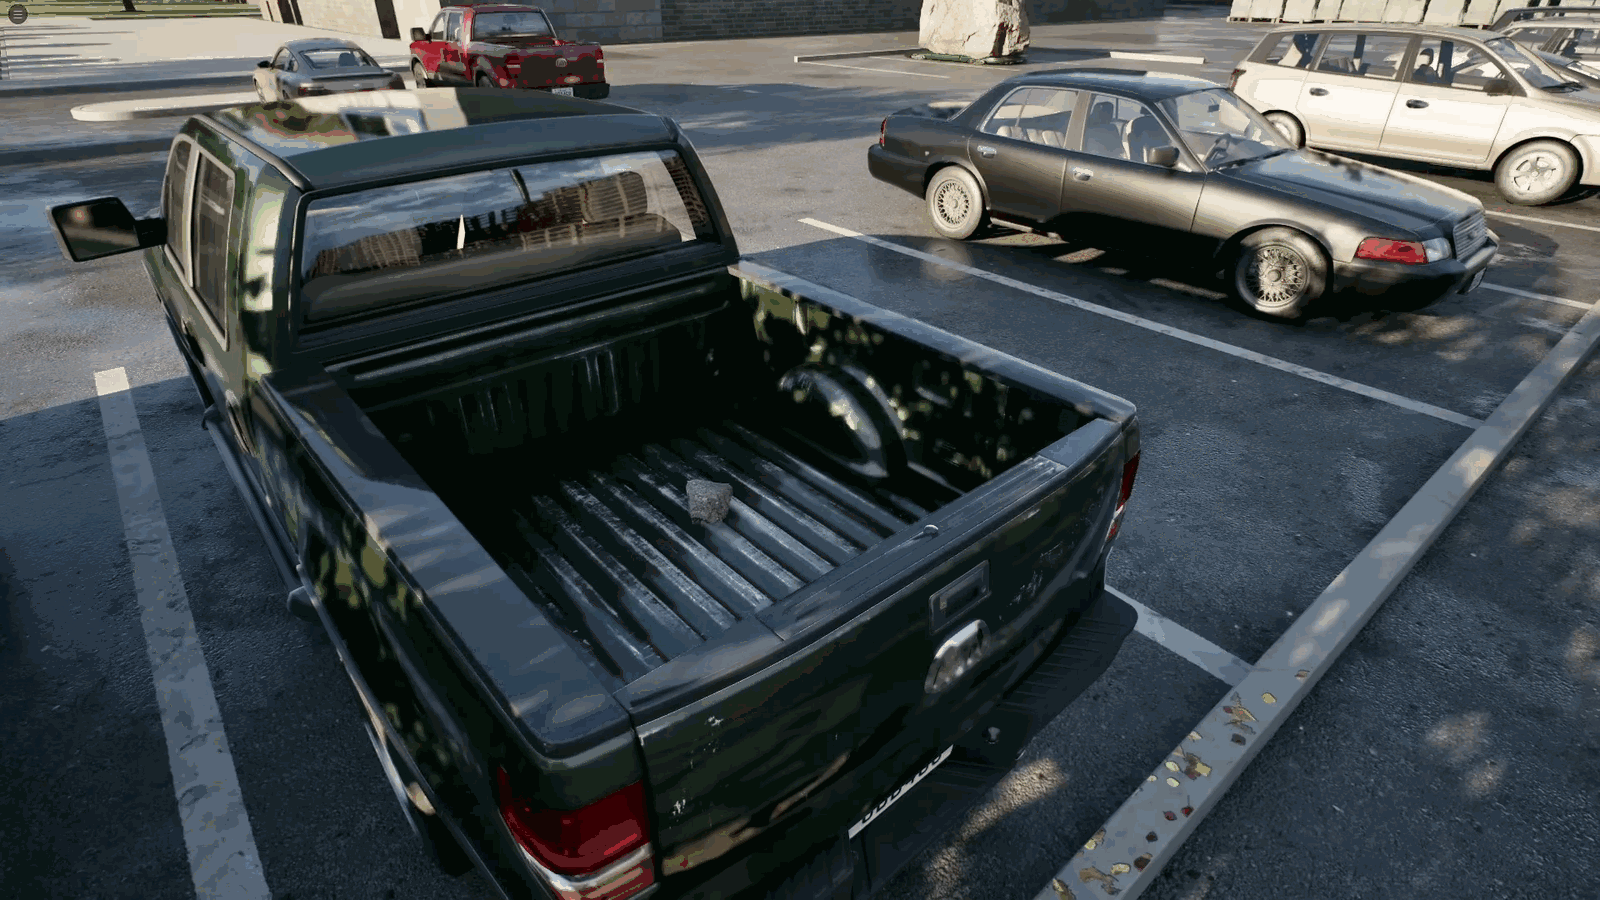
You could absolutely do that, but then as we get toward the end of the project, we want to make sure that we are using just as much memory as we absolutely need to, so that we’re again making efficient use of our video memory, because again, generally speaking, we.
Slide 73 — 00:18:23
📌 要点汇总
- (过渡内容,无关键要点)
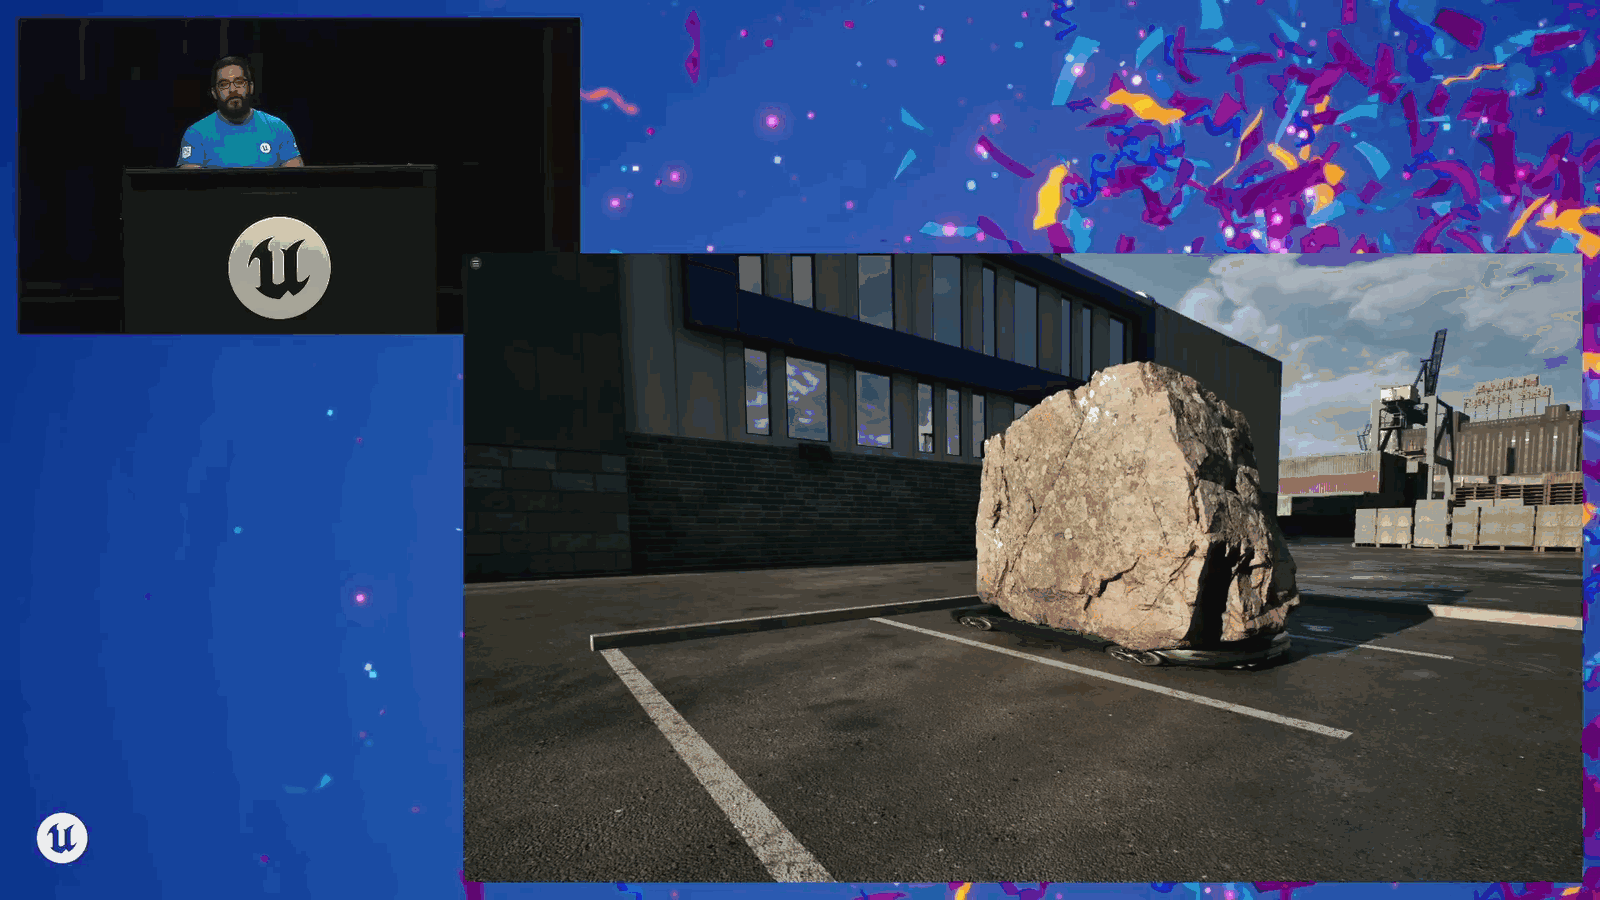
We don’t want to use a pickup truck to carry around a pebble, right? That’s not an efficient use of that space. But similarly We also don’t want to use.
Slide 74 — 00:18:30
📌 要点汇总
- 使用过载的池(pool)来承载超出其容量的任务会导致系统崩溃,类似用小车拉大石头
- 过度填充池会导致性能下降和不可预测的错误
- 需要合理评估池的容量和任务负载,避免资源浪费和系统不稳定
We also don’t want to use a coop to carry around a boulder because when we try and fit too much into a pool that cannot hold it, we’ve all seen this before, right? We all know what this is?
Slide 75 — 00:18:46
📌 要点汇总
- 因为内存不足,不得不降低纹理分辨率以适应可用空间。
- 该操作导致 mip 映射被丢弃,影响了画面质量。
This is a dropped mip. We had to lower the texture resolution so that we could fit everything into our available space.
Slide 76 — 00:18:54
📌 要点汇总
- 虚拟纹理技术可能导致纹理从资源池中被移除,引发画面“跳跃”现象
- 这种“跳跃”会影响用户体验,是需要避免的问题
- 内存管理在虚拟纹理中尤为重要,需谨慎处理
And with virtual textures, sometimes we’ll just drop a texture out of the pool altogether, and then you start getting popping. Right? That’s not really something nobody enjoys. The other thing I wanted to call out with virtual texture memory, and in memory in general, is a new.
Slide 77 — 00:19:08
📌 要点汇总
- 提到名为 Render Resource Viewer 的工具,用于资源管理
- 该工具在 Five Four 中被调用,具有实用价值
Tool in Five Four called the Render Resource Viewer, and this is great because this is.
Slide 78 — 00:19:13
📌 要点汇总
- 该幻灯片展示了视频内存中需要同时表示场景的所有元素
- 包括虚拟纹理页面池、Nanite 流式传输池和 TSR 历史颜色缓冲区
- 用于渲染复杂场景的完整内存布局说明
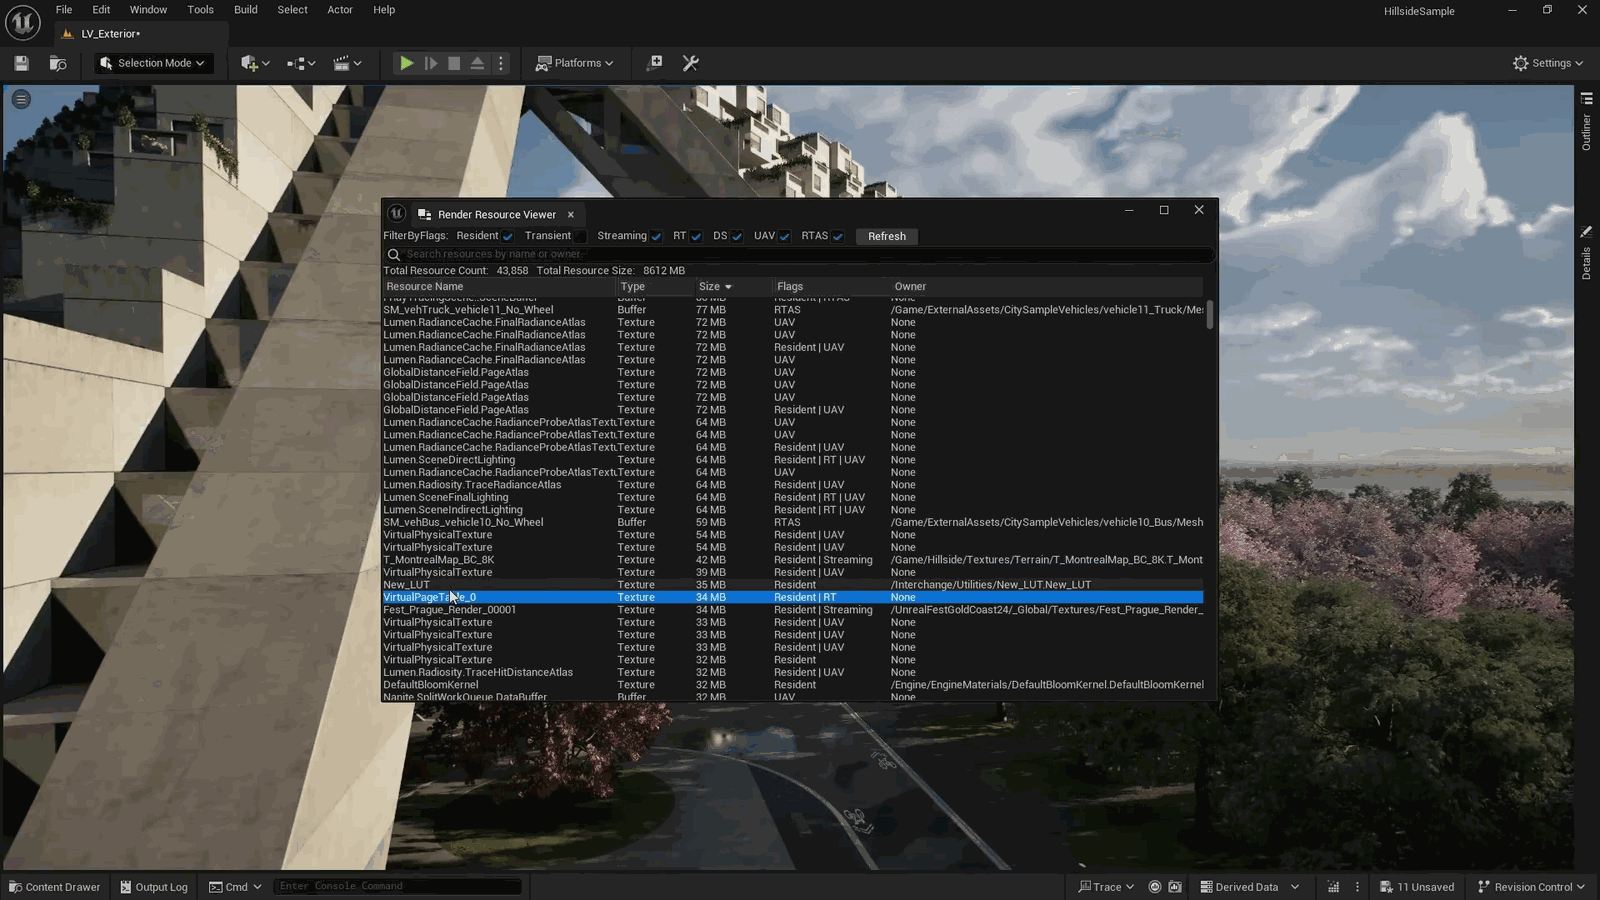
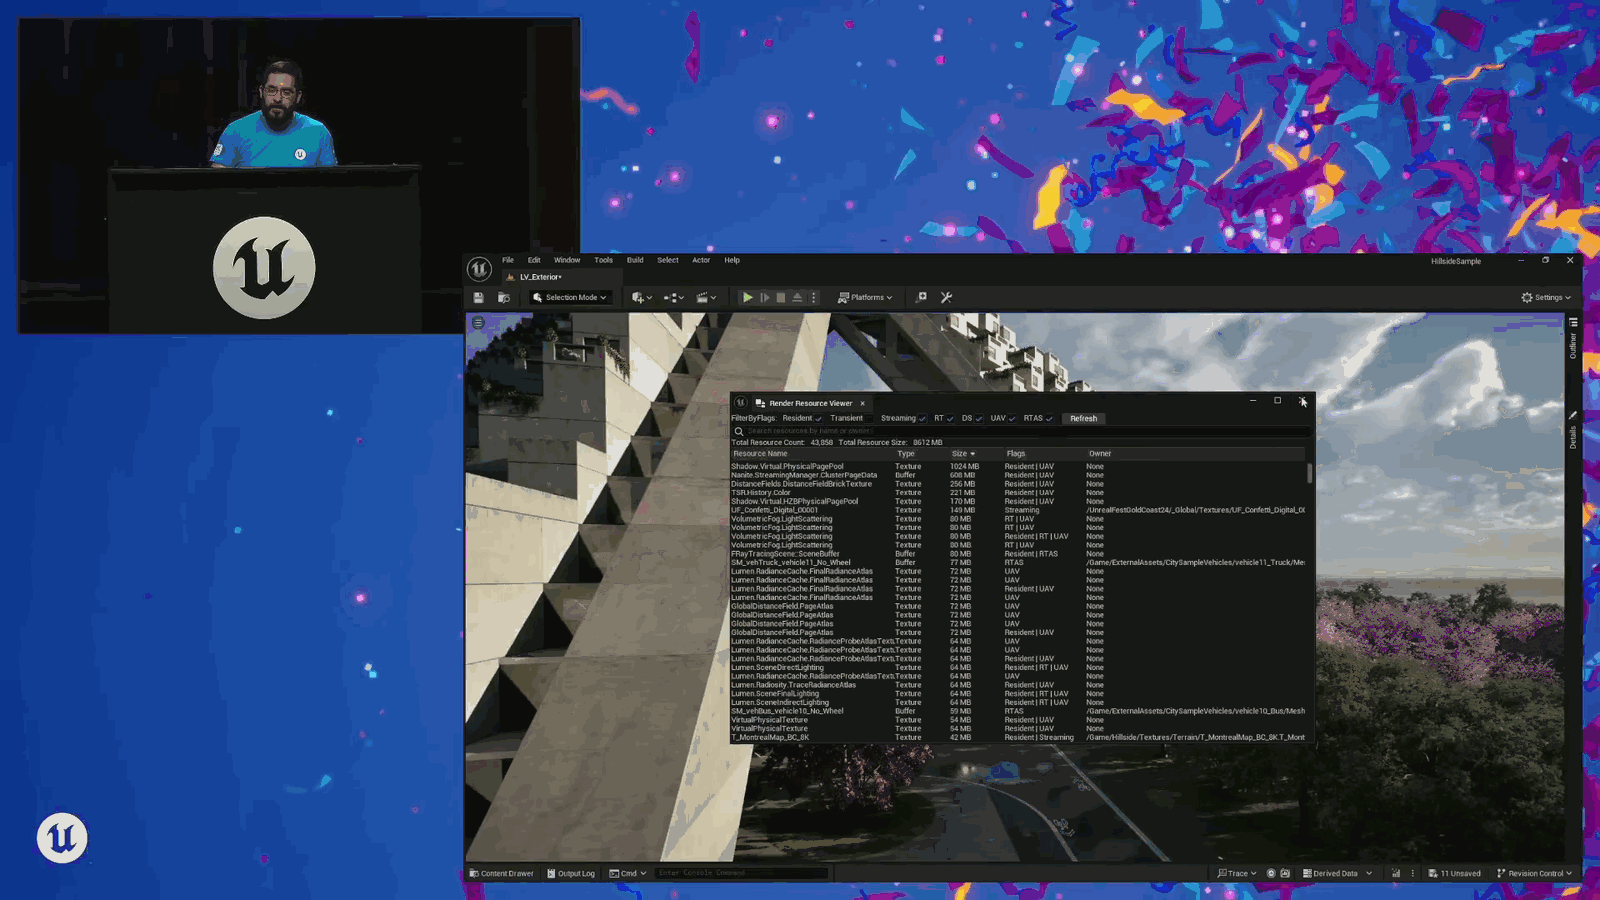
All of it. This is everything that we need to represent the scene in video memory all at once. And you can see, I’ve got my virtual texture page pool. I’ve got my Nanite streaming pool, my TSR history color buffer, and I can see.
Slide 79 — 00:19:28
📌 要点汇总
- 提到虚拟物理纹理的压缩类型
- 引入虚拟页表用于系统内存引用机制
Got my virtual physical textures. So these are the different compression types. There’s also the virtual page table. This is how we go about referencing memory in the system.
Slide 80 — 00:19:35
📌 要点汇总
- 内存中包含大量项目信息,有助于分析不同功能的内存使用情况
- 内存使用不再仅限于纹理和网格,涉及更多项目功能
- 该方法可提供更全面的内存使用洞察,帮助优化性能
All of that stuff in memory, and this is going to give you a lot more information about all of the different features that are using memory in your project. It’s because it’s not just textures and meshes anymore, right? So I mentioned.
Slide 81 — 00:19:48
📌 要点汇总
- 需要从 GPU 获取反馈信息以优化性能
- 实时监控 GPU 状态有助于及时发现瓶颈
- 反馈机制对调试和调优至关重要
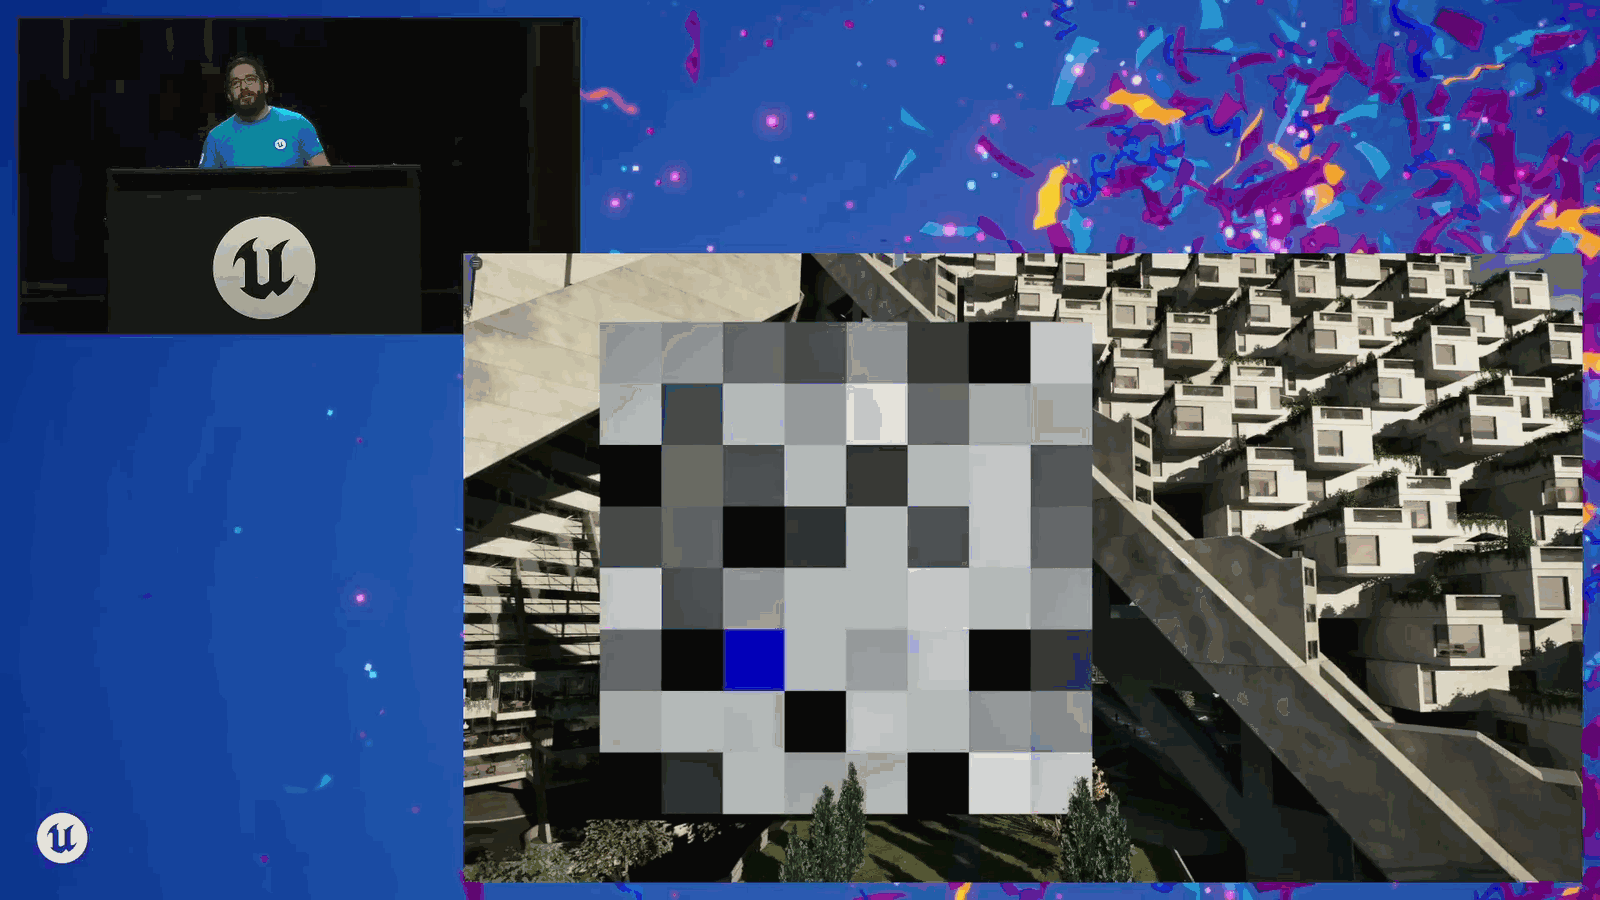
We need to get feedback from the GPU.
Slide 82 — 00:19:53
📌 要点汇总
- 每16个像素加载一次MIPs和tiles到内存
- RVT反馈因子控制加载频率和位置
- 通过抖动选择目标像素以优化内存使用
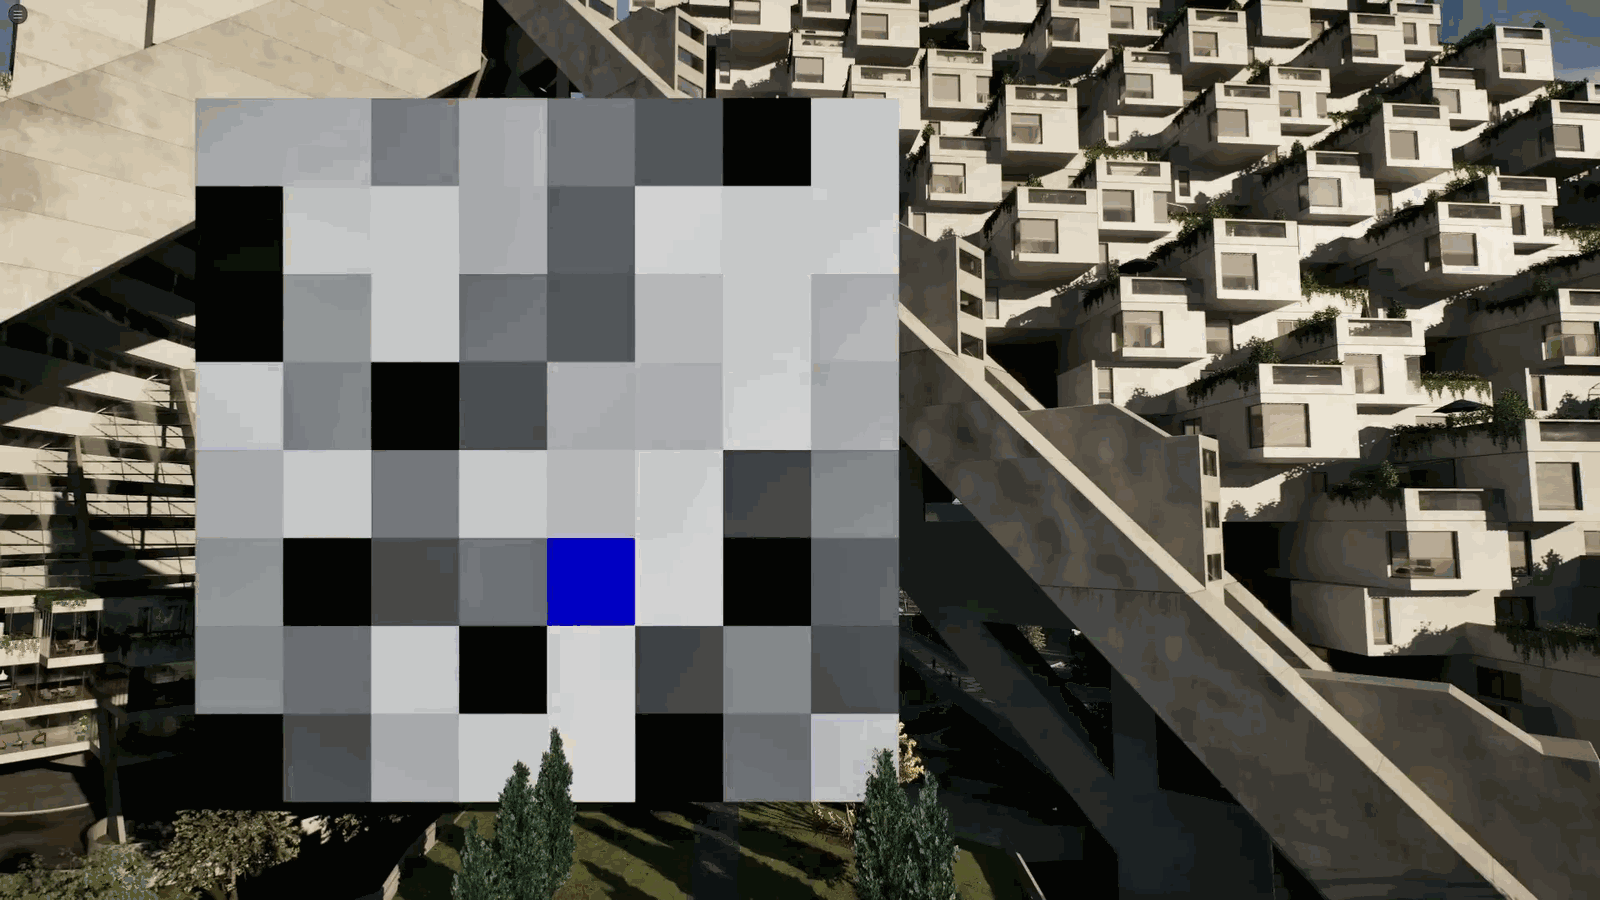
About what MIPs and tiles we need to load into memory at any given time, and we do this once every sixteen pixels. That’s controlled by the RVT feedback factor. So, every sixteen pixels, we’re going to jitter this around, and we’re going to pick which pixel we want.
Slide 83 — 00:20:11
📌 要点汇总
- 页面在最后一次查看后会被存储在内存中以避免重复获取
- 通过内存缓存提升页面加载效率和用户体验
- 该机制适用于用户快速切换视图的场景
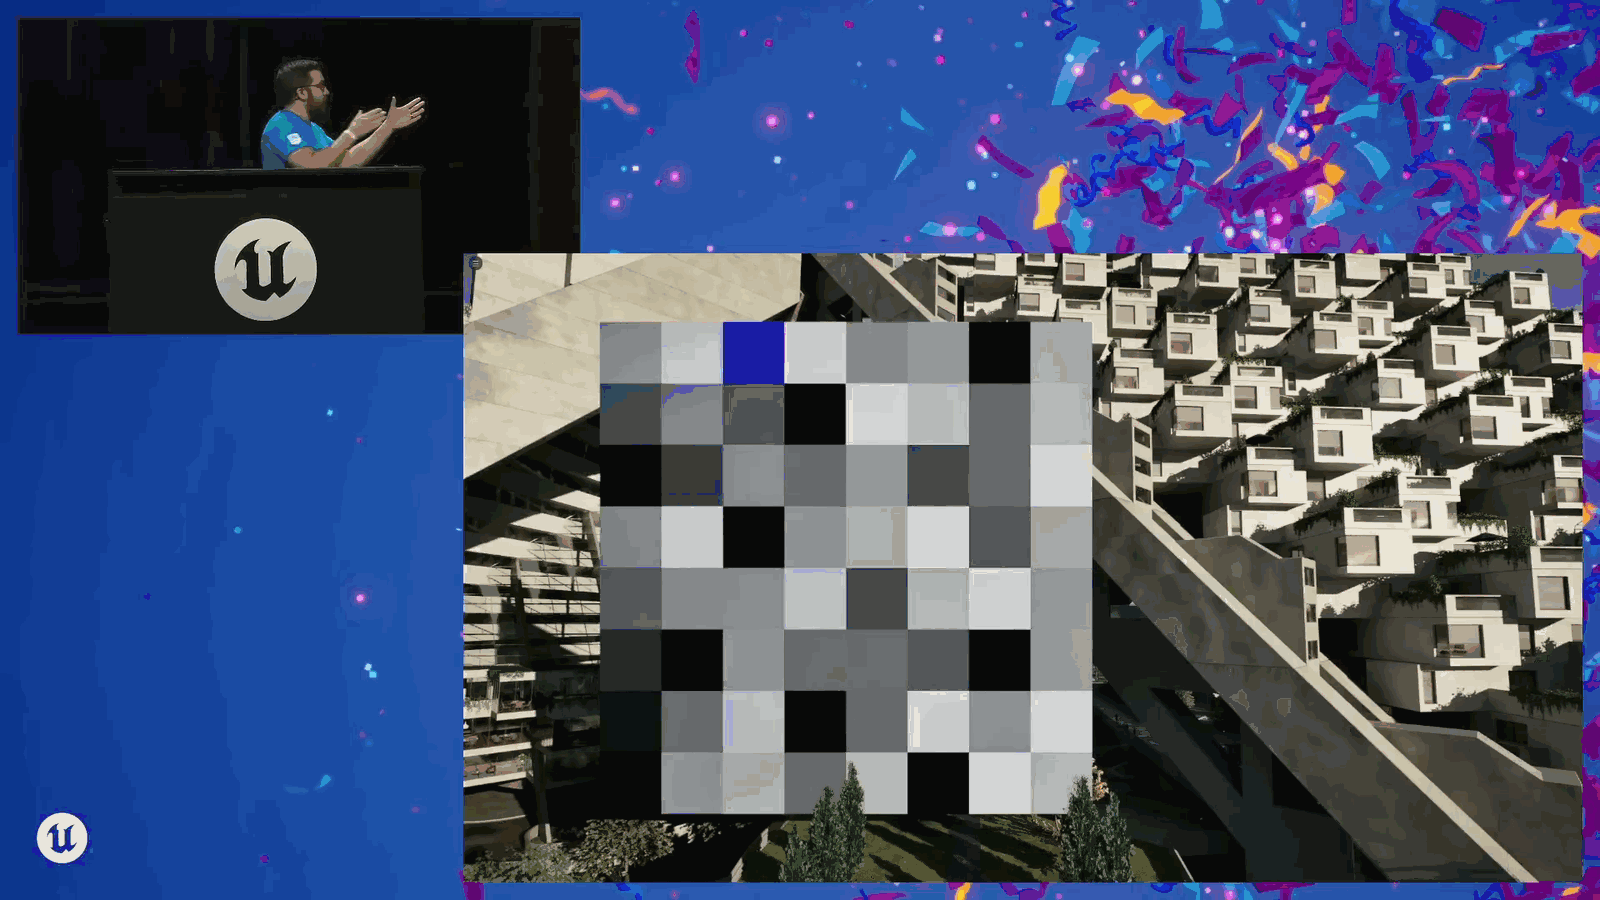
A test, and then we’ll figure out if we have the right tile for that. Cue the upload, and so on and so forth. And pages are being stored in memory after they’ve last been seen because sometimes, if you’re looking over at the right side of the room, and then you really quickly move over to the left side of the room, okay, we don’t want to have to re-fetch the page from the server.
Slide 84 — 00:20:27
📌 要点汇总
- (过渡内容,无关键要点)
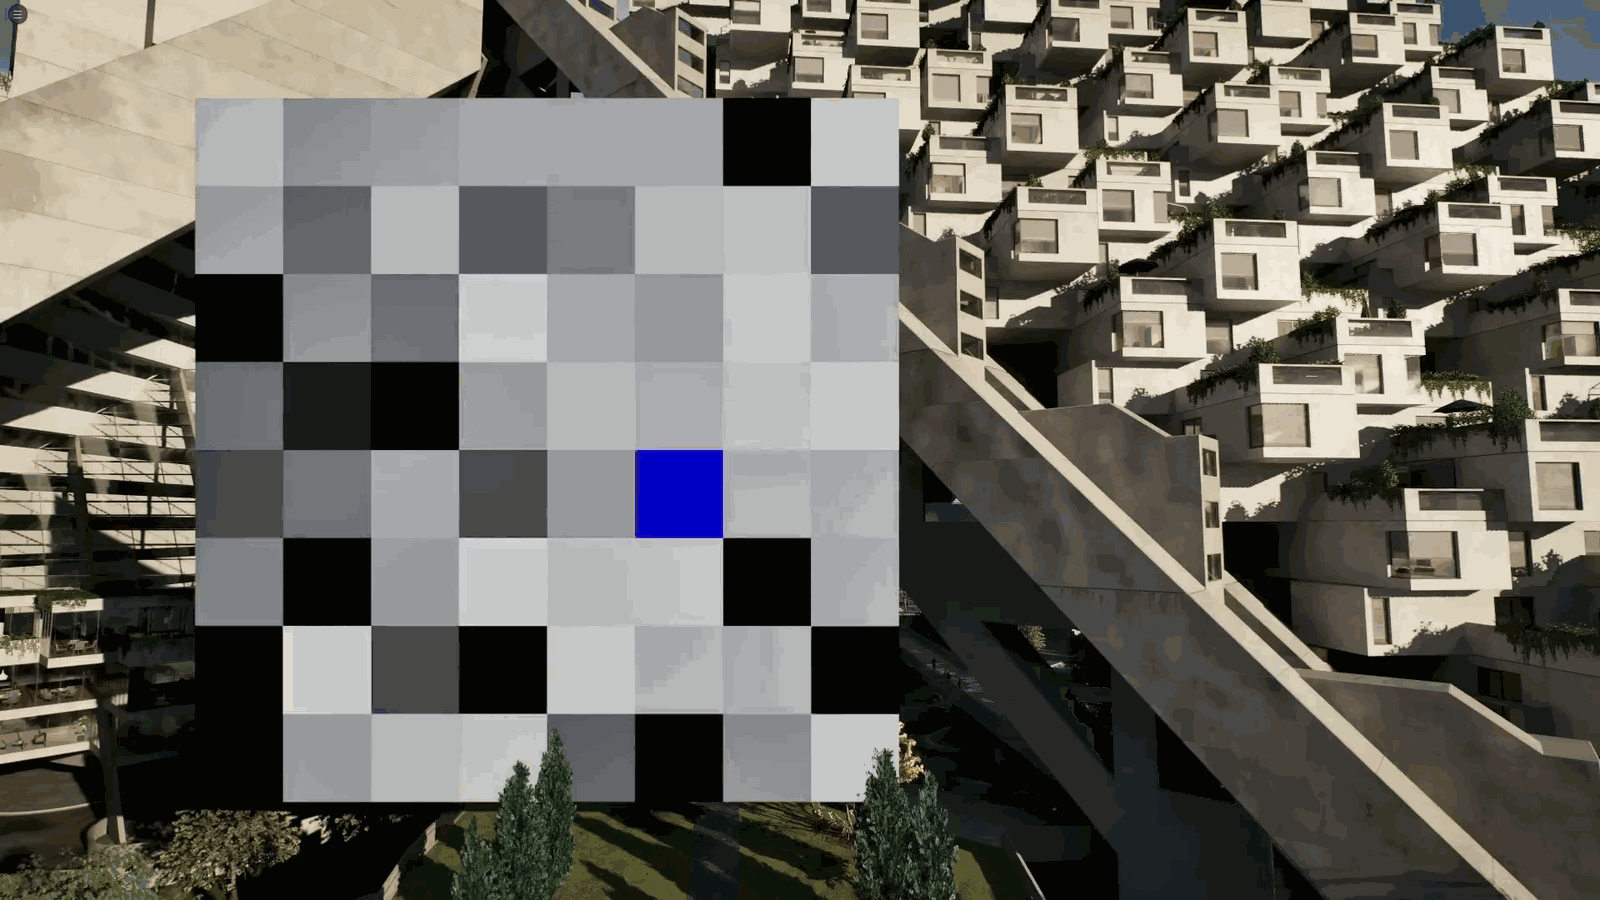
See those textures anymore, so we can drop them and make room for something else. But then, if you really quickly turn back over in the amount of time that it took me from go right to…
Slide 85 — 00:20:37
📌 要点汇总
- 正在处理纹理上传问题,希望保留原有内容
- 使用计时器(渐变色表示)来管理 RVT 页面的可用阈值
- 存在异常情况可能导致阈值变化
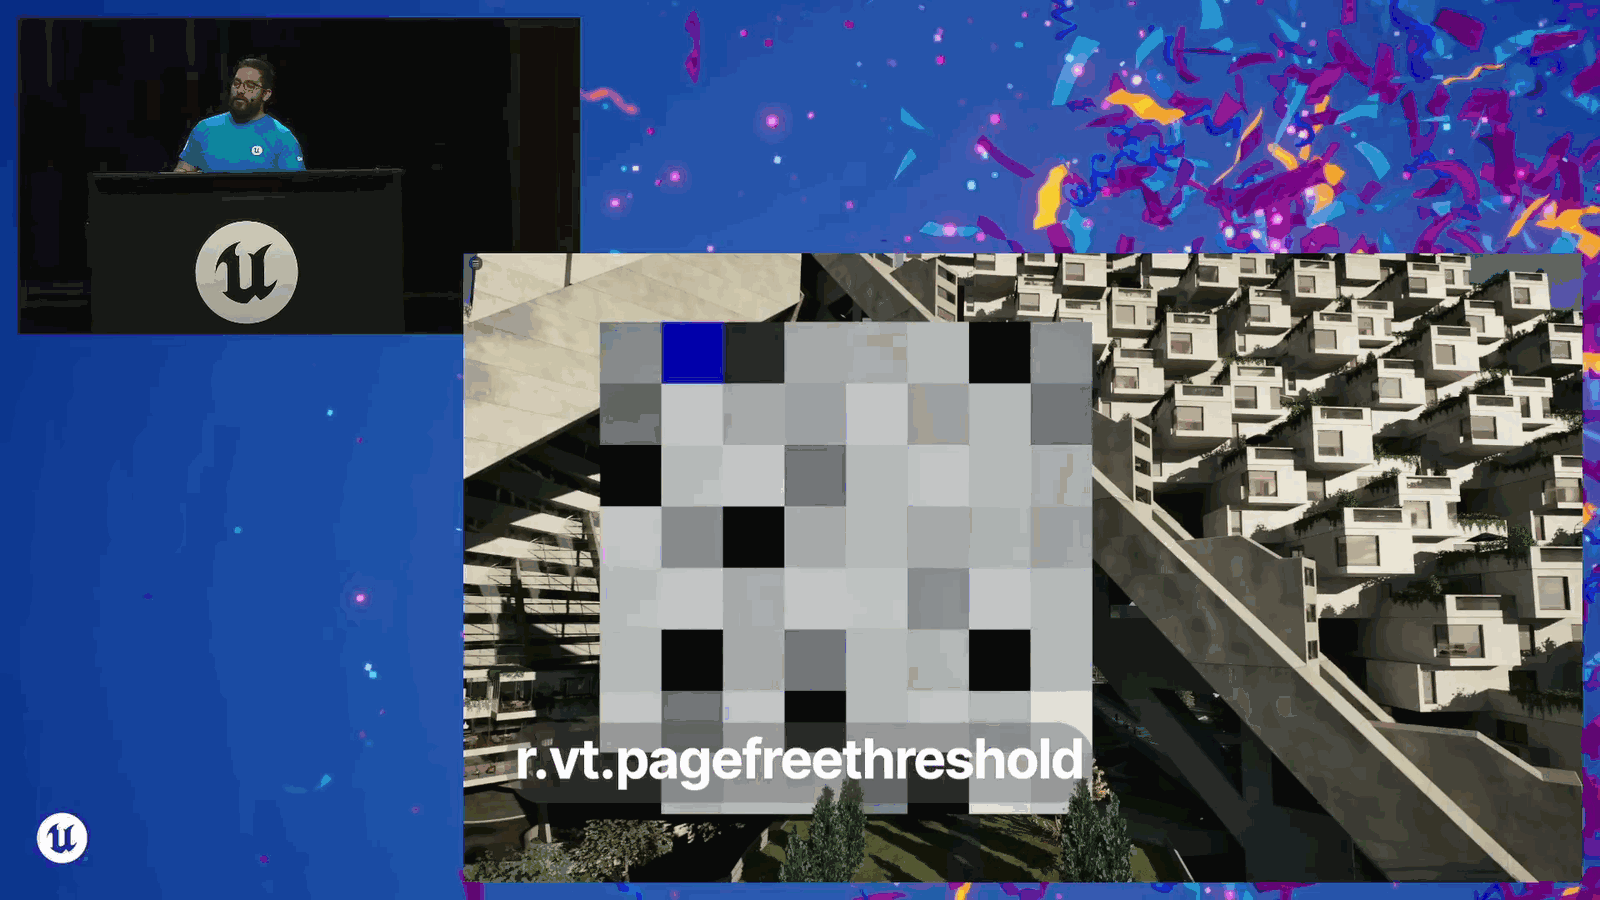
Left to right, I don’t really have time to re-upload that texture, and we still want it to be there when we look back at it. So there is basically a timer, which is represented by all these little gradients timing down. That is the RVT page free threshold, and there’s a weird thing that can happen where if…
Slide 86 — 00:20:55
📌 要点汇总
- 场景中纹理数量过多可能导致可见纹理被丢弃
- 这会导致 stat virtual texturing 中的 map requests 值下降
- 需要平衡反馈因子、堆栈数和纹理数量以避免性能问题
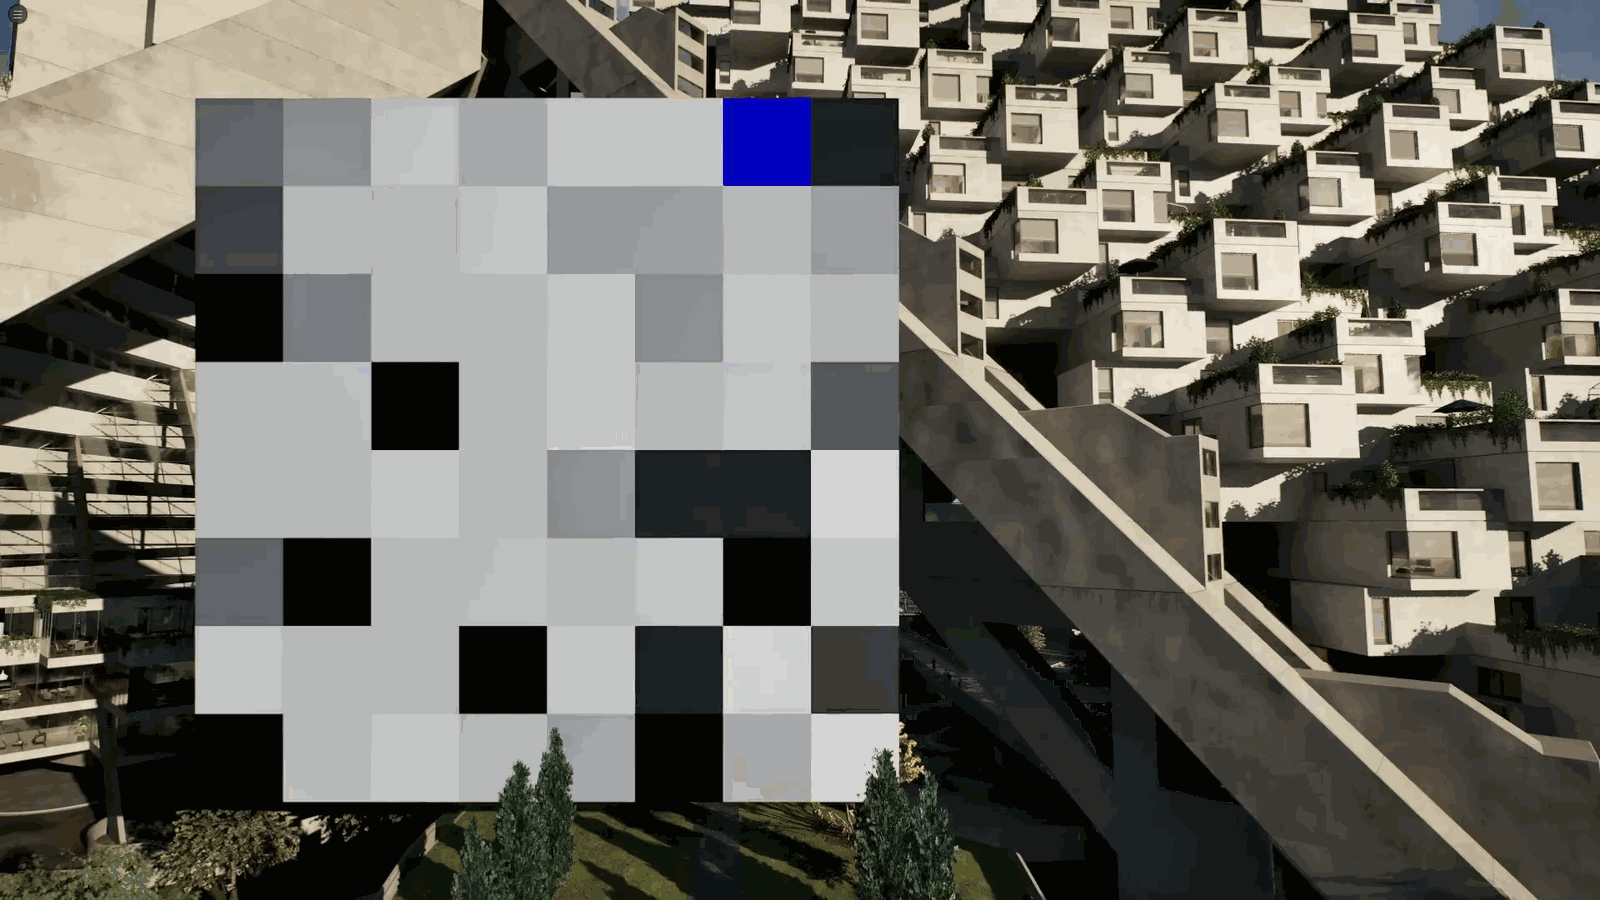
Sometimes the feedback factor and the number of stacks and the number of textures that we’ve got in the scene, we don’t quite hit everything, and so we start dropping textures that are actually visible in the scene. And what you will see where this will come up is the map requests value in stat virtual texturing will start to go.
Slide 87 — 00:21:15
📌 要点汇总
- 静态场景中虚拟纹理可能出现异常高亮
- 相机不动时理论上应无动态效果
- 虚拟纹理使用需注意此类视觉问题
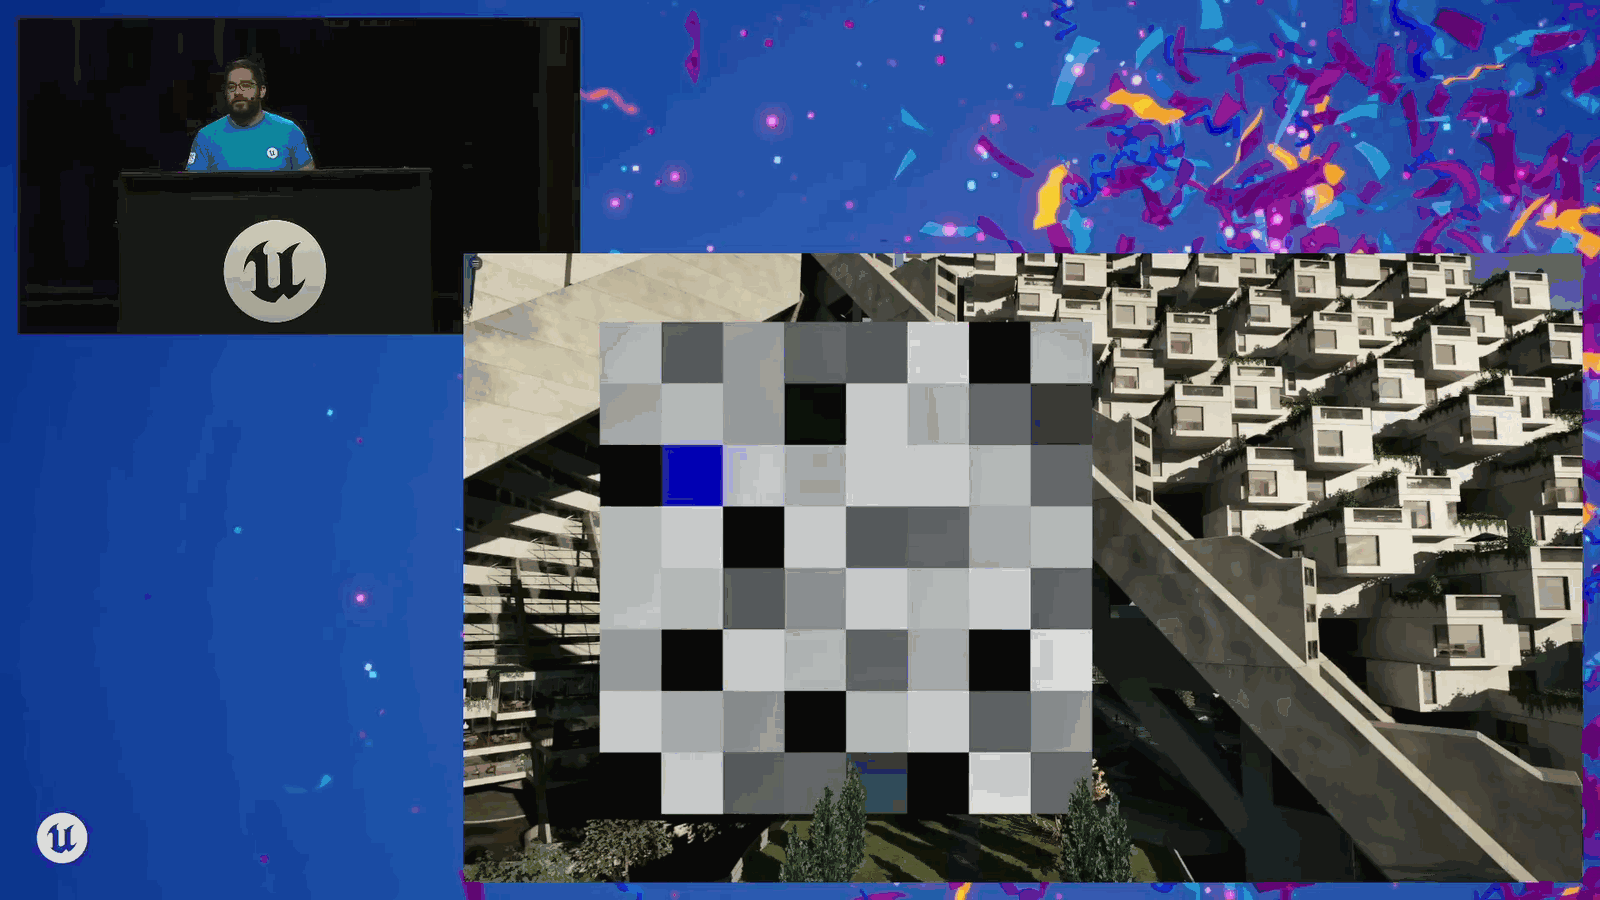
Really high in a scene that is static, because if you’re not moving your camera, theoretically everything should settle, right? So, just wanted to throw that out there—a fun little pro tip, thing to watch out for with virtual texturing.
Slide 88 — 00:21:26
📌 要点汇总
- (过渡内容,无关键要点)
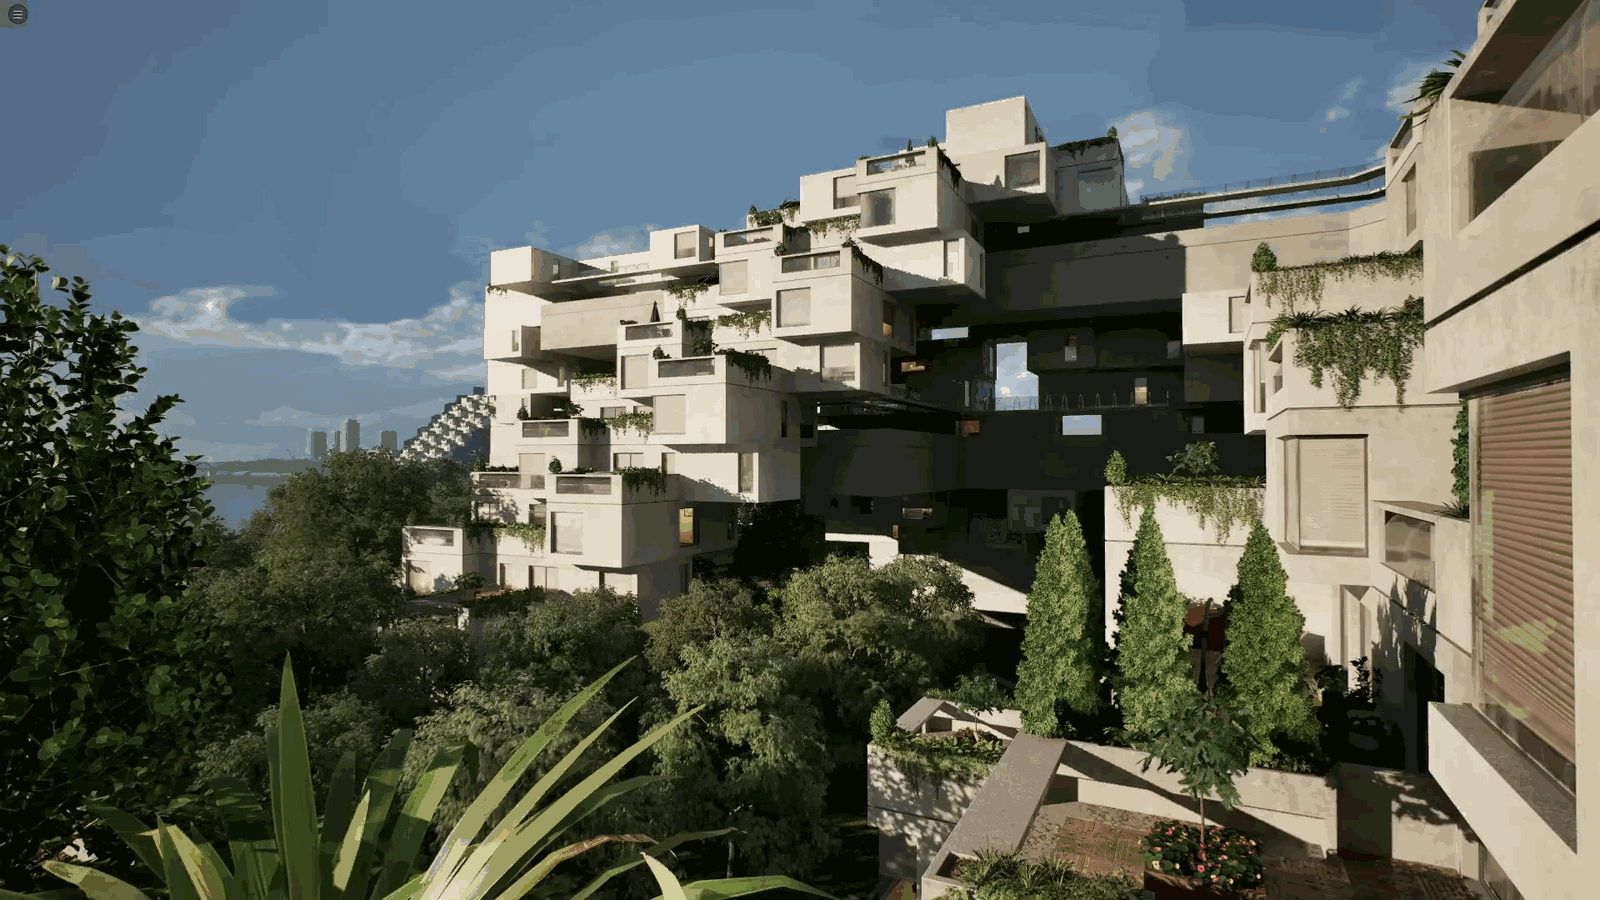
But how are we feeling? Feeling good about this? Everybody seeing you use virtual textures? We’re feeling great. We know where our project settings are. We’re good to go. Okay, so let’s talk about Nanite.
Slide 89 — 00:21:37
📌 要点汇总
- Nanite 是一种虚拟化微多边形几何体技术
- 可实现接近像素级精度的 LOD(细节层次)渲染
- 即使模型包含 1000 万三角形,实际渲染时 GPU 也不会全部处理
- 提升性能同时保持视觉质量
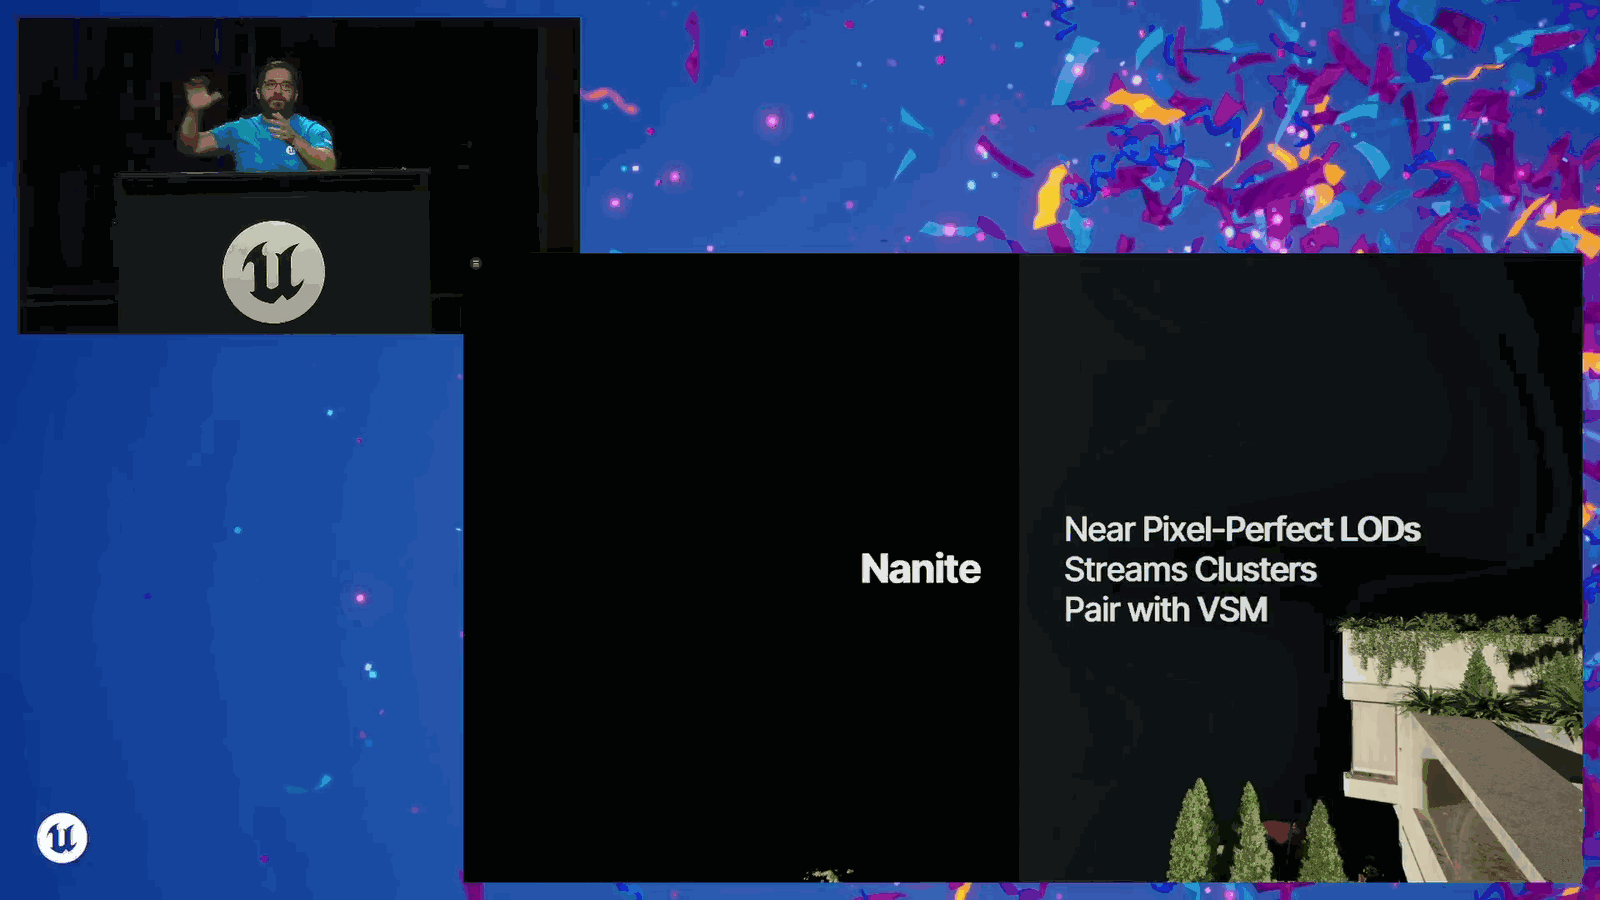
Nanite is also a virtual feature. It is virtualized micro polygon geometry. Really quickly, here’s a quick overview. Nanite is great. It’s going to give you near pixel perfect LODding of your geometry, and what that means, what I mean by that, is that even though you might have 10 million triangles in your static mesh asset in your FBX, it is very rare that you will ever be rasterizing all ten of those millions on the GPU in the frame that you’re looking at.
Slide 90 — 00:22:03
📌 要点汇总
- 该技术通过将几何体从磁盘预简化为约128个三角形的簇
- 简化簇以提高GPU使用效率
- 将多个簇合并为一个簇以优化渲染性能
Right? It’s trying to be efficient about using the GPU. So what it does, the way it does this, is it pre-simplifies your geometry from the disk in clusters of about 128 triangles, and then it will simplify those clusters down so that we can, okay, these ten clusters were together. Now we can simplify those down to one cluster based on.
Slide 91 — 00:22:34

📌 要点汇总
- 最大边数、每像素最大边数、每边最大像素数等概念本质上是虚拟纹理瓦片
- 这些是几何体的离散单元,可根据反馈进行流式加载和卸载
The max edge, max edges per pixel, max pixels per edge, and these are basically virtual texture tiles. Right? These are discrete units of the geometry that we can stream in and out based on our feedback.
Slide 92 — 00:22:49
📌 要点汇总
- 使用 Nanite 时建议同时使用虚拟阴影贴图(virtual shadow maps)
- Nanite 与虚拟阴影贴图系统协同工作效果极佳
- 两者配合可高效生成高质量高分辨率阴影
And as an aside, if you are using Nanite, I highly recommend also using virtual shadow maps. Those two systems work together very, very well, and they’re meant to work together so that you get really nice, high-resolution shadows fairly efficiently.
Slide 93 — 00:23:05
📌 要点汇总
- Nanite spline meshes 现在已达到生产就绪状态
- 可以使用建模工具将人行道与道路对齐
- 新功能在 Five Four 版本中上线
- 提到具体使用场景:道路与人行道的贴合
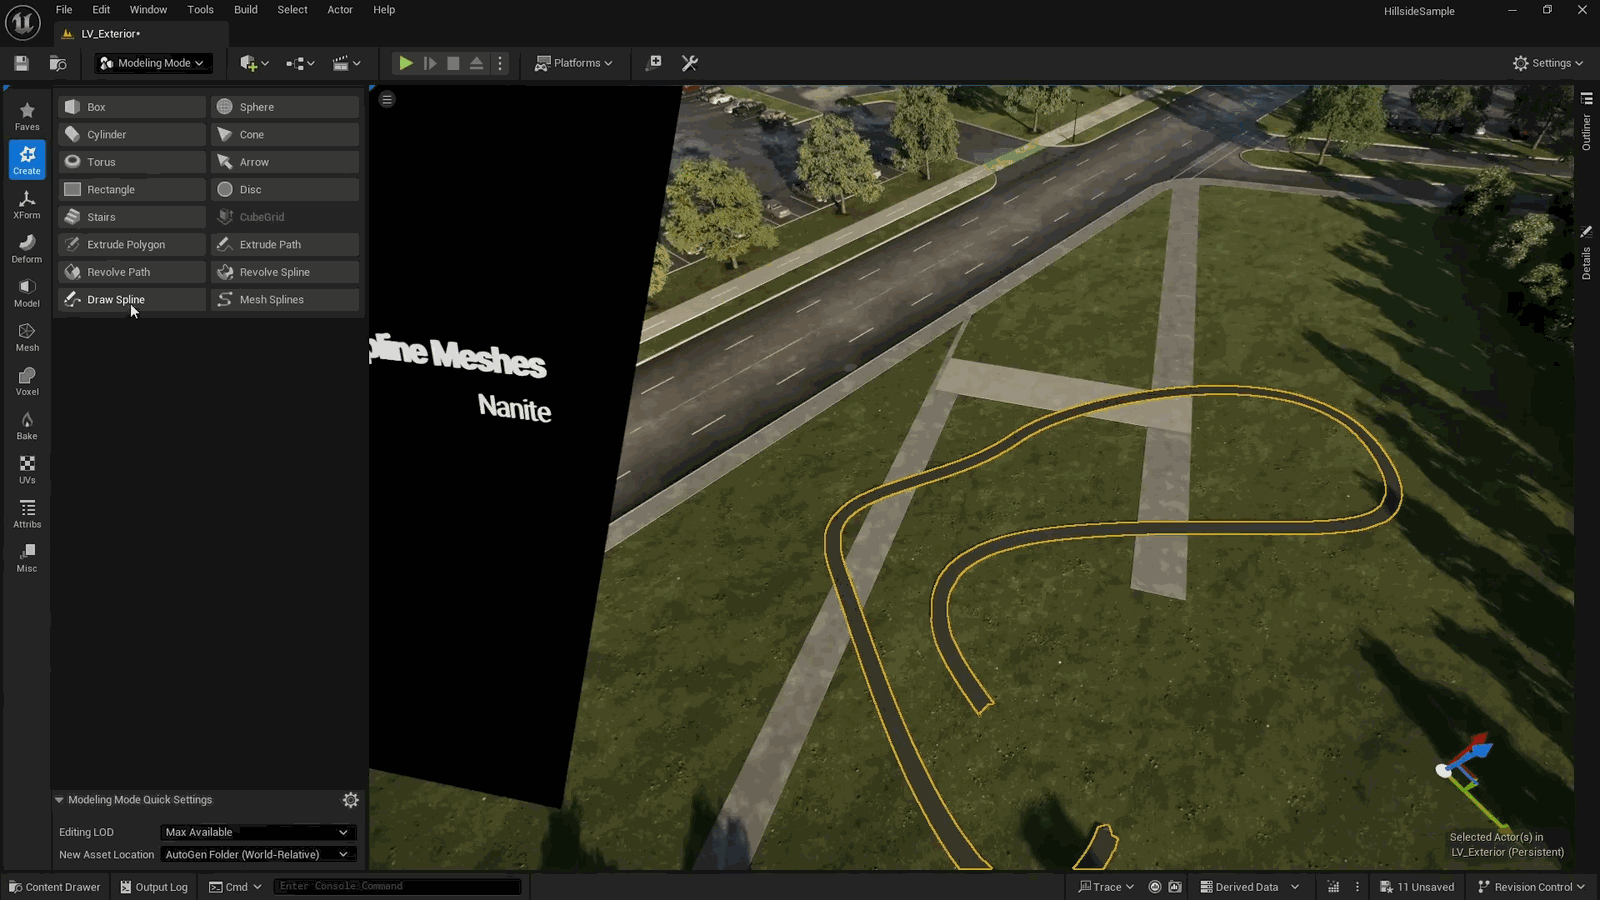
Using Nanite, there are some fun updates and new features that have come online with Five Four, which I’d like to briefly discuss. The first is that Nanite spline meshes are now production ready. Here’s a small example: I have my spline mesh, and I want to conform this sidewalk to the road. What I’ll use are our modeling tools, and then…
Slide 94 — 00:23:24
📌 要点汇总
- 使用现有蓝图工具绘制样条线,可点击世界地图进行操作
- 绘制的样条线会自动适配地形,实现人行道与地形的贴合
- 操作完成后点击“接受”即可确认生成结果
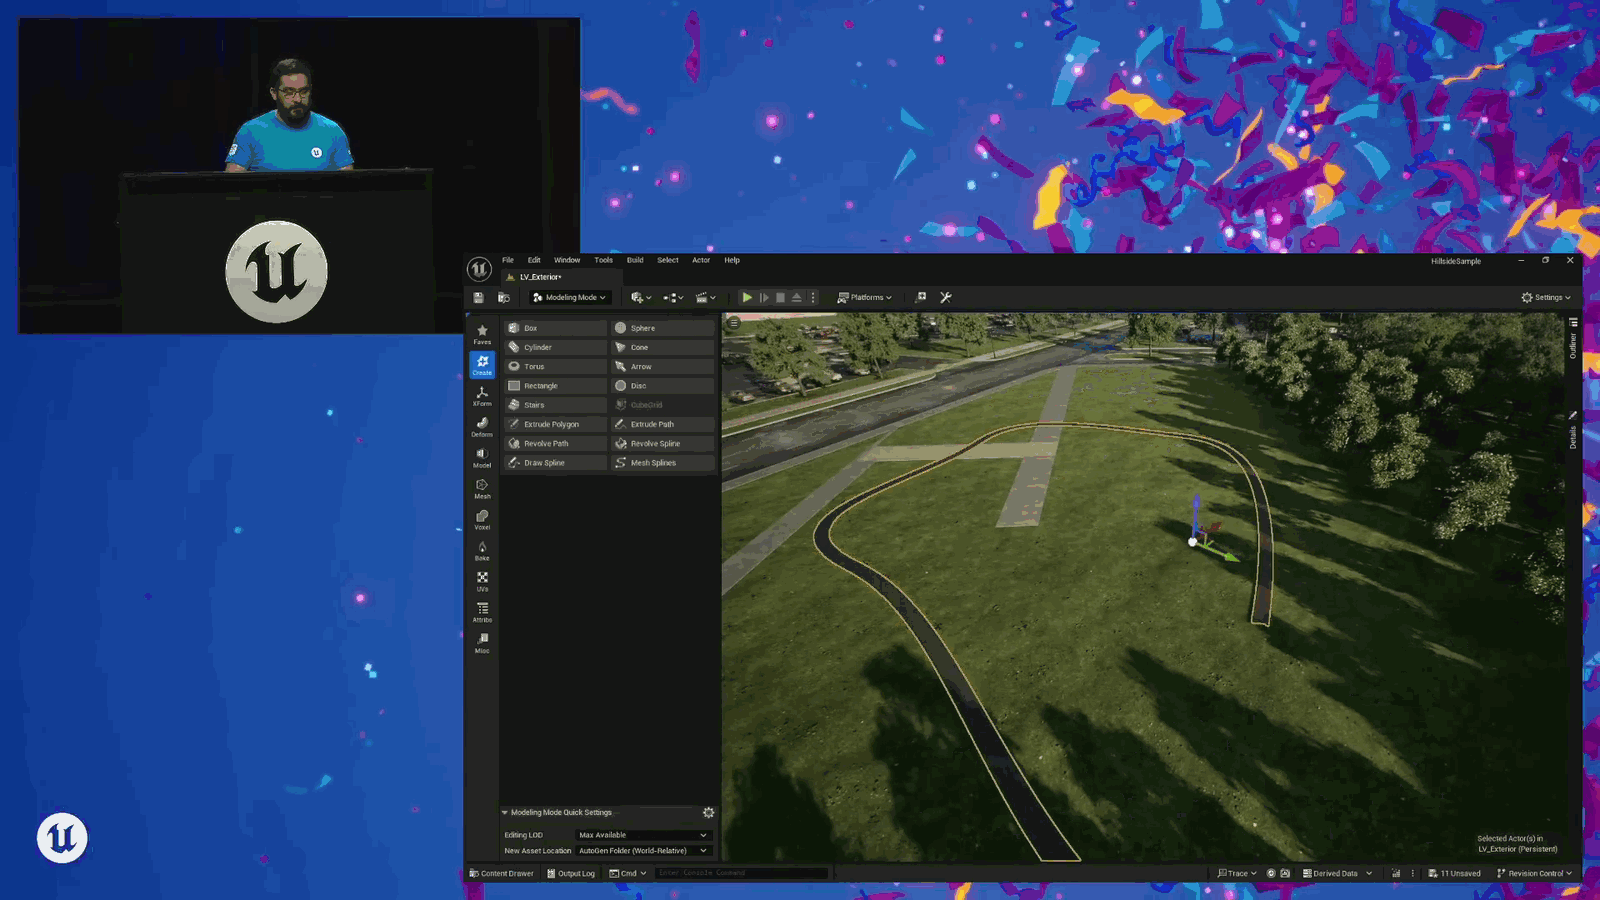
Draw spline tool. I grab that existing blueprint, and now I can click in the world and draw out a spline. It’s going to conform that sidewalk to the terrain. I’m feeling really happy about that. So I hit accept, and then.
Slide 95 — 00:23:37
📌 要点汇总
- 展示了纳米ite遮罩可视化效果
- 使用了样条网格并启用了纳米ite技术
- 纳米ite细分技术实现了更精细的几何细节
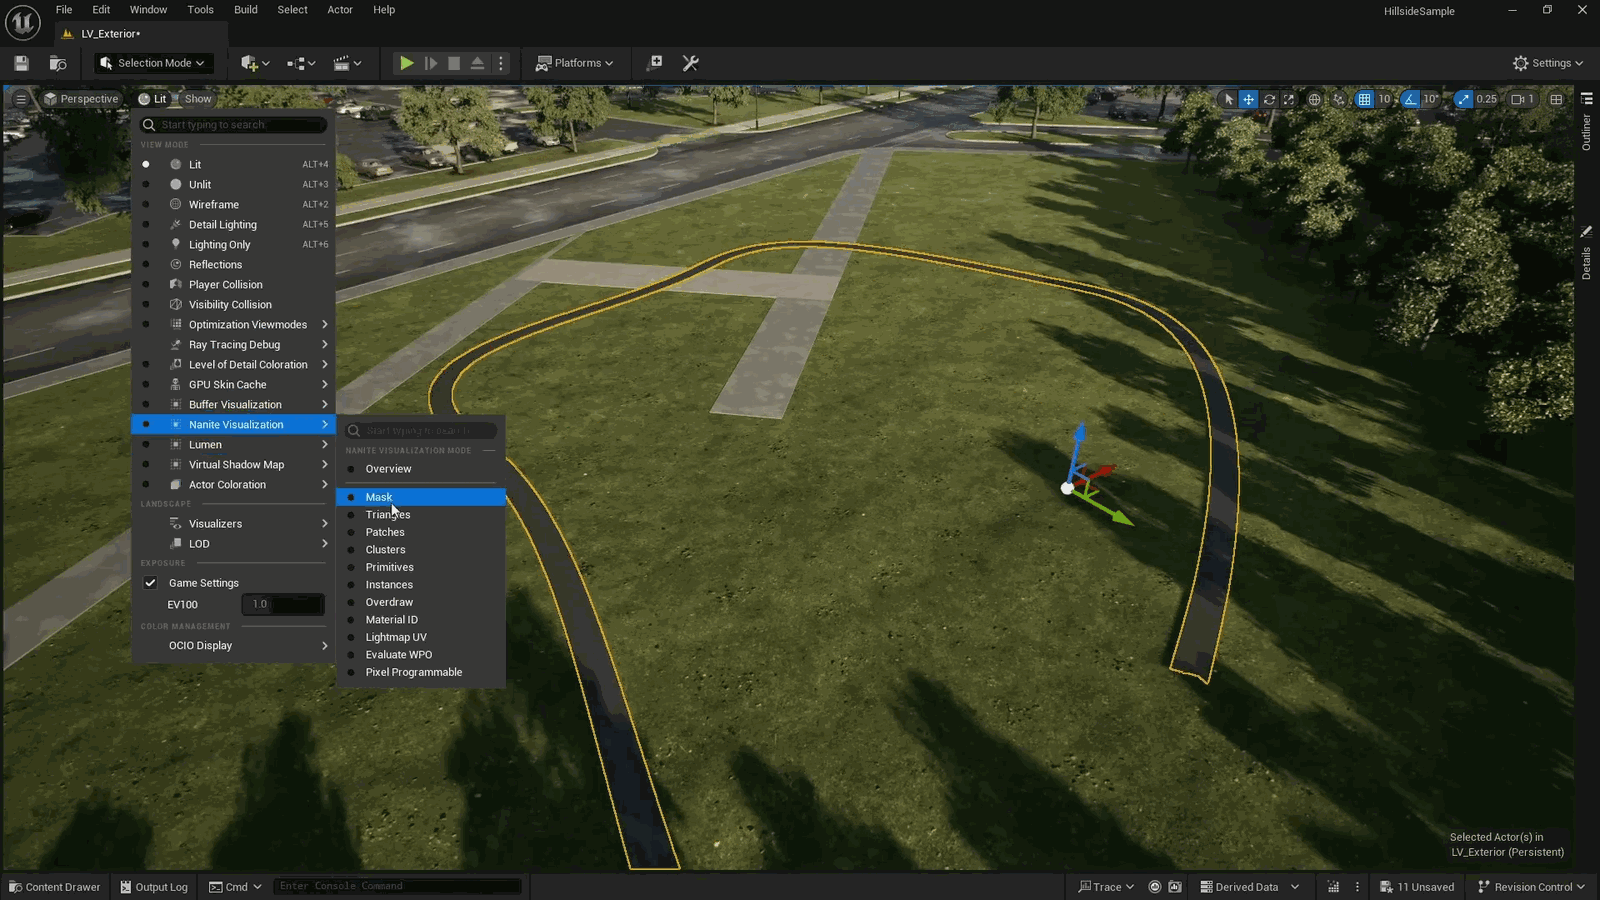
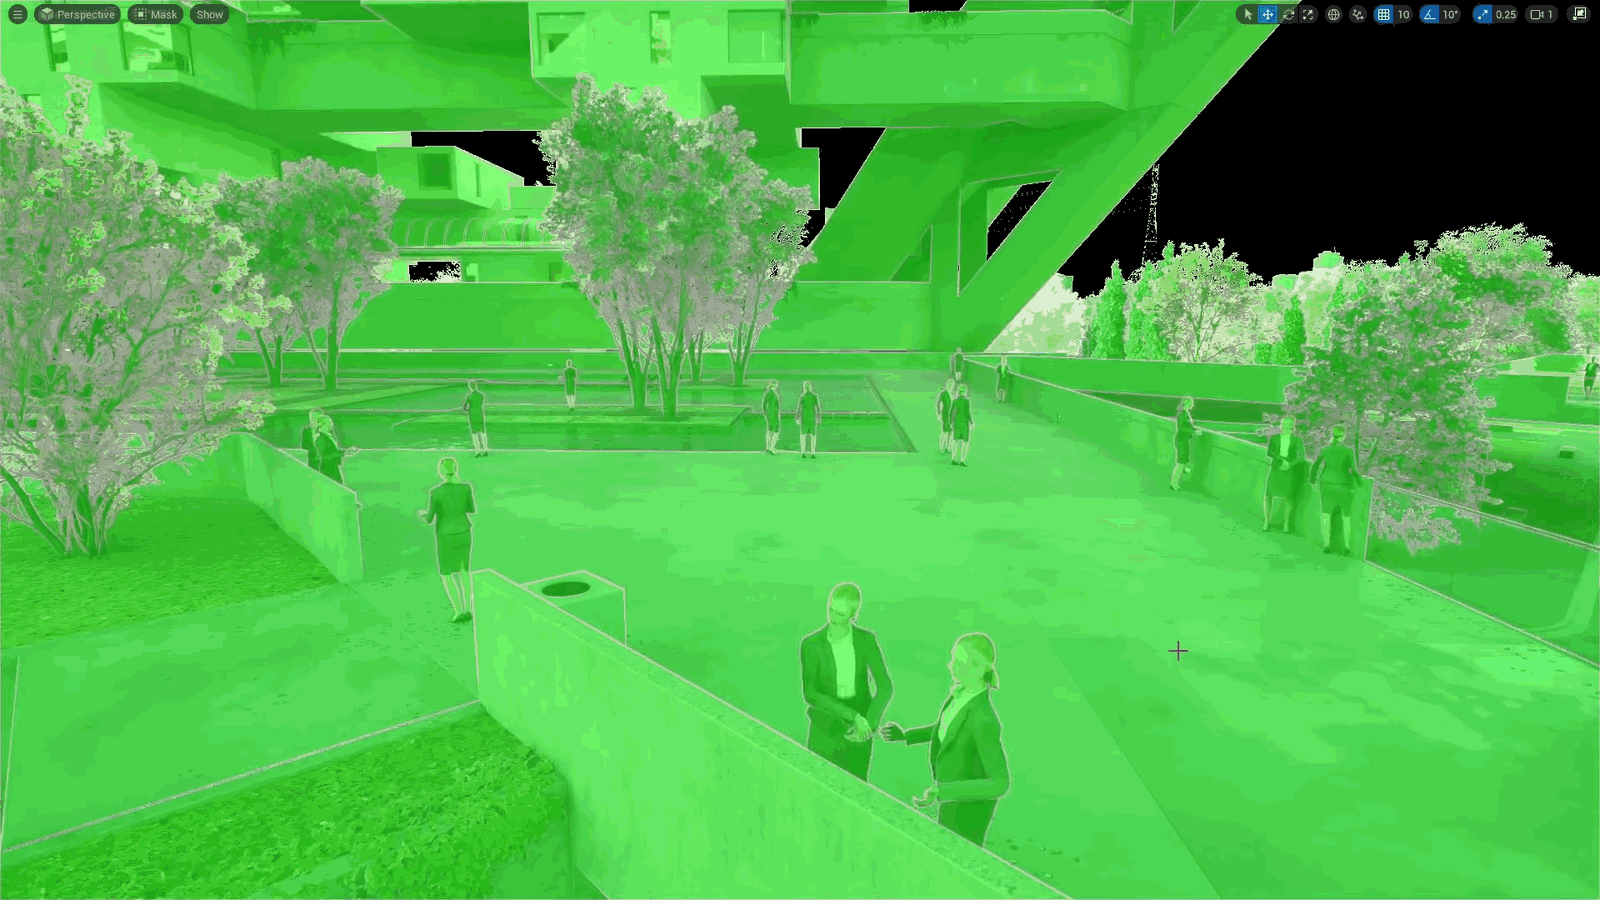
I can go into our nanite mask visualization. There we go. So you can see I have a spline mesh, and it is nanite. Huzzah. The other fun thing that we’ve got is nanite tessellation.
Slide 96 — 00:23:47
📌 要点汇总
- 该技术仍处于实验阶段,后续由 Aaron Langmead 进一步讲解
- 使用该方法会增加三角形光栅化和位移的计算成本
- 该方法在内存使用方面具有潜在优势
- 展示了两个 Quixel Megascans 岩石模型,左侧为 Nanite 分辨率,右侧为另一种方案
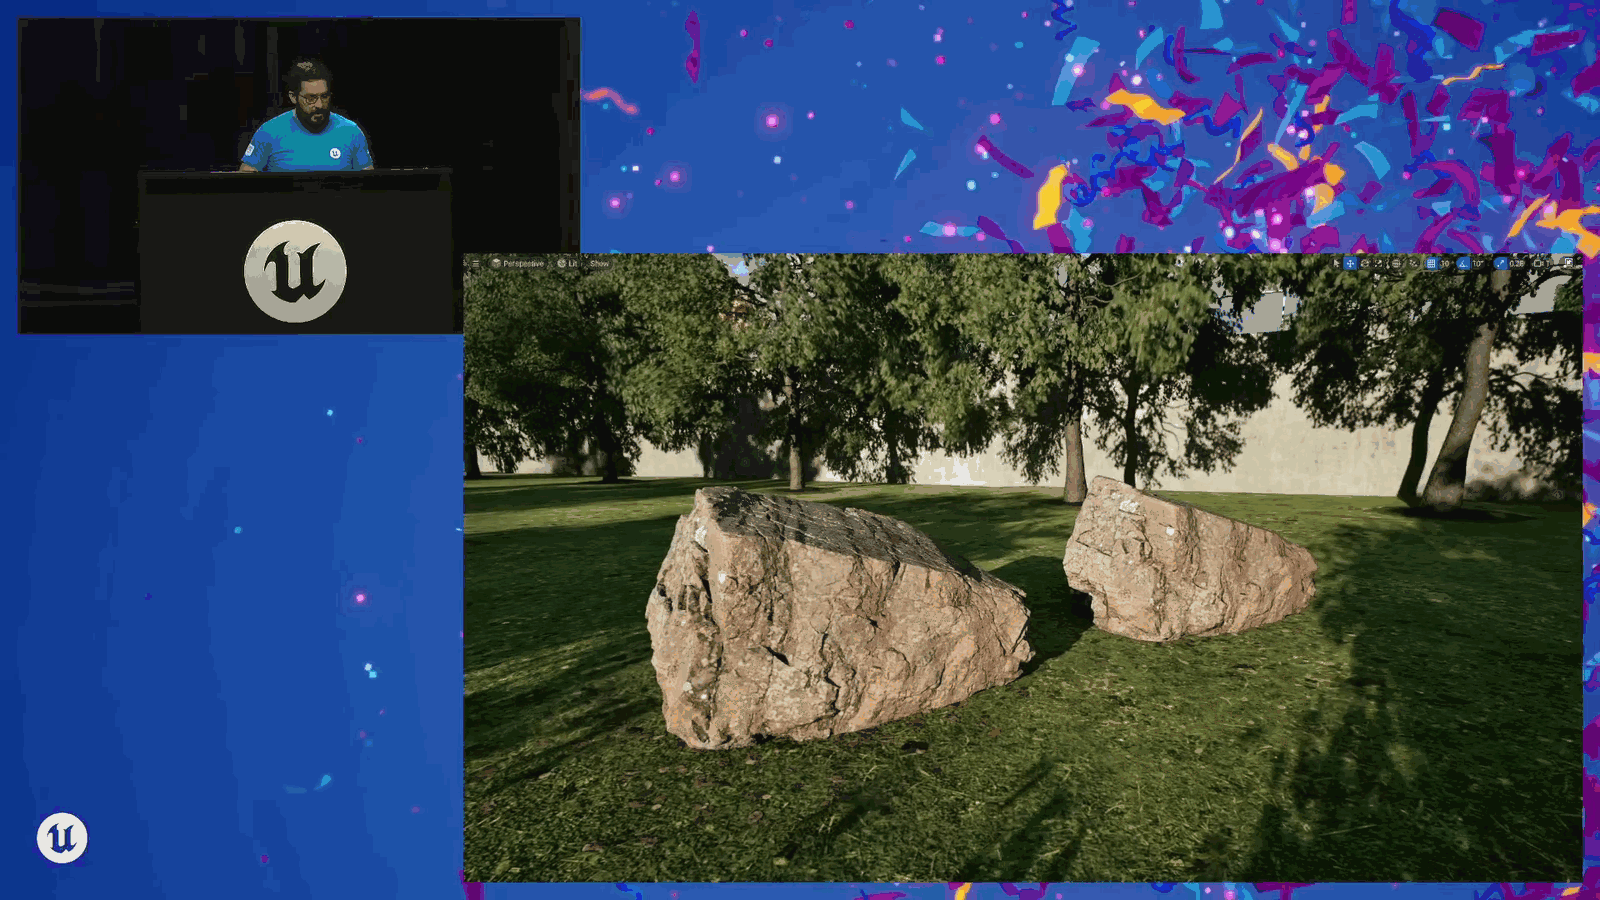
This is still experimental, but I do want to talk about it. And Aaron Langmead is going to talk about this a lot more later today. Generally speaking, this is a sometimes good approach. It does add a cost to rasterizing all of these triangles because we have to figure out how to tessellate and then displace them. But there are some interesting memory benefits that we can get out of this level of tessellation. So I’ve got two rocks from Quixel Megascans here. The one on the left is Nanite resolution, and the one on the right.
Slide 97 — 00:24:19
📌 要点汇总
- 展示中等分辨率模型,以证明无隐藏操作
- 使用线框视图模式展示模型基础分辨率
- 启用 tessellation 以提升模型细节表现
- 通过 r.nanite.tessellation 选项实现细分效果
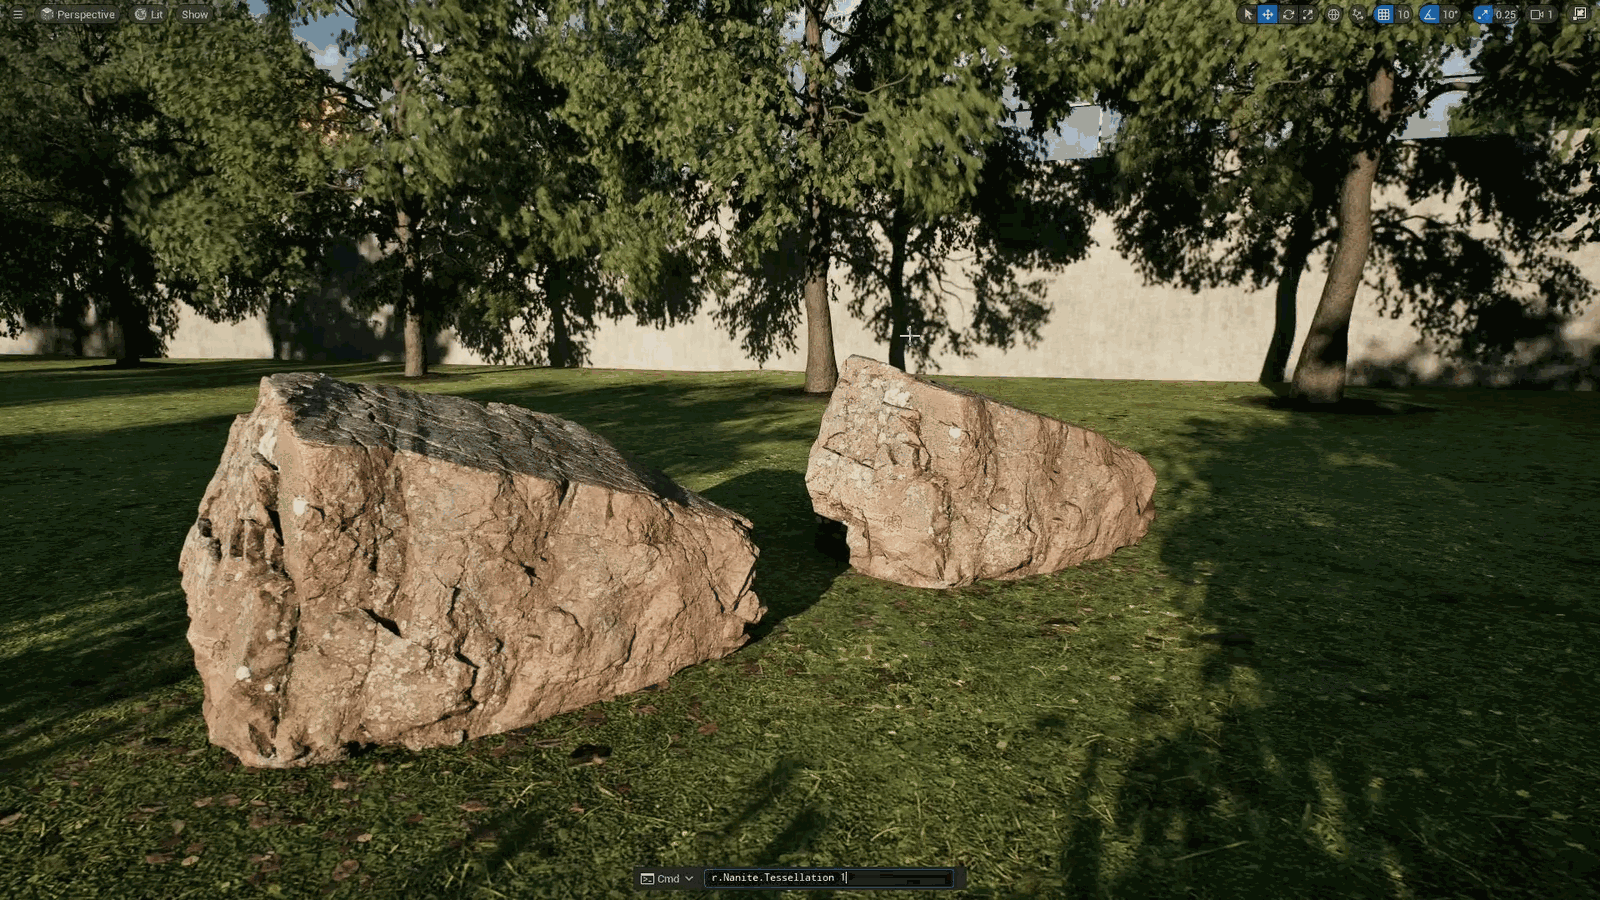
Is medium resolution, and to show you nothing is up my sleeve, here is the wireframe view mode. These are the respective base resolutions of these meshes, and then if I turn on tessellation, so I do r dot nanite dot tessellation one.
Slide 98 — 00:24:33
📌 要点汇总
- 进入 Nanite 三角形视图模式以查看几何细节
- 用于分析和优化复杂模型的渲染性能
- 可视化三角形分布有助于识别潜在性能瓶颈
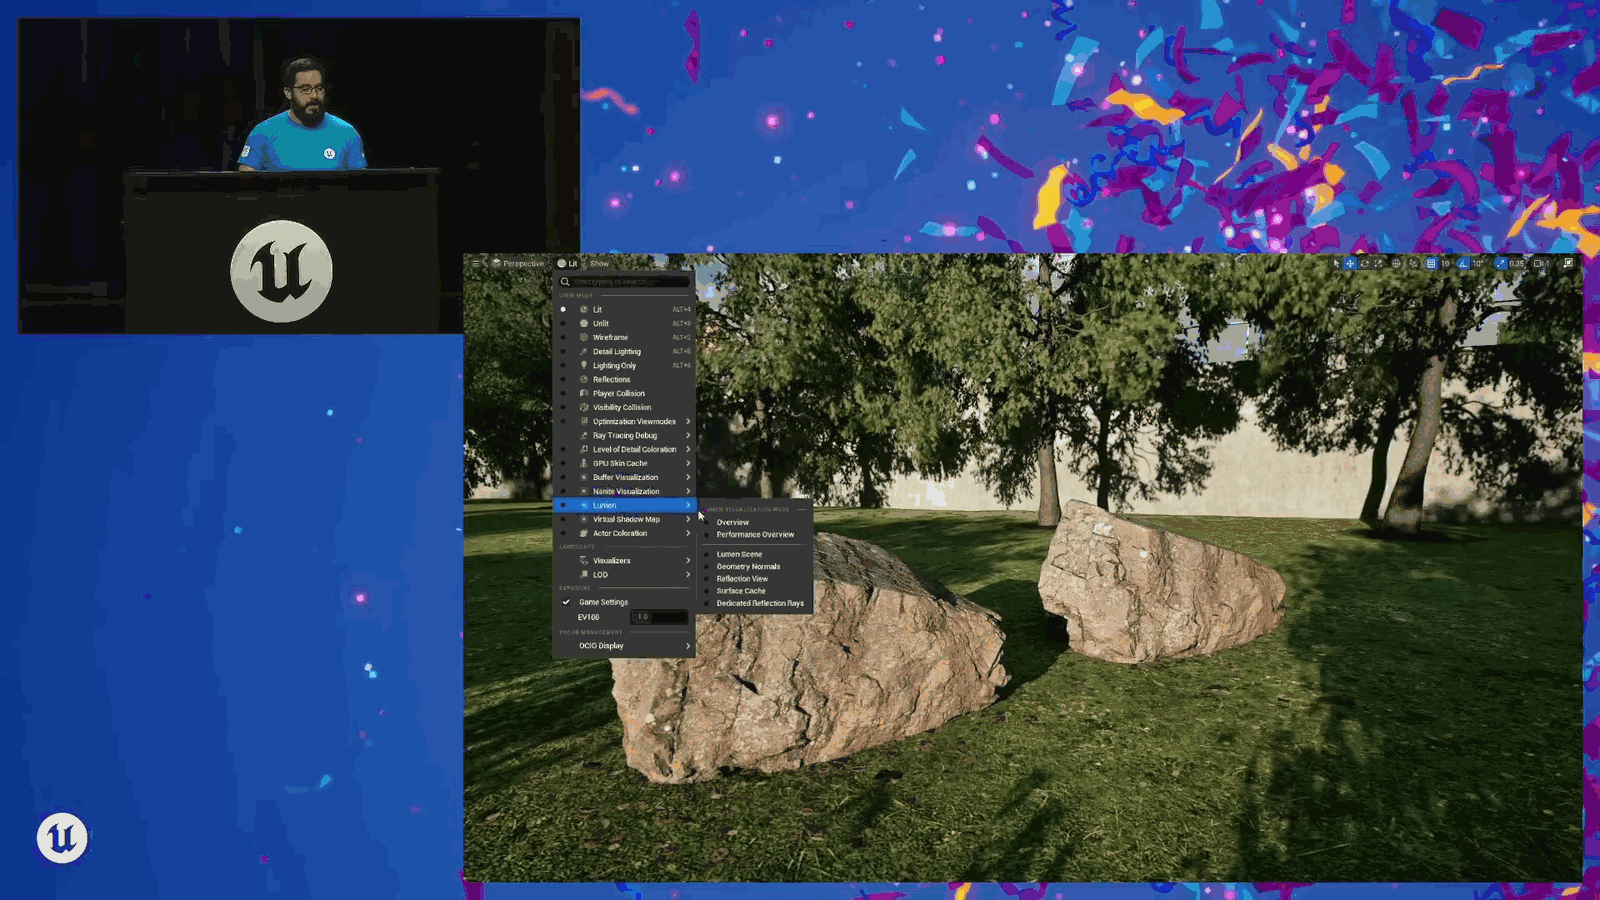
And then, if I go into my Nanite triangles view mode.
Slide 99 — 00:24:38
📌 要点汇总
- 使用4MB或1MB位移纹理可位移5万三角形网格
- 位移纹理方案最终磁盘占用低于200万三角形基础网格+Nanite方案
- 均匀细分技术提升了纹理使用效率
- 位移映射技术可显著减少模型复杂度
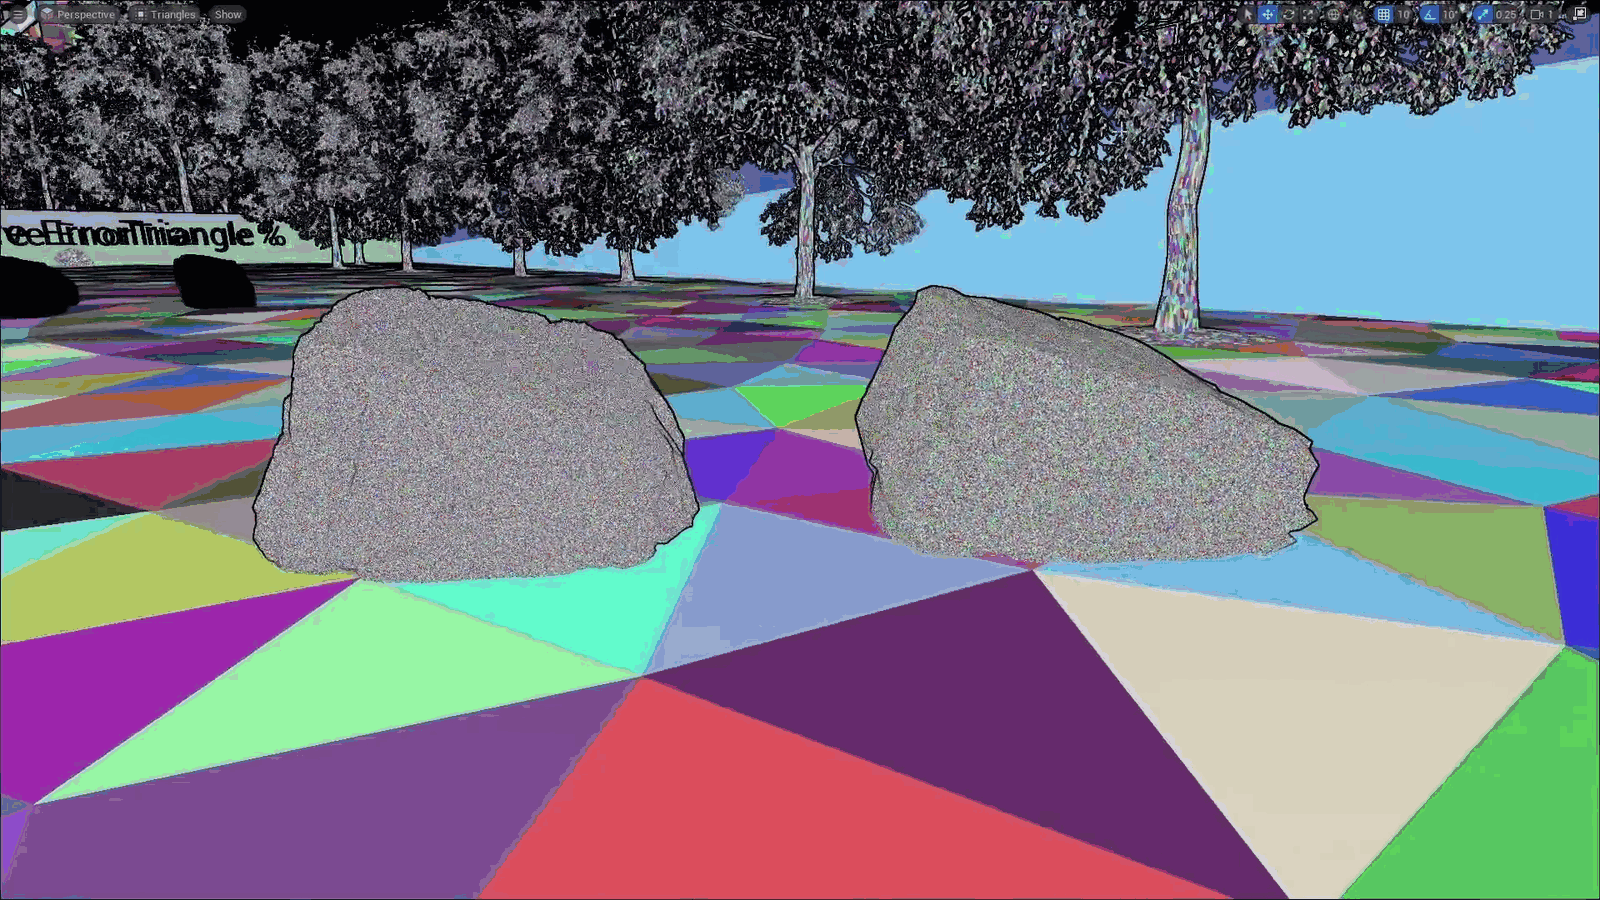
We’re going to see that they are now uniformly tessellated, and the benefit here is that I can use maybe a four megabyte or one megabyte displacement texture to displace a fifty thousand triangle mesh, and that’s going to have ultimately a lower disk footprint than a two million triangle base mesh with Nanite.
Slide 100 — 00:24:57
📌 要点汇总
- 提供不同分辨率和几何细节选项以节省硬盘空间
- 新增了一个尚未广泛讨论的复选框功能
So, if you’re worried about your hard drive space, there might be some benefits here to evaluate based on what resolution you need, how detailed you need this geometry to be, and so on. The other fun one that I don’t think a lot of us have really talked about yet is a new checkbox we added to.
Slide 101 — 00:25:13
📌 要点汇总
- Nanite 默认使用线性插值来简化并生成聚类
- 线性插值是 Nanite 简化几何结构的核心方法之一
- 该方法影响最终聚类的平滑度和细节保留程度
The Nanite setting struct. So, by default, when Nanite is simplifying things together to generate those clusters, it will interpolate linearly.
Slide 102 — 00:25:22
📌 要点汇总
- 合并顶点是常见的需求,需确保行为符合预期。
- 顶点属性需在合并过程中保持一致性。
- 需要处理顶点合并带来的潜在数据冲突。
The attributes of all of the vertices. So, as we know, collapsing two verts together, we want this to be a desirable behavior generally.
Slide 103 — 00:25:31
📌 要点汇总
- 顶点动画纹理需要显式的UV坐标来查找纹理中的具体值
- 这种情况通常需要特殊处理以确保正确映射纹理数据
Unless we need to do something like vertex animated textures, where we need an explicit UV coordinate to look up an explicit value in a texture.
Slide 104 — 00:25:41
📌 要点汇总
- 添加了一个复选框,用于在插值或合并几何体时选择 UV 值
- 现在可以使用 Nanite 实现顶点动画纹理技术
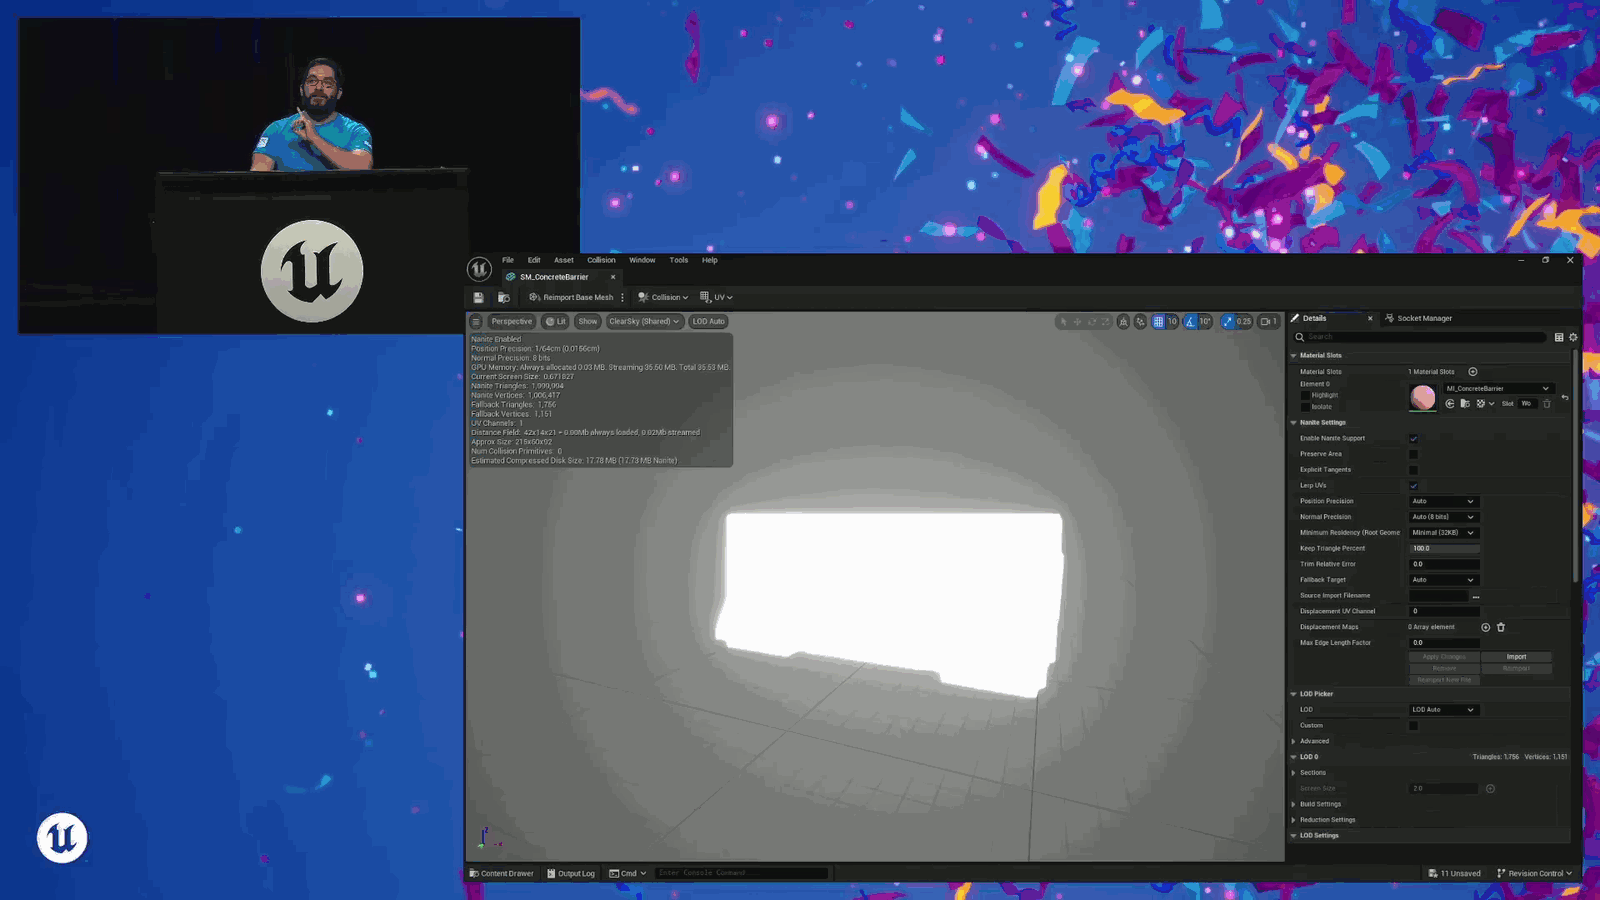
So, what we did was we added a checkbox that said, “Hey, don’t do that. Pick a UV value when you are interpolating or when you’re collapsing that geometry down together.” What this means is now we can do vertex animated texture techniques using Nanite.
Slide 105 — 00:25:56
📌 要点汇总
- 使用了 Animate Texture 插件实现纹理动画效果
- 插件应用提升了视觉表现力和动态效果
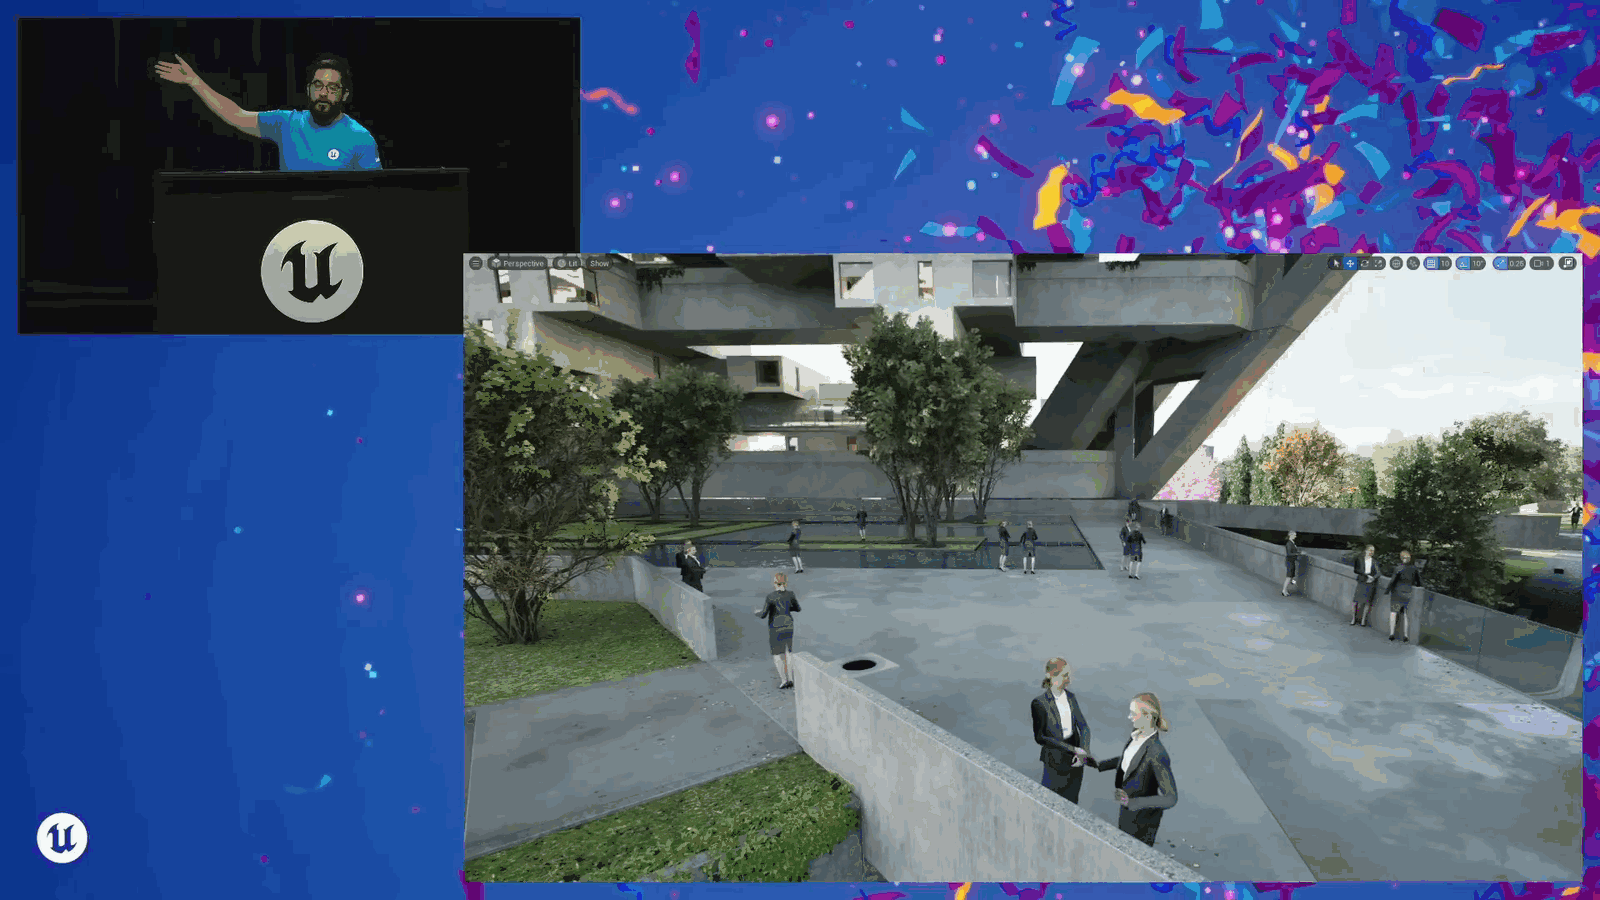
And what this looks like, I used the Animate Texture plugin on this.
Slide 106 — 00:26:01
📌 要点汇总
- 使用双运动资产生成小规模人群效果
- 将熔融纳米机器人转化为动态模拟系统
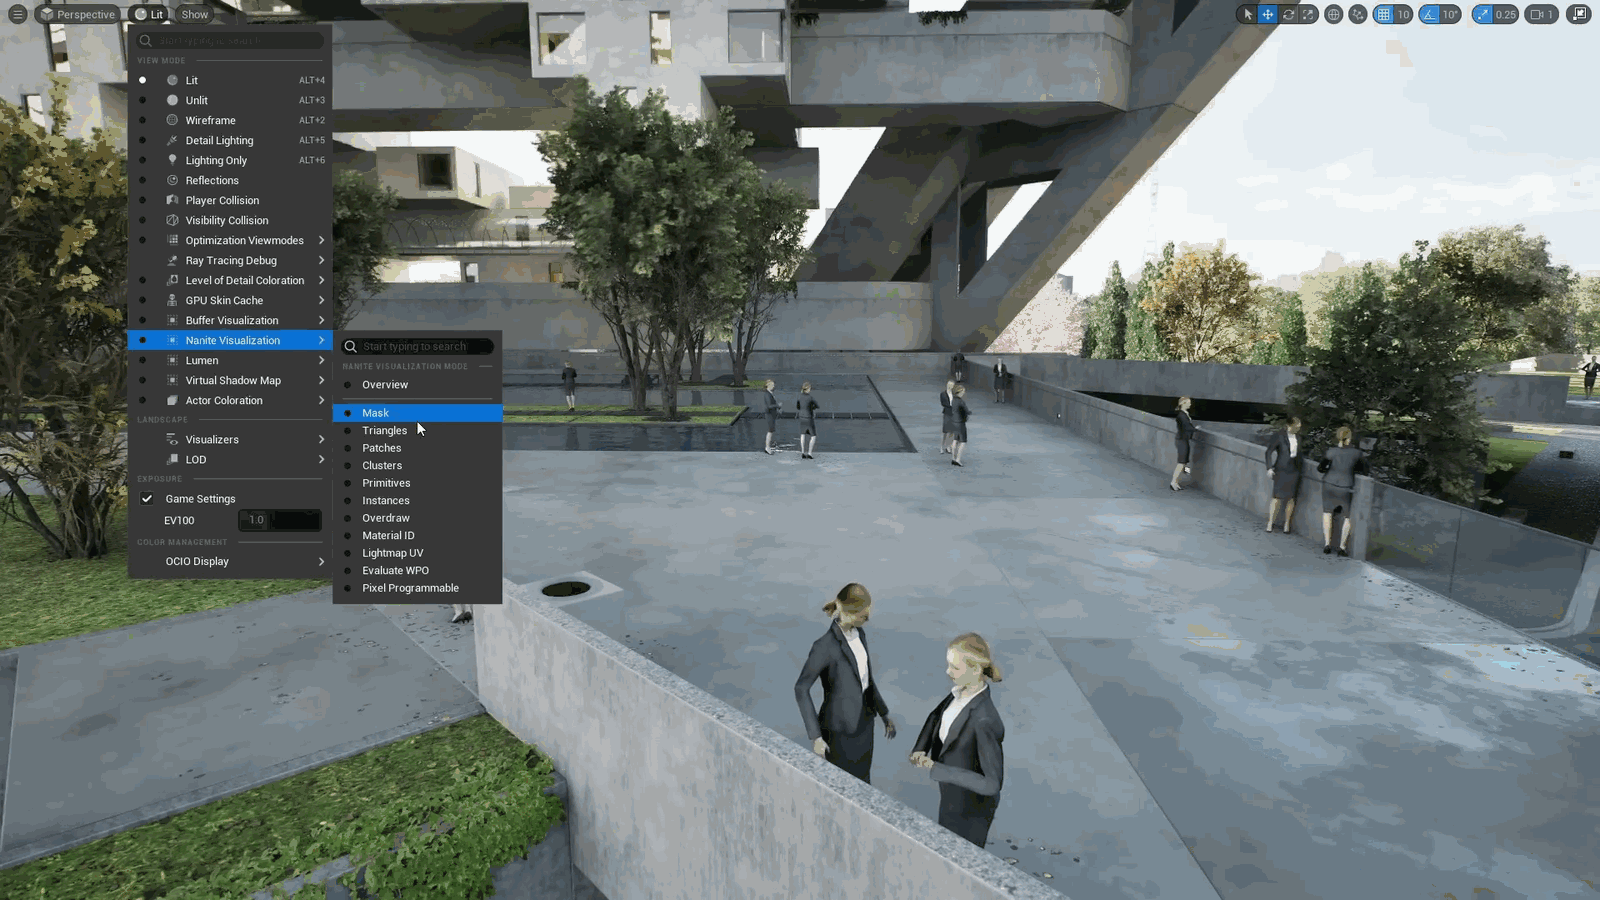
On these twin motion assets to generate a little crowd, and I turned the molten nanite into a dynamic simulation.
Slide 107 — 00:26:06
📌 要点汇总
- 提到使用纳米机器人(nanite)进行可编程光栅化处理
- 强调这一过程充满趣味性,但需注意编程控制细节
And now I have a little nanite crowd, which is a lot of fun. General recommendation here, though, because these are all going to be programmably rasterized.
Slide 108 — 00:26:14
📌 要点汇总
- 需要设置 WPO 距离以确保正确处理
- 建议使用当前一代的高分辨率角色网格
- 避免每个模型使用三百万三角形以保持性能
- 此功能可用于渲染人群等复杂场景
- 需要主动选择启用相关功能
Basically, treat them like trees, right? We have to make sure we have WPO distance set. We’re probably going to want to use a fairly current-gen resolution character mesh. We don’t want to go, three million triangles for each of these. But this is now an option for rendering things like crowds. So those are things that we have to opt into.
Slide 109 — 00:26:33
📌 要点汇总
- (过渡内容,无关键要点)
We might have to do a little bit of setup for the next couple of things. I want to talk about are things that you get for free with Five Four. So the first one, as my colleague Graham Wildall discusses in his recent GDC.
Slide 110 — 00:26:44
📌 要点汇总
- Nanite 着色现在在计算着色器中进行,实现了像素着色的突破性进展
- 使用计算着色器可避免之前因未使用材质导致的“空着色器 bin”问题
- 该改进提升了渲染效率并优化了资源管理
2024 talk Nanite GPU-driven materials. The first one is that now Nanite shading takes place in compute shaders, so we are finally using compute shaders to shade pixels, which is wild. The benefit here is that, as I talked about in New Orleans last year, if you had a bunch of materials referenced in your scene that weren’t Those created what were called empty shading bins.
Slide 111 — 00:27:07

📌 要点汇总
- 空着的着色 bin 会带来一些成本,因为需要在每个 bin 之间进行切换
- 通过计算,现在可以将所有内容合并,减少不必要的切换
- 现在只需关注屏幕上实际可见的像素和材质,减少开销
- 这种优化无需额外操作,提升了效率
Empty shading bins had a little bit of a cost because we had to transition between each of those. And now with compute, we can compact all of those together. Now we are only worrying about shading the pixels and the materials that are actually visible on screen. This is great. This reduces a bunch of overhead, and you don’t have to do anything for this.
The next one is as we, as he was building all of this out, we also got.
Slide 112 — 00:27:33
📌 要点汇总
- 可变速率着色纳米级技术显著提升了图形渲染效率
- 该技术允许对2x2像素块进行完整着色,而非简化处理
- 提高了图形细节表现,同时优化了计算资源利用
Variably rate shaded nanite, which is a really big improvement, because it means that now, if you are shading a two by two quad, you actually get to use all of those pixels instead of doing a two by two quad.
Slide 113 — 00:27:43
📌 要点汇总
- 每个像素都需要计算导数以实现正确着色
- 使用 ddx 或 ddy 会导致变量速率着色失效
- 材料中应避免使用 ddx 或 ddy 以保持兼容性
- 开发者可能不希望因此修改现有材料代码
For each pixel, so that you could get the derivatives. The thing you have to watch out for is that if you’re using things like ddx or ddy in your materials, that breaks variable rate shading, so you can’t use those in your materials. And you’re like, man, I really don’t want to. I’m not looking forward to having to go.
Slide 114 — 00:27:59
📌 要点汇总
- (过渡内容,无关键要点)
Through each of my materials to figure out where all of these things are. Don’t worry, I’ve got you. So all we have to do is R dot nanite dot visualize dot advanced one. See ours in the links at the end.
Slide 115 — 00:28:10
📌 要点汇总
- 新增 Nanite 的视图模式,包括无衍生操作模式
- 无衍生操作模式可提升渲染性能和灵活性
And that’s going to give me a few more view modes for Nanite, and one of them is no derivative ops.
Slide 116 — 00:28:16
📌 要点汇总
- 展示所有未使用显式导数(如 ddx 或 ddy)的蓝色材质
- 有助于识别潜在优化机会
- 可能影响着色器性能和精度
This is showing me all of the materials in blue that don’t use explicit derivatives like ddx or ddy.
Slide 117 — 00:28:22
📌 要点汇总
- 使用红色标记所有相关材料以便后续评估
- 需要判断是否必须使用DDX、DDY进行处理
- 该方法有助于对Nanite进行可变着色评级
And in red, all of the materials that are so. Now I can go find those materials and evaluate them. Do I really need to be using DDX, DDY? And this is going to help you make sure that you are able to variably rate shade your nanite.
Slide 118 — 00:28:35
📌 要点汇总
- 引入了基于 Nanite 的像素视图模式
- 该模式可提供更精细的视觉细节呈现
- 适用于需要高精度渲染的场景
Which is great. The other one, the other new view mode that has come online with Nanite that I wanted to highlight is the pixel view mode.
Slide 119 — 00:28:42
📌 要点汇总
- 可编程视图模式展示了被遮挡的材质、像素深度偏移和动态位移。
- 该功能会带来一定的性能成本。
Programmable view mode. So this is showing us all of the materials that are masked, pixel depth offset, or dynamic displacement. So again, there is going to be a cost.
Slide 120 — 00:28:53
📌 要点汇总
- (过渡内容,无关键要点)
This and pixel programmable is always going to be evaluated, so we have to go figure out what’s going on over there. But this is going to give you a little bit more information into digging into your Nanite performance, which is the next thing that I wanted to talk about. I think in New Orleans, I didn’t really talk about a philosophy of how to debug the performance of Nanite, so I wanted to do that. If you’ll bear with me, because one of the things that I found in talking to people.
Slide 121 — 00:29:19
📌 要点汇总
- 存在过度优化的本能倾向,容易针对尚未明确的问题进行优化。
There is a sort of instinct to over-optimize and to start optimizing for problems that are.
Slide 122 — 00:29:26
📌 要点汇总
- 本幻灯片讨论从性能调试角度分析Nanite的方法
- 第一步是确认Nanite是否存在问题
Are not there? So I want to talk about how we can look at nanite from a performance debugging point of view. So step one is it nan.
Slide 123 — 00:29:35
📌 要点汇总
- 提到Nanite在性能方面存在问题,影响帧率表现
- 需要确定Nanite的预算,例如在16毫秒帧时间内可接受的毫秒数
- 问题分析将从两个具体位置入手进行排查
I’ve talked to some people before. They’re debugging machines, like, “Oh man, nanite! You know, we really gotta, we really gotta solve this problem with nanite. Nanite’s causing us a bunch of performance problems.” Like, great. What’s your nanite budget? How many milliseconds are you willing to spend on nanite in a 16 millisecond frame? Is nanite over that? Great. Okay, now we can start talking about it. And there’s two places that we’re going to look for this. The first one, the first place we’re going to look for this.
Slide 124 — 00:30:00
📌 要点汇总
- 展示了可编程光栅化技术(Programmable Rasterization)
- 使用 Nanite Viz Buffer 进行 GPU 可视化
- 通过 Control + Shift + Comma 触发可视化功能
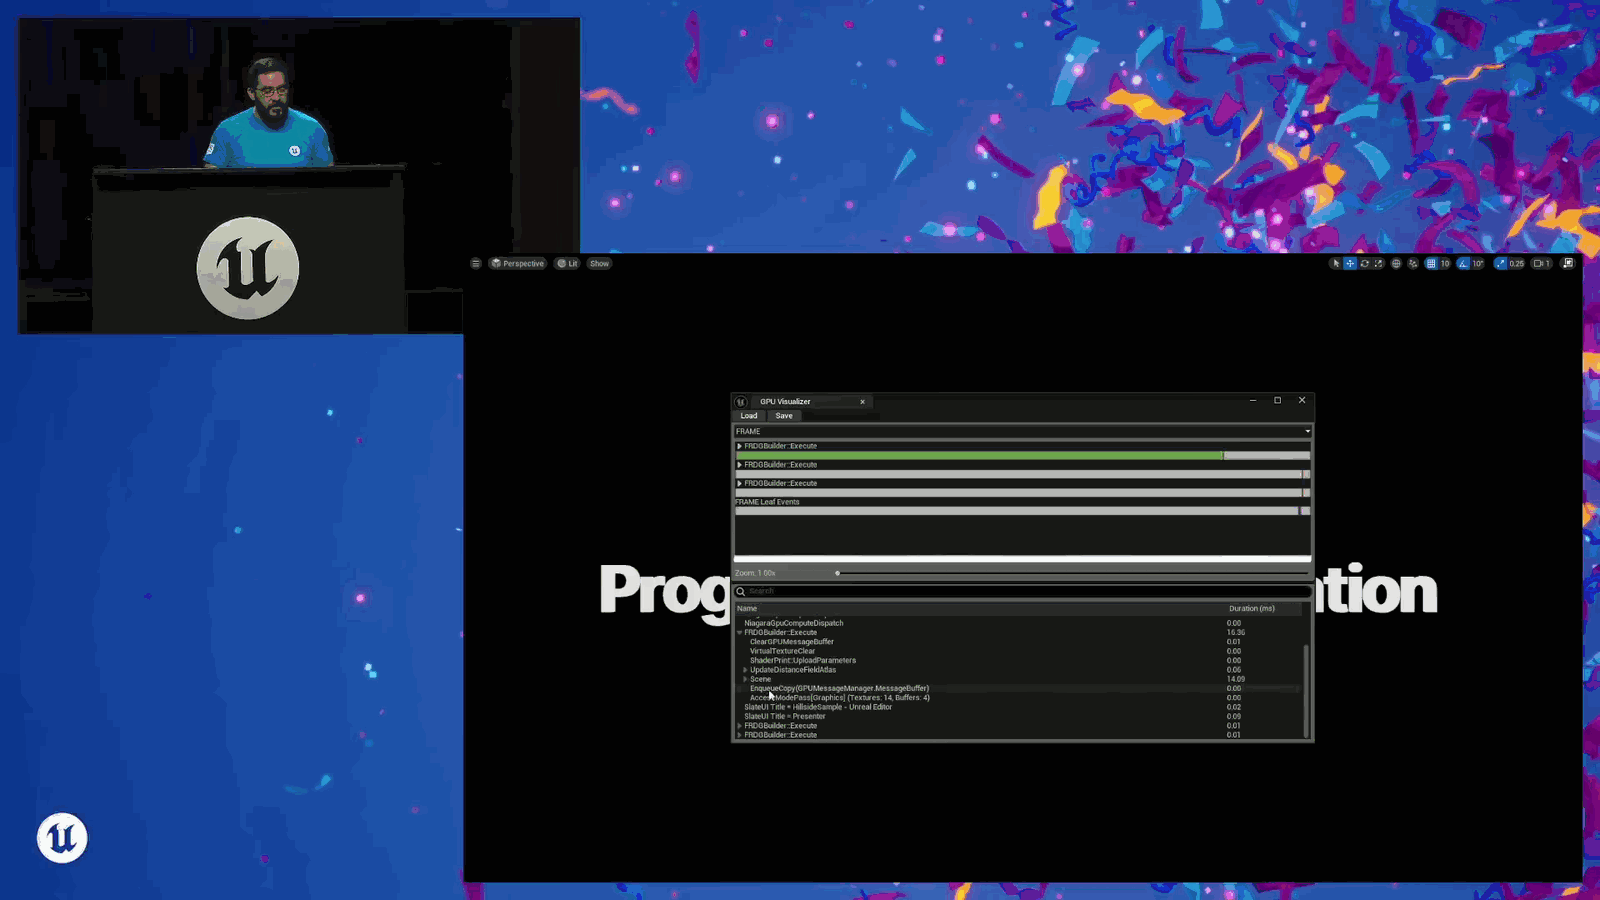
Is programmable rasterization, and this is the Nanite viz buffer. So, if we do a GPU visualizer with Control Shift Comma, this is going to show.
Slide 125 — 00:30:08
📌 要点汇总
- 通过 R.Nanite.show mesh draw events 可查看 Nanite 性能相关信息
- 使用 GPU visualizer 可深入分析 Nanite viz buffer 的绘制几何体主通道
- 可区分硬件光栅化与软件光栅化的表现
- 该方法有助于识别 Nanite 性能问题的根源
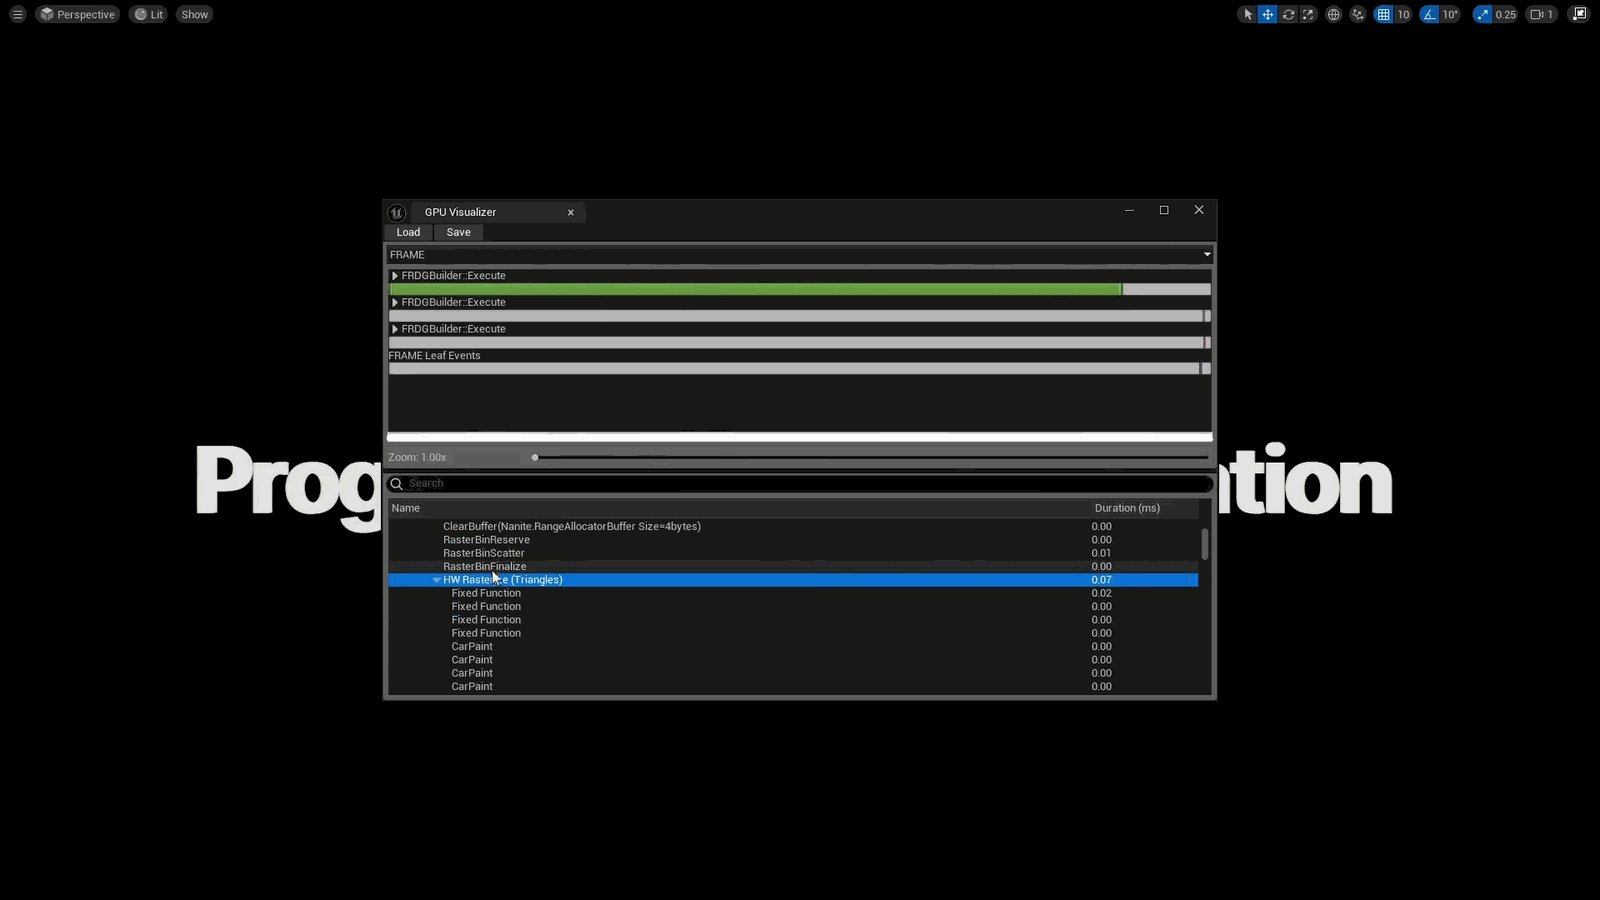
Me in the scene Nanite viz buffer. So this is usually where we see some problems with Nanite performance. This is where programmable rasterization specifically comes into play. So if we want to see more information about that, we just have to do R dot Nanite dot show mesh draw events one. And then if we do another GPU visualizer, I can dig into that scene value and go to Nanite viz buffer draw geometry main pass. And this is going to show me hardware rasterize and software rasterize. And if I expand this out, this shows me.
Slide 126 — 00:30:38
📌 要点汇总
- 函数光栅化处理不透明且不可变形的对象及可编程光栅化的材质。
- 包括WPO max材质等,用于判断问题是否出在固定函数或光栅化单元的累积计算中。
- 通过分析这些值,可以确定问题来源并进行针对性优化。
Function rasterization, which is all of the stuff that is opaque and non-deforming, and all of the materials that are programmably rasterized for whatever reason, right? WPO max materials and so on. So this gives me some information, and I can look at these values and go, okay, is my issue in fixed function or is it in the accumulation of all of these raster bins and their various evaluations, right? So now I can figure this out. Now the way that I kind of look at this. If I wanted to, kind of.
Slide 127 — 00:31:08
📌 要点汇总
- 通过 Nanite 可视化工具进一步诊断问题
- 评估 WPO(World Position Output)以识别可编程光栅化的对象
- 每个像素需要执行顶点着色器三次,影响性能
- 红色区域表示潜在性能瓶颈或渲染问题
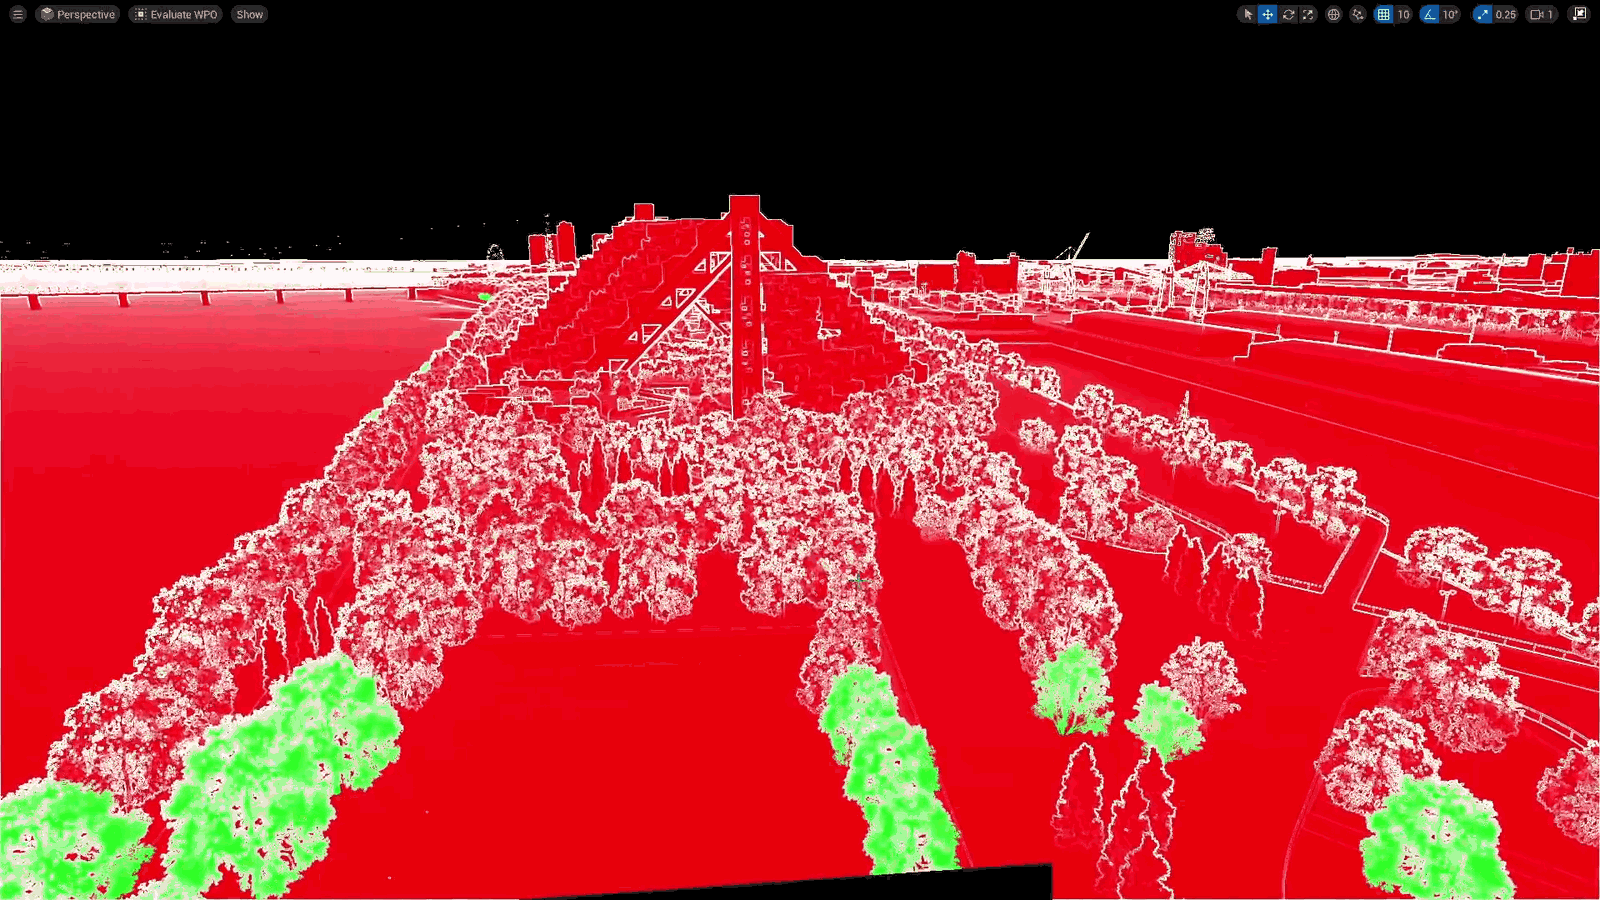
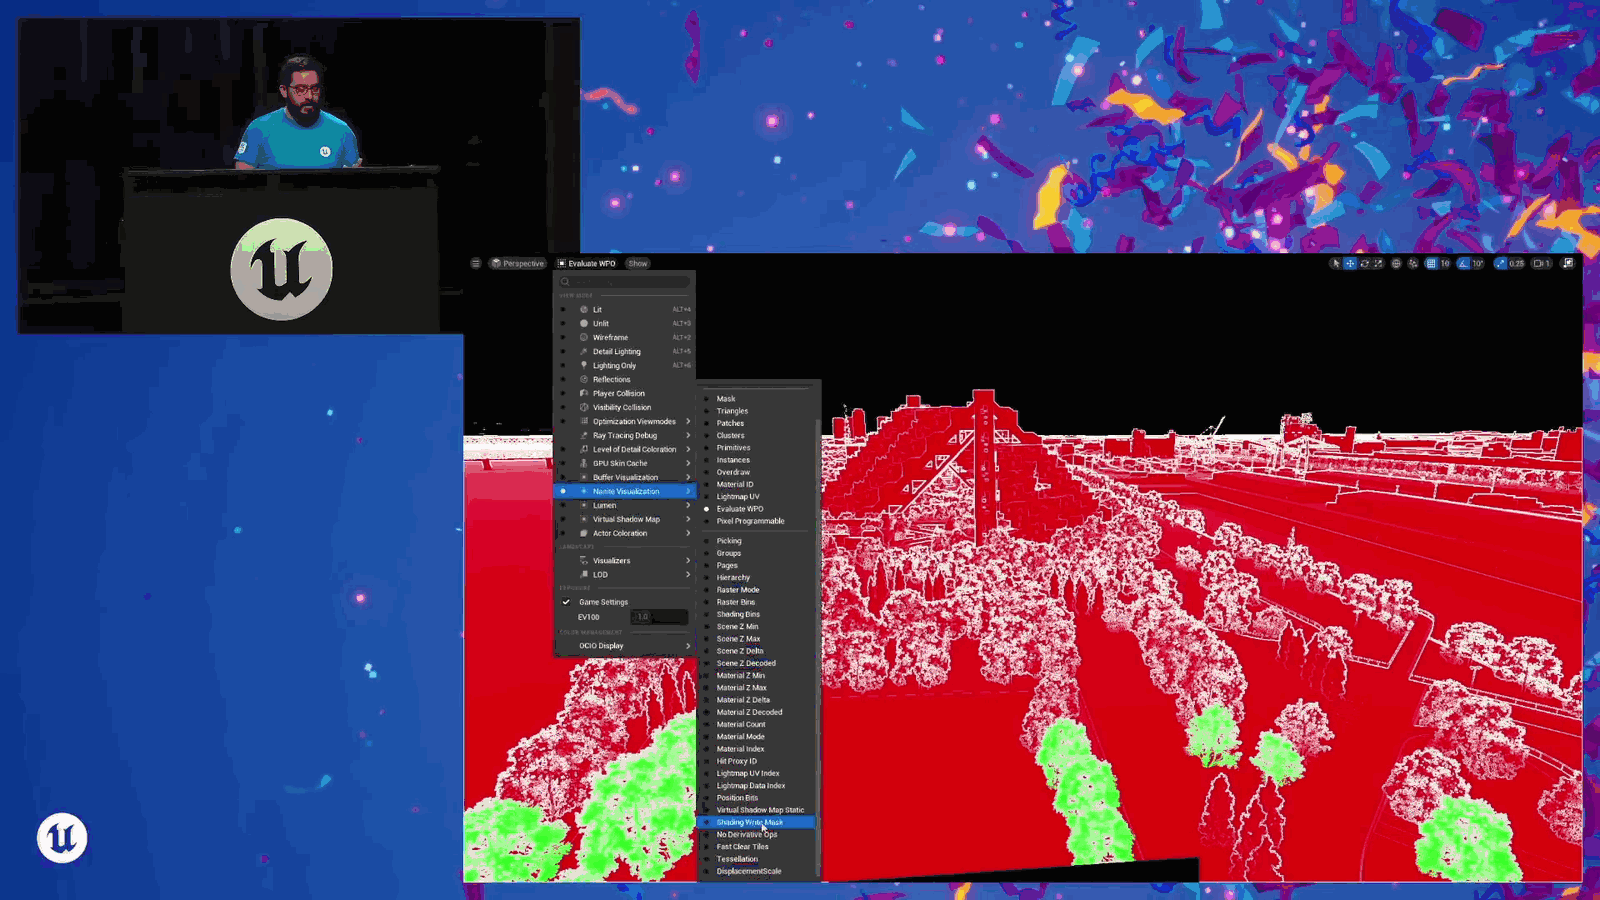
Diagnose it further. Start figuring out the binary tree. The first thing that I’m going to do is go to Nanite visualization. Evaluate WPO. So this is going to show me all of the things that are going to be programmably rasterized. We have to evaluate all of the vertex shader three times per pixel, and so on and so forth. If this view is mostly red and my…
Slide 128 — 00:31:27
📌 要点汇总
- 可编程光栅化成本较高,可能与遮罩材质有关
- 场景中可能存在大量遮罩材质
- 需要进一步检查遮罩材质对性能的影响
Programmable rasterization cost is high. I might then assume that the issue is with masked materials. I might have a lot of masked materials in my scene, and I can see that if I go into.
Slide 129 — 00:31:38
📌 要点汇总
- 提到像素可编程视图模式,超出WPO评估范围
- 首先关注mask material的实现细节
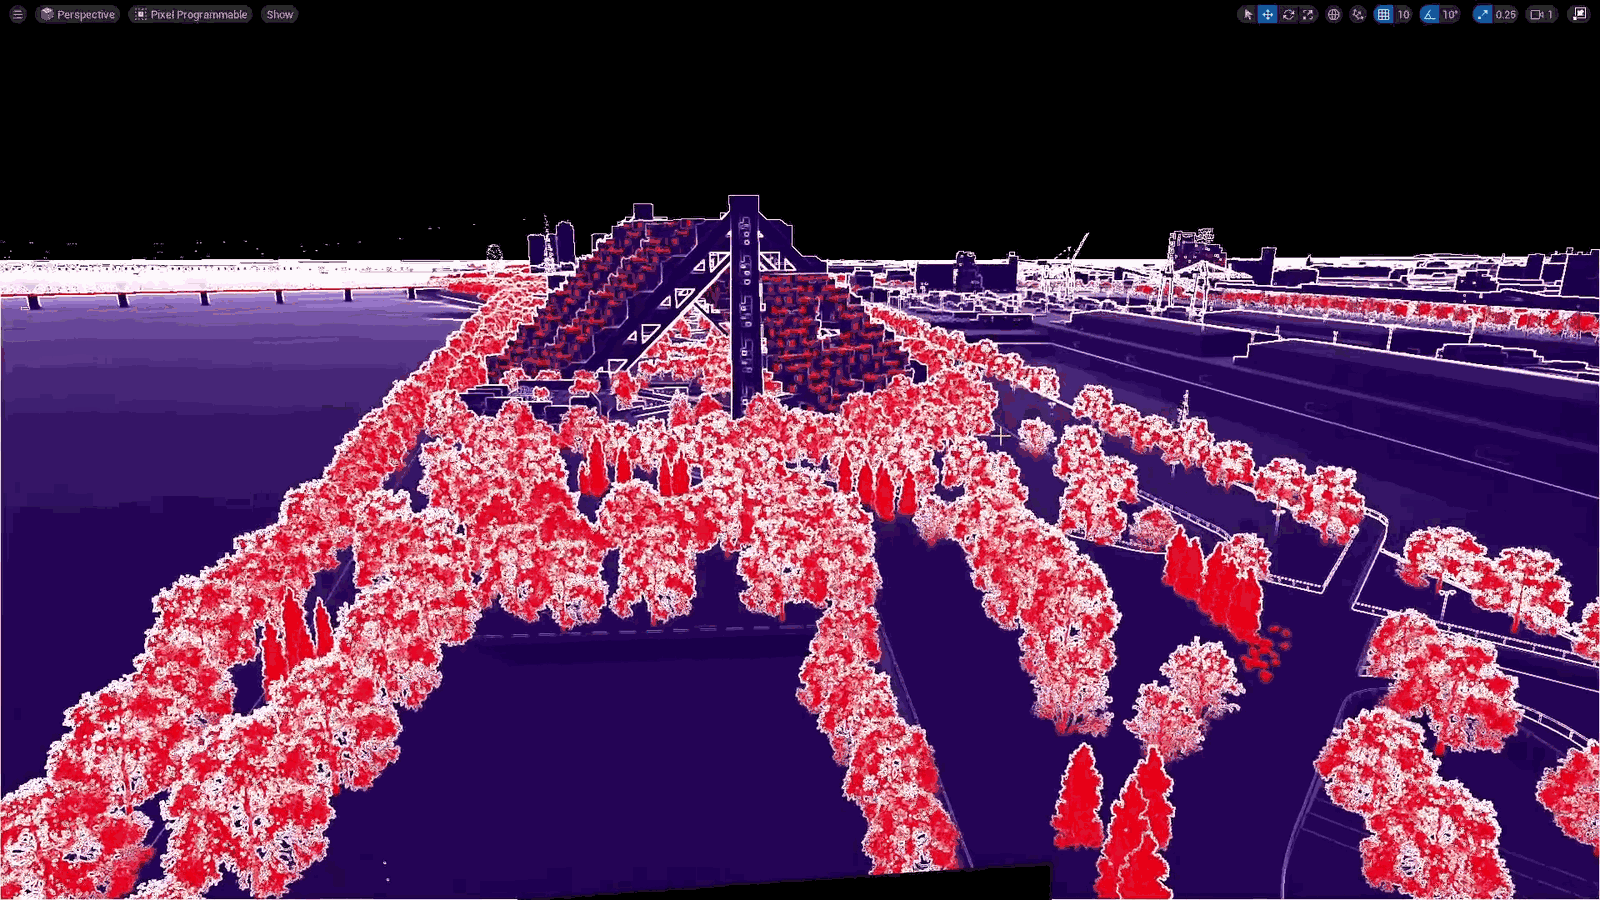
Our pixel programmable view mode. So, there’s a lot more pixel programmable stuff than is being evaluated in WPO. So, maybe the first thing I’m going to look at is my mask material.
Slide 130 — 00:31:47
📌 要点汇总
- 该幻灯片讨论了非可编程像素和顶点处理的固定功能光栅化技术
- 强调了固定功能光栅化适用于不透明且非变形的图形渲染场景
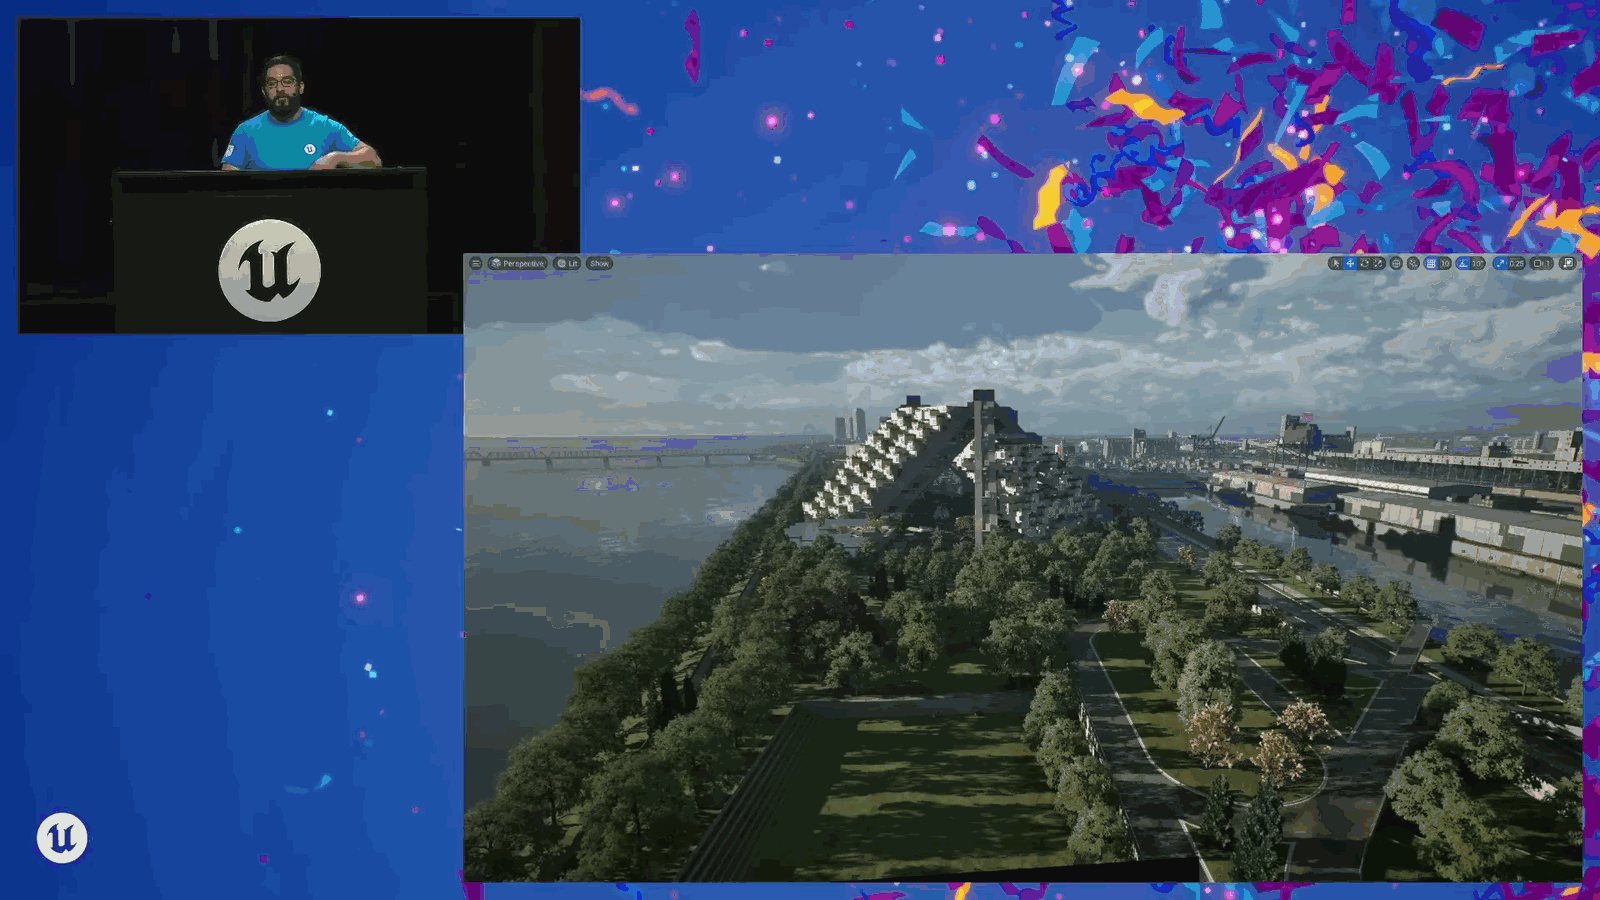
Right? Okay. So maybe it’s not either of those. Maybe you have no pixel programmable. You have no vertex programmable. Great. So that—and then we start looking at fixed function rasterization, which is all of the stuff that is opaque and non-deforming.
Slide 131 — 00:31:57
📌 要点汇总
- 提到 Nanite Overdraw 作为需要关注的性能指标
- 可能涉及渲染效率与图形处理优化问题
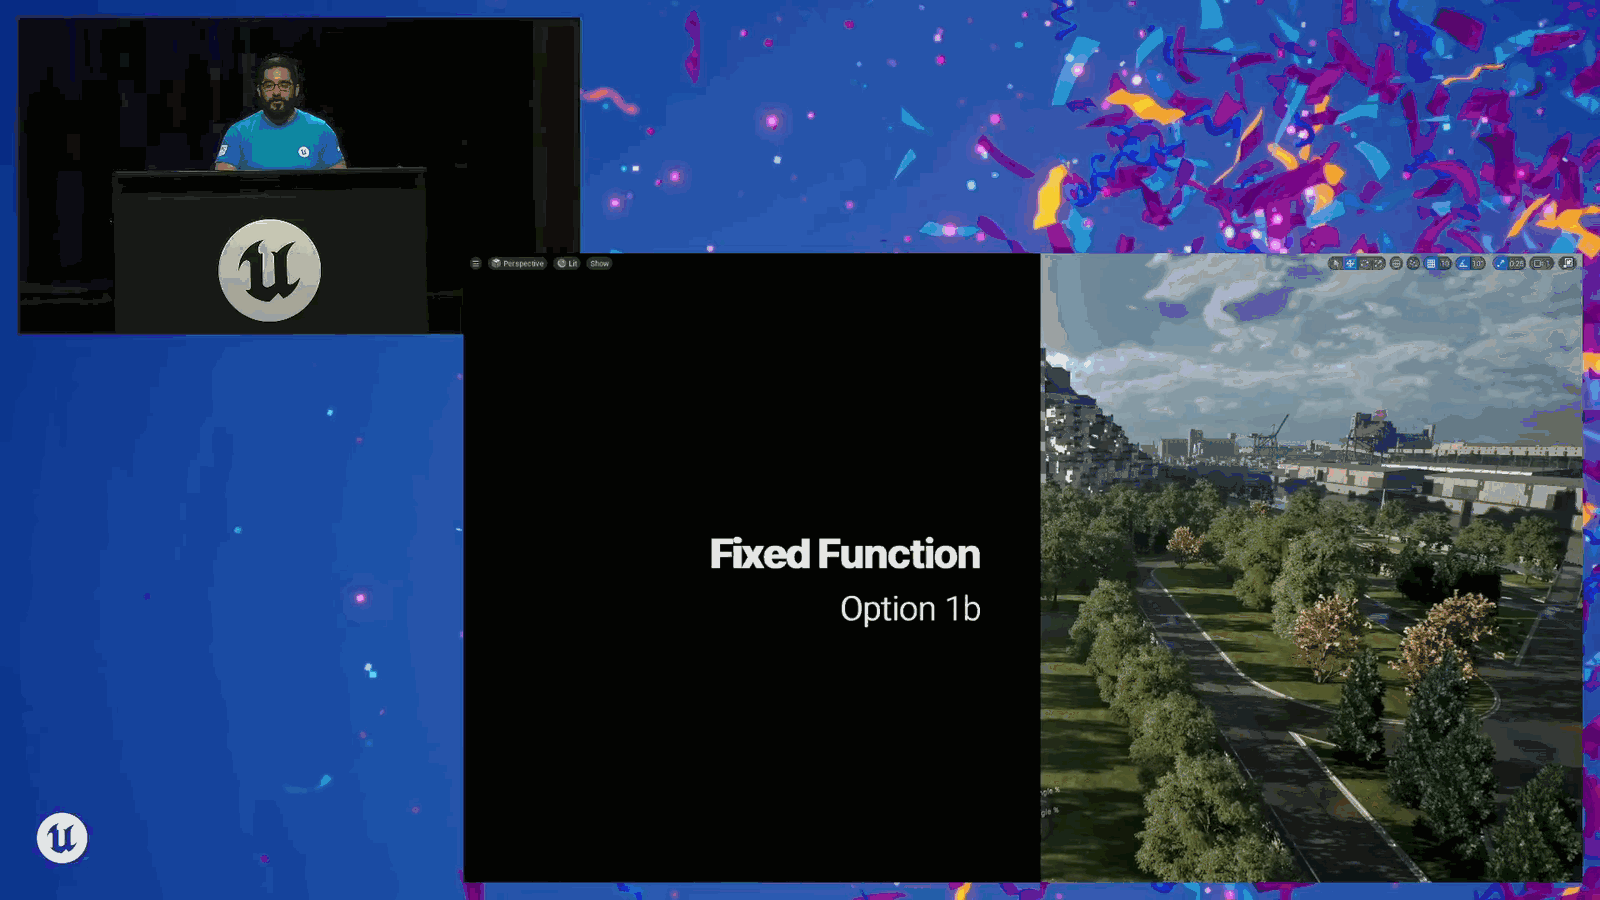
And the first, one of the things that you might look at here is nanite overdraw, and you’ll.
Slide 132 — 00:32:08
📌 要点汇总
- 首次提及Nanite性能中的overdraw问题
- 常见流程是从Nanite可视化转向overdraw分析
- 这是首次指出overdraw问题的切入点
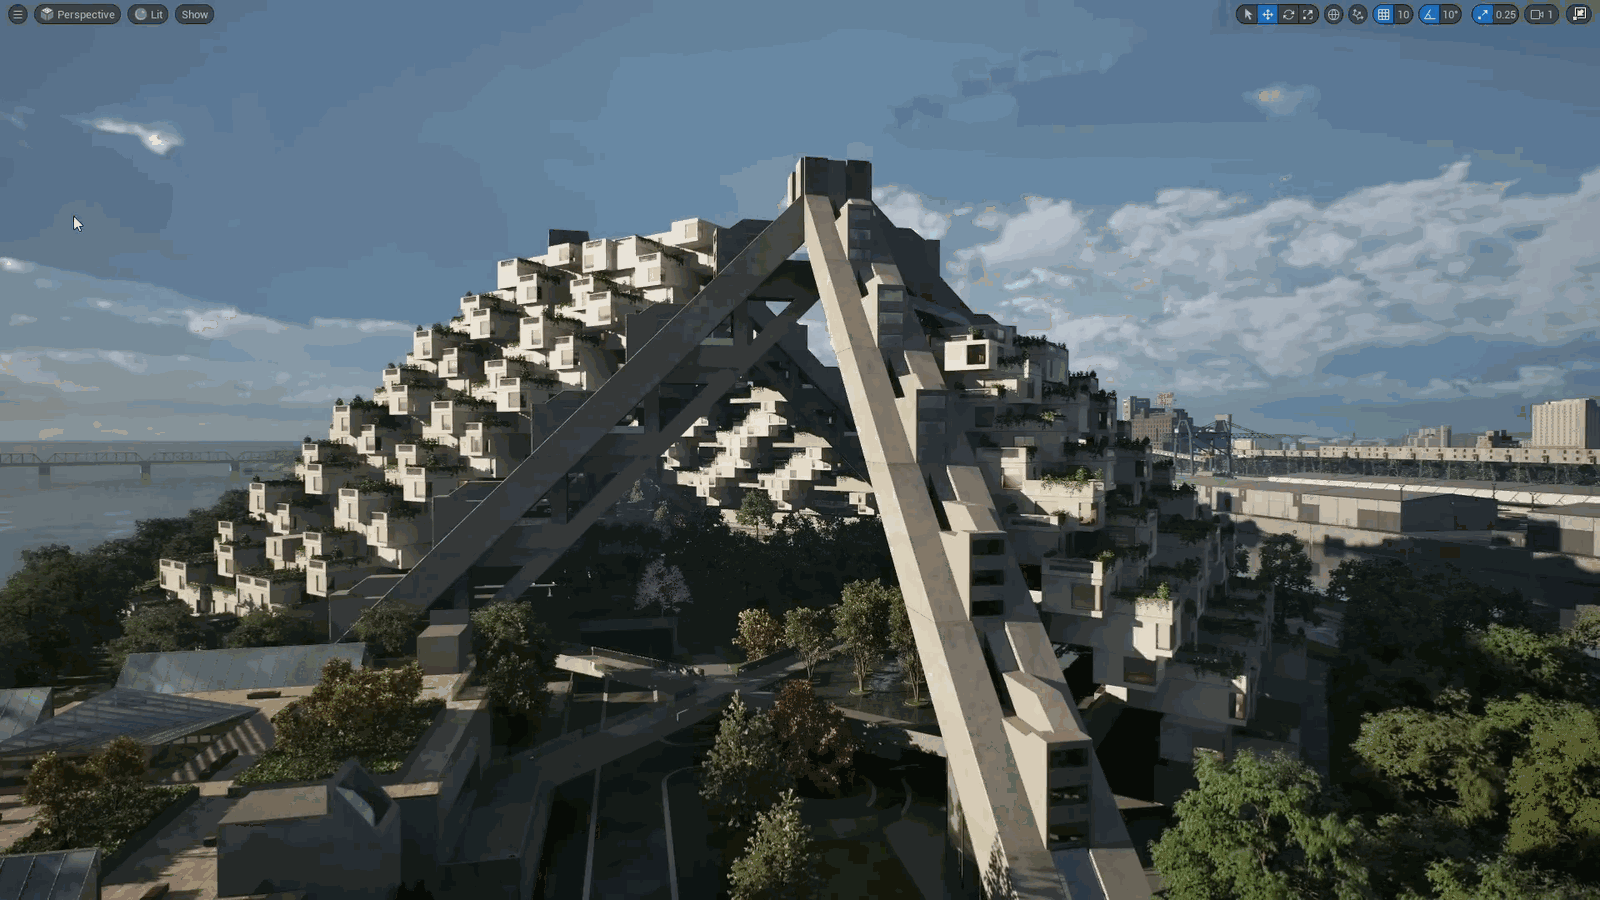
Notice that I’ve been talking about Nanite performance for a bit, and this is the first time that I’m bringing up overdraw. I feel like one of the things that I see happening a lot is we go from Nanite visualization to overdraw, and this is our first port of call to say there.
Slide 133 — 00:32:23
📌 要点汇总
- 存在纳米机器人性能问题
- 当前视图模式使用方式不符合预期
There is a nanite performance issue, and that’s not really how I want you to be using this view mode.
Slide 134 — 00:32:29
📌 要点汇总
- 该视图模式用于诊断性能问题的来源
- 不直接表明存在过度绘制问题
- 可帮助定位问题并提供解决方法
- 白色像素是识别问题的关键视觉线索
I want you to use this view mode as a tool. I have noticed a performance problem, and this is a tool to diagnose where that issue might be coming from. This is not telling you there is an issue with an overdraw. It can tell you where that issue might be and how you can resolve it. So it’s really easy for us to look at this view mode and go, ah, there are white pixels.
Slide 135 — 00:32:44
📌 要点汇总
- 白色像素表明存在大量Nanite过度绘制问题
- 需要立即采取措施解决Nanite过度绘制问题
White pixels is a lot of nanite overdraw, so I immediately have to start solving for that.
Slide 136 — 00:32:54
📌 要点汇总
- 讨论 Nanite Overdraw 问题及缓解方法
- 提到使用 shipping containers 示例进行说明
- 强调在内容构建阶段即可减少问题影响
I would prefer if you didn’t. But I want to talk about Nanite Overdraw because there’s a few different things that we can do when we’re building our content to mitigate the issue out of the gate, so that we never have to worry about that, or we can worry about it less. So we’ve got these shipping containers here, and I want to talk about these. So we go into wire.
Slide 137 — 00:33:13
📌 要点汇总
- 这些三角形非常细长,对 Nanite 的表现不利
- 细长三角形导致 Nanite 可视化聚类效果不佳
- 整个集装箱侧面仅由少数聚类组成,影响细节表现
We can see that these are really long, thin triangles, which is not really great for Nanite. And one of the reasons for that is we go to Nanite visualization clusters. You can see that the whole side of this shipping container is comprised of a few clusters.
Slide 138 — 00:33:24
(该幻灯片时间段内未检测到语音内容)
Slide 139 — 00:33:30
📌 要点汇总
- Nanite 可以遮挡集群,无需渲染不可见的集群
- 部分可见的集群可能导致过度绘制问题
- 示例中集装箱因部分可见导致渲染冗余
And those aren’t going to partially occlude, right? And one of the really cool things about Nanite is we can occlude clusters. We don’t have to rasterize clusters that aren’t visible. But if these clusters are partially visible, you can see this shipping container is almost totally overdrawing this other shipping container because those clusters are partially visible. So even if I go.
Slide 140 — 00:33:49
📌 要点汇总
- 需要将下方内容进行光栅化处理以确保顶部边缘可见
- 光栅化是实现视觉层次的关键步骤
- 处理过程中需注意图层叠加效果
Along here, right? I can see that top edge, so I have to rasterize all of the stuff underneath.
Slide 141 — 00:33:54
📌 要点汇总
- 使用几何脚本工具对模型进行粗略且均匀的重新网格化
- 旨在优化 Nanite 的过度绘制问题,避免过度优化
- 演示在构建过程中可采取的一种实用方法
Right, so maybe there’s a better way we can be building our content so that we can better leverage things like we can improve our nanite overdraw without necessarily going in and immediately over-optimizing everything. So what I’ve got here is a I used our geometry scripting tools to somewhat crudely remesh these and uniformly remesh these so I could demonstrate a thing that you can do as you’re building.
Slide 142 — 00:34:17
📌 要点汇总
- 展示了集群视图模式下,各个集群分布在表面的不同位置
- 进入Nanite Overdraw模式后,可以看到后方的集装箱部分被遮挡
So I can go to my clusters view mode, and you can see that now I’ve got individual clusters scattered all over the surface. So if I go into Nanite Overdraw, what we’ll see is that the shipping container behind is being partially occluded.
Slide 143 — 00:34:34
📌 要点汇总
- 随着集群变得不可见,系统不会进行光栅化处理
- 该方法能够保持对单个集装箱的高精度渲染
- 未出现细节丢失问题,渲染效果保持良好
Right, as we move around, as those clusters become invisible, we’re not rasterizing them. This is great. We want this, and you can also see that even the one shipping container — it’s still rendered accurately without any loss of detail.
Slide 144 — 00:34:45
📌 要点汇总
- (过渡内容,无关键要点)
Itself is more effectively partially occluding itself. This is right. We can build our content.
Slide 145 — 00:34:51
📌 要点汇总
- 集群剔除可提升 Nanite 过绘制性能
- 静态网格紧密堆叠会导致过绘制和穿透问题
- 集群剔除基于边界,紧密堆叠物体无法剔除
- 过度堆叠的物体(如集装箱)会影响渲染效率
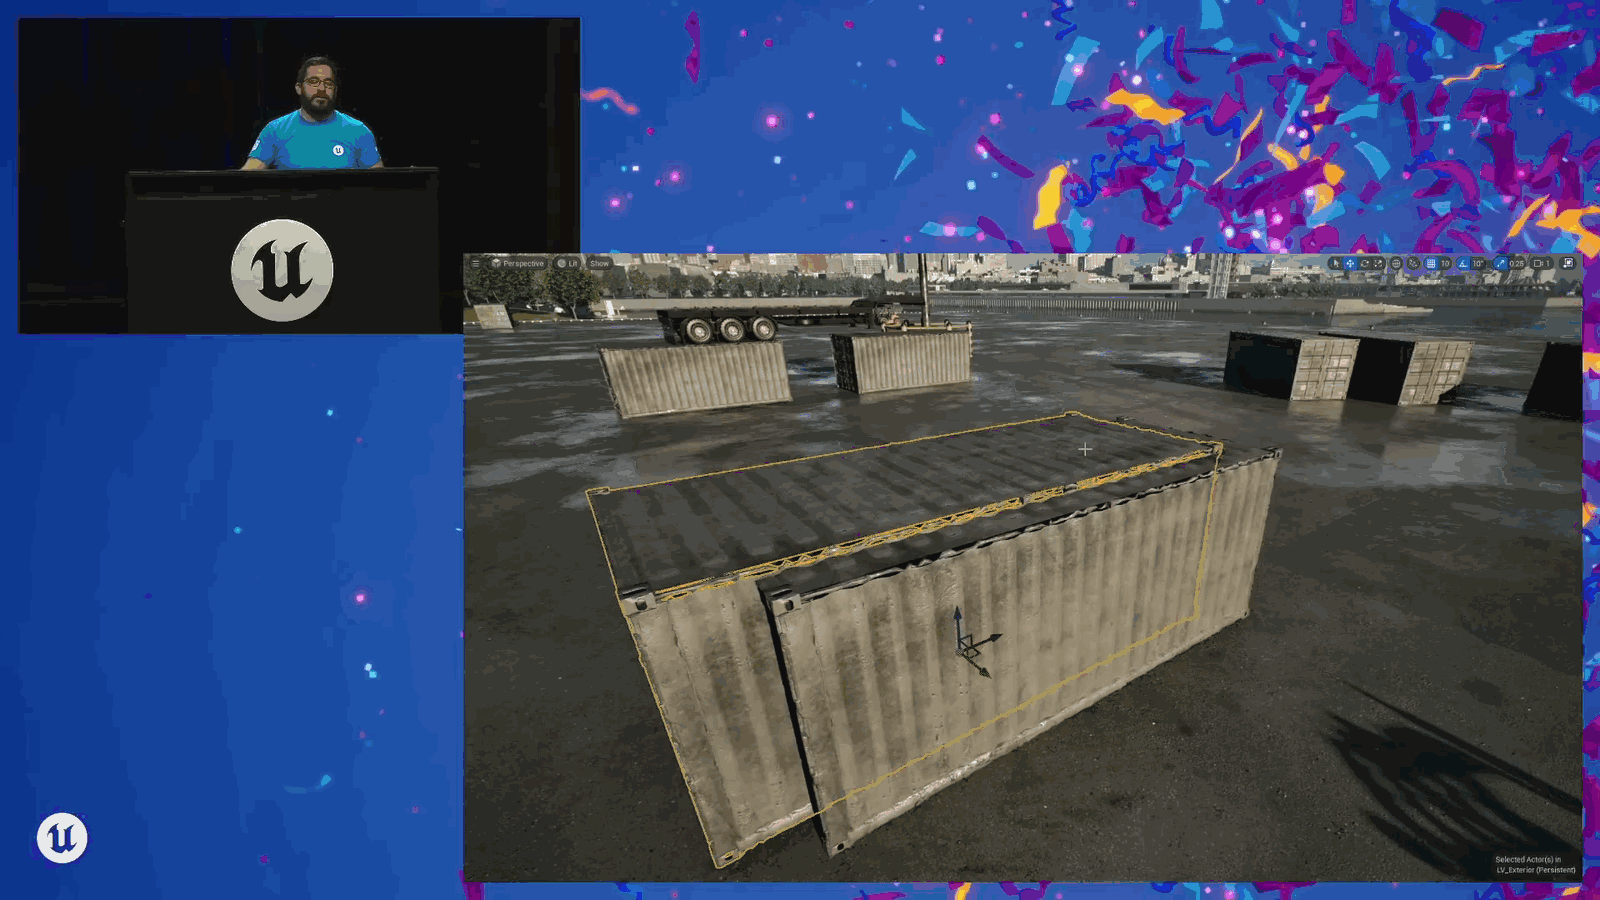
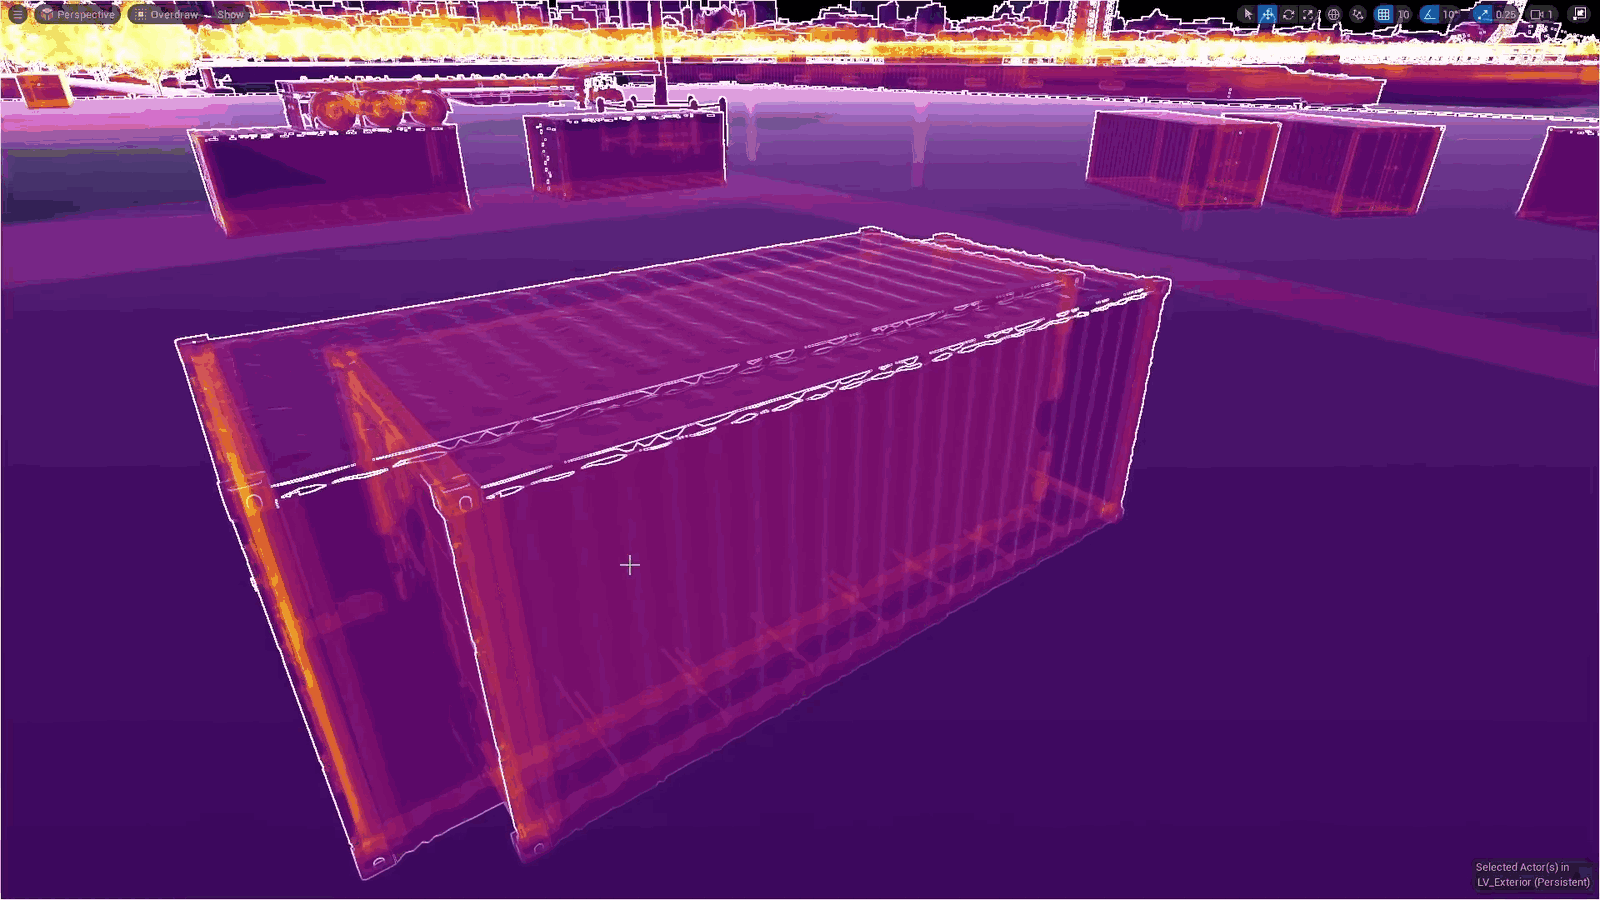
Thinking about cluster culling, it’ll give us more efficient Nanite overdraw performance. There are a couple of things we can do that cause more problems with Nanite overdraw and its interpenetration. So if I jam a bunch of static meshes together, they’re partially overlapping. Clusters are culled based on bounds. So if you have stuff that’s really closely stacked, like these shipping containers, we can’t cull those clusters.
Slide 146 — 00:35:14
📌 要点汇总
- 避免将大量静态网格合并,以减少过度绘制(overdraw)问题
- 合理构建场景可有效优化图形渲染性能
And so we get even more overdraw. So as you’re building out your worlds, make sure that you’re not jamming a bunch of static meshes together—we can ensure that we are not going to run into these kinds of overdraw issues.
Slide 147 — 00:35:26
📌 要点汇总
- (过渡内容,无关键要点)
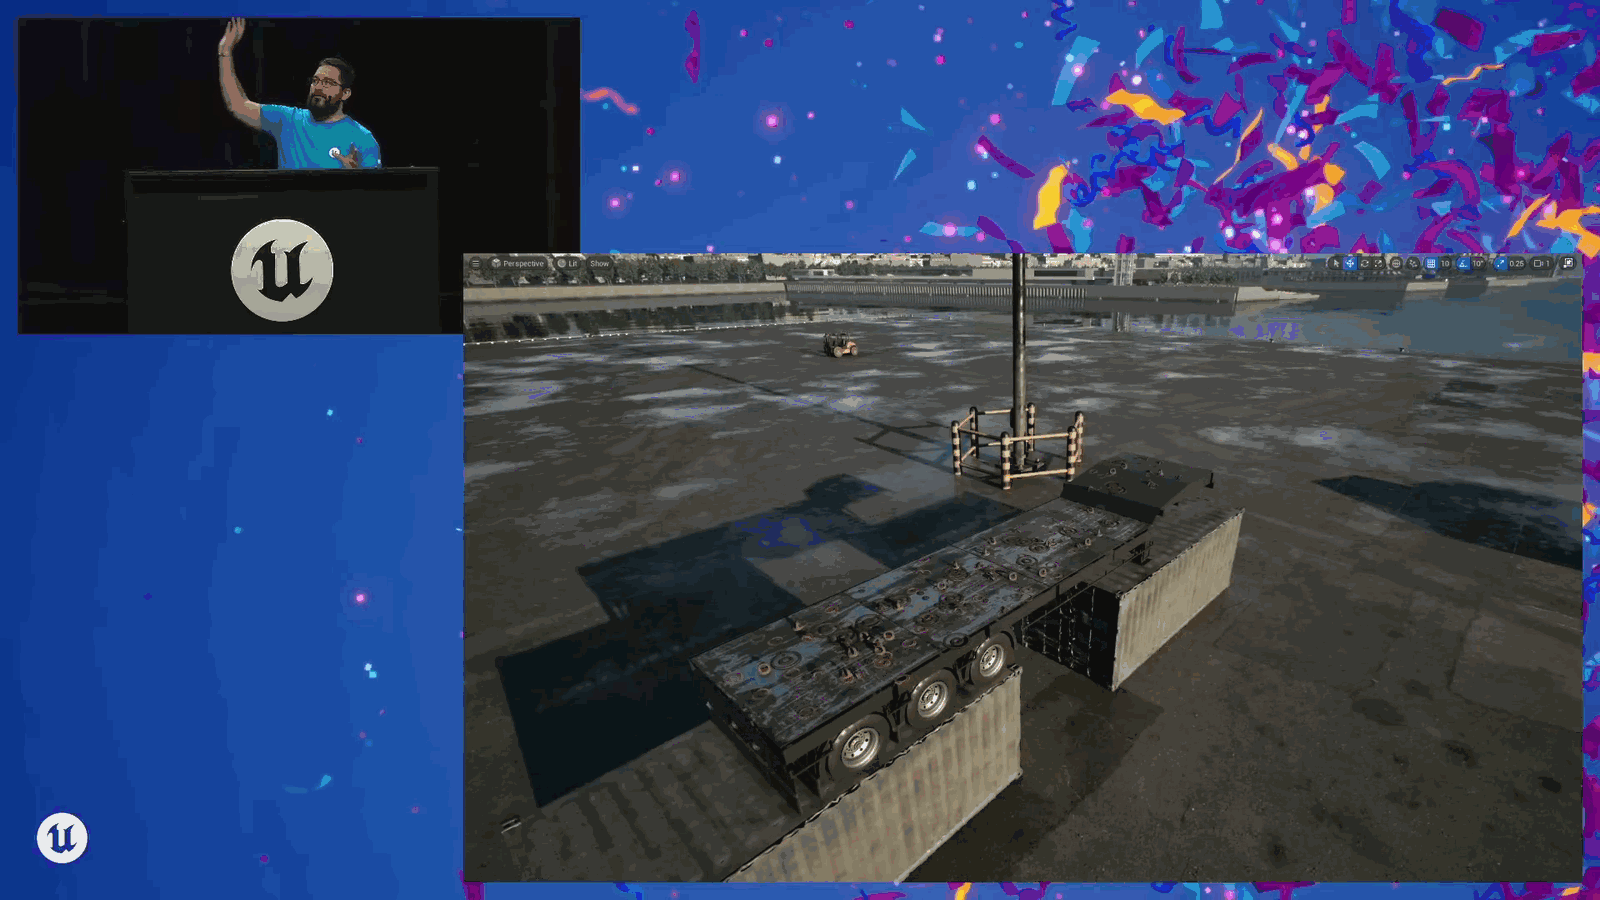
Right, so this is a preventive measure. The other thing that I see a lot with nanite is greblies. Right, I want to scatter a bunch of stuff over my sci-fi.
Slide 148 — 00:35:36
📌 要点汇总
- 展示了一个类似飞船的设计示例,使用了Quixel Megascans的新素材
- 提到Nanite Overdraw功能,可能用于优化渲染性能
- 示例设计风格接近Greblies,但为简化版本
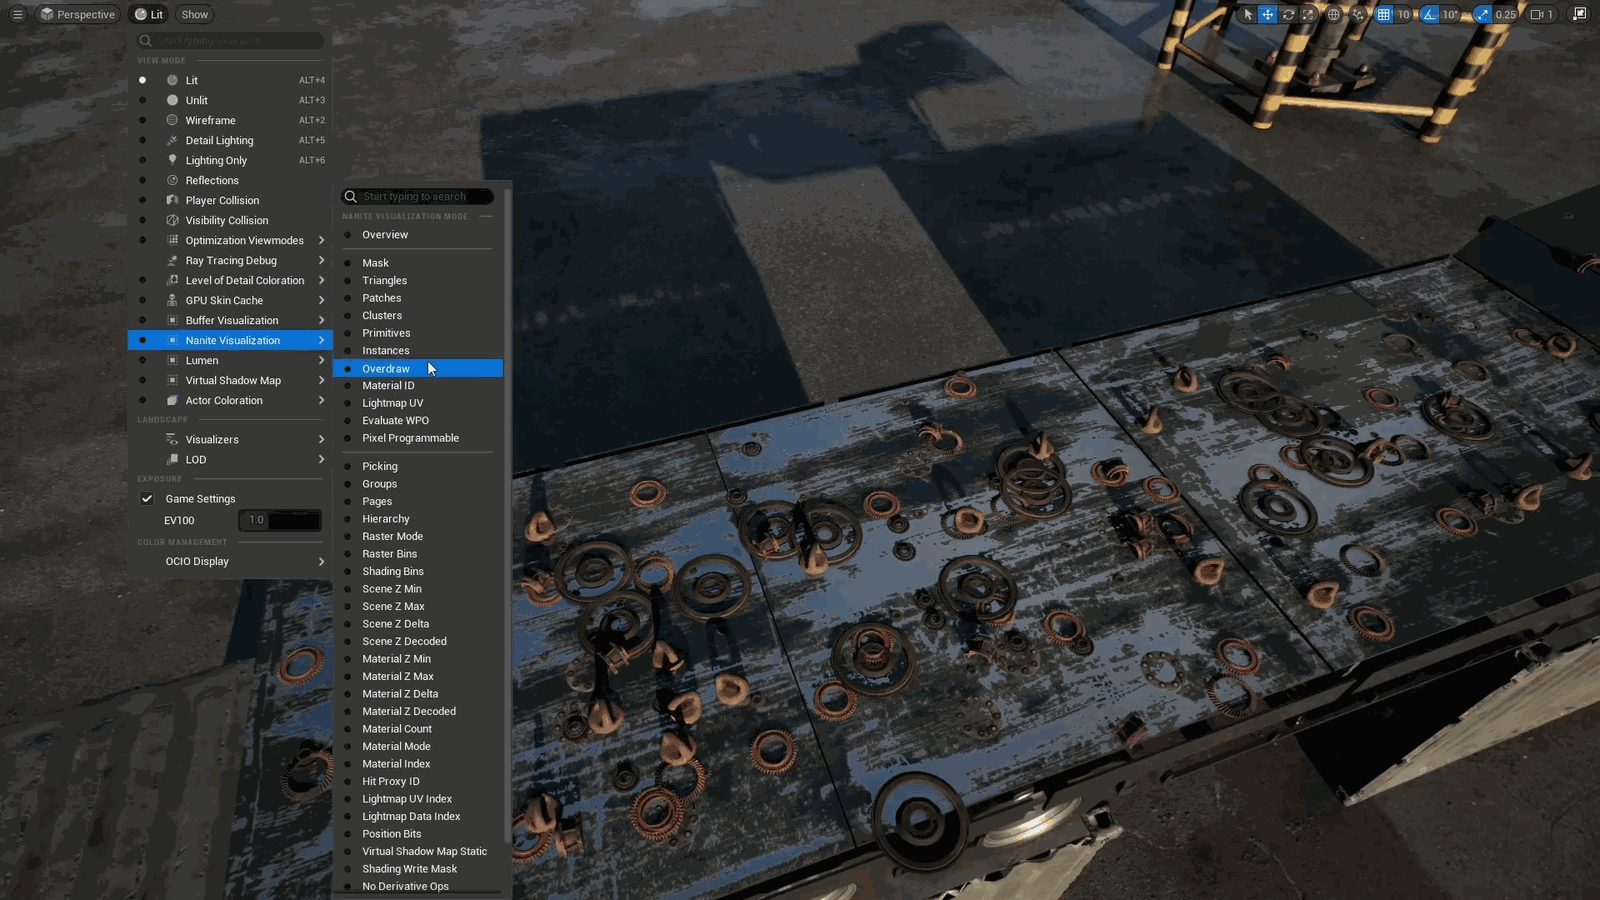
Spaceship or something like that. I have very crudely mocked up an example here with some new assets from Quixel Megascans that look a lot like Greblies. But if I go into Nanite Overdraw, you might.
Slide 149 — 00:35:47
📌 要点汇总
- 提到过度绘制(overdraw)可能因大面积平坦表面而加剧
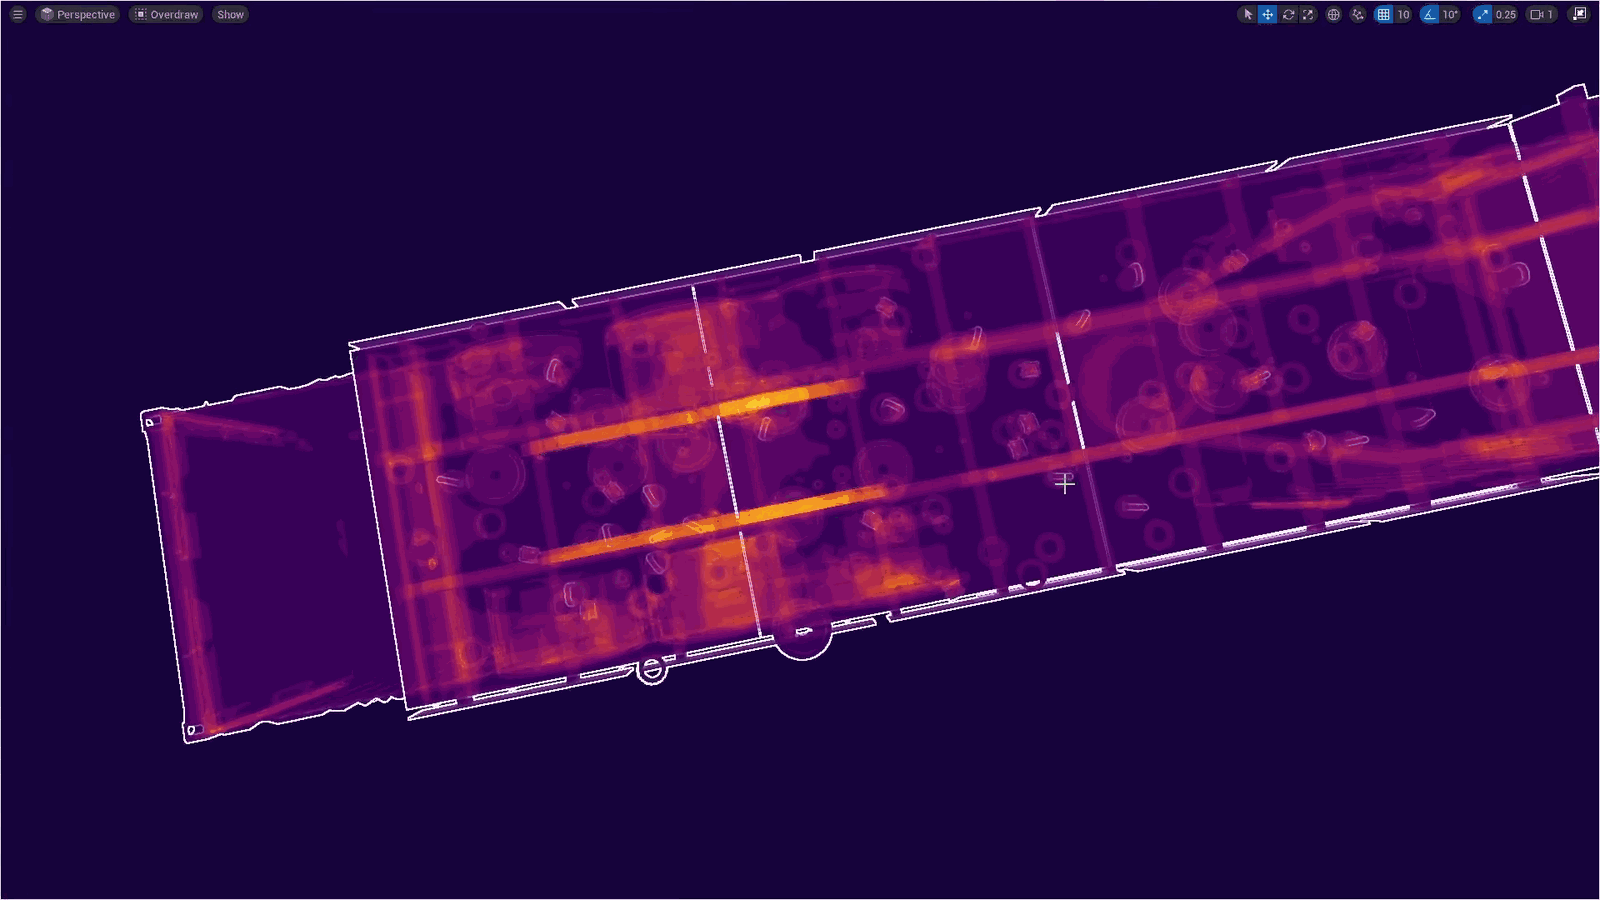
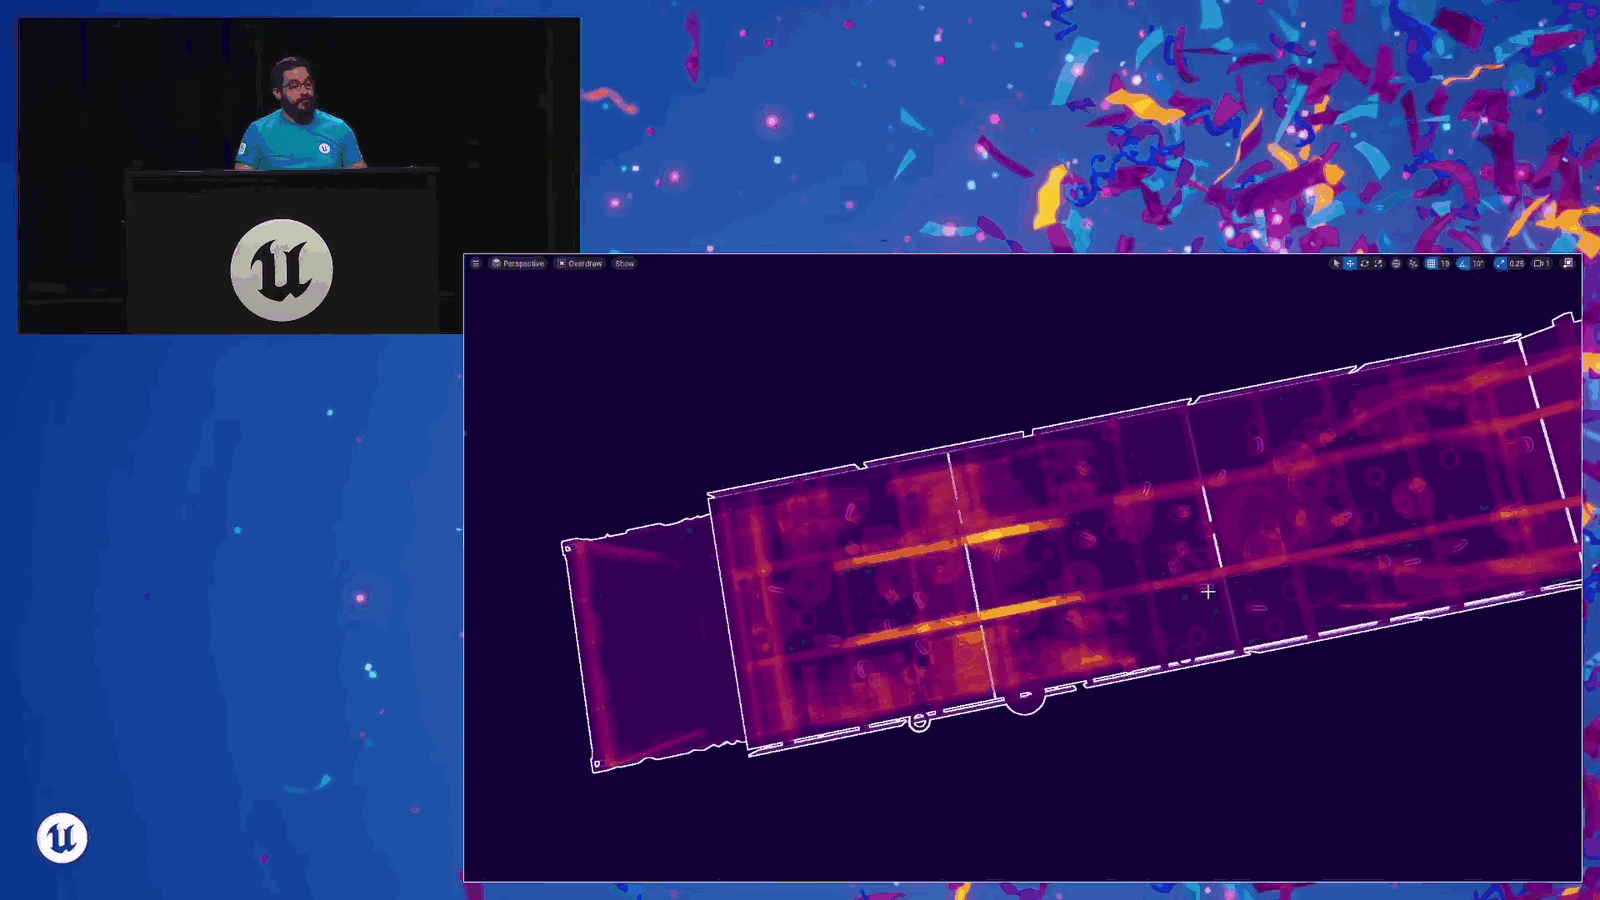
- 强调渲染性能优化需考虑几何结构特点
Think like, oh man, that’s going to cause a lot of overdraw. But because they’re sitting on a really large flat surface.
Slide 150 — 00:35:53
📌 要点汇总
- 大面积平坦表面会遮挡下方内容,避免产生大量Nanite过度绘制
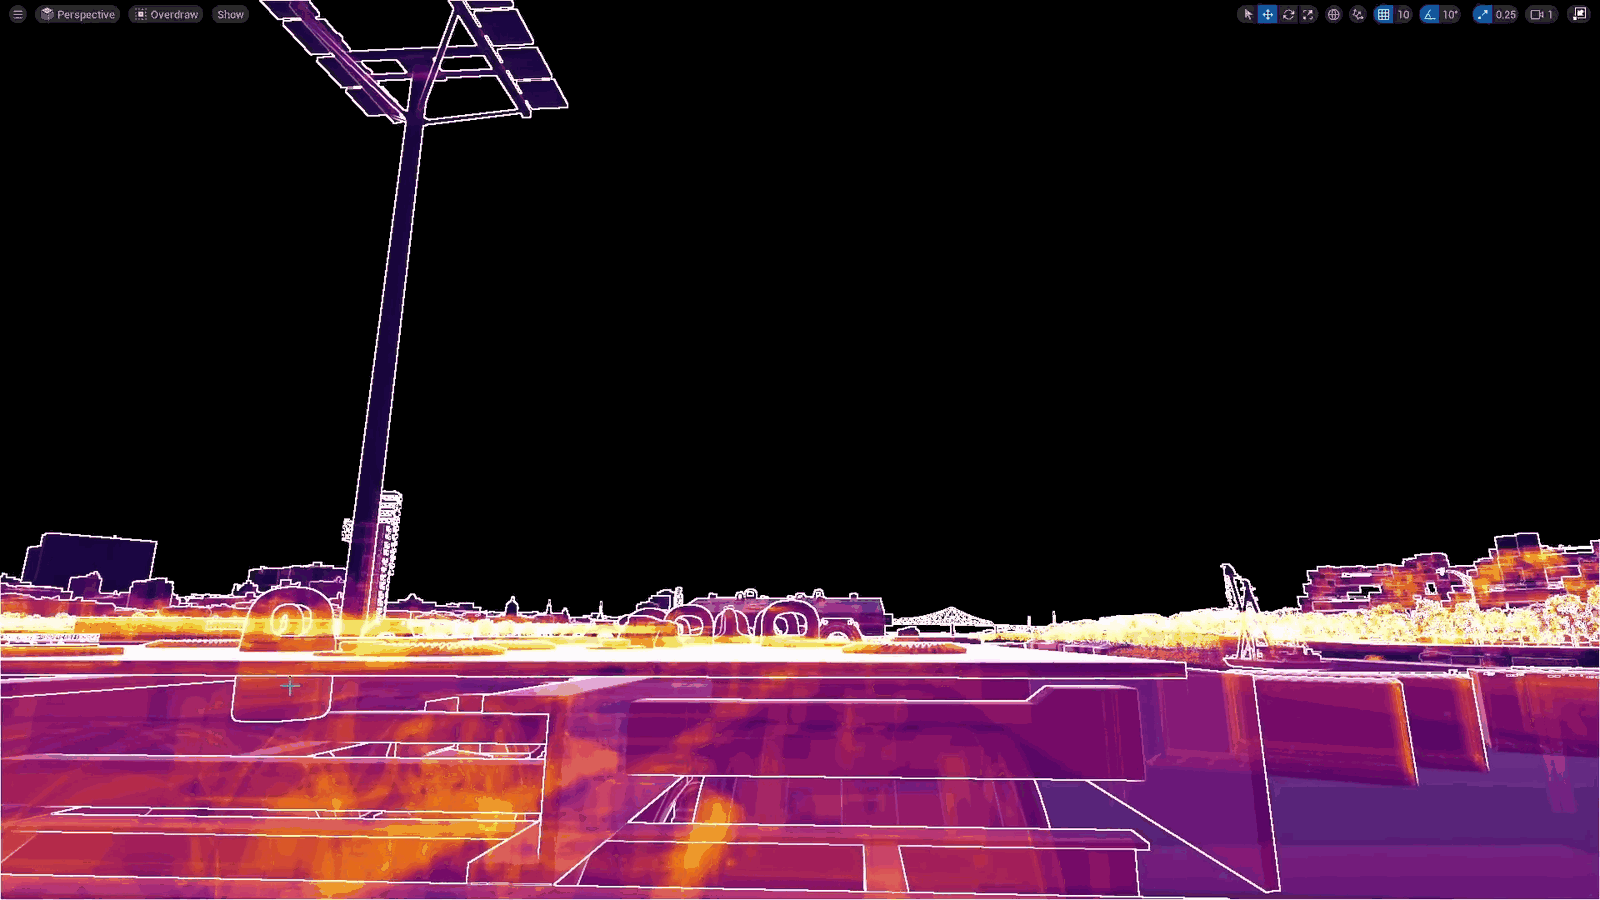
- 在低角度光照下可能出现局部热点问题
That large flat surface is going to occlude everything underneath, so we don’t end up with a huge stack of nanite overdraw, which is actually kind of nice. But we do get some hot spots if we get down to a glancing angle.
Slide 151 — 00:36:02
📌 要点汇总
- 热点区域仅限于特定并行视图
- 现在进入 Nanite Base Pass 阶段
- 在可变速率着色和计算着色之前,数据更紧凑
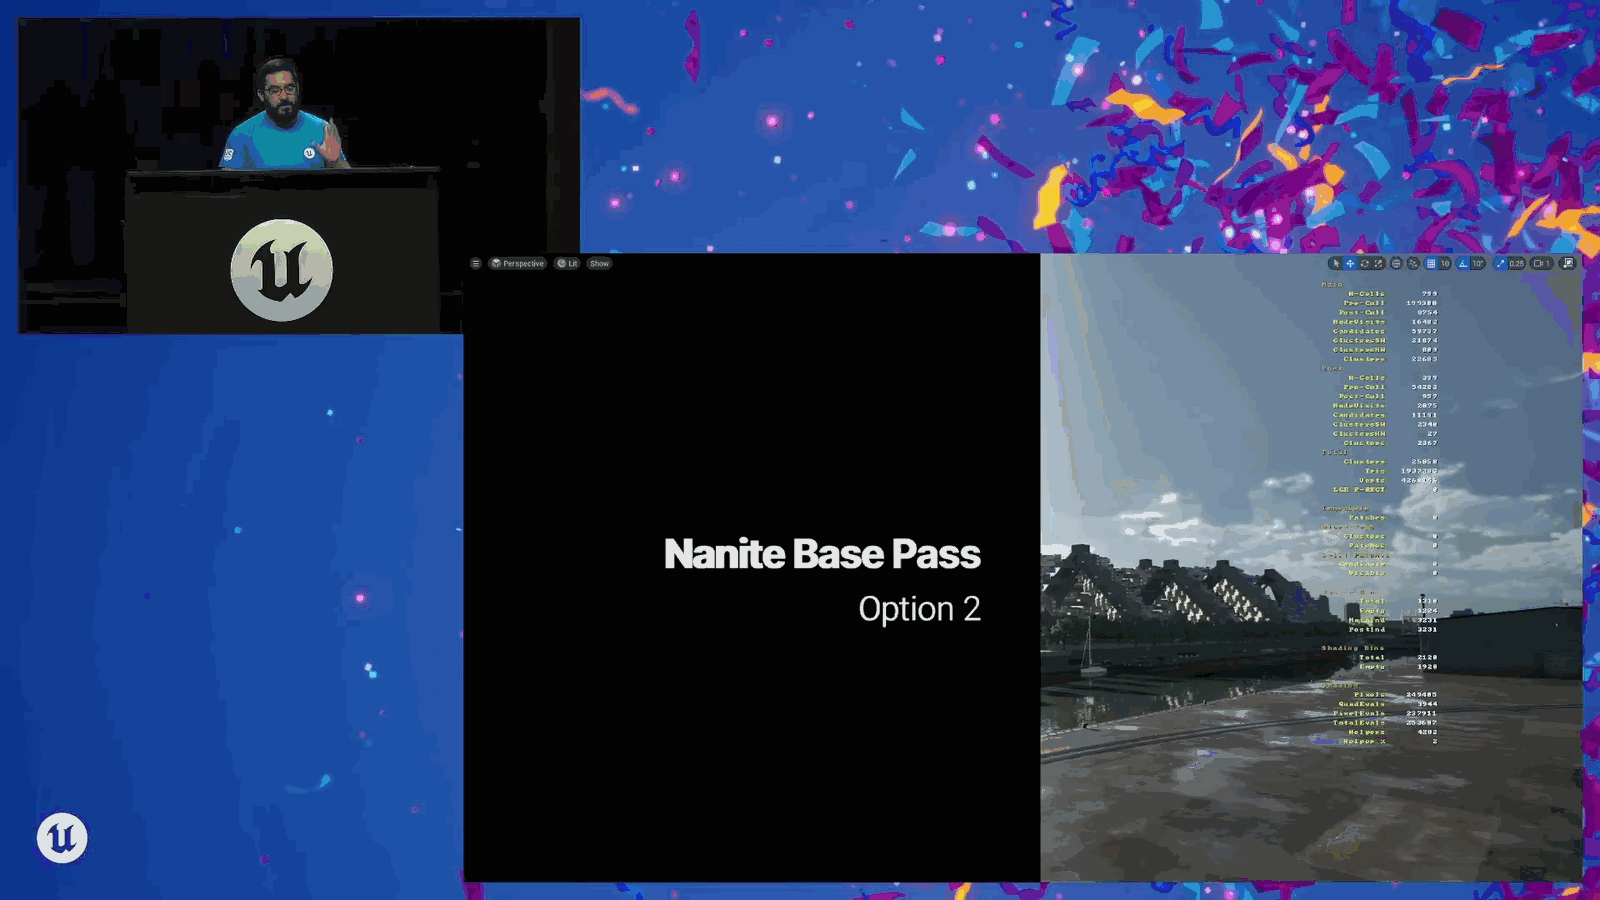
But those hot spots are going to be isolated to that kind of parallel, parallel on-side view. Okay. So finally, so now we’ve gone through Nanite Viz Buffer. Now we’re getting to Nanite Base Pass. And the short of it is, prior to variable rate shading and compute shading, this gets more compact.
Slide 152 — 00:36:19
📌 要点汇总
- Nanite base pass预算超出可能导致问题
- 预算超支可能与着色单元(shading bins)数量有关
- 可通过Nanite stats工具查看具体数值
- 着色单元数量通常为数千级别
- 预算定义需在早期阶段明确
It does get a little trickier. But the short of it is, if the Nanite base pass is out of the budget that we have defined for the Nanite base pass, because we’re defining our budgets early, there are two things this could be. It is either the number of shading bins, so you have a few thousand of those. We can always see that with Nanite stats. So if I just do a little Nanite stats, that’s going to bring up these numbers. I love numbers, and I can see the total number of shading bins.
Slide 153 — 00:36:49
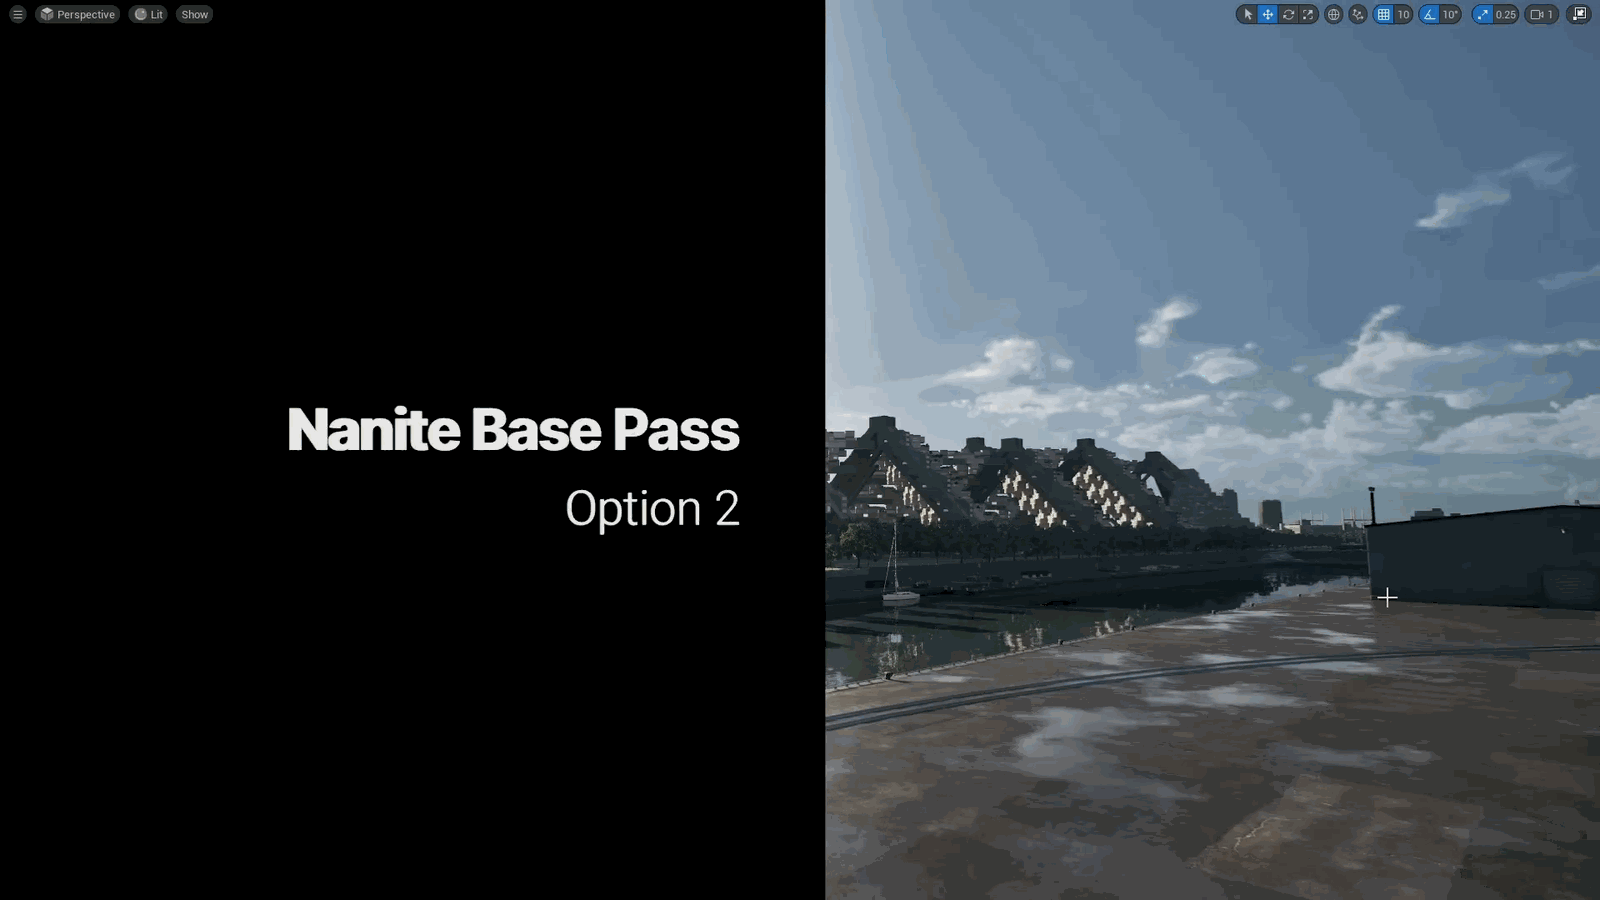
📌 要点汇总
- 通过减去空着的着色器 bin,可以计算实际使用的着色器 bin 数量
- 可以分析 draw call 的数量,以优化渲染性能
- 建议进行 Anite stats pass 来获取统计数据
- 材料成本过高可能影响性能,需注意优化
I can then subtract that for the empty shading bins, and I can start figuring out, right? How many shading bins am I effectively using? How many draw calls am I doing? So I’m going to do an Anite stats pass. The other possibility here is that your materials are expensive. This is when we are…
Slide 154 — 00:37:06
📌 要点汇总
- 使用 Nanite 填充像素时,需处理所有光栅化像素的材质绘制
- Nanite 在渲染过程中对每个像素进行材质分配和细节处理
- 需优化 Nanite 的绘制流程以避免性能瓶颈
- 材质绘制需与 Nanite 的光栅化过程紧密配合
- 高精度像素填充可能影响渲染效率和资源占用
Filling the pixels with Nanite, or when Nanite is drawing the materials to all of the pixels that it rasterized.
Slide 155 — 00:37:13
📌 要点汇总
- Lumen 是一个高性能的实时光线追踪全局光照和反射系统
- 采用像素级光线追踪,而非传统光线追踪方式
- 强调实时渲染和全局光照效果的实现
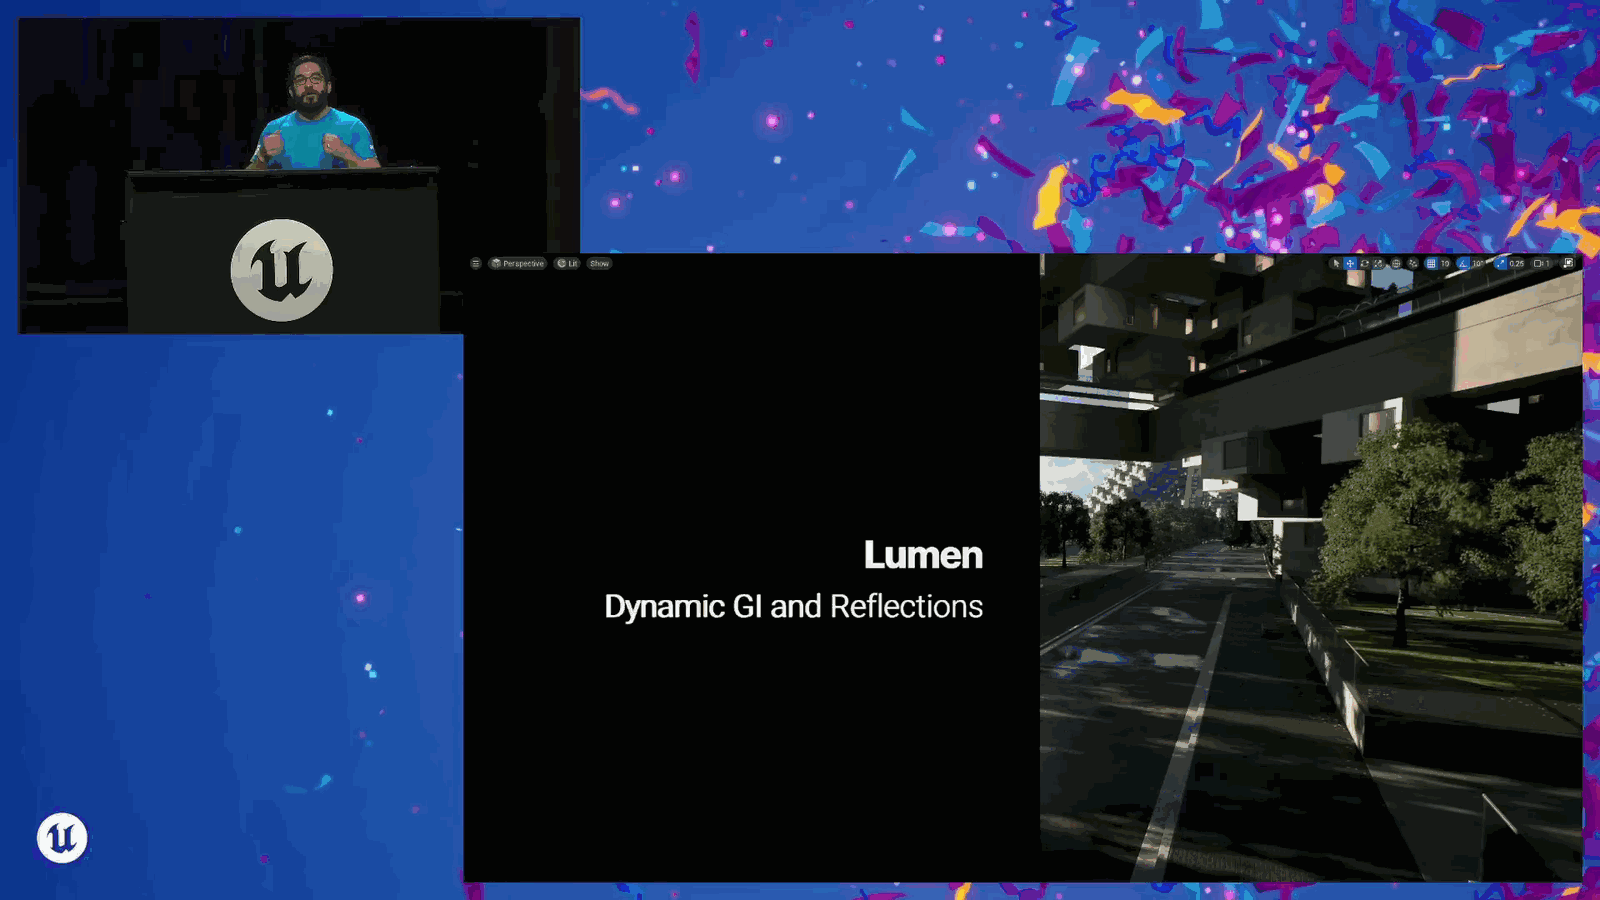
So then, we could finally start talking about material performance. Okay. So really quickly, I’m going to talk about Lumen. Quick refresher: This is a performant, real-time ray-traced global illumination and reflection system. It is tracing pixels per ray, not rays.
Slide 156 — 00:37:32
📌 要点汇总
- 提到逐像素处理,类似传统光线追踪系统,以提高效率
- 将讨论性能优化和 Lumen 问题的调试演示
- 提到去年十月的相关内容,作为背景信息
Per pixel, like a normal ray traced system, so that we can do things more efficiently. I want to talk really quickly about some performance considerations and demo a little bit of debugging with Lumen issues. So, in October last year.
Slide 157 — 00:37:45
📌 要点汇总
- Lumen 的预算时间与游戏帧率密切相关,60 帧需约 4 毫秒,30 帧需约 8 毫秒。
- Lumen 在主机上异步运行,导致实际实现复杂度增加。
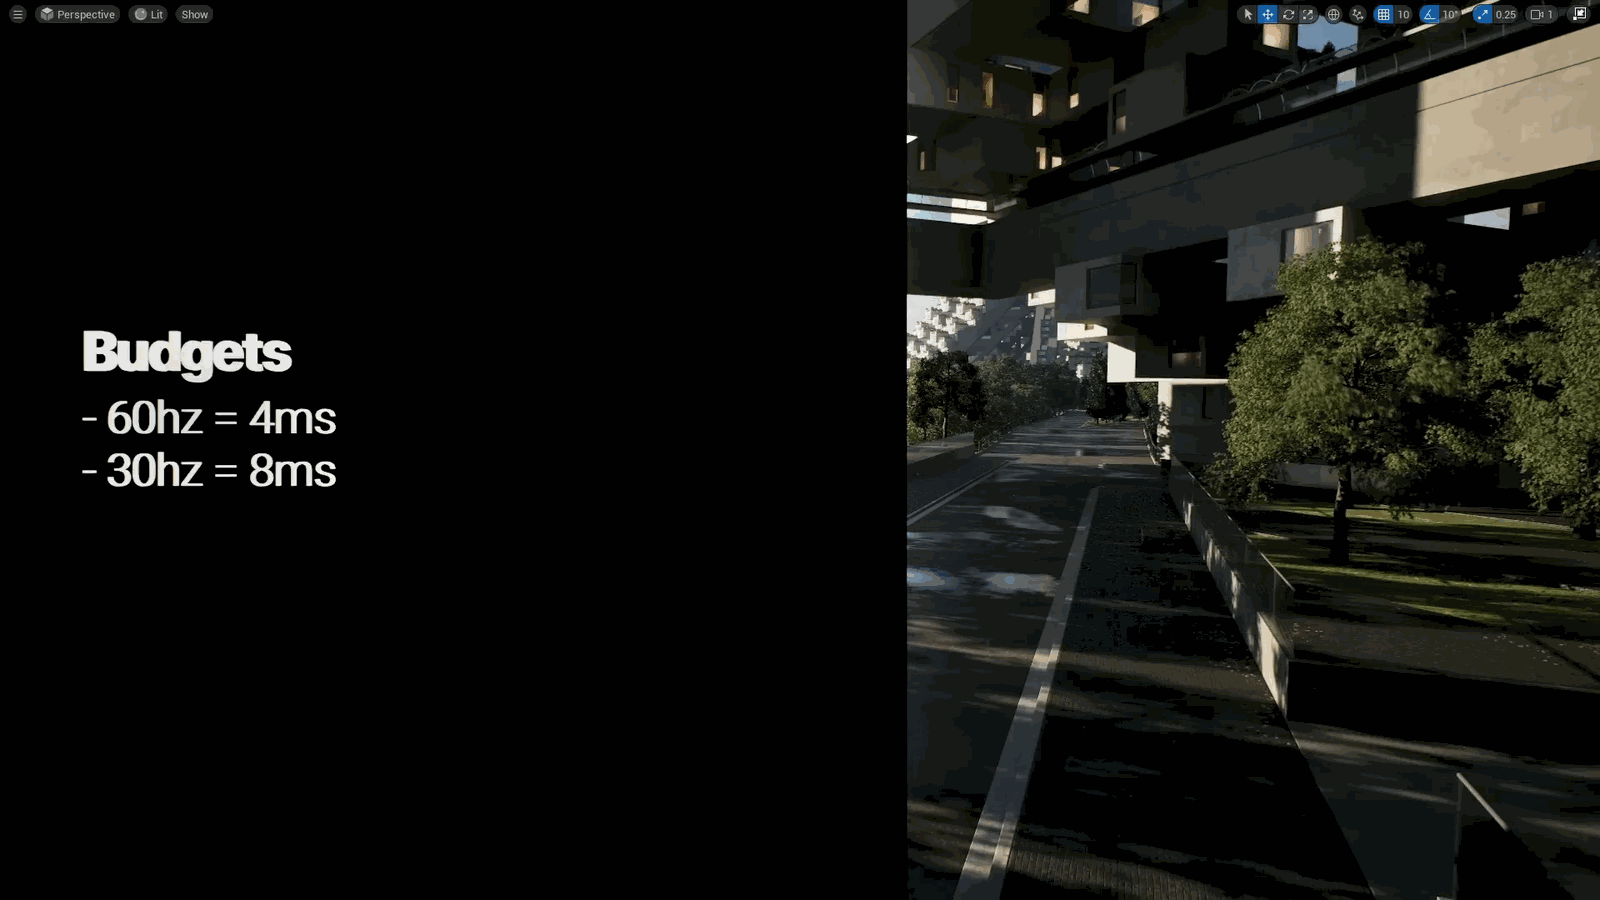
Last year, I said if you are going to do a sixty frames per second game, you should budget about four milliseconds for Lumen. If you’re doing a thirty frames per second game, you should budget about eight milliseconds. And I left it at that, and I yada yada yadded past it, and I didn’t really explain what I meant by this.
So, what I’m getting at is, it gets tricky because Lumen is running asynchronously on consoles, so it’s.
Slide 158 — 00:38:07

📌 要点汇总
- Lumen 包含多个功能模块,如场景光照、漫反射、间接光和 AO 反射等
- 关闭 Lumen 后,RDOT 动态全局光照和反射功能将失效
- Lumen 的实现较为复杂,涉及多阶段处理和多种光照特性
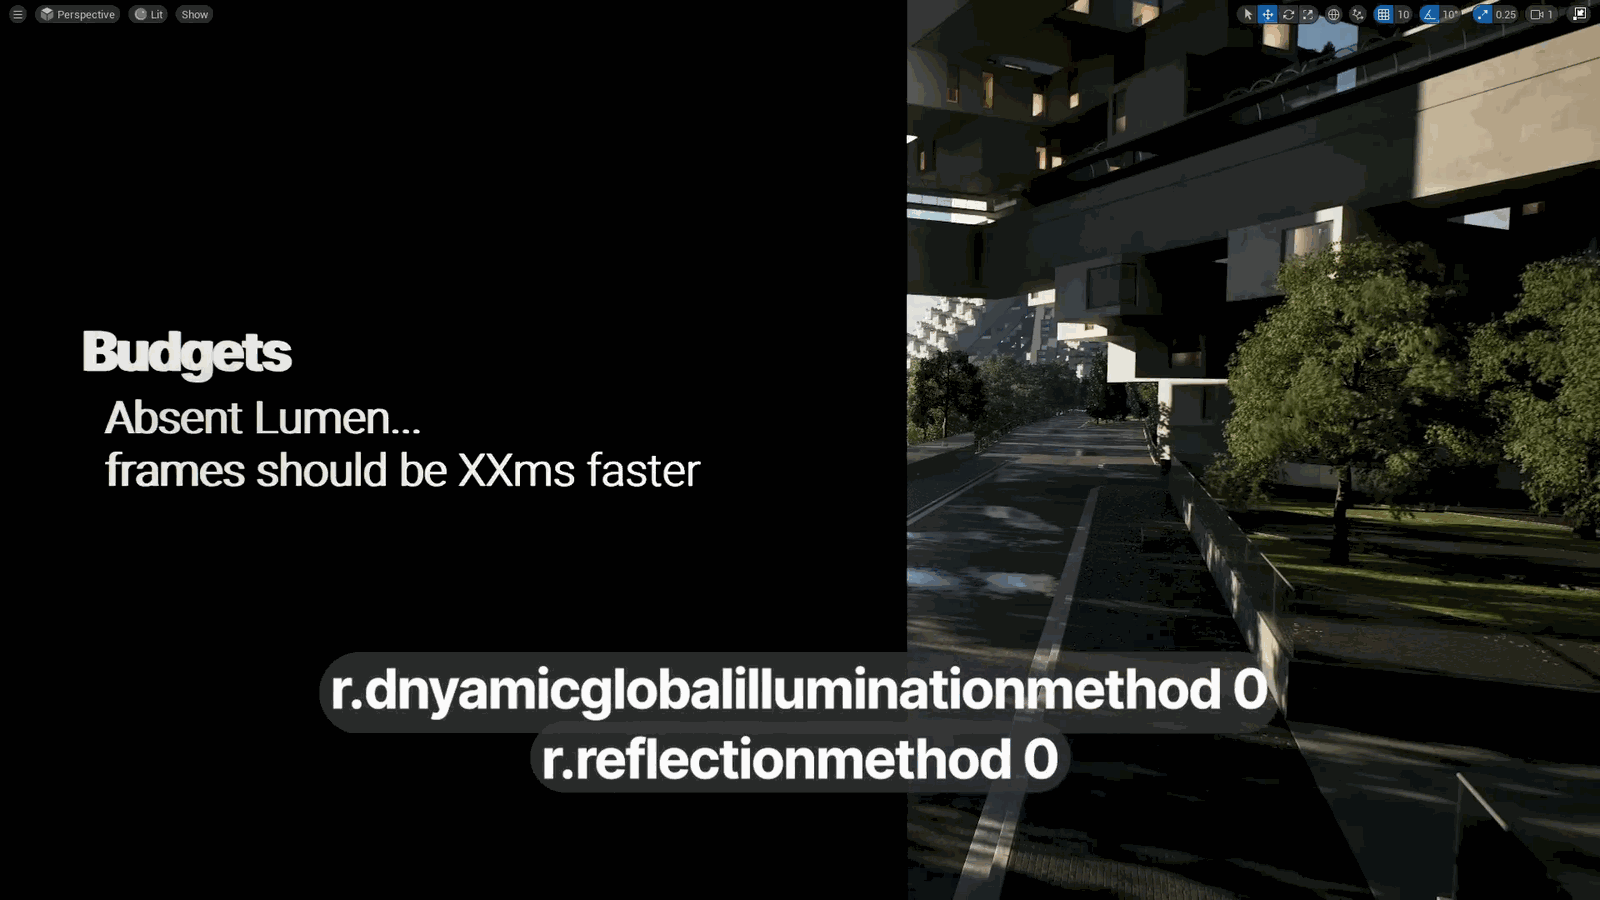
Hard to give specifics here, and Lumen also comprises multiple passes and features: Lumen scene lighting, diffuse, indirect, and AO reflections, lights, and so on. So, what I mean by this—is if you turn Lumen off, RDOT dynamic global illumination method zero, RDOT reflection.
Slide 159 — 00:38:26
📌 要点汇总
- 方法零可使帧率加快约4到8毫秒
- 需要寻找进一步优化性能的方案
Method zero. You should see frames that are about four or eight milliseconds faster. So, what can we do about that?
Slide 160 — 00:38:33
📌 要点汇总
- 可以将物体移出 lumen 场景以优化性能
- 设置物体为不可见并关闭光线追踪以减少计算负担
- 关闭动态间接光照影响可提升渲染效率
- 上述方法是去年10月提到的优化技巧
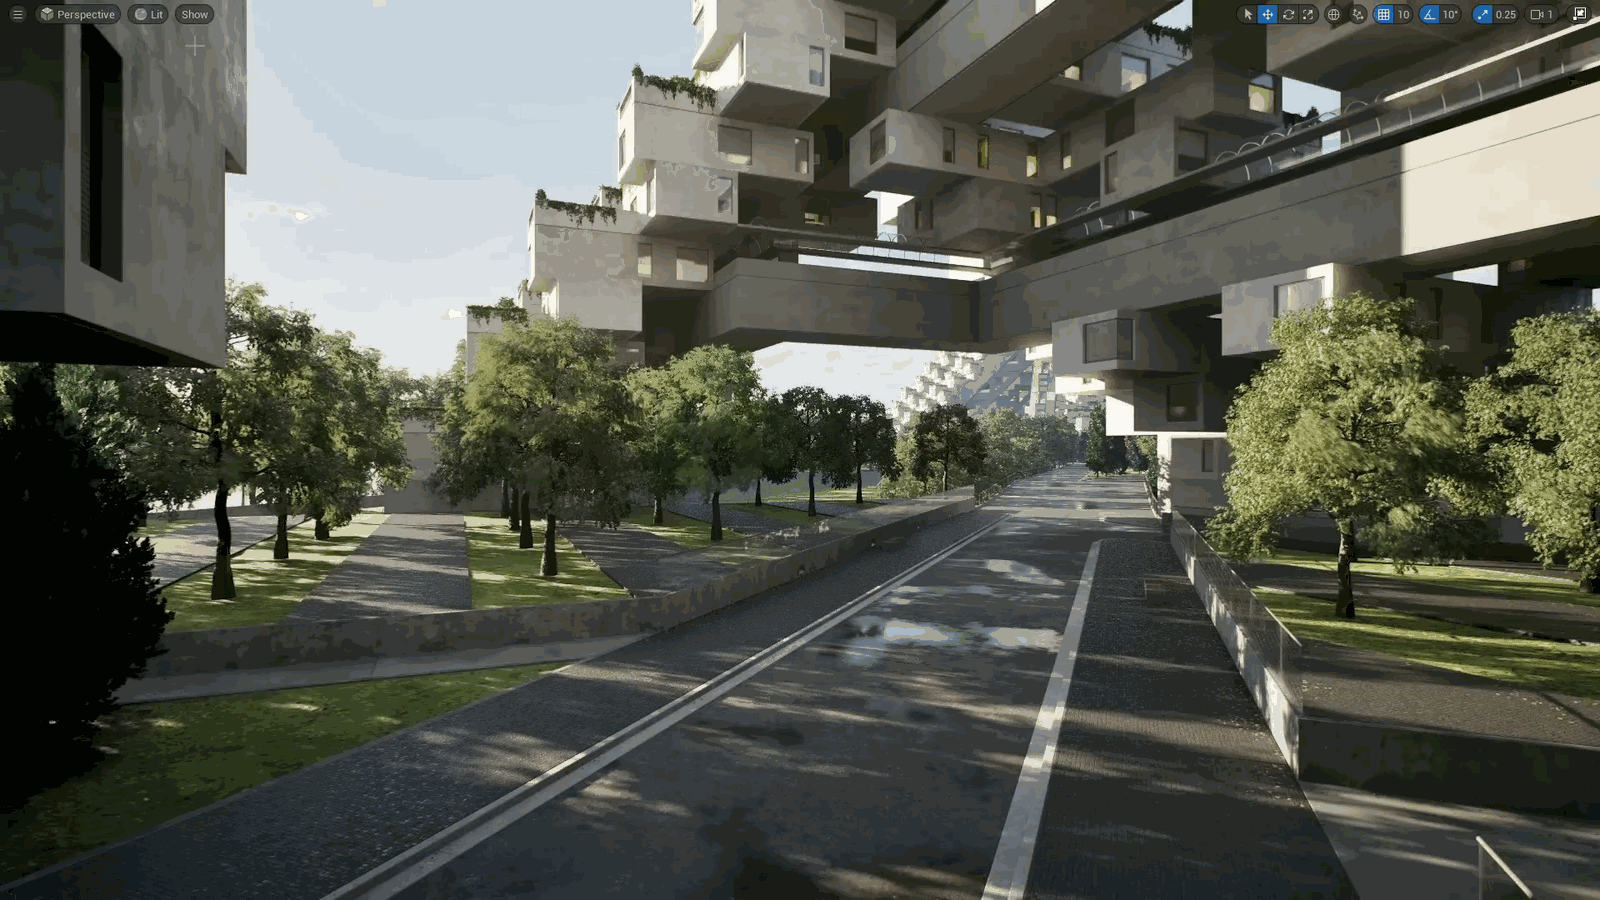
There’s a couple of things I talked about in October last year, right? We can move stuff out of the lumen scene, set things to visible and ray tracing false, set things to affect dynamic indirect lighting false. Those kinds of things are things that we can.
Slide 161 — 00:38:51
📌 要点汇总
- 讨论如何提高 Lumen 场景渲染效率
- 特别关注反射效果的实现
- 提到 R dot Lumen dot reflections dot max roughness 的追踪技术
To make it more efficient to render the Lumen scene, but maybe we want to talk about reflections because one of the things I talked about was R dot Lumen dot reflections dot max roughness to trace because.
Slide 162 — 00:39:00
📌 要点汇总
- (过渡内容,无关键要点)
If our reflection cost is really high, we need to figure out what’s going on there. Well, great news in Five Four—we add.
Slide 163 — 00:39:05
📌 要点汇总
- 新增了性能概览模式,用于显示所有追踪专用反射光线的像素
- 该模式有助于分析渲染性能瓶颈
- 可视化反射光线分布对优化渲染效率有帮助
Added a new view mode, which is the performance overview mode, and this is showing me all of the pixels that are tracing dedicated reflection rays.
Slide 164 — 00:39:12
📌 要点汇总
- 绿色部分使用了地下或双面植被阴影模型
- 该模型有独立的控制台版本
- 模型细节对树木渲染效果有显著影响
And I might look at this and go, “Wow! Why are all of the trees? So things that are in green are using the subsurface or two-sided foliage shading model. It has a separate console variant.”
Slide 165 — 00:39:25
📌 要点汇总
- 森林反射效果因材质粗糙度设置触发
- 天气着色器将树木设为低粗糙度以模拟雨后湿润状态
- 高反射精度导致树木产生独立反射光线
- 该现象在渲染中可能影响性能与视觉效果平衡
R. Lumen. Reflections. Max Roughness to Trace for Foliage, and I’m like, Wow! Why are all of these trees casting dedicated reflection rays? Oh, the weather shader is making them low roughness because they’re wet — because it just rained. Well, I don’t really…
Slide 166 — 00:39:42
📌 要点汇总
- 需要为树木追踪专用反射光线
- 通过 R dot lumen dot reflections dot max roughness 设置为零,减少反射光线追踪
- 减少树木反射可节省 GPU 计算资源
- 其他场景部分仍需大量反射光线追踪,可能影响效率
Need to trace dedicated reflection rays for these trees, right? I’m not going to see anything in those reflections, so I can go to R dot lumen dot reflections dot max roughness to trace for foliage. Maybe I set that to zero. I don’t need trees to reflect anything, and now I’m tracing fewer reflection rays. And then I look at the rest of the scene and I go, wow. For what I’m looking at, that is a lot of dedicated reflection rays, and that’s not maybe the most efficient use of my GPU time.
Slide 167 — 00:40:06
📌 要点汇总
- 提到使用 R.lumen.reflections.reflections.max roughness 进行光线追踪
- 涉及渲染过程中的反射与粗糙度参数调整
- 可能与光照模拟或图形渲染技术相关
And so I can start to look at this and go R dot lumen dot reflections, reflections dot max roughness to trace.
Slide 168 — 00:40:22
📌 要点汇总
- 通过将参数设为零二,发现水洼面积略有减小
- 水洼的粗糙度衰减值较高,导致出现该数值
- 可考虑进入材质设置,对数值进行限制
- 限制后可扩大水洼区域,但不影响建筑侧面效果
Maybe I set that to zero two, and I notice my puddles got a little smaller. But those puddles had a really high roughness falloff, so that we were getting that value. But maybe I might go into that material and kind of clamp it down, so that I’m only having a bigger area for those puddles, but like the side of this building over here.
Slide 169 — 00:40:41
📌 要点汇总
- 该建筑正在追踪反射光线,可能没有必要
- 如果 Lumen 反射效果已经很高,可以考虑简化处理
This building was tracing reflection rays. That’s a bit silly to me. Maybe we don’t need to do that. So, if your Lumen reflections are pretty high, that’s a place.
Slide 170 — 00:40:50
📌 要点汇总
- (过渡内容,无关键要点)
To look, we can talk more about it. There’s also a Lumen performance guide that is in the links at the end of the show. That’s going to go into way more detail than I have time for. I also wanted to talk very briefly.
Slide 171 — 00:41:00
📌 要点汇总
- 提供调试 Lumen 的一般性指导,而非具体细节
- 强调需要关注问题发生的位置以定位原因
- 提示观众可能已注意到某些潜在问题
- 时间有限,未深入讲解具体解决步骤
Briefly, about how we can debug Lumen, where we can look to figure out why a problem is happening with Lumen and how we might resolve it. Not going to get into super specifics. We are running out of time, but I wanted to give you a little hint about where we can start looking. So maybe the keen-eyed among you have already noticed this issue, right?
Slide 172 — 00:41:18
📌 要点汇总
- (过渡内容,无关键要点)
There, so keep your eyes right there. You see that subtle flicker? There’s just like a.
Slide 173 — 00:41:23
📌 要点汇总
- (过渡内容,无关键要点)
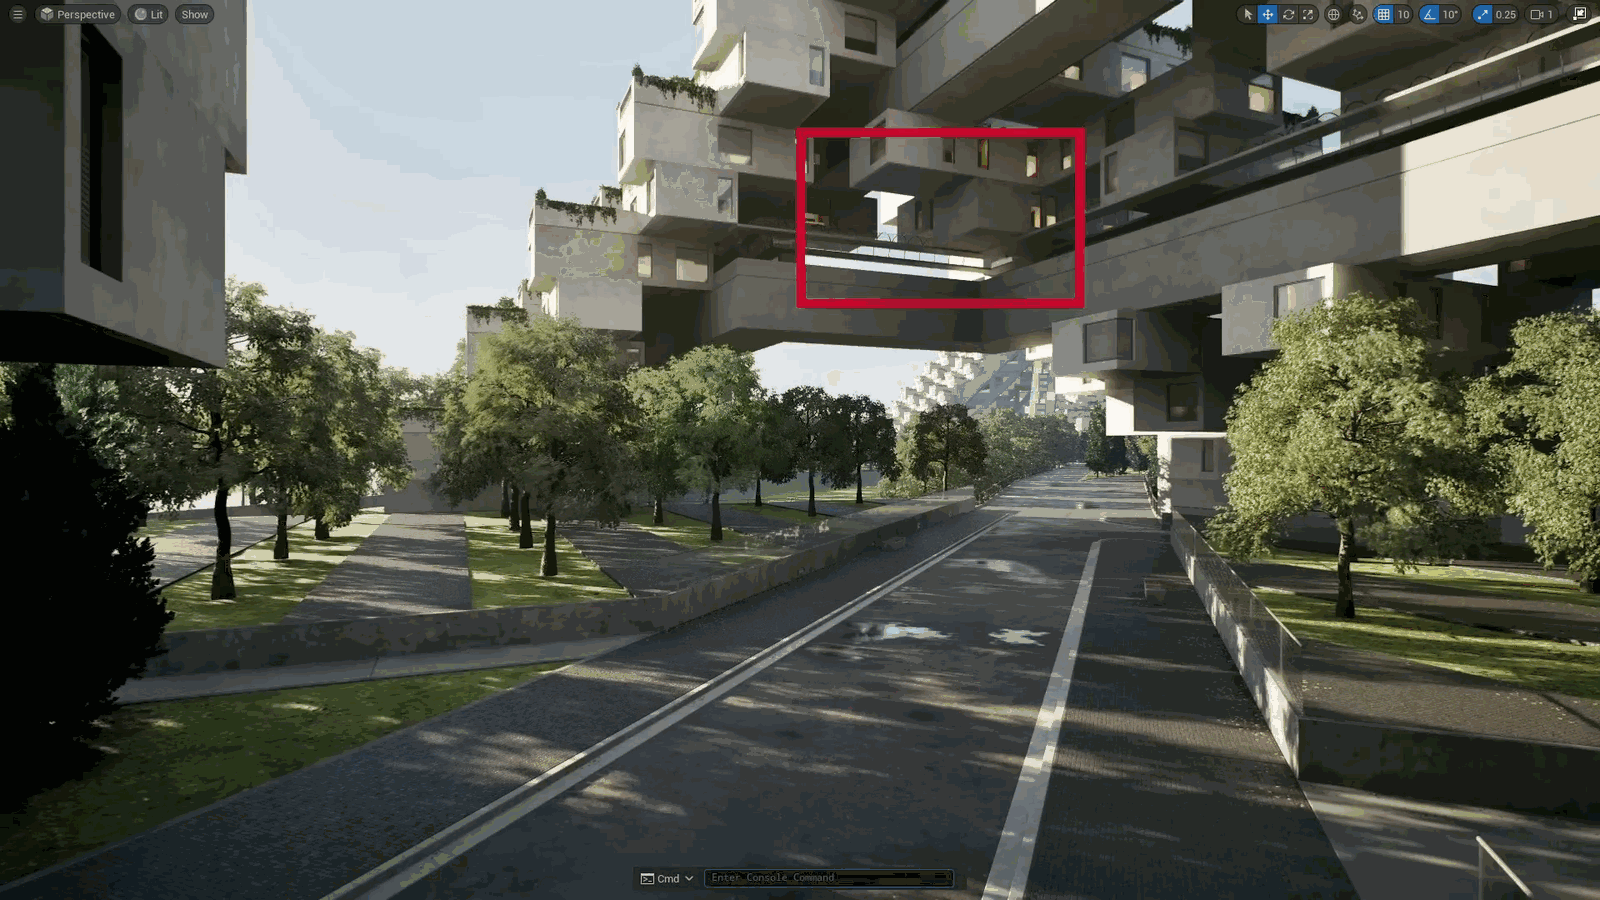
On, off, on, off. Right. I’m pretty sure it’s lumen. So, what I might do to figure out if it’s lumen dynamic global illumination would be.
Slide 174 — 00:41:34
📌 要点汇总
- (过渡内容,无关键要点)
R dot dynamic global illumination method zero, and now I’m not using any global illumination. Oh, I know why that doesn’t work. We’ll talk about that later. So see me after class.
Slide 175 — 00:41:44
📌 要点汇总
- Lumen 使用两种方式追踪光线并收集全局光照信息:屏幕追踪(screen traces)和世界追踪(world traces)
- 屏幕追踪(screen traces)是从屏幕像素中获取值
- 世界追踪(world traces)涉及更复杂的光线追踪计算
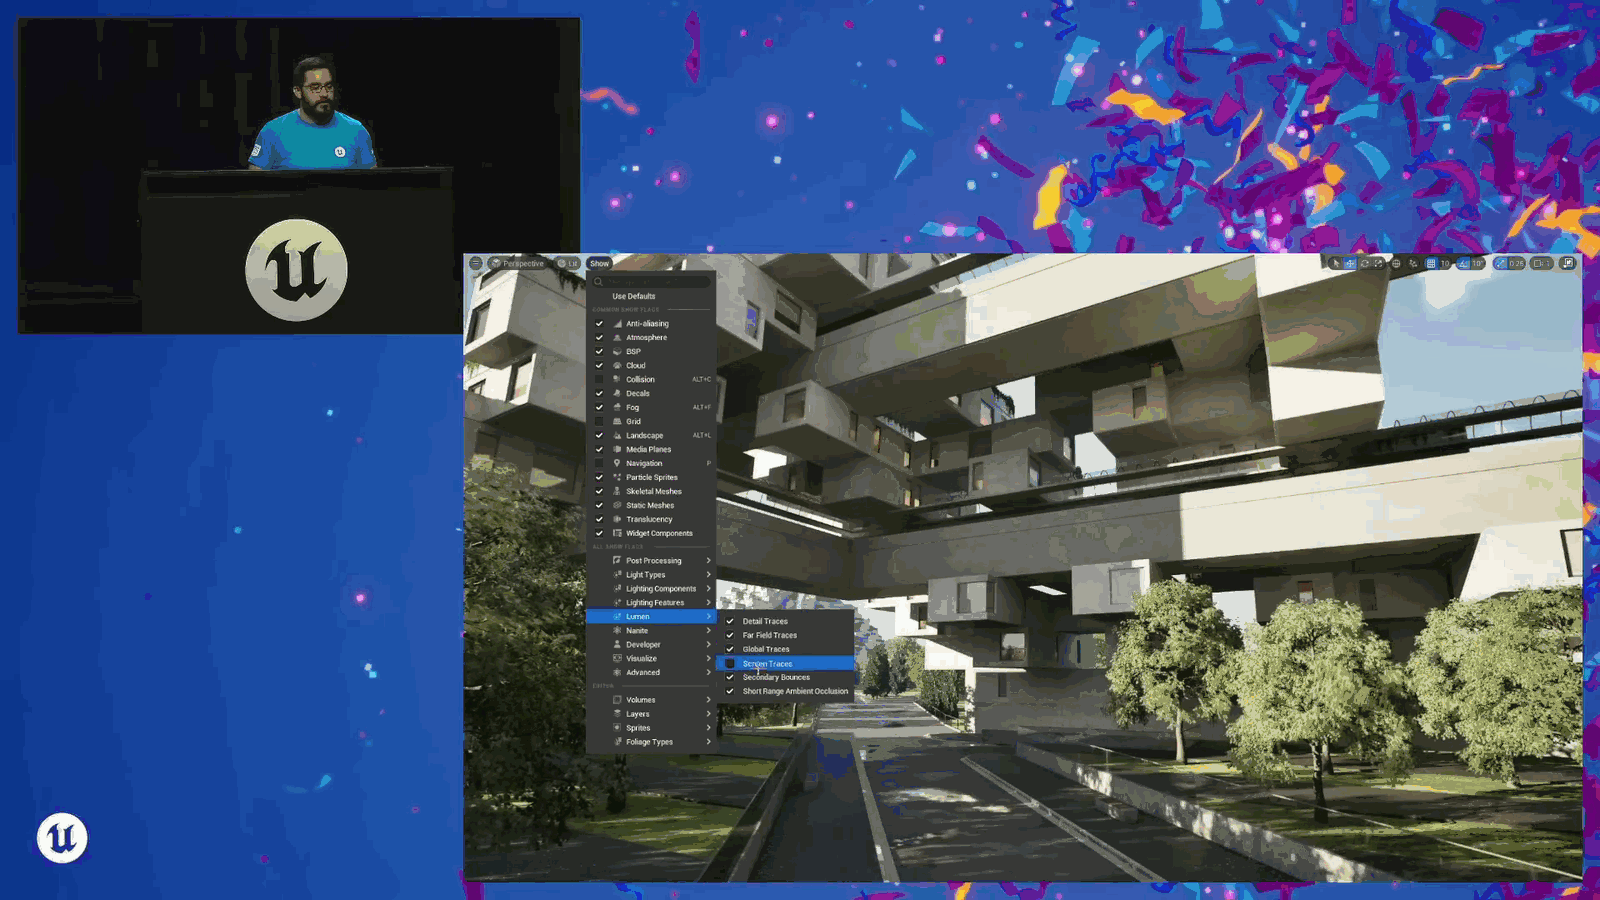
So I know that this is a Lumen issue, and I want to figure out what it is. Well, there are two different ways that Lumen traces rays and gathers information for its global illumination. There are screen traces and world traces. Screen traces are just grabbing values from pixels on the screen.
Slide 176 — 00:42:00
📌 要点汇总
- 建议在调试 Lumen 时首先确认 World traces 是否正确从 Lumen 场景中提取值
- 过渡内容,无关键要点
World traces are pulling values from the Lumen scene, and the first thing that I recommend you do if you’re debugging Lumen is to figure out.
Slide 177 — 00:42:09
📌 要点汇总
- 通过关闭屏幕追踪功能来判断问题是否由屏幕追踪引起
- 若问题消失,可确认问题与屏幕追踪相关
- 该方法用于排查性能或显示相关问题
- 展示了调试过程中常见的排查思路
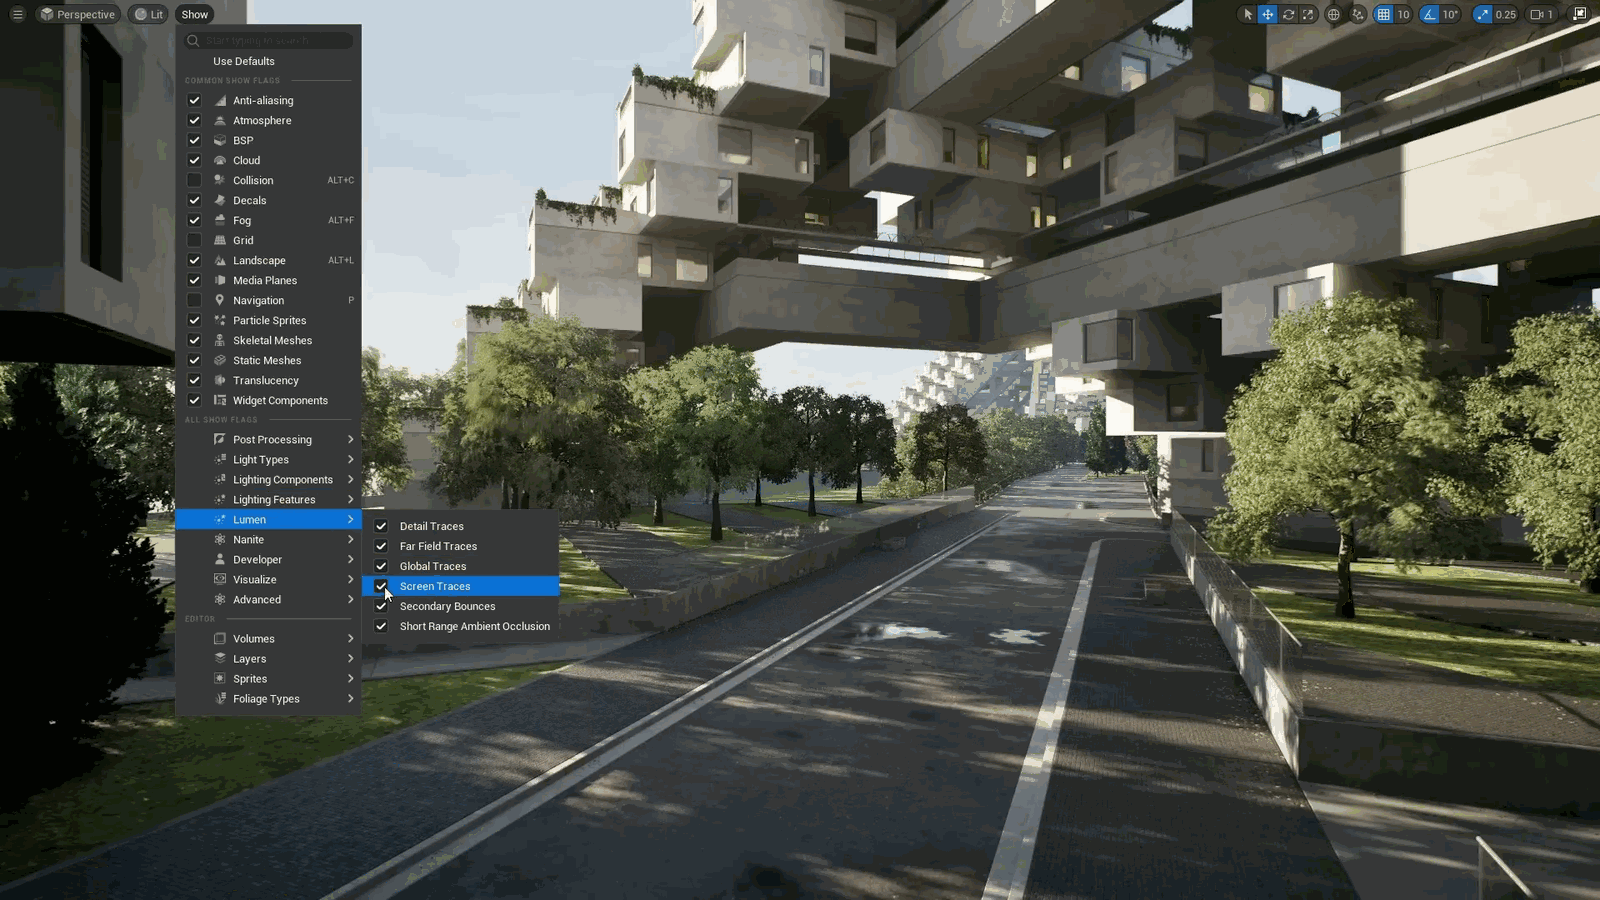
Which is which, right? What is the binary search tree? So I’ll go into Show. I’ll go to Lumen, and I can turn off screen traces. And if I turn off screen traces and the issue goes away, I know it’s screen traces.
Slide 178 — 00:42:20

📌 要点汇总
- 提到控制台变量 R.LuminScene.ProbeScreenProbeGather 用于调试或调整光照效果
- 控制台变量数量众多,难以全部列举
- 可能存在其他未提及的控制台变量或解决方案
And this is where I might start looking at console variables like R.LuminScene.ProbeScreenProbeGather, which are too numerous to list. The other possibility is that.
Slide 179 — 00:42:31
📌 要点汇总
- (过渡内容,无关键要点)
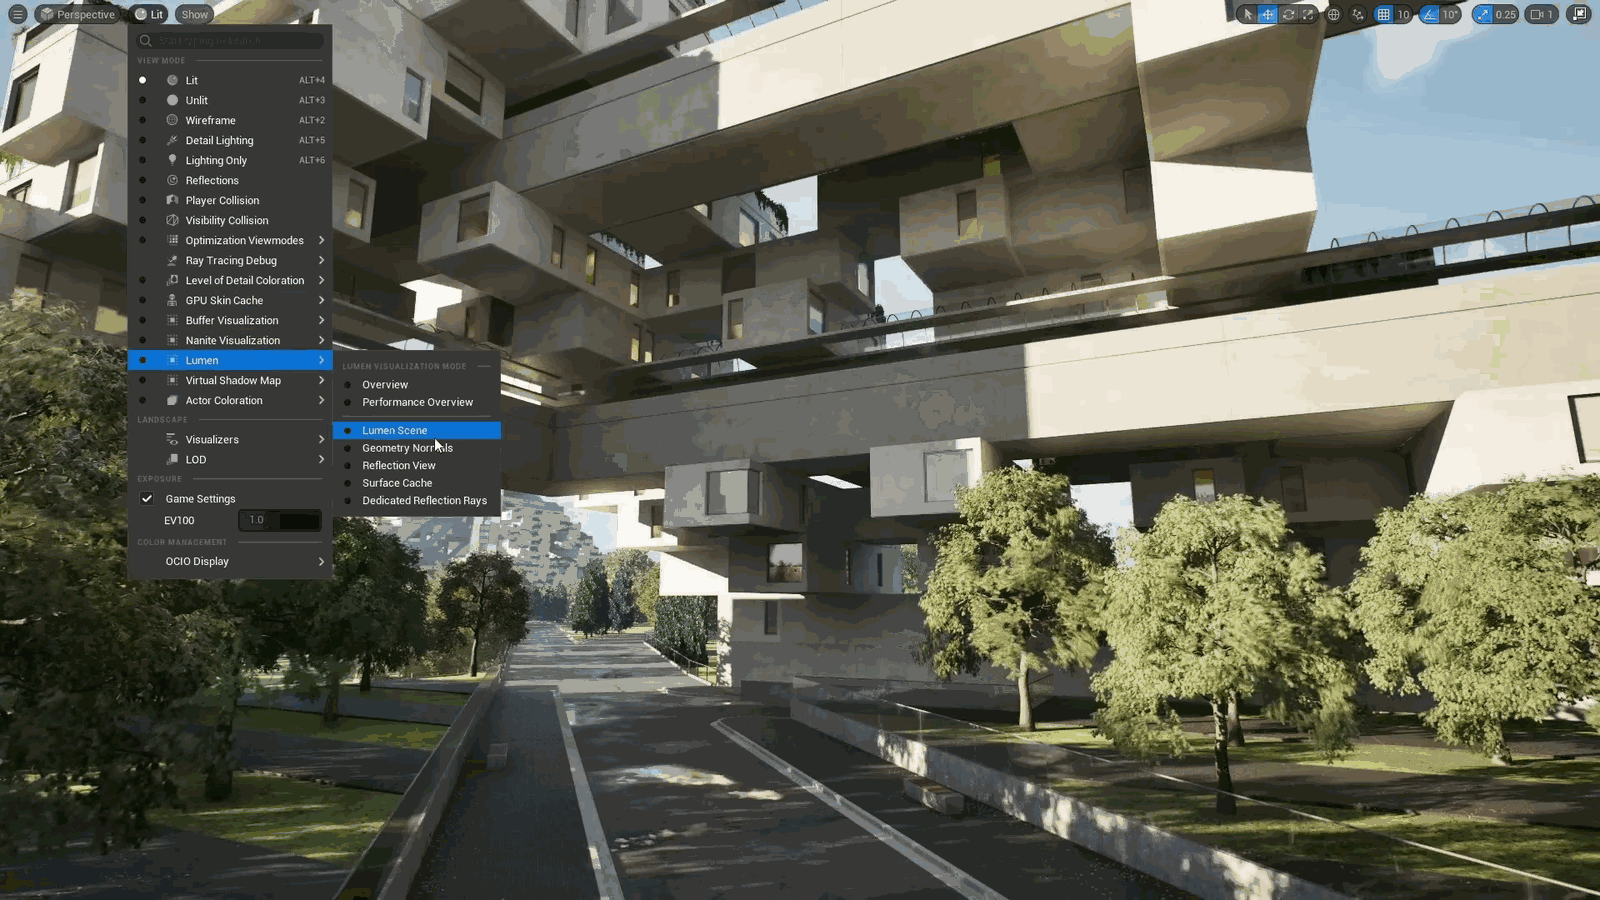
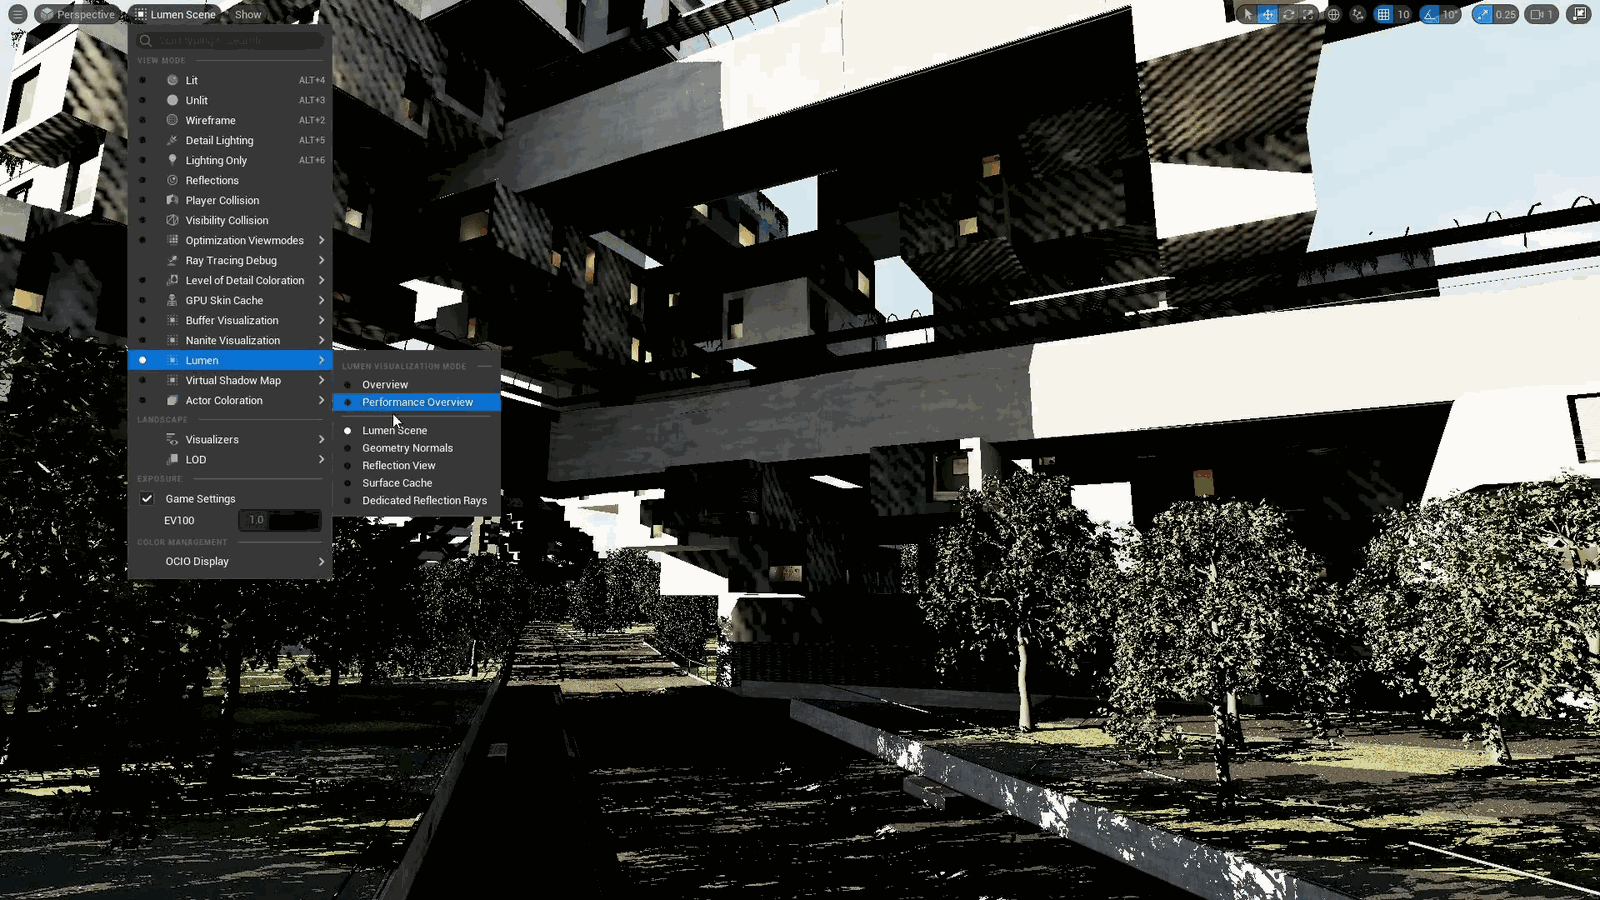
It is going to be global traces, so I’m going to turn our screen traces back on. Where I might start looking here is in the lumen scene.
Slide 180 — 00:42:36
(该幻灯片时间段内未检测到语音内容)
Slide 181 — 00:42:41
📌 要点汇总
- (过渡内容,无关键要点)
Mode, I might look at this and see. Wow, there’s some stuff. Some of this stuff is maybe too black. I would expect some of this stuff to be a little bit more visible. Why is that happening? So I can go then look at the.
Slide 182 — 00:42:51
📌 要点汇总
- 使用 Surface cache view mode 可以识别黄色区域
- Lumen 会自动忽略黄色区域,不参与渲染
- 该功能有助于优化 Lumen 场景性能
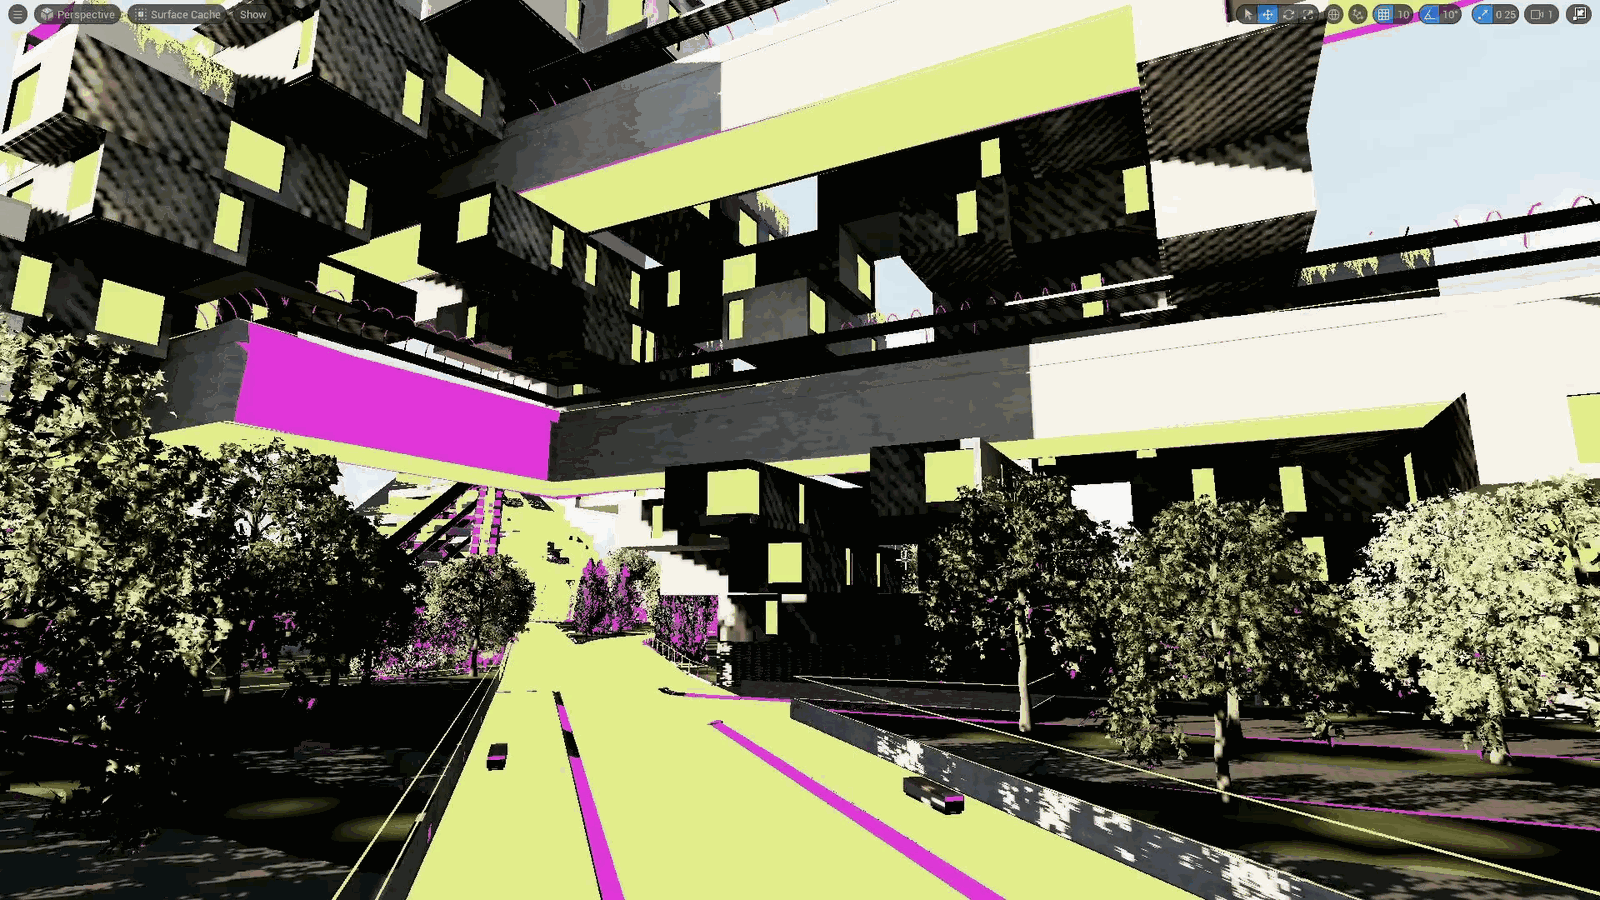
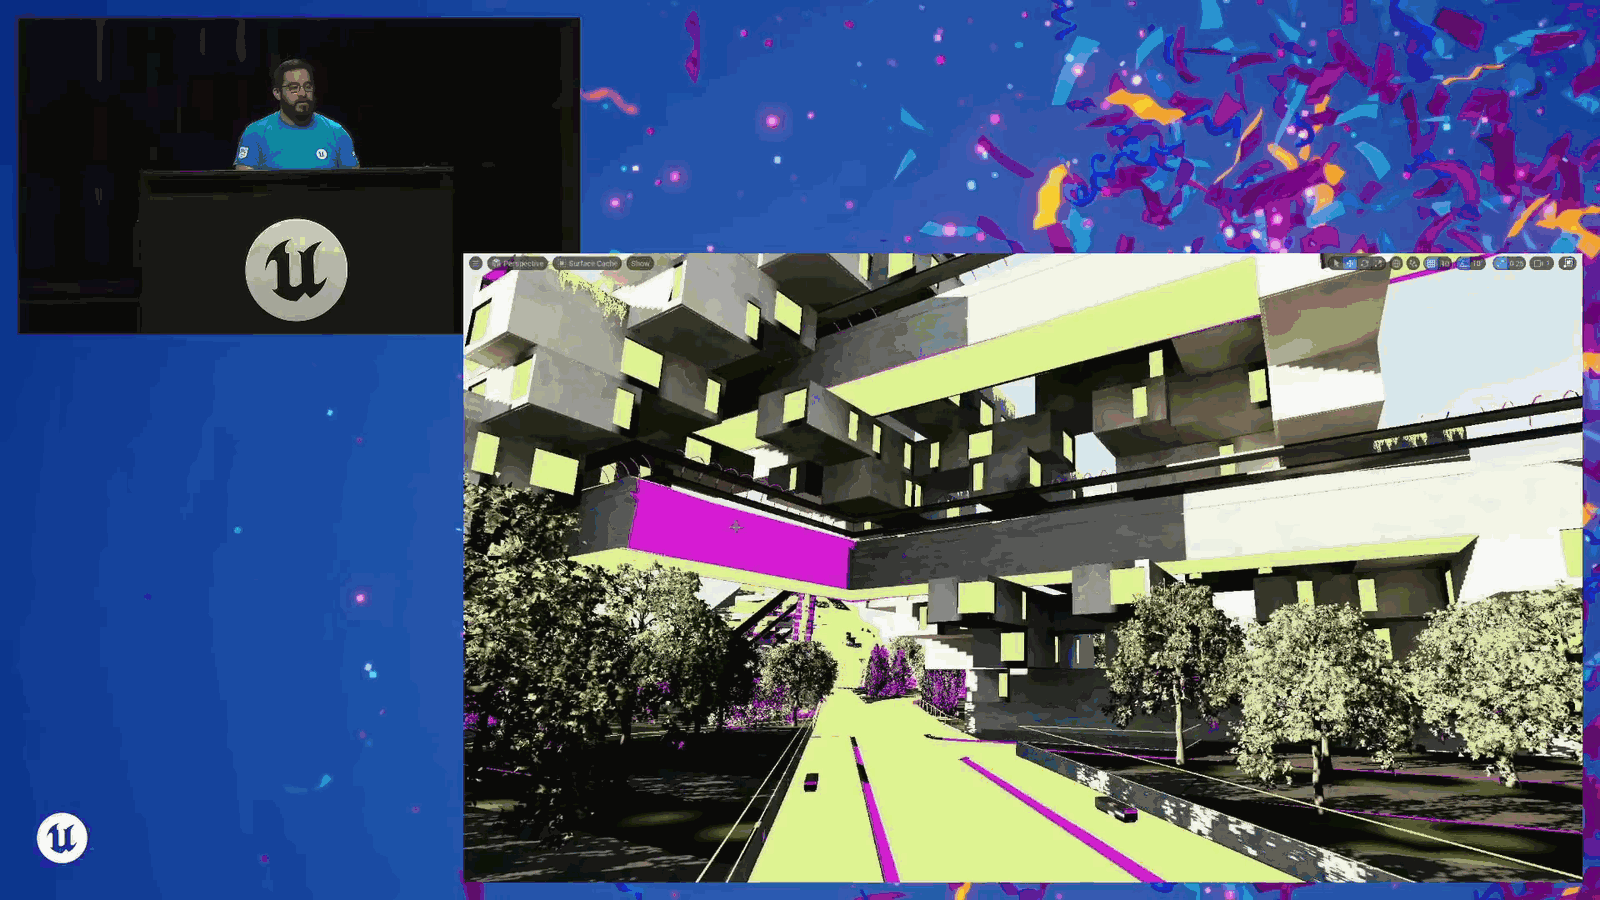
Surface cache view mode, and everything that is in yellow, Lumen said, “I don’t need to worry about this. I’m going to drop it out of the Lumen scene.” Everything.
Slide 183 — 00:42:59
📌 要点汇总
- 紫色部分已导入Lumen场景,但未正确渲染
- 表面卡片设置可能不正确导致渲染失败
- 网格过于复杂多变,影响Lumen绘制
- 走廊侧面未正确显示可能是上述问题所致
That is in purple was drawn into the Lumen scene, but those pixels were not rendered to because maybe our surface cards were not set up correctly, or our mesh is too multi-variant and complex, and so Lumen wasn’t able to draw to those pixels. That’s why something like the side of this catwalk over here is not showing up correctly.
Slide 184 — 00:43:20
📌 要点汇总
- (过渡内容,无关键要点)
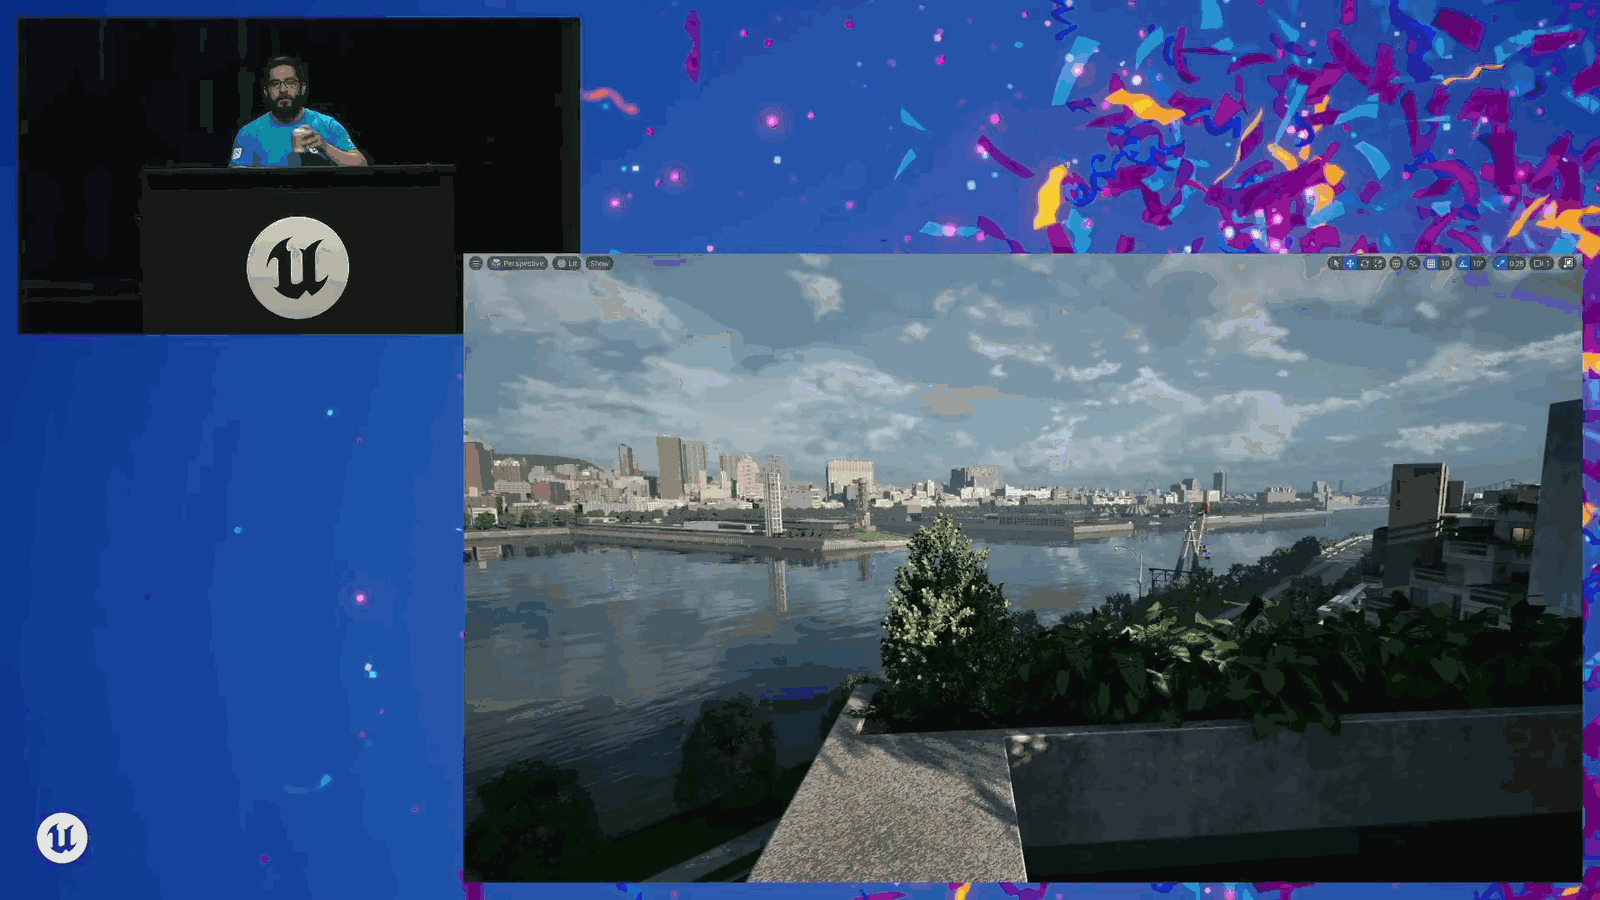
In the Lumen scene. I think I’m going to do it.
Slide 185 — 00:43:26
📌 要点汇总
- 新系统使用虚拟阴影地图(Virtual Shadow Maps)作为UE Five的阴影解决方案
- 强调阴影在视觉表现中的重要性,无法忽略
- 该系统是UE Five中的关键图形技术更新之一
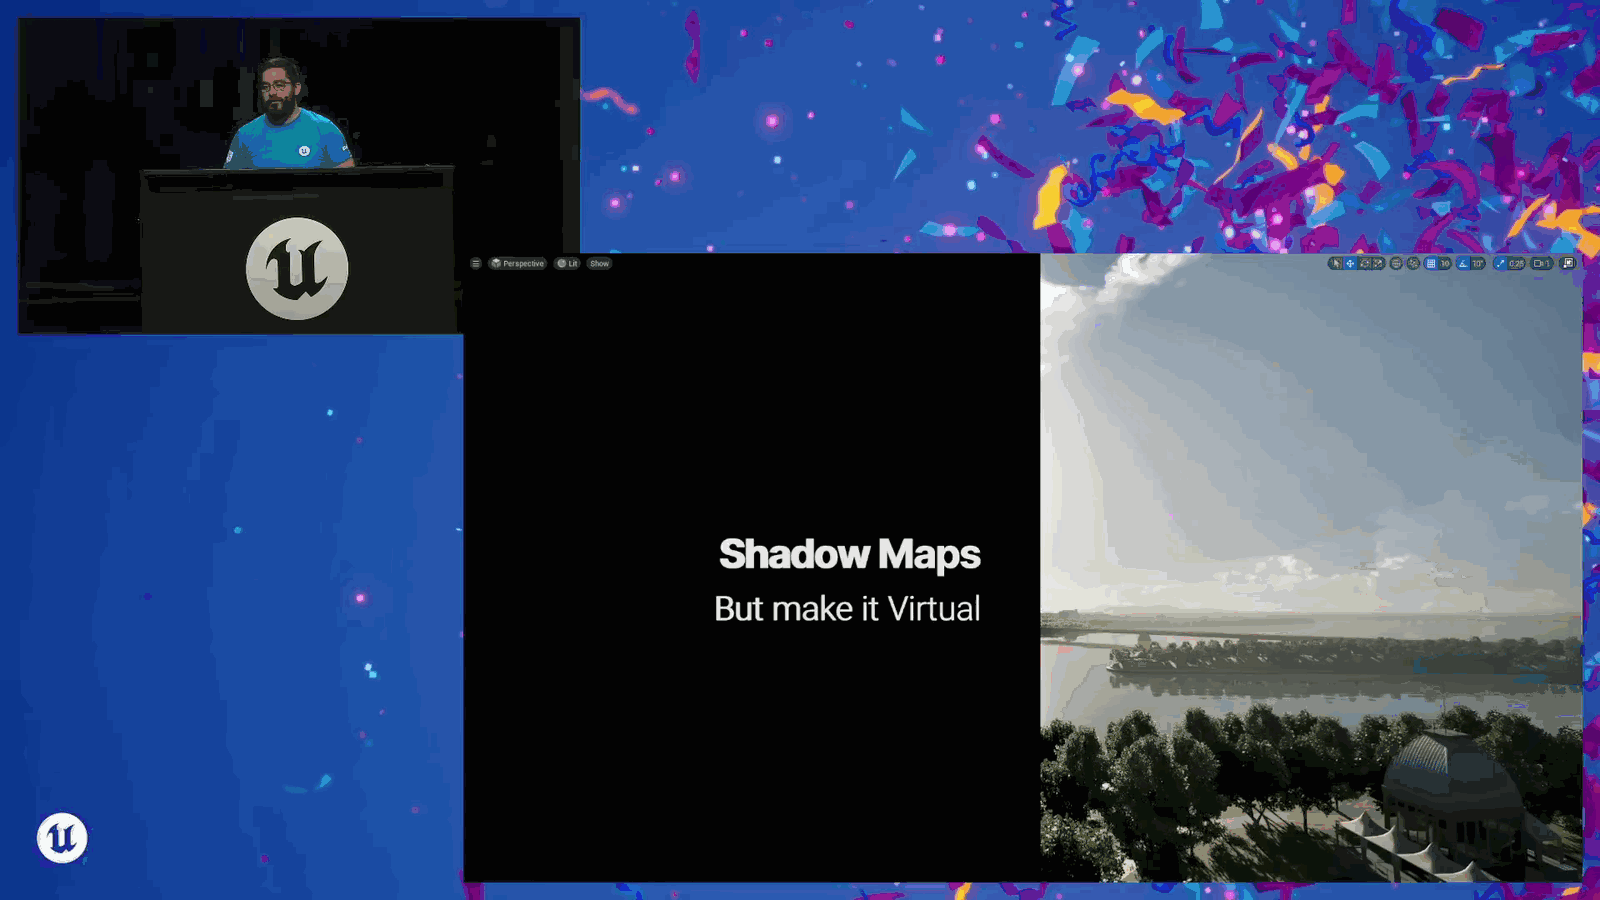
All right. Got to talk about shadows. Can’t not talk about shadows. Virtual shadow maps are our new system for UE Five.
Slide 186 — 00:43:33
📌 要点汇总
- 通过虚拟化阴影页面,避免每帧生成大量阴影深度级联
- 虚拟阴影地图与虚拟纹理类似,均采用分块(tiles/pages)方式管理
- 每个阴影页面可独立缓存,仅更新实际需要的部分
- 有效提升阴影渲染性能并减少内存占用
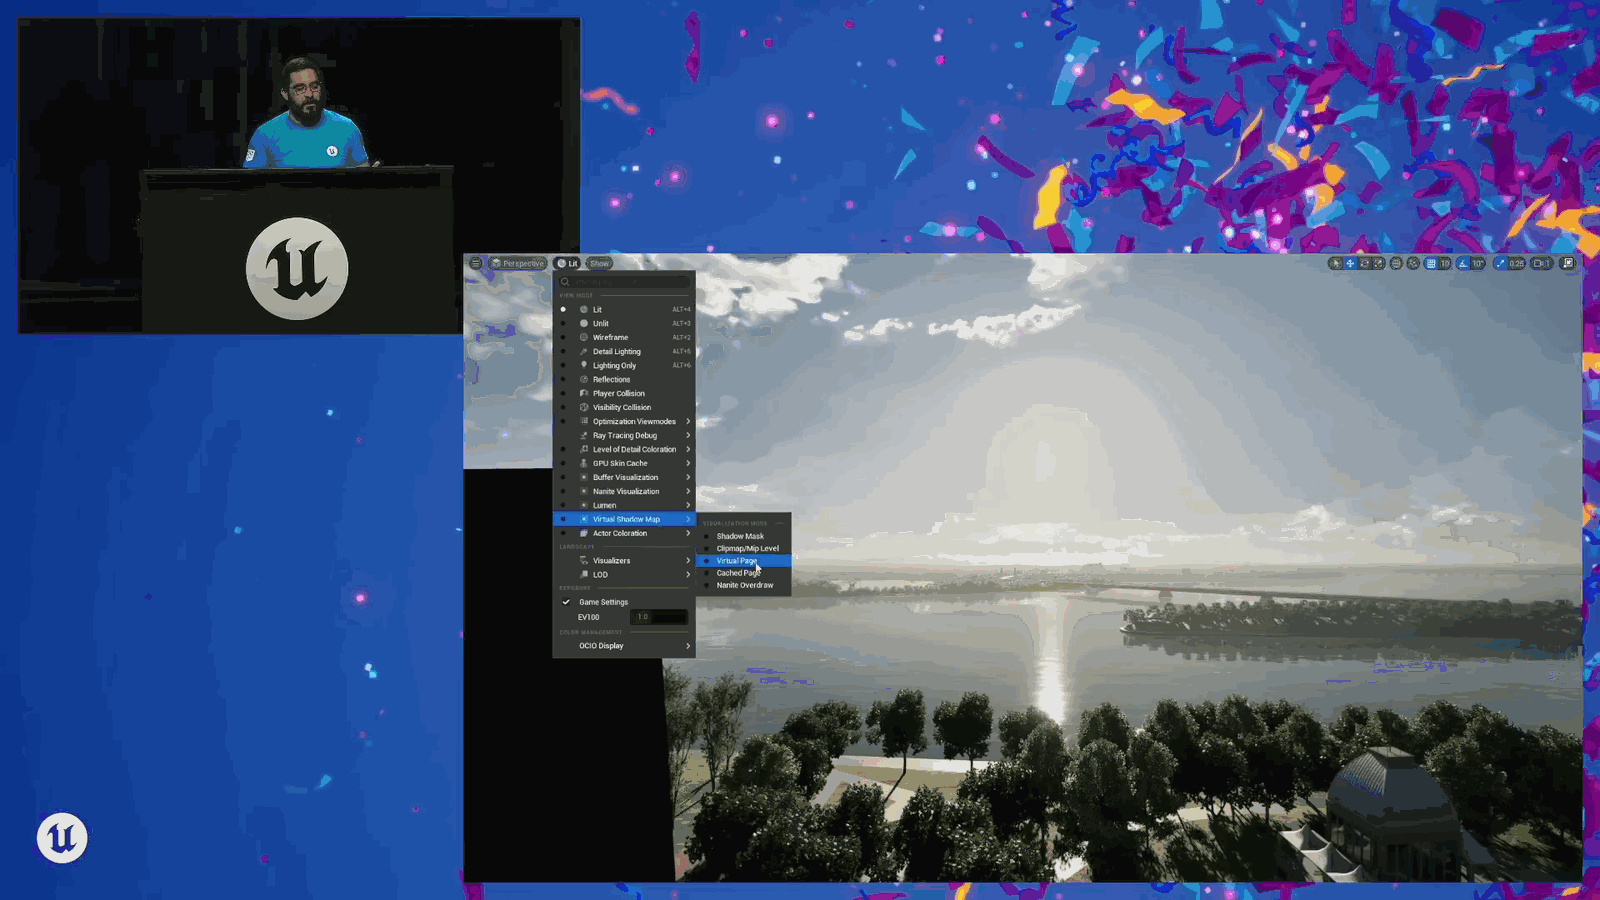
Instead of writing out a bunch of shadow depth cascades every frame, we virtualize those shadow pages, which lets us cache these pages and only update the parts of the shadow map that we actually need. To give you an overview of that, right? We talked about virtual textures; those have tiles. Similarly, virtual shadow maps have pages, and each of these little squares we can think of as effectively a page.
Slide 187 — 00:43:58
📌 要点汇总
- 提到关于 five four 的新特性 virtual texture tile
- 该特性与纹理管理相关,可能涉及性能优化
- 未提供具体技术实现细节或数据指标
Virtual texture tile. So, a couple of quick things I wanted to mention about this new to five four.
Slide 188 — 00:44:05
📌 要点汇总
- 静态缓存默认不会每帧更新阴影缓存
- 动态缓存需要根据场景变化进行更新
- 虚拟阴影映射默认处理静态对象以提高性能
- 缓存更新策略影响渲染性能和视觉质量
There’s an update to static versus dynamic caching. So, if you’re unfamiliar, by default, virtual shadow maps will say, “All right, I’ve got things that are static. They are not invalidating the shadow cache every frame, so those get.”
Slide 189 — 00:44:17
📌 要点汇总
- 静态页面与动态虚拟阴影地图缓存分离处理
- 任何导致缓存页面失效的操作都会将其标记为动态
- 走近树木会触发缓存页面失效,标记为动态
- 超出WPO禁用距离后,缓存页面不再失效
- WPO禁用距离由开发者设定,影响缓存行为
Drawn into the static pages, and then I have stuff that does invalidate cache pages, and those are going to go into a dynamic virtual shadow map cache. So they’re separate, right? But if something ever prior to five four, if something ever invalidated a cache page, it would always be treated as dynamic. So if I walk up to a tree, it invalidates cache pages. Great, it’s dynamic. But then if I walk far away from the tree, beyond its WPO disable distance, because we set our WPO disable distances.
Slide 190 — 00:44:47
📌 要点汇总
- 动态缓存页面会错误地包含不需要的内容
- 可通过控制台变量
r.shadow进行调整 - 该问题可能影响性能和缓存效率
It’s not invalidating cache pages, but it is still being treated as dynamic, and it’s still going to be drawn into dynamic cache pages, even though it doesn’t actually need to be. So, we’ve got a console variable for that, which is r dot shadow.
Slide 191 — 00:45:00
📌 要点汇总
- 提到虚拟缓存静态分离和帧静态阈值的CVar设置
- 与r_vt_page_threshold类似,用于控制未命中缓存的等待时间
- 该设置影响渲染性能和资源加载策略
Virtual cache static separate dot frame static threshold cvars in the links and this is similar to the r vt page threshold. This is basically saying, okay, how long should something not in.
Slide 192 — 00:45:14
📌 要点汇总
- 在将缓存页面转换为静态前需进行验证,以避免转换过程中的成本
- 转换回动态内容时同样会产生一定成本
- 虚拟阴影地图的另一项修改涉及对WPO禁用距离的处理方式
Validate cache pages before I turn it to static, because when I turn it to static, there’s a little bit of cost there. When I turn it back to dynamic, there’s a little bit of cost there. The other change to virtual shadow maps is how we treat the WPO disable distance.
Slide 193 — 00:45:28
📌 要点汇总
- 使用 WPO 实现了 Ferris wheel 的动画效果
- 设置了极短的 WPO 禁用距离以演示效果
- WPO 具有稳定的距离控制特性
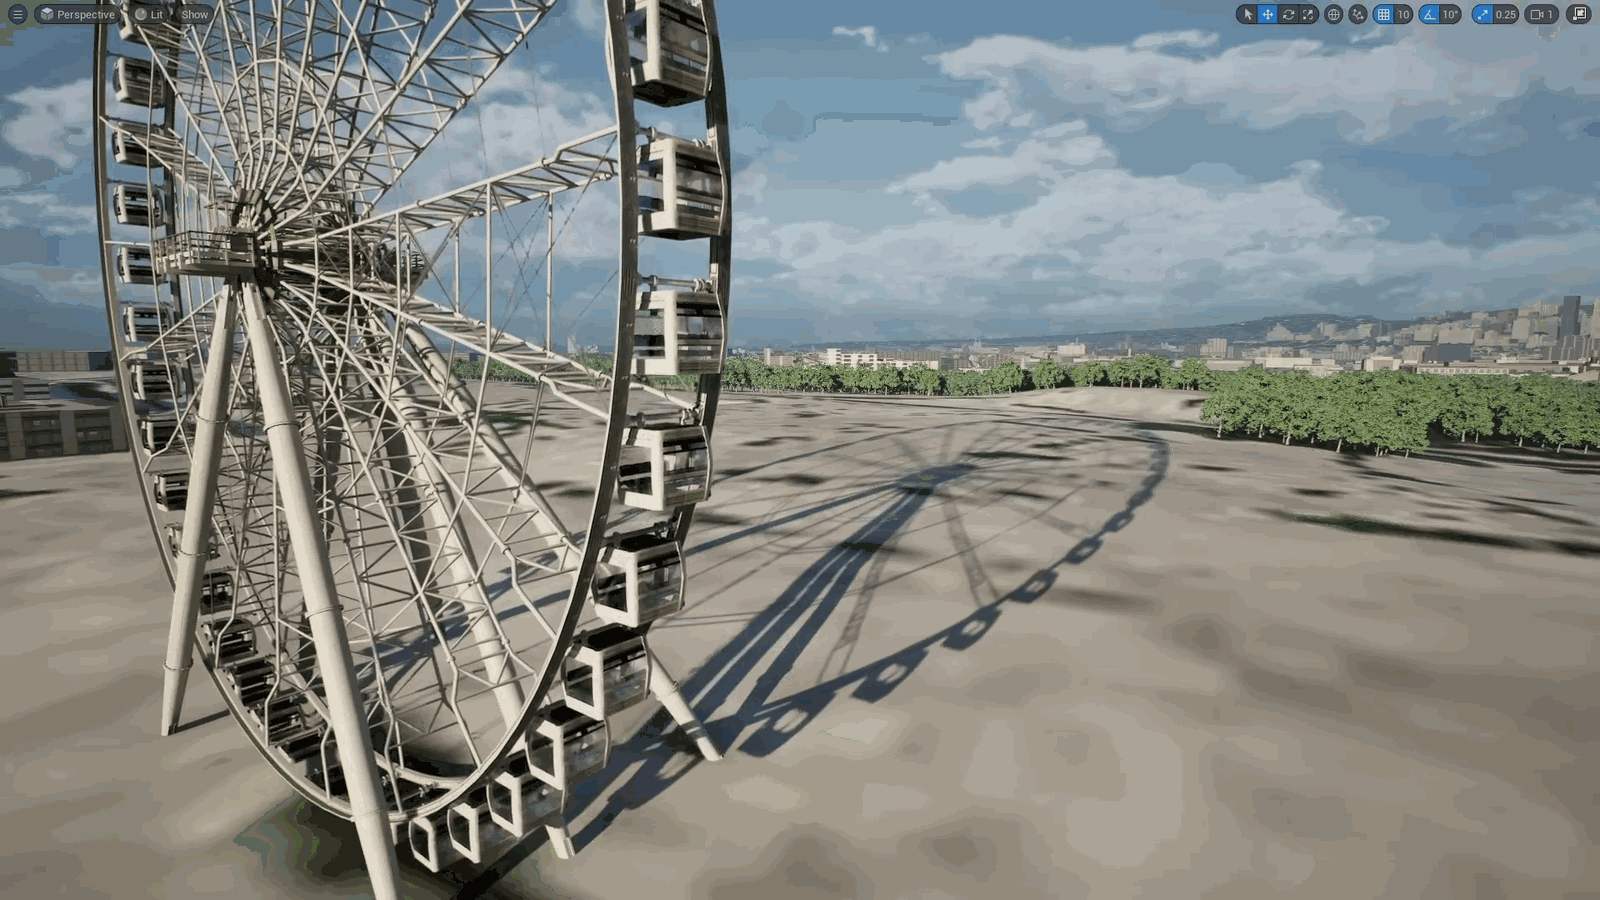
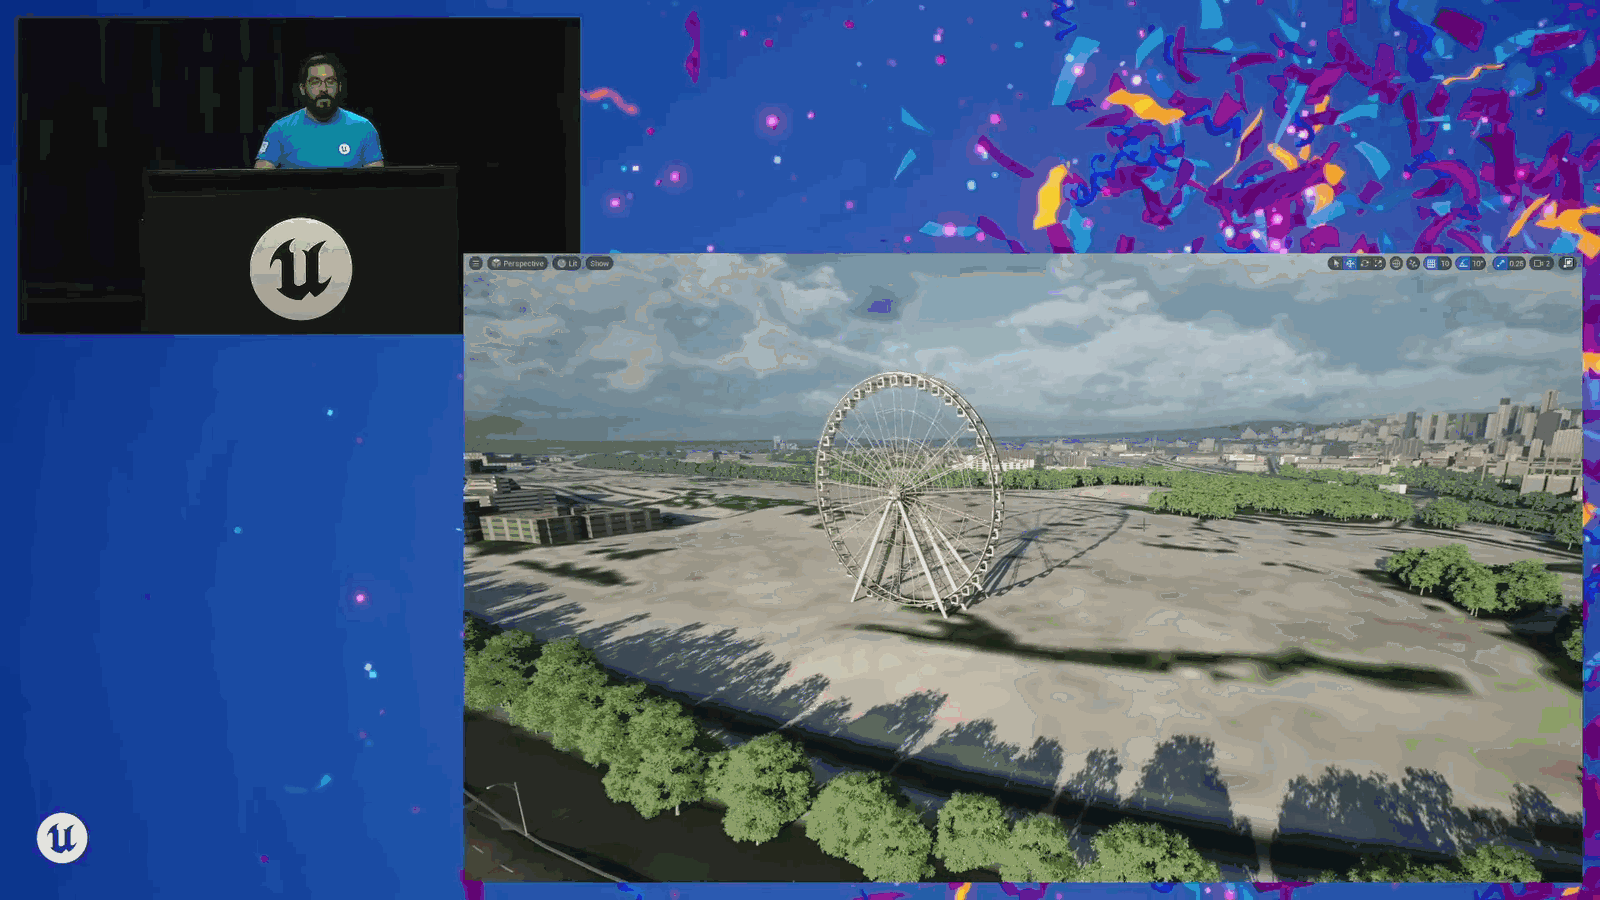
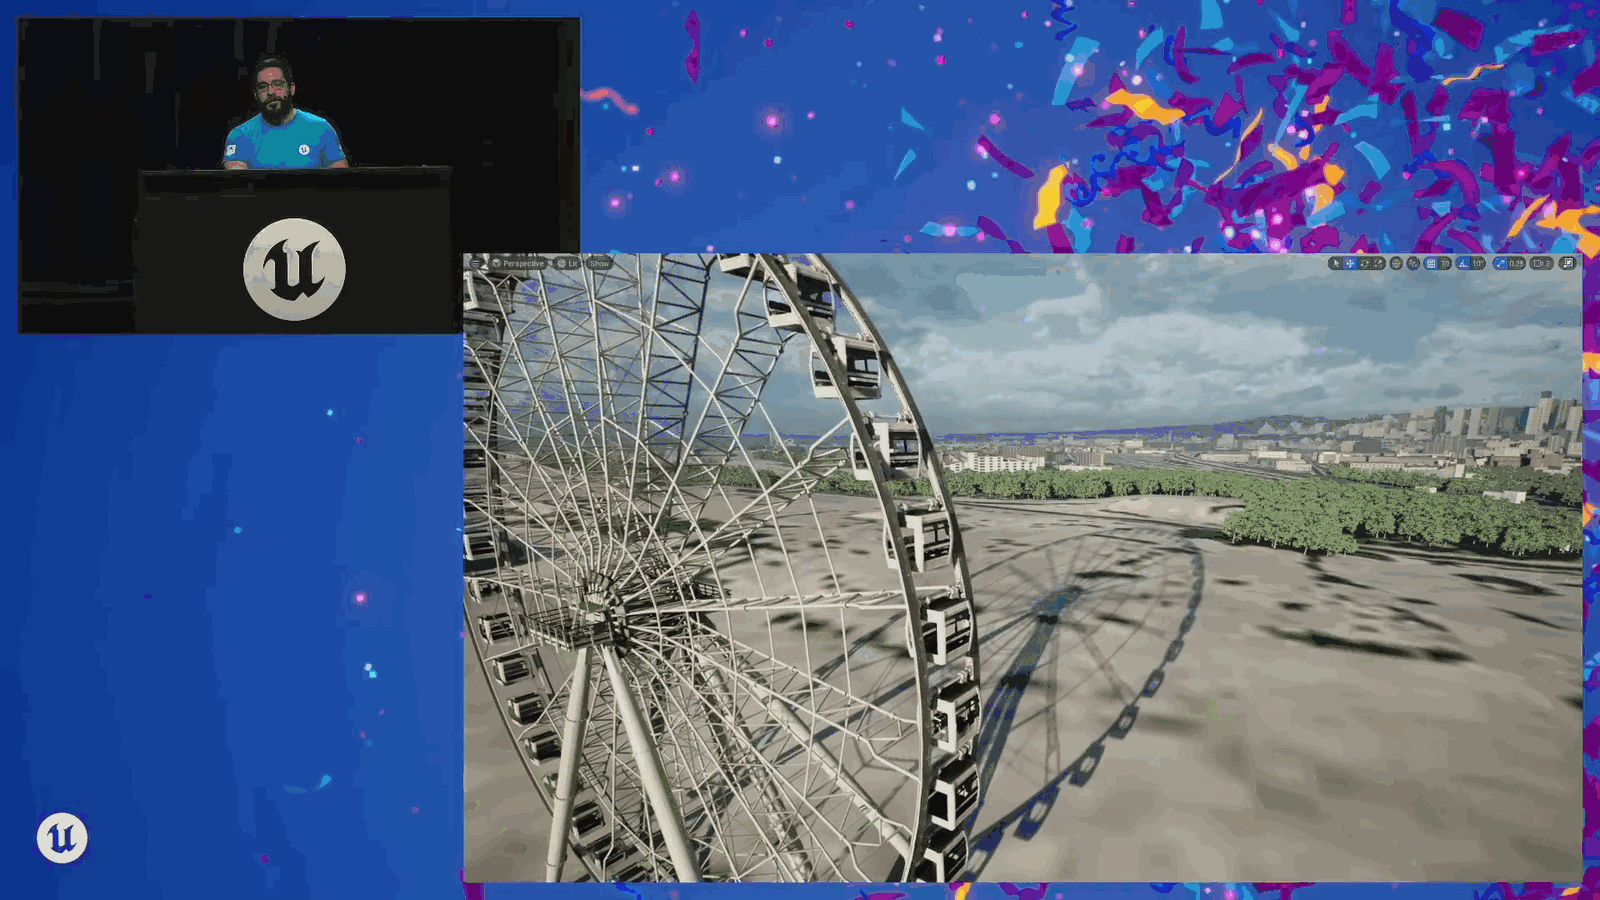
So I set up this Ferris wheel here. It is totally animated with WPO, so that I could create this example, and I’ve set a really short WPO disable distance on it, so I can demo this. So WPO has a stable distance.
Slide 194 — 00:45:40
📌 要点汇总
- (过渡内容,无关键要点)
If I get far away from this thing, it will stop animating, and it will then of course.
Slide 195 — 00:45:47
📌 要点汇总
- 停止使阴影缓存页面失效,符合预期行为。
It will stop invalidating shadow cache pages, which is desirable behavior.
Slide 196 — 00:45:52
📌 要点汇总
- 在5.4版本之前,如果物体在日出或日落时投下长影子,会无效化整个影子范围内的缓存页。
- 这种行为与直觉相反,可能导致不必要的缓存刷新和性能下降。
But what would happen prior to 5.4 is if we had this thing casting a really long shadow, like at dusk or dawn, if it was close to us, it would invalidate cache pages all the way out the length of its shadow, which is kind of counterintuitive.
Slide 197 — 00:46:07
📌 要点汇总
- WPO disable distance影响缓存页面失效范围,类似五版实现
- 新系统将WPO disable distance向上取整到最近的clip map层级
- 通过clip map mask层级确定取整规则
- 该方法优化了缓存失效范围的计算精度
That’s not really how we would want to do this. We would think that the WPO disable distance would have an effect on how far it can invalidate cache pages, which is what we did for five four. So let’s go back to that. Let’s get closer to it, get it animating. And so what the new system does is it takes the WPO disable distance, it rounds up to the nearest clip map level, which, if we look at clip map mask level.
Slide 198 — 00:46:33
📌 要点汇总
- (过渡内容,无关键要点)
So we can see. All right, so it’s going out to here, out to here, out to here, and then I’m going to round up to green from green to green.
Slide 199 — 00:46:39
📌 要点汇总
- 红色阴影投射时,不应使红色缓存页面失效
- 存在LOD偏移,会导致实际效果超出预期
Red, and then if the shadow is casting into red, don’t invalidate any of the red cache pages. There’s a LOD bias to this, so it’ll actually go out.
Slide 200 — 00:46:47
📌 要点汇总
- (过渡内容,无关键要点)
A little bit further, just to make sure that you don’t see the artifact that I’m about to show you, because I want to show you what this looks like. So if you’re
Slide 201 — 00:46:53
📌 要点汇总
- WPO disable distance 设置较短,用于控制渲染距离
- LOD bias 设置为 3,影响细节层次切换
- 通过 R_shadow_virtual_clip_map_WPO_disable_distance_LOD_bias 可调整参数
- 参数调整影响阴影渲染性能与视觉质量
You ever see it, you know what it is. So, I’ve got the WPO disable distance set really short. The LOD bias on the WPO disable distance is set to three. So we’re going to go three beyond that by default. But then if I do R shadow virtual dot clip map dot WPO disable distance dot LOD bias, and I set that to…
Slide 202 — 00:47:16
📌 要点汇总
- (过渡内容,无关键要点)
Zero. Hopefully, you can see half of the shadow stopped animating. Do you see that? Right. So if you’re…
Slide 203 — 00:47:23
📌 要点汇总
- 半影移动不一致是由于WPO禁用距离和LOD偏移控制变量共同作用
- 通过调整控制变量可对阴影效果进行一定程度的控制
- 示例中设置极低的WPO禁用距离,不建议在生产环境中使用
- 需注意此类参数对最终视觉效果的影响
See this like artifact where just like half the shadow is moving and the other half isn’t. That’s what is going on here. It’s a combination of the WPO disable distance on the primitive and the LOD bias in that console variable. So it gives you a little bit of control there. So I’m going to bring that back. But I contrived this example. Short WPO disable distance. Set that CVAR really, really low. Not necessarily what you’re going to do in production, but thing to watch.
Slide 204 — 00:47:48
📌 要点汇总
- 虚拟阴影贴图(VSM)性能优化前需先进行调试
- 优化前应关注缓存失效(cache invalidations)等问题
- 调试是优化VSM性能的关键第一步
Watch out for other things. One thing I want to talk about is virtual shadow map performance, and again, how we want to debug that. Firstly, before you start optimizing VSMs and cache invalidations and things like that, start with the.
Slide 205 — 00:48:00
📌 要点汇总
- 使用 Nanite 的 viz buffer 可以在 GPU visualizer 中查看 shadow depth 数据
- 通过 shadow depth 分析可以优化 Nanite 的阴影渲染性能
- 该方法有助于识别 Nanite 在 GPU 上的深度缓冲区使用情况
- 可用于排查 Nanite 渲染过程中的潜在性能瓶颈问题
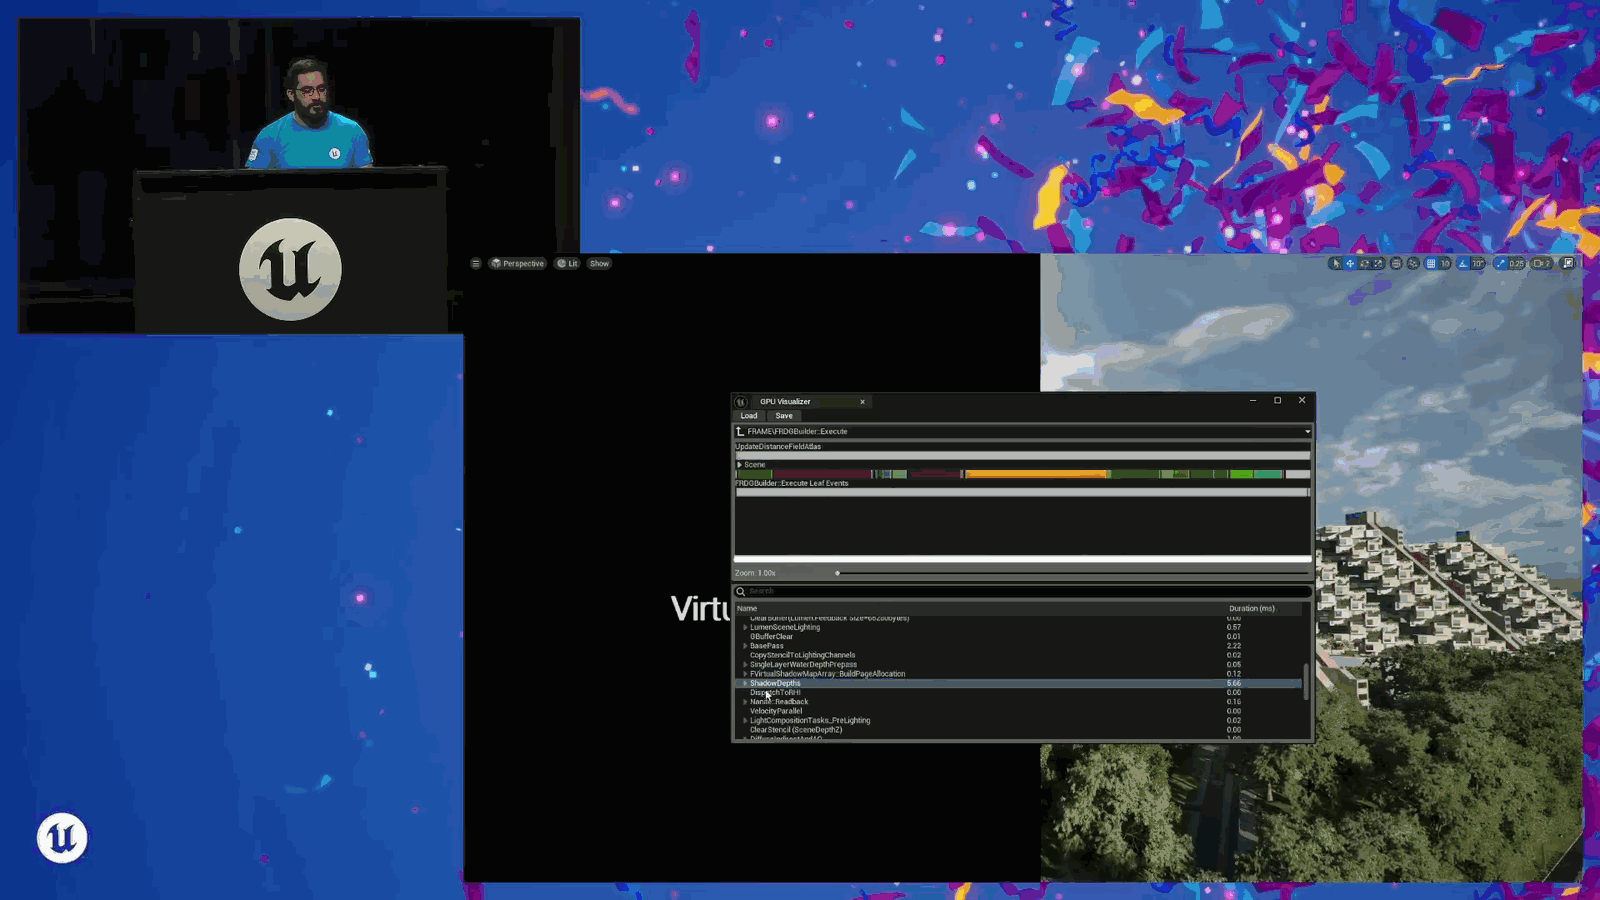
Nanite viz buffer because if we go into our GPU visualizer, I can go to shadow depth.
Slide 206 — 00:48:07
📌 要点汇总
- Nanite Viz buffer 优化可同时提升虚拟阴影地图渲染效果
- 虚拟阴影地图与 Nanite 几何体绘制存在关联
- 优化 Nanite Viz buffer 带来多重性能收益
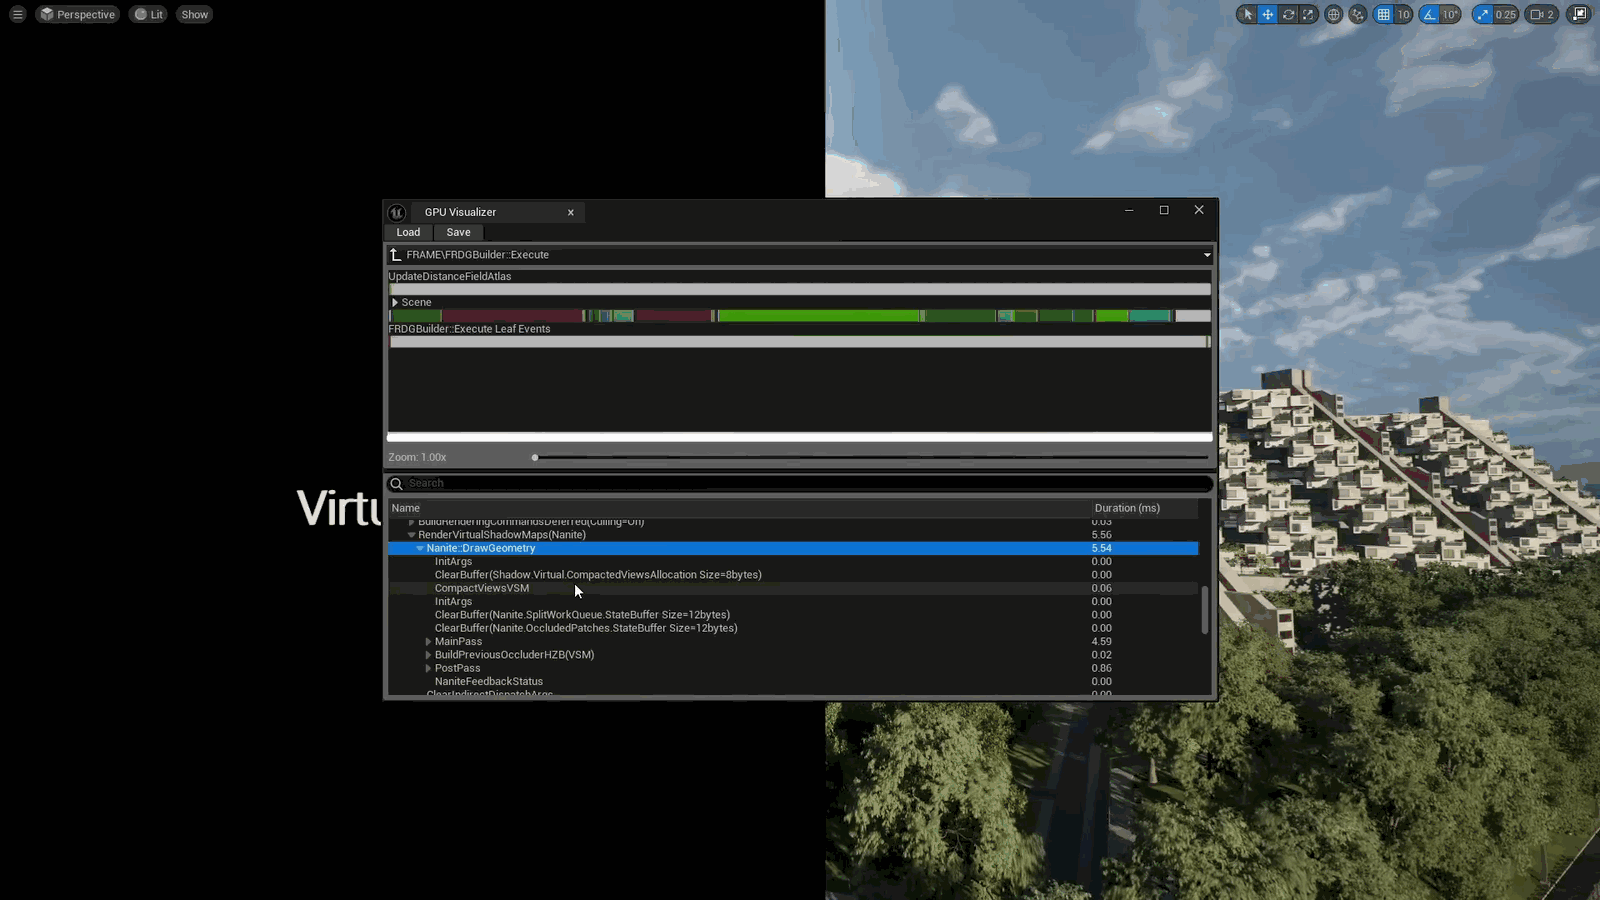
And we can see that in render virtual shadow maps, Nanite draw geometry. This is also a Nanite Viz buffer pass. So if you optimize your Nanite Viz buffer, you will also have benefits when you’re rendering virtual shadow maps, which is great. The other thing that you can do.
Slide 207 — 00:48:25
📌 要点汇总
- 在调试 Nanite 可编程光栅化时,发现虚拟阴影映射存在 Nanite 过绘制问题
- 过绘制问题可能影响渲染性能和视觉效果
- 需要进一步分析 Nanite 可视化树以定位问题根源
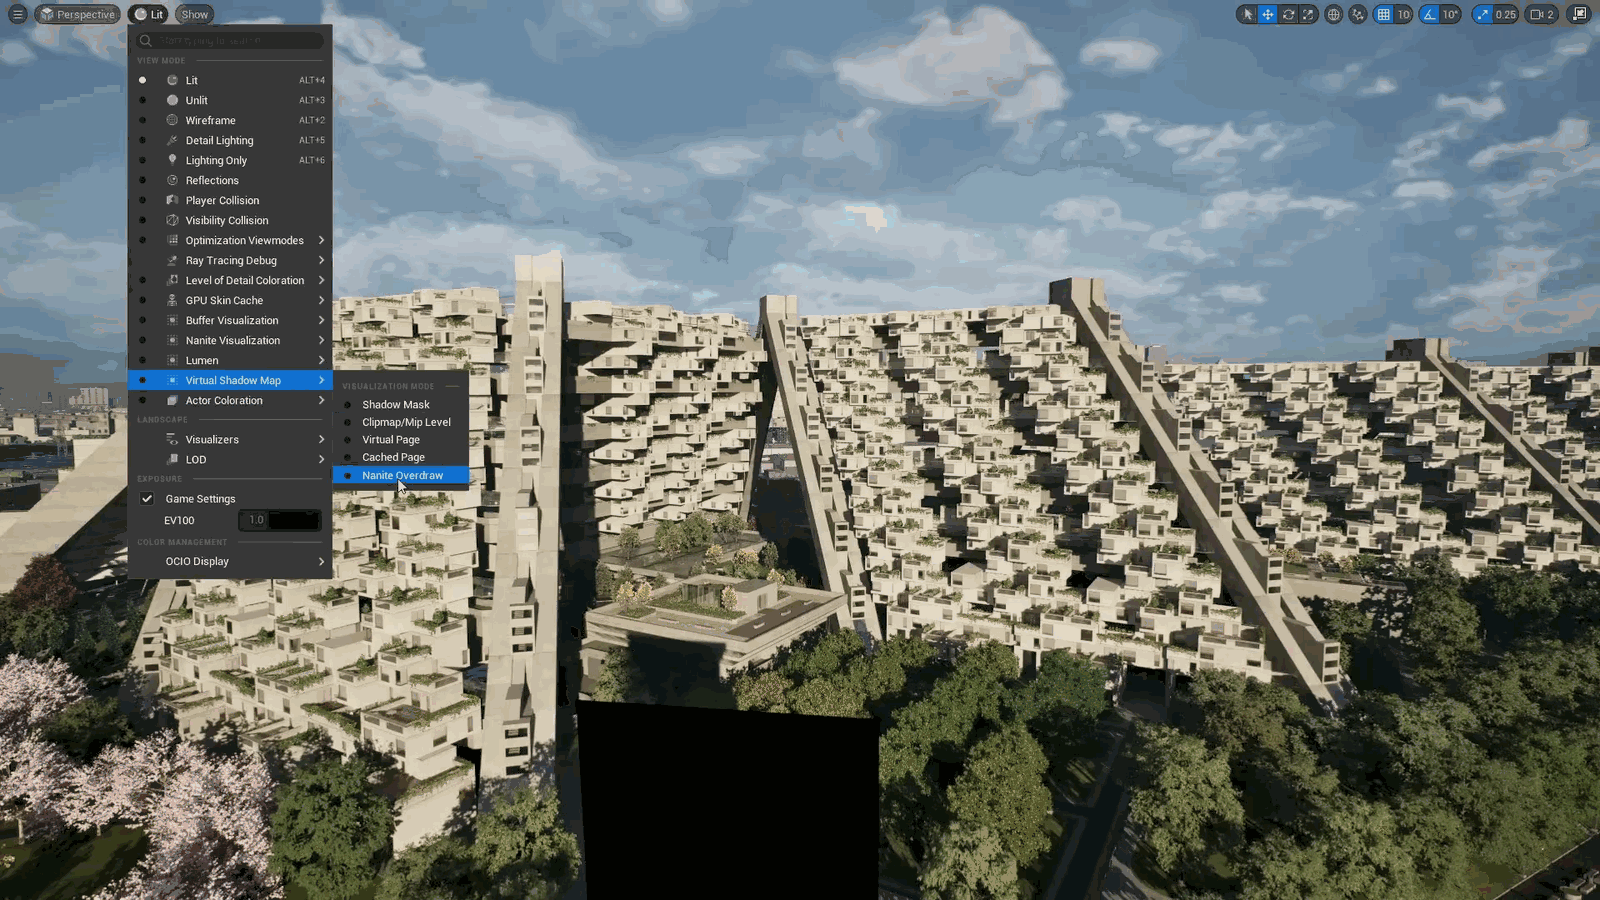
Again, as we’re debugging the Nanite visualization tree, as we’re debugging our Nanite programmable rasterization, there is a virtual shadow map Nanite overdraw.
Slide 208 — 00:48:34
📌 要点汇总
- 从定向光视角查看虚拟阴影贴图的视图模式
- 仅缓存页面被刷新,因此并非所有内容都会渲染
- 强调通过数据展示性能和效果指标的重要性
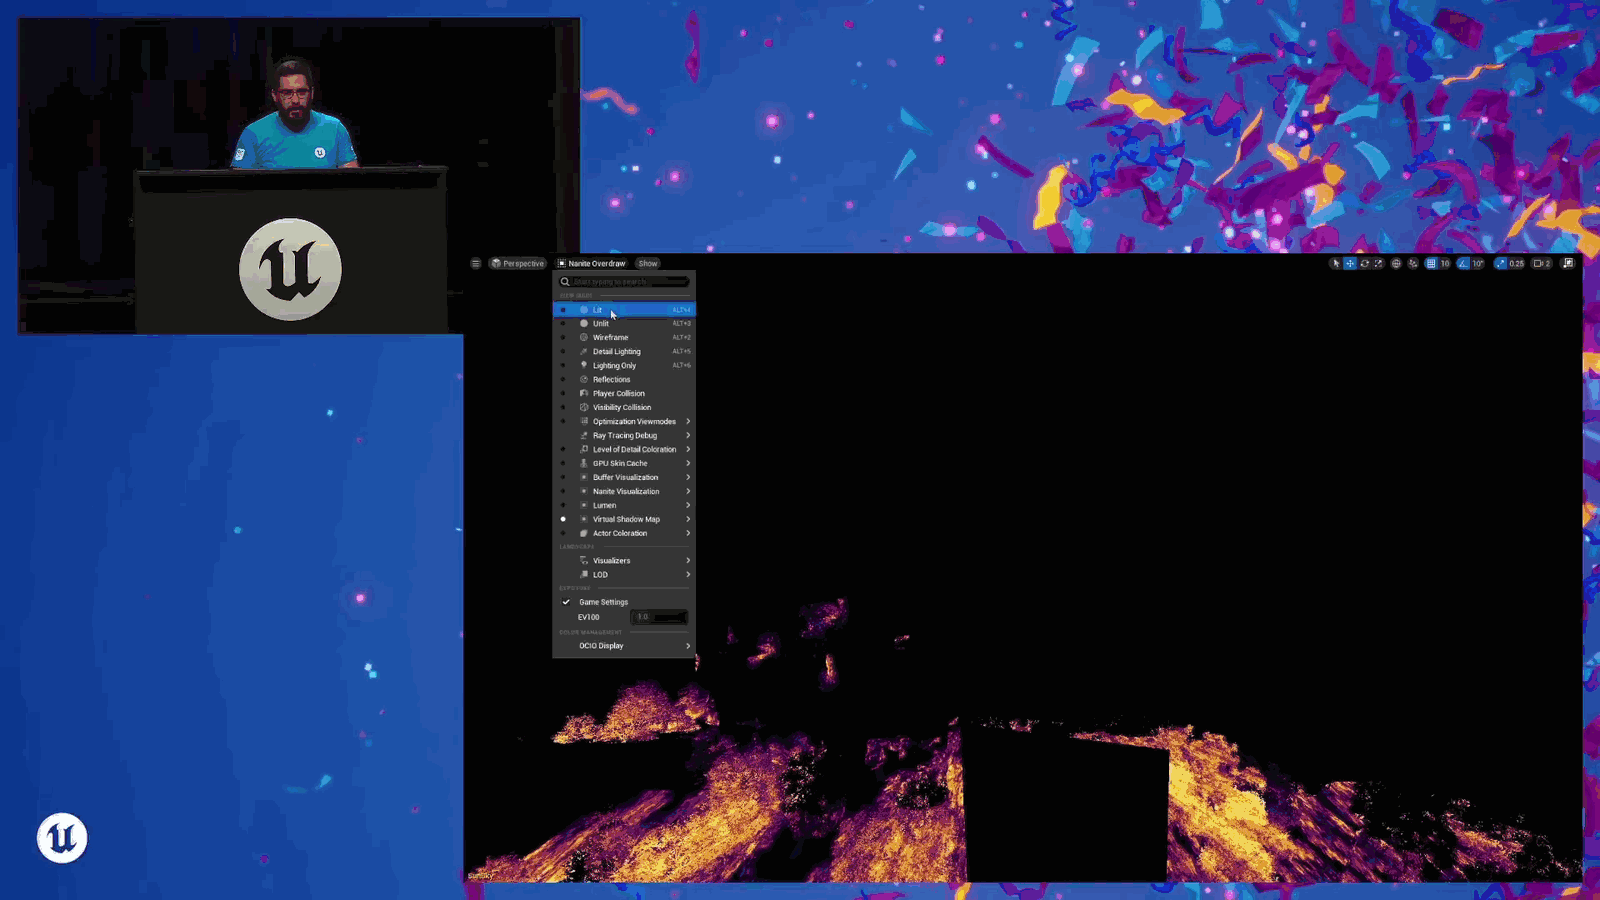
View mode for virtual shadow maps from the perspective of the directional light, and you’re going to see that not everything is rendering in this view because only those cache pages are the ones that are being invalidated. Okay, and as I said, I’m a numbers guy. I want to show you some numbers.
Slide 209 — 00:48:52
📌 要点汇总
- 可通过运行 shader print 命令查看虚拟阴影贴图信息
- 使用 “r_dot_shadow_virtual_show_stats 1” 可获取详细统计数据
- 该方法有助于分析虚拟阴影贴图的性能与渲染表现
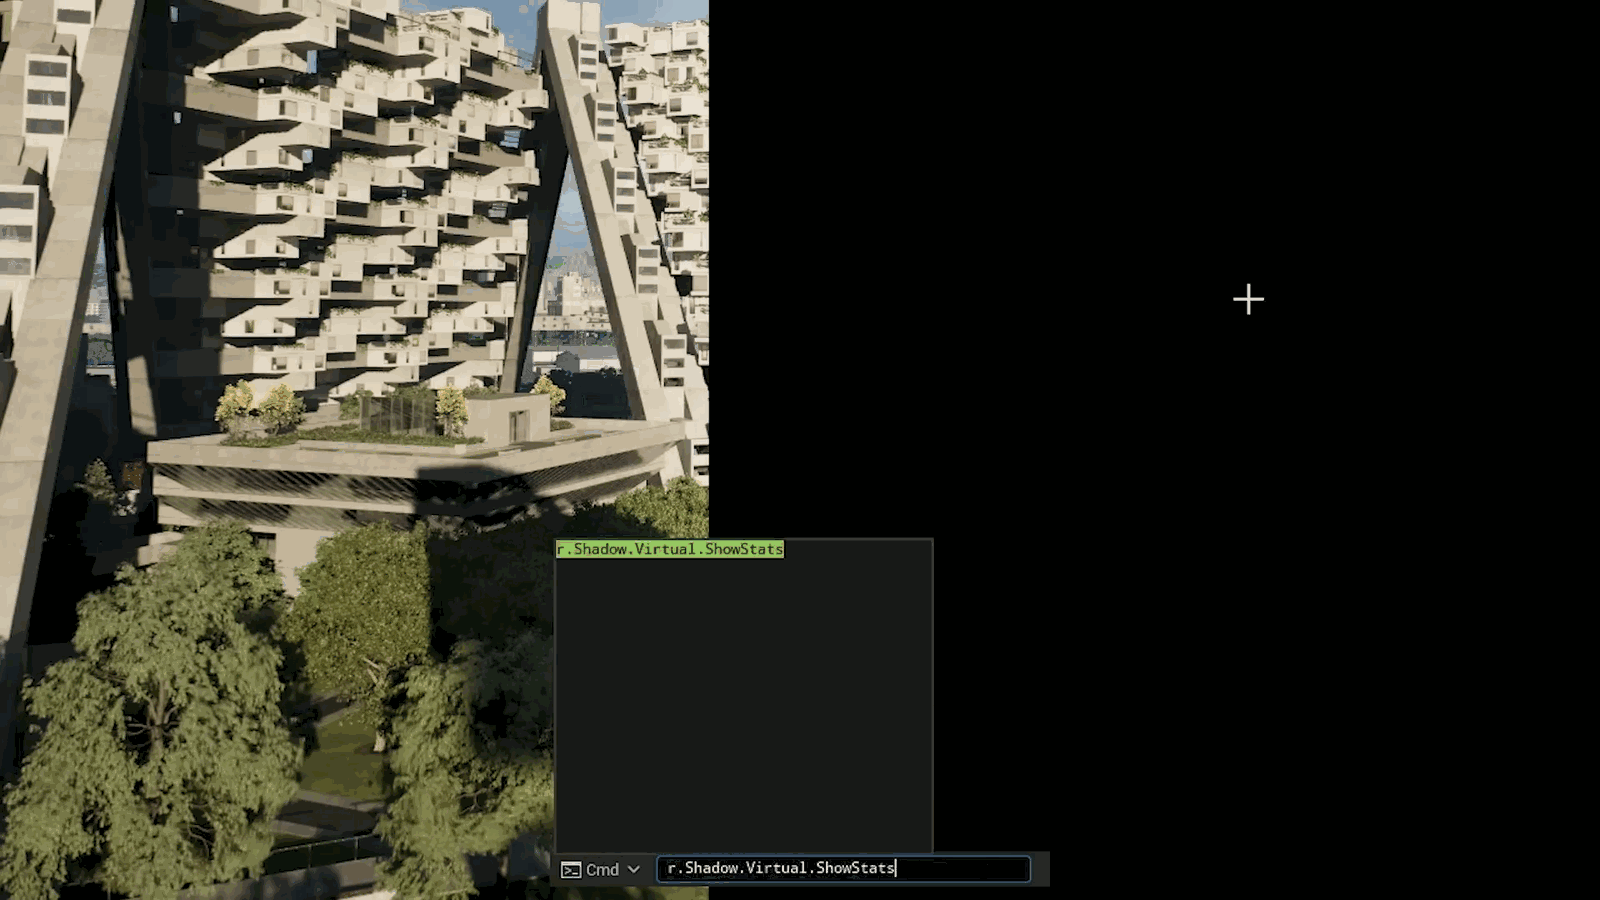
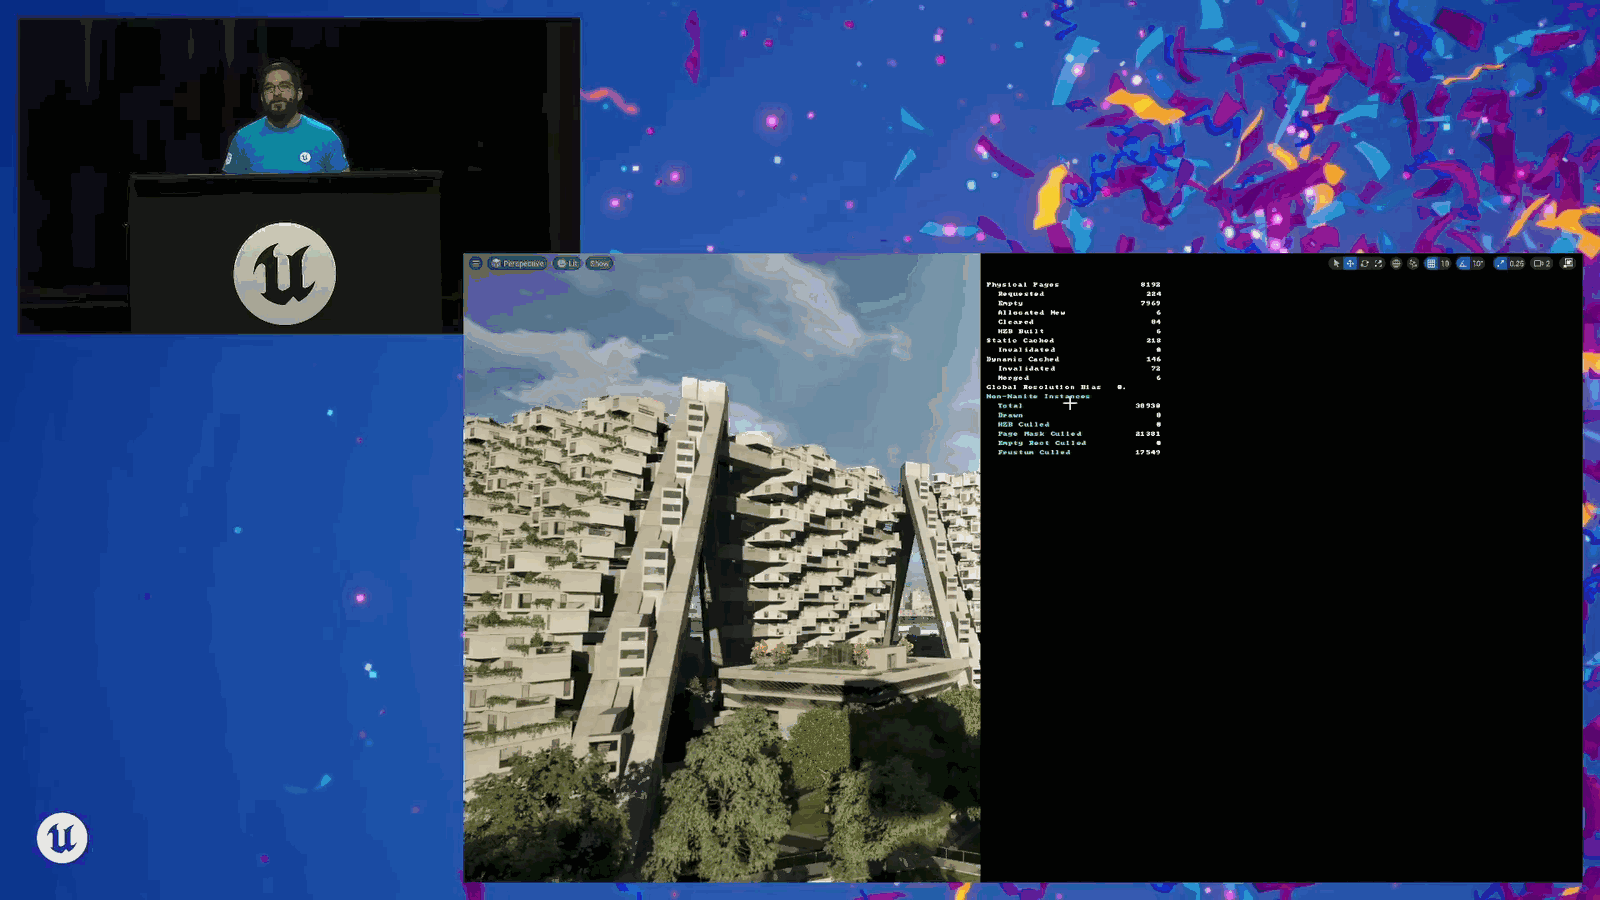
So one of the things that we can do with virtual shadow maps is run the shader print command, and then we can do “r_dot_shadow_virtual_show_stats 1,” and this is going to give us a bunch of information.
Slide 210 — 00:49:04
📌 要点汇总
- 屏幕显示物理页面数量
- 绘制非Nanite几何体的数量较高,使用VSM成本较大
- 静态页面失效数量
- 动态页面缓存数量
Numbers on our screen. That’s going to show us the number of physical pages, the amount of non-Nanite geometry that’s being drawn, which is fairly expensive with VSM. The number of static pages that are being invalidated. The number of dynamic pages that are cached.
Slide 211 — 00:49:19
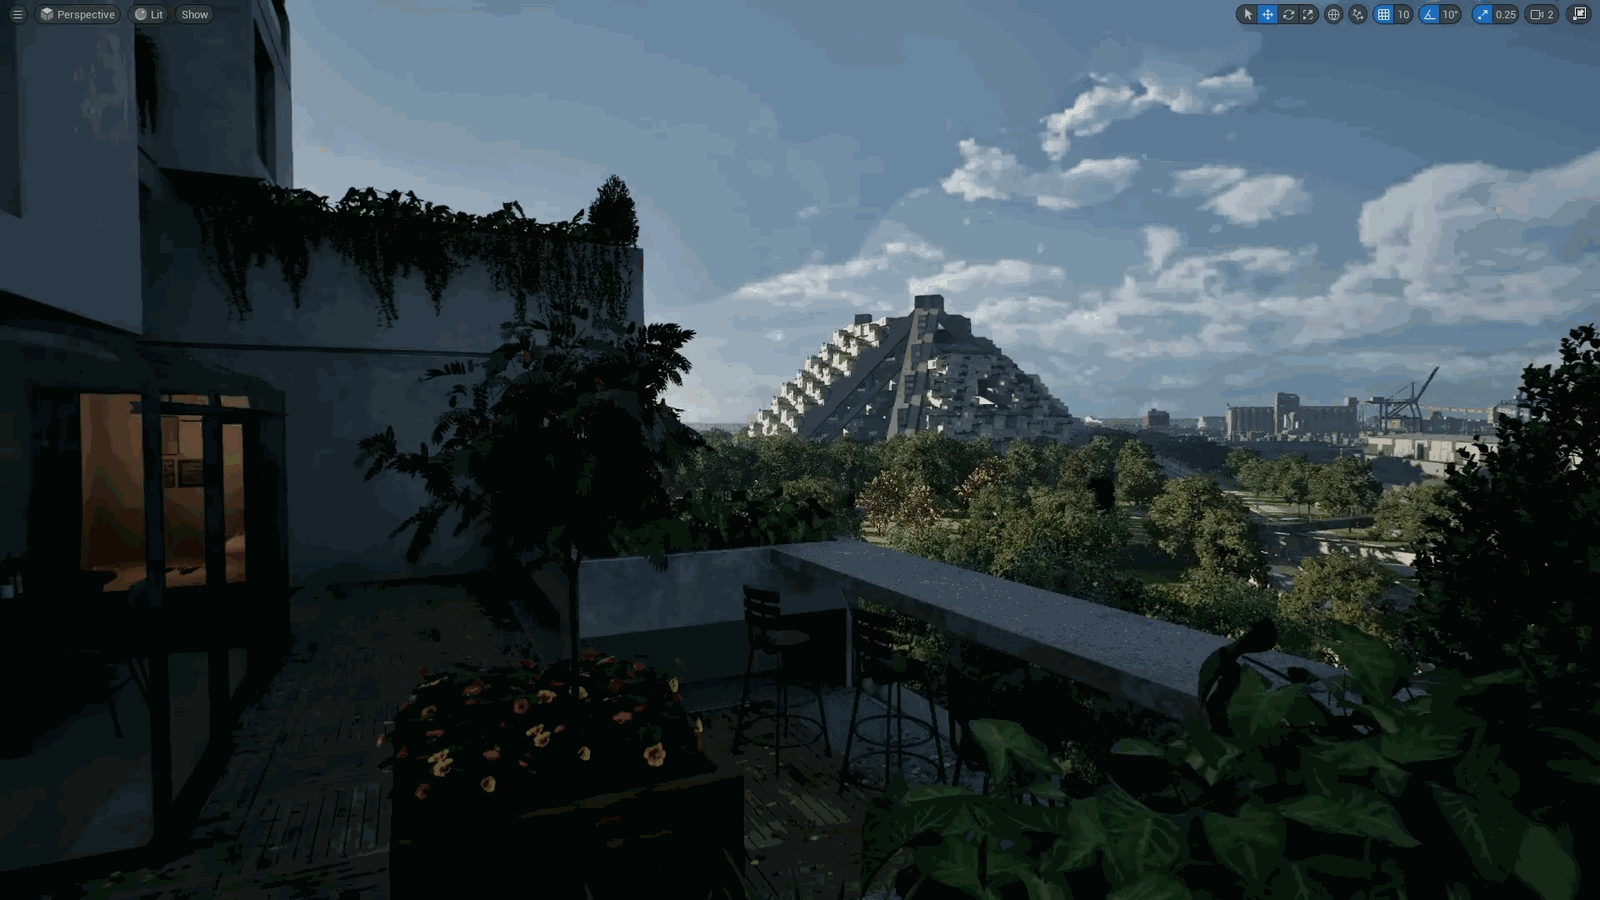
📌 要点汇总
- (过渡内容,无关键要点)
Invalidated. This is going to give you some numbers to help you figure out where to look. Should I be focusing on dynamic invalidations or static invalidations, and so on? So turn that one off.
Okay. So what have we learned today?
Slide 212 — 00:49:33

📌 要点汇总
- 学习了虚拟纹理的设置及其构建时的注意事项
- 了解了如何调试 Nanite 性能及新特性如细分和样条网格
- 获得调试 Lumen 的技巧,包括屏幕追踪、世界追踪和控制台变量
- 了解虚拟阴影贴图的工作原理及一些有趣特性
Well, we learned some project settings that are going to make things a little easier for us. We learned about setting up virtual textures and the considerations that we’re going to need to make as we are building them out. We also learned how we can debug Nanite performance. We learned about some of the new features with Nanite, like tessellation and spline meshes.
We got some tips for debugging Lumen, such as setting our screen traces or world traces, or which console variables we might want to look at. And we learned some fun things about virtual shadow maps and how they work.
Slide 213 — 00:50:02

📌 要点汇总
- 通过调试可以快速确定无效化问题的范围
- 有助于更高效地定位和解决系统问题
We might debug some of those issues so that we can figure out the extent of our invalidations very quickly.
Slide 214 — 00:50:08
📌 要点汇总
- (过渡内容,无关键要点)
There are some other talks I want you to go to. So if you leave right now, you might be able to make it to the rendering session.
Slide 215 — 00:50:13
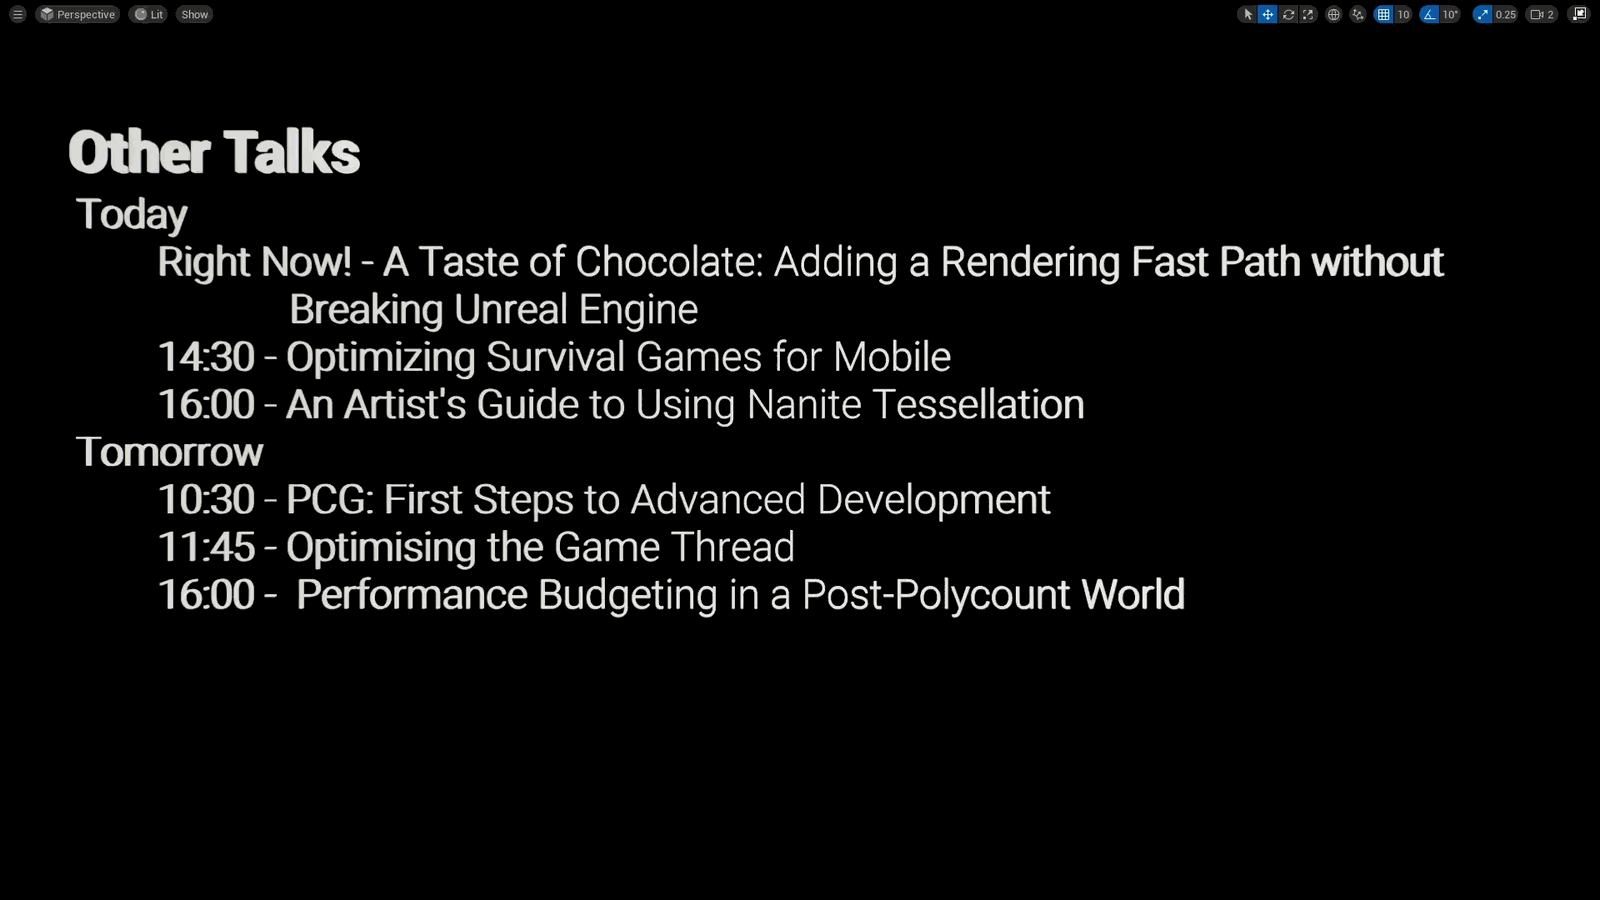
📌 要点汇总
- 提到在不破坏Unreal Engine的前提下实现快速路径优化
- 建议关注移动端生存游戏优化相关内容
- 提到Aaron Langmead将讲解Nanite细分技术的艺术指南
- 强调对PCG(程序化内容生成)的兴趣并推荐相关主题
Fast path without breaking Unreal Engine. You might also want to go to optimizing survival games for mobile. Or again, Aaron Langmead is doing an artist’s guide to using Nanite tessellation tomorrow. I just love talking about PCG, so definitely check out first steps to.
Slide 216 — 00:50:27

📌 要点汇总
- 强调游戏线程优化的重要性,并引用 Tanglewood Games 的经验
- 在 Nanite 时代,三角形数量不再是性能预算的核心指标
- 需要适应 post-polycount 时代的新性能优化方法
- 传统性能评估方式已不适用于现代图形技术(如 Nanite)
Advanced development. There’s also optimizing the game thread, game thread from our friends at Tanglewood Games, and of course performance budgeting in a post-polycount world. Because asking how many triangles you can have for Nanite is the wrong question.
Slide 217 — 00:50:38

📌 要点汇总
- (过渡内容,无关键要点)
So definitely go check that talk out. All right, we are at time, so I’m going to give you a choice. It is lunchtime. We’re all hungry.
Slide 218 — 00:50:50

📌 要点汇总
- (过渡内容,无关键要点)
If you would like to leave for lunch, feel free to leave. But nobody is in this room for the next hour, so I am happy to keep going.
Slide 219 — 00:50:59
📌 要点汇总
- (过渡内容,无关键要点)
So, if you want to leave, feel free. If you want to ask questions, head up to the microphones.
Slide 220 — 00:51:04

📌 要点汇总
- (过渡内容,无关键要点)
On that, that’s all I got. Thank you all so much for coming out. I really appreciate your time. You’ve been a lovely audience.