
【GDC 2024】Open World Rendering Techniques in 'Hogwarts Legacy'
来源:PDF: D:\迅雷下载\Graphics Materials\GDC 2024 - Open World Rendering Techniques in ‘Hogwarts Legacy’.pdf Video: D:\迅雷下载\Graphics Materials\GDC 2024 - Open World Rendering Techniques in ‘Hogwarts Legacy’.mp4
提取时间:2026-05-16 14:29:10
以下是对您提供的《霍格沃茨遗产》(Hogwarts Legacy)技术文档内容的结构化总结与归纳,涵盖性能优化、渲染技术、视觉效果、季节系统、天气系统、天文系统、材质系统、自动化测试等多个方面,便于快速理解与查阅:
🧰 一、性能优化与渲染技术
1. 材质与渲染优化
- 材质排列器(Material Permutation):用于实现天气切换、魔法效果、生命绘画等场景,支持动态材质替换。
- 置换材质(Displacement Material):支持透明度、双面渲染、材质参数调整等。
- 预烘焙电影贴图集:用于减少动态3D角色渲染成本,整合大量动态绘画内容。
- 虚拟纹理(Virtual Texturing):用于自上而下天气渲染通道,提升性能。
2. 光照与HDR
- 光照探针(Light Probes):用于自适应亮度调整,确保画面切换时无突兀效果。
- HDR显示能力:通过HDIG实现,需额外添加校准纹理以确保图形设置准确。
- Lumos技术:用于提升画面亮度,但需处理亮度突变问题,采用基于探针的自适应方法。
3. 渲染通道与贴图
- 天气贴图(Weather Decal):用于天气累积效果,避免材质更换后影响其他对象的 stencil 使用。
- Niagara粒子系统:用于生成动态雨水波纹纹理,并通过渲染目标实现无缝平铺。
- Stencil Mask:用于增强渲染控制,支持动态物体和半透明材质处理。
🌧️ 二、天气与环境系统
1. 天气系统
- 天气贴图(Weather Decal):用于天气累积效果,支持动态物体和半透明材质处理。
- 天气遮罩(Weather Mask):采用多种遮罩方式,避免在室内接收信号。
- 动态天气渲染通道:成本过高,因此采用虚拟纹理进行自上而下捕获,结合法线和内部体积实现遮罩效果。
2. 雪地与季节系统
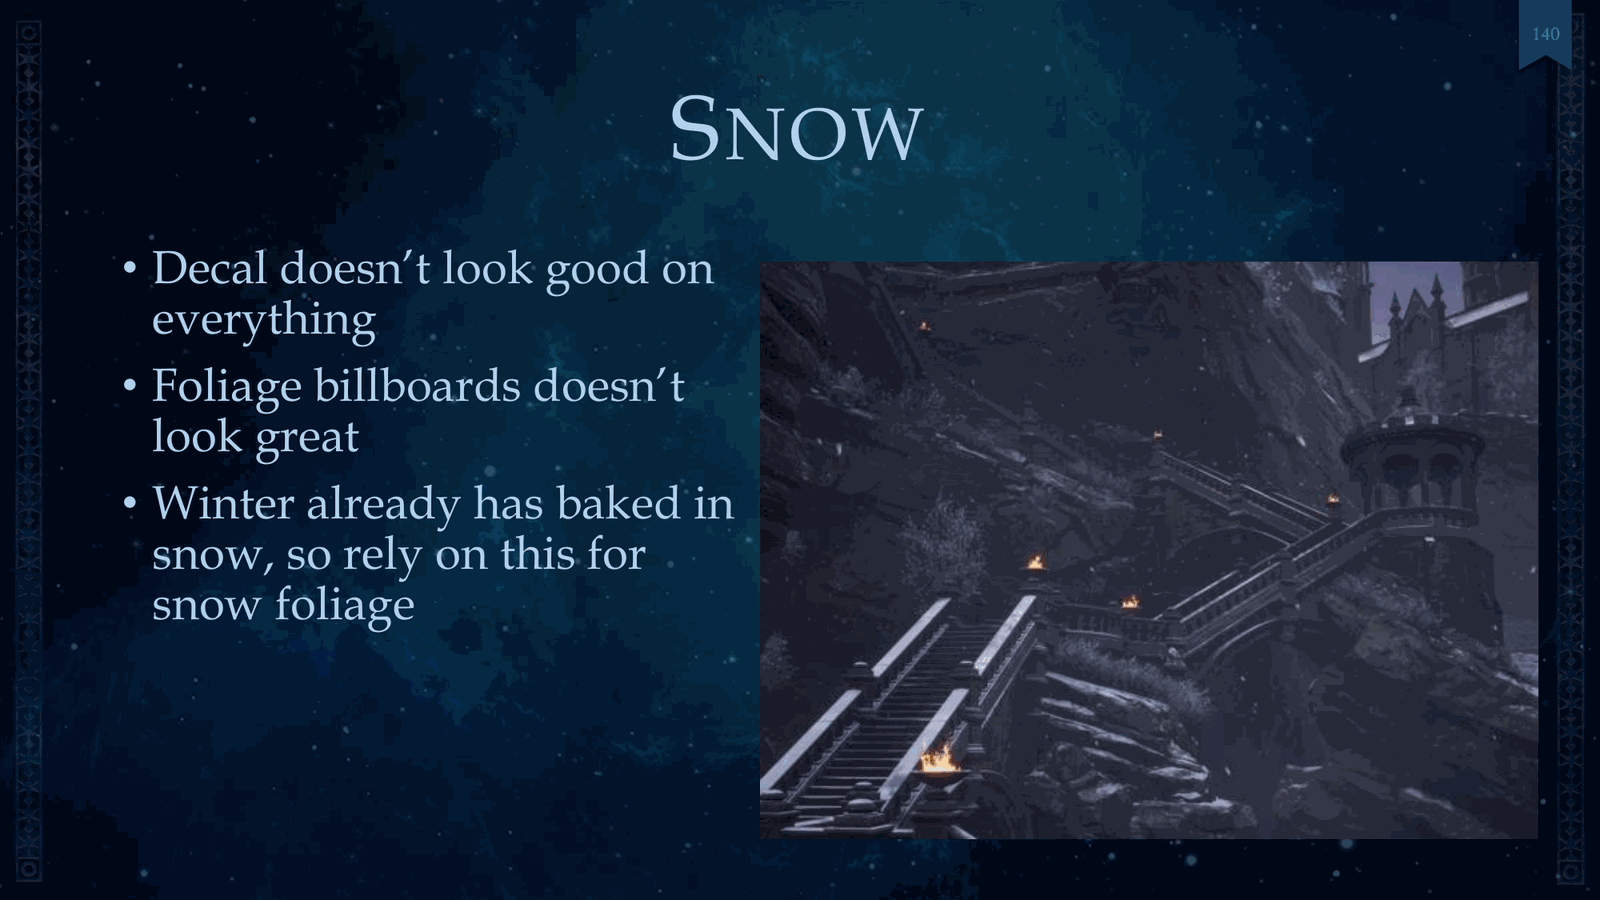
- 雪地贴图:在植被上效果不佳,因此直接使用冬季已烘焙的雪效果。
- 基于季节的资源切换:仅根据当前季节流式加载对应资源,提高性能。
- 季节特定计算:增加资源成本,但仅植被和草地需要调整。
3. 天气与材质切换
- 材质排列器:用于天气切换、魔法效果、生命绘画等场景。
- 材质替换(Material Swap):用于优化效果不佳的材质。
- 移动对象使用材质排列器:存储天气状态以控制积聚或衰减效果。
🌌 三、天文与天空系统
1. 天空大气着色器
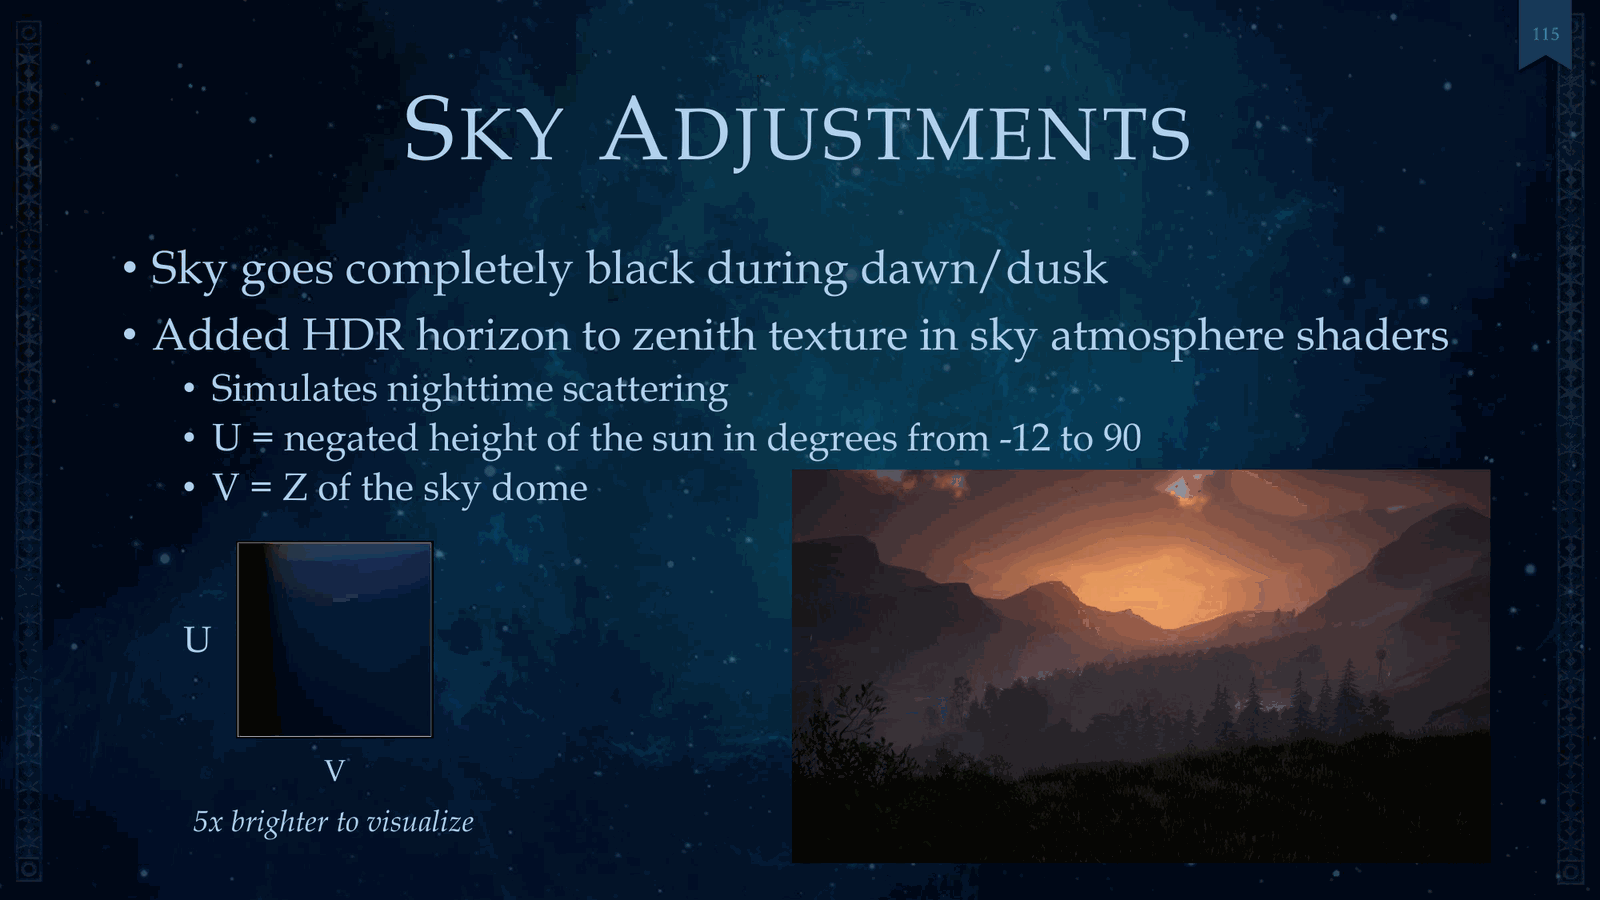
- HDR地平线到天顶纹理:用于模拟夜间散射,U坐标表示太阳高度的负值(单位为度,范围-12到90),V坐标表示天空穹顶的Z轴位置。
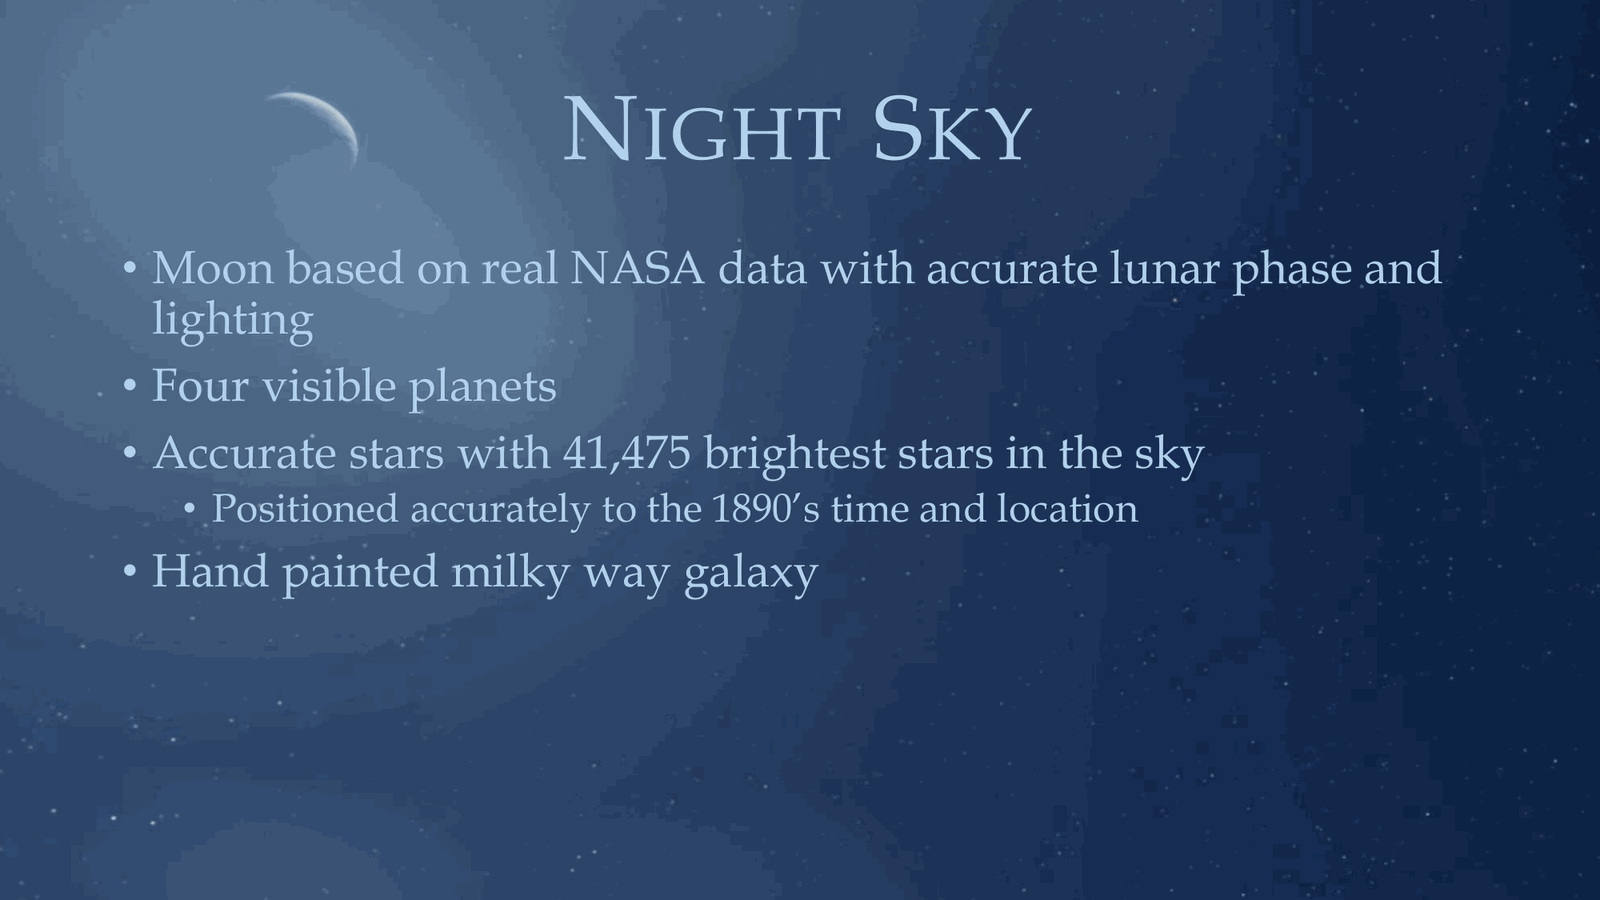
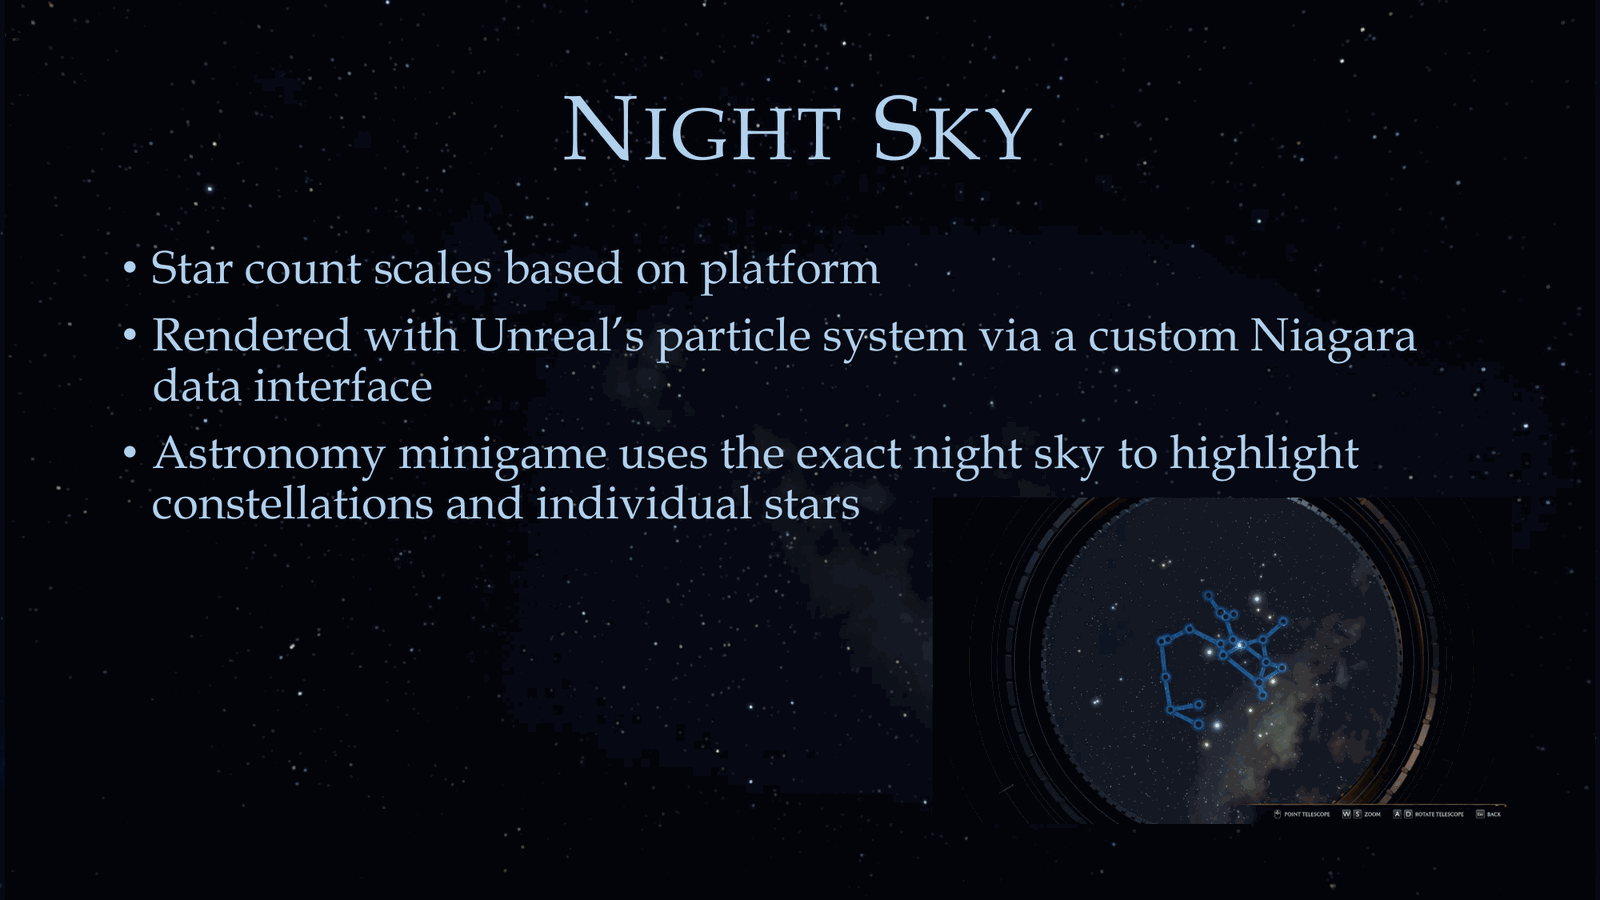
- 夜空与月相:基于真实NASA数据,包含准确的月相和光照效果,渲染了41,000颗最亮的恒星和四颗可见行星。
2. 天文可视化
- Unreal粒子系统与Niagara接口:用于实现夜空中的星座和单个恒星的渲染。
- 天文小游戏:展示真实夜空与星座,用于教育和娱乐。
🌳 四、季节与植被系统
1. 季节切换
- 基于区域的季节系统:山区任务固定为冬季,艺术家无需额外工作。
- 材质排列器:用于实现季节切换,支持植被和草地的实时材质替换。
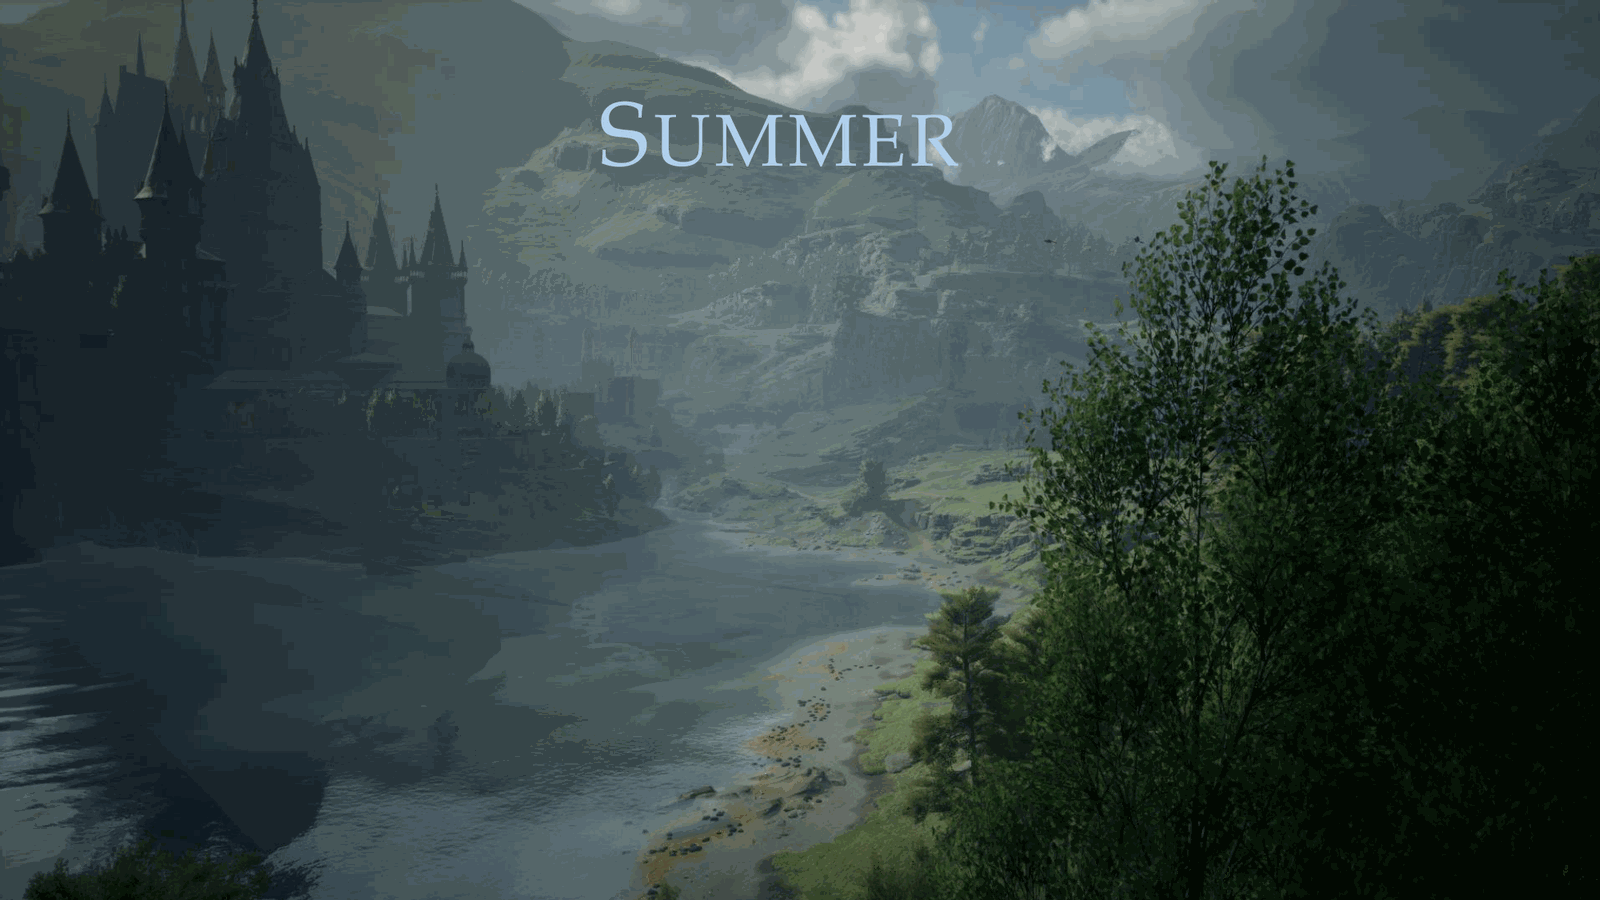
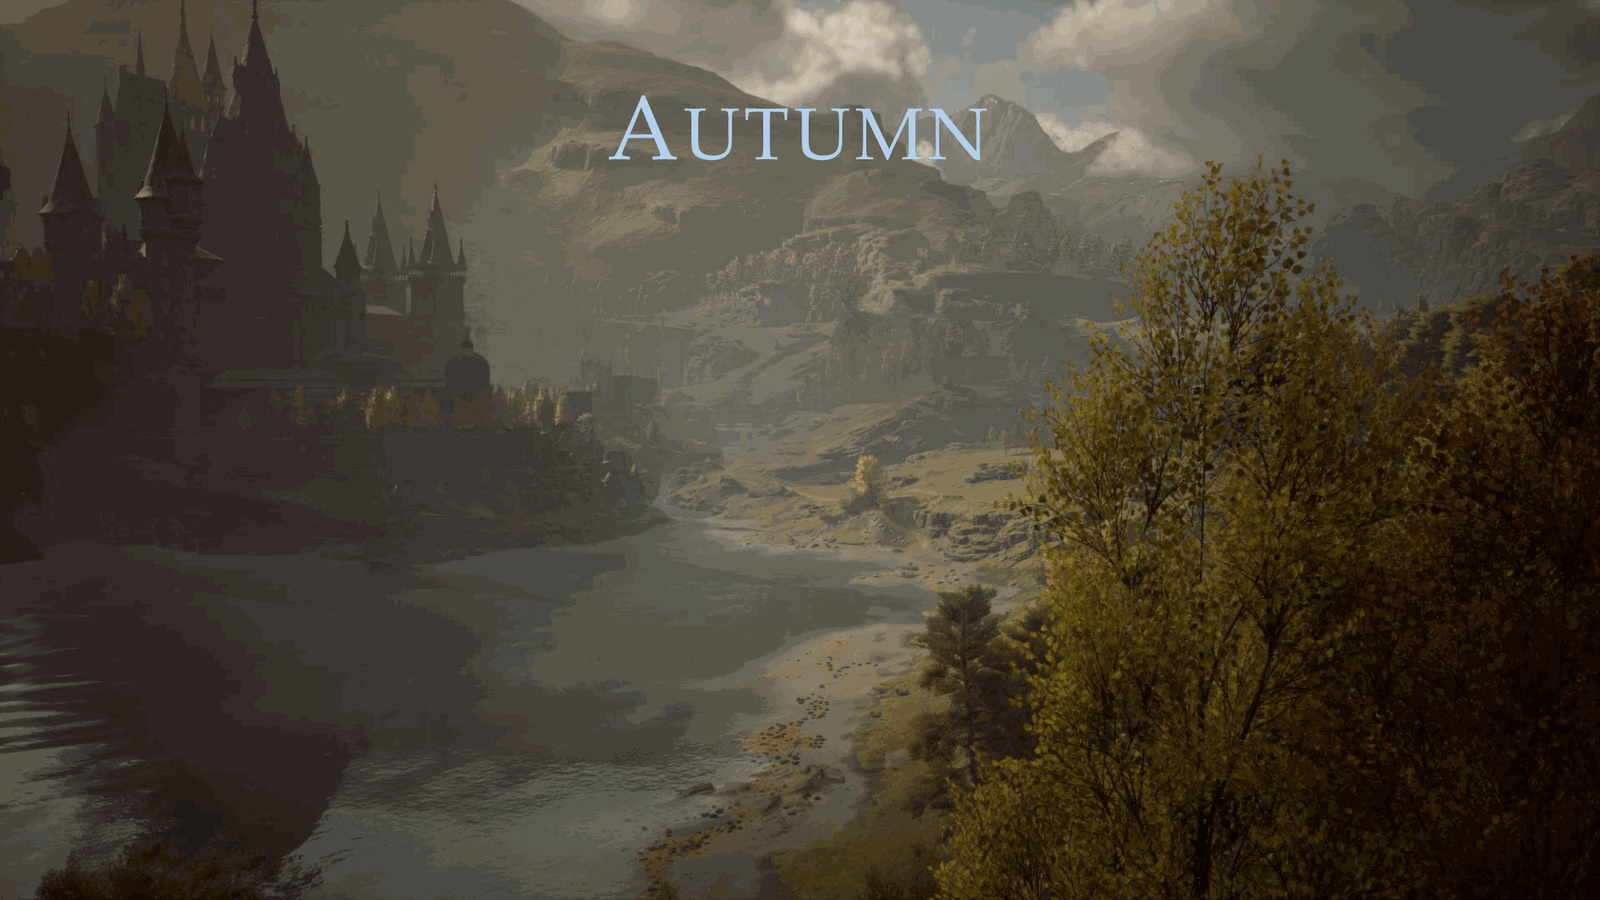
- 预渲染视频:用于季节过渡效果,根据区域渲染雪景,沿海地区无积雪,仅在山区渲染雪。
2. 季节资源管理
- 流式加载:仅根据当前季节加载对应资源,提高性能。
- 季节特定资源:并非所有元素都需要随季节变化,通常只有植被和草地需要调整。
🎨 五、材质与视觉效果系统
1. 材质系统
- 手工制作材质:用于弥补预设材质不足,如《死亡圣器》效果、红蓝传送门地牢、皮肤效果系统等。
- 基于蓝图的材质参数动画系统:专为VFX艺术家设计,用于实现Magic等特效,支持天气控制与时辰相关。
2. 动态绘画与3D渲染
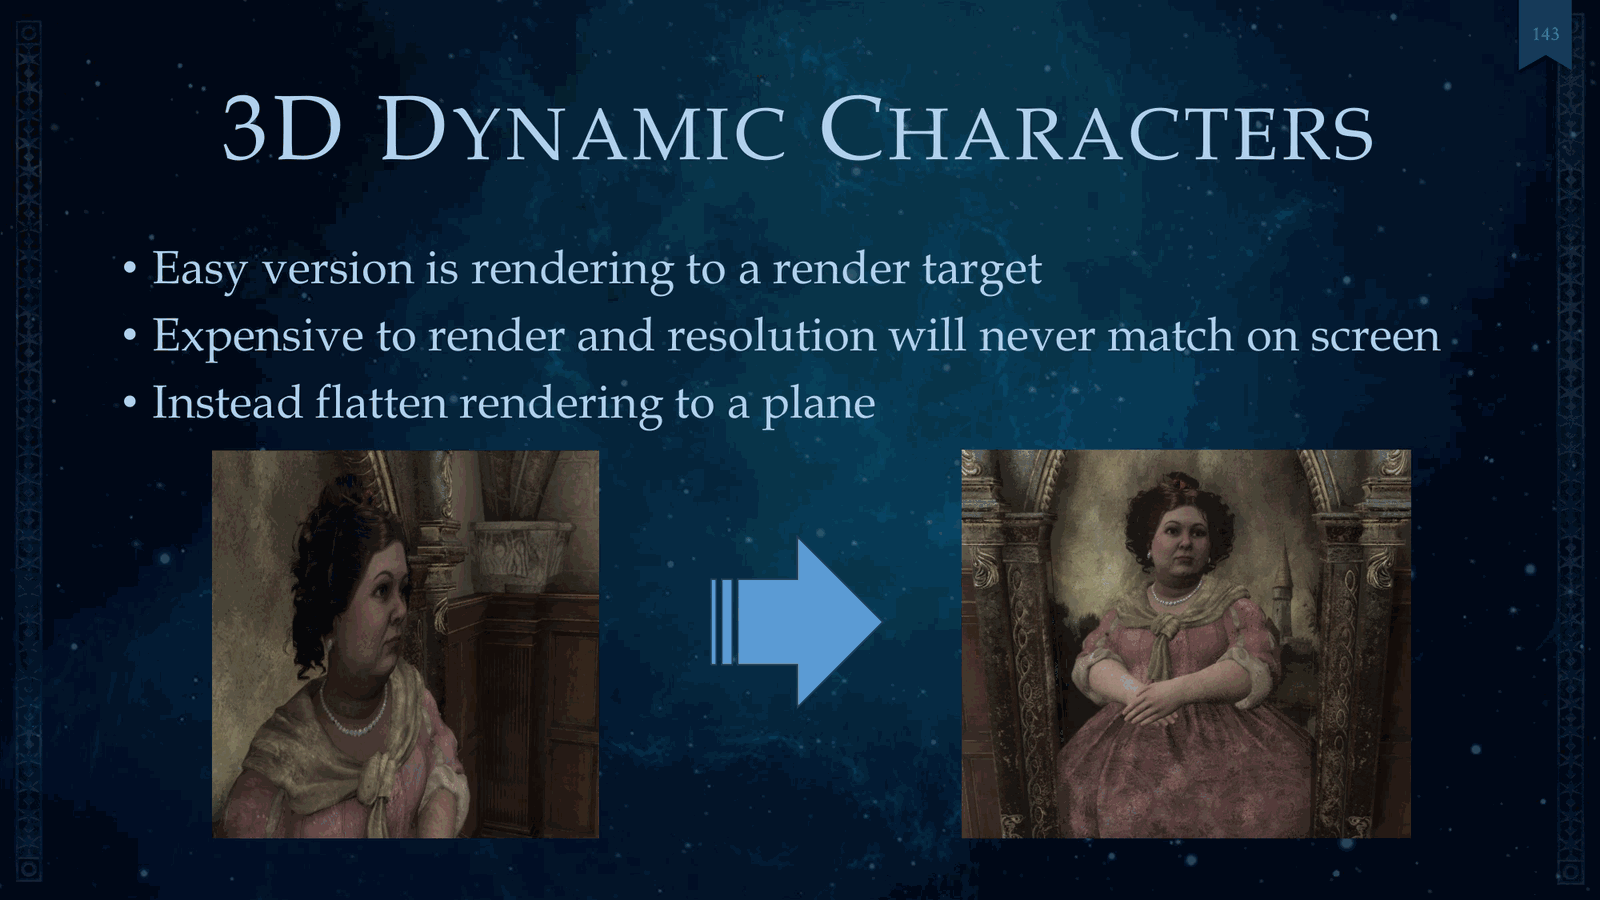
- 3D绘画渲染到渲染目标:成本较高,且分辨率无法匹配。
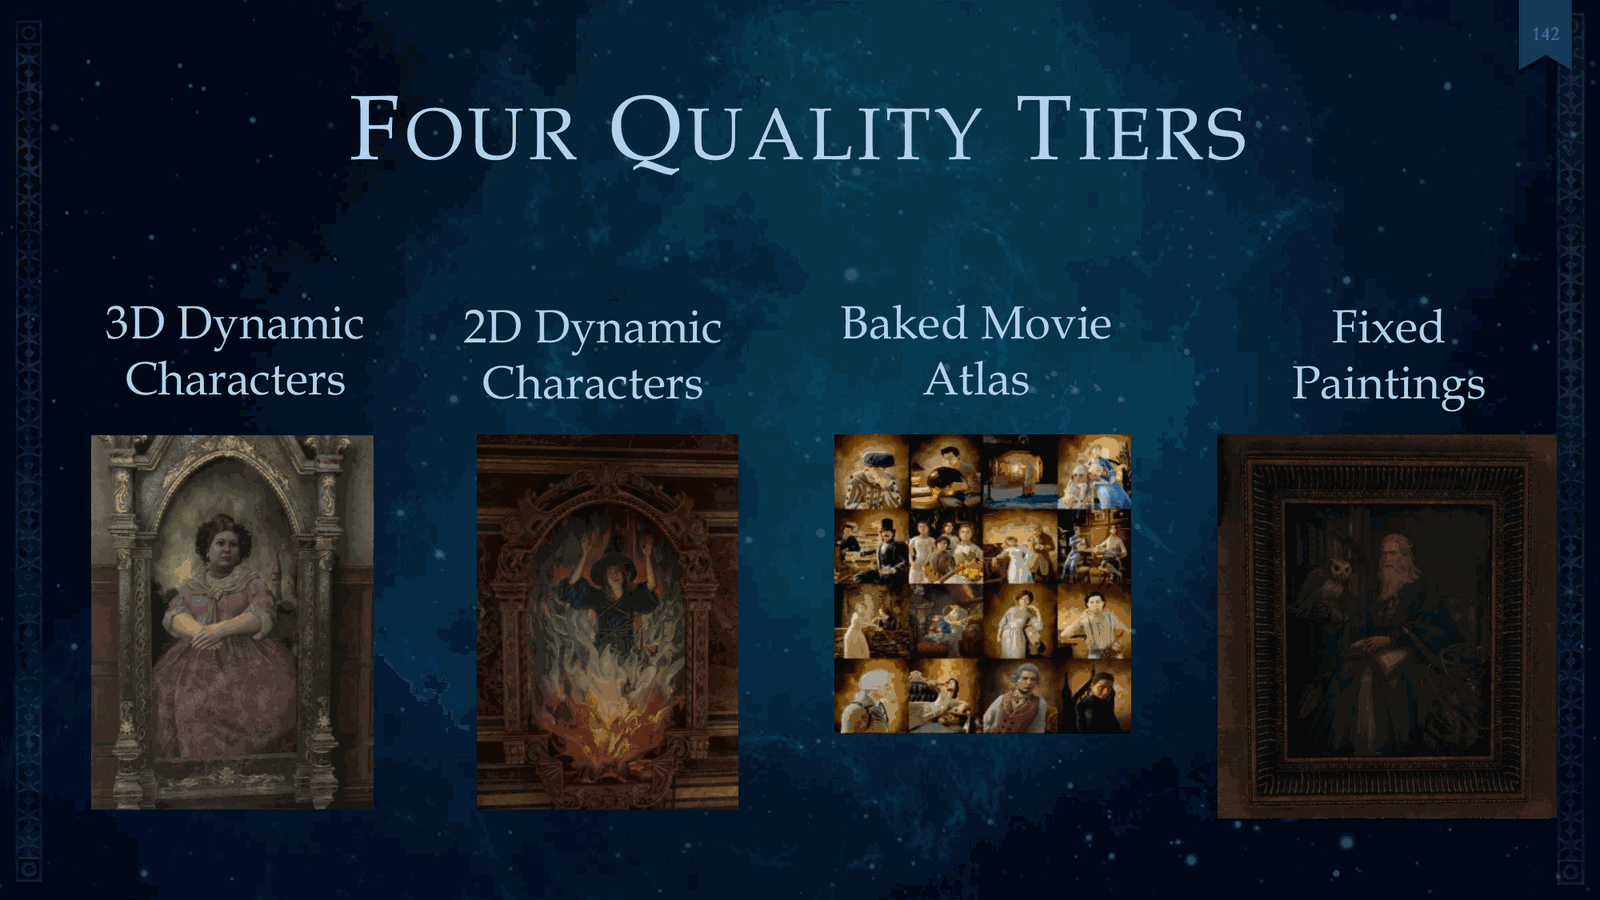
- 四个质量层级:3D、2D、baked atlas、fixed painting,用于不同场景下的实时效果。
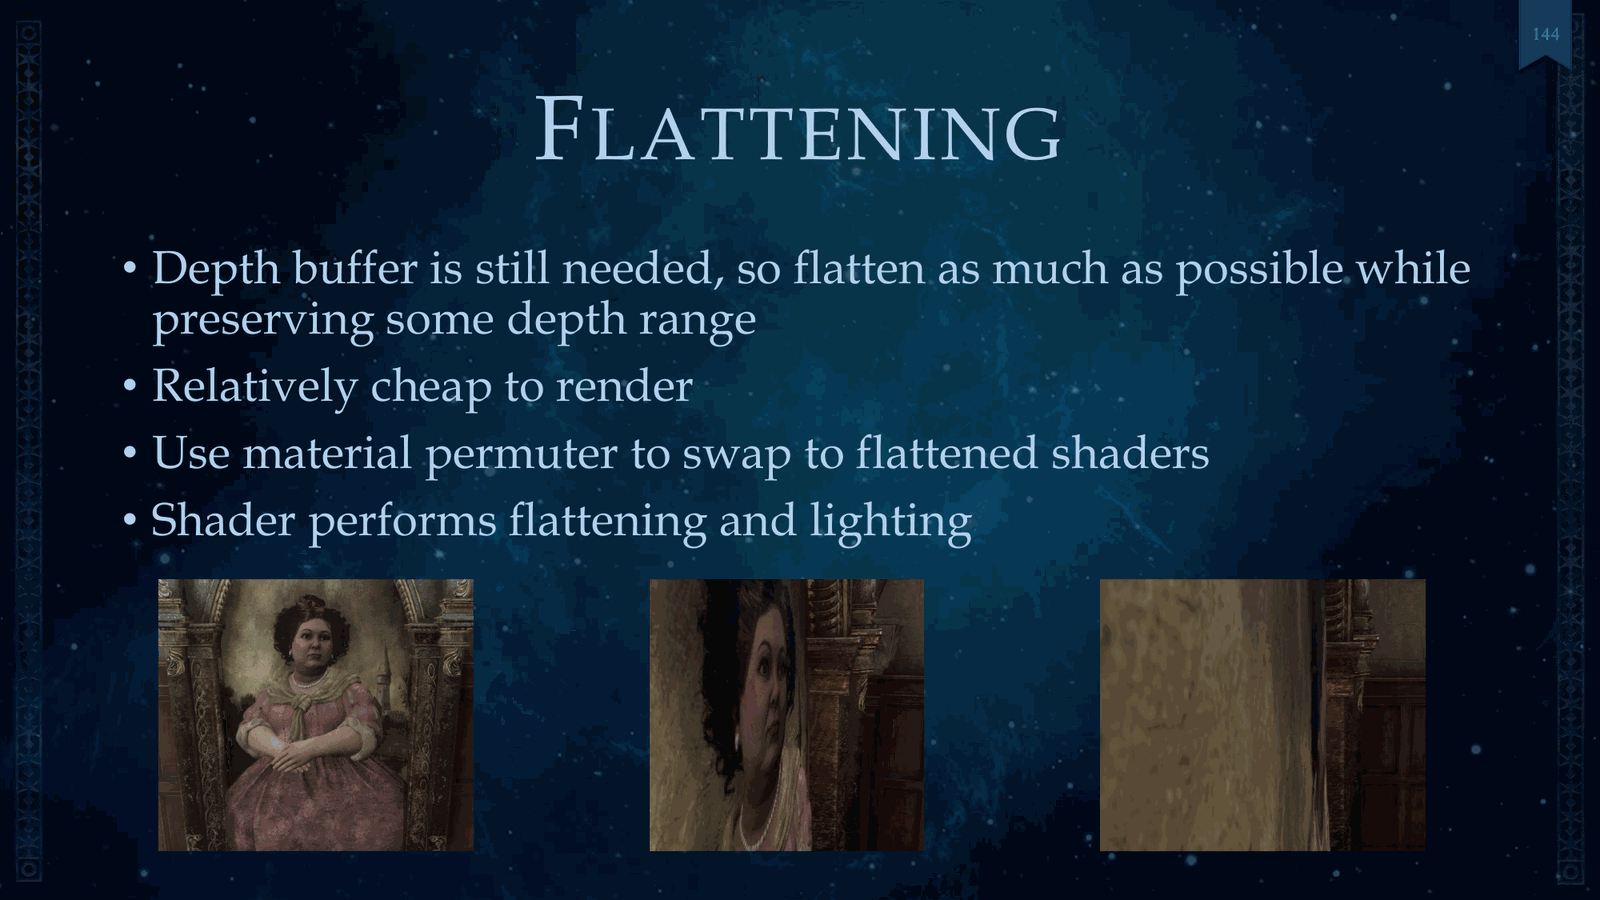
- 平面化处理:通过将场景平面化优化渲染,保留部分深度范围。
🧪 六、自动化测试与性能管理
1. 自动化测试
- 跨平台性能目标:资源平衡是实现跨平台性能目标的关键因素。
- 自动化测试在开发中的作用:贯穿开发全过程,确保性能与视觉效果的稳定。
2. 性能优化
- 预烘焙电影贴图集:用于减少动态3D角色渲染成本。
- 材质排列器与材质替换:用于优化天气、魔法、生命绘画等场景的渲染效率。
📌 七、技术实现与平台支持
1. 平台支持
- 不支持bindless的GPU:未在这些平台上发布游戏。
- Switch平台支持bindless:通过DirectX 12实现Unreal 4的bindless功能。
- HDR显示能力:通过HDIG实现,需额外添加校准纹理。
2. 飞行玩法与开放世界渲染
- 更远的绘制距离:飞行玩法对开放世界渲染提出更高要求。
- 更精确的光照处理:需优化光照计算以提升视觉效果。
🎁 八、致谢与总结
- 感谢团队:感谢Render Tech团队及外部工程师对《Hogwarts Legacy》的贡献。
- 致谢艺术家与合作工作室:所有视觉技术帮助游戏在竞争中脱颖而出。
- 技术文档总结:涵盖性能优化、渲染技术、视觉效果、季节系统、天气系统、天文系统、材质系统、自动化测试等多个方面。
✅ 附录:关键术语表
| 术语 | 说明 |
|---|---|
| 材质排列器(Material Permutation) | 用于实现天气、魔法、生命绘画等场景的动态材质切换。 |
| 光照探针(Light Probes) | 用于自适应亮度调整,确保画面 |
Slide 1 — 00:01:11

📌 要点汇总
- (过渡内容,无关键要点)
My opponent is a weaker one. They will test your abilities, both innate and learned. You’ve done it!
I am wary of how much time the new fifth year seems to be spending away from the castle.
No need for theatrics. I’m only here for this one, anyway.
What do they want with a Hogwarts student?
I have a rare ability to see whispers.
Slide 2 — 00:01:33

📌 要点汇总
- (过渡内容,无关键要点)
Of ancient magic.
Extraordinary! It’s a powerful magic that should only be wielded by a select few.
The path we’re on is terribly dangerous, but I do not know where it leads.
Slide 3 — 00:01:55
📌 要点汇总
- (过渡内容,无关键要点)
I’m afraid you’re on your own.
Slide 4 — 00:02:17
📌 要点汇总
- (过渡内容,无关键要点)
I’ve ensured that we have a moment to ourselves.
Let’s even her out, shall we?
Slide 5 — 00:02:39

📌 要点汇总
- 游戏开发历时五年
- 从自研引擎迁移至 Unreal 引擎
- 最终使用 Unreal 引擎发布游戏
We leave our legacy in your hands.
Now you guys got to see what the game looks like.
I’ll start here with the background.
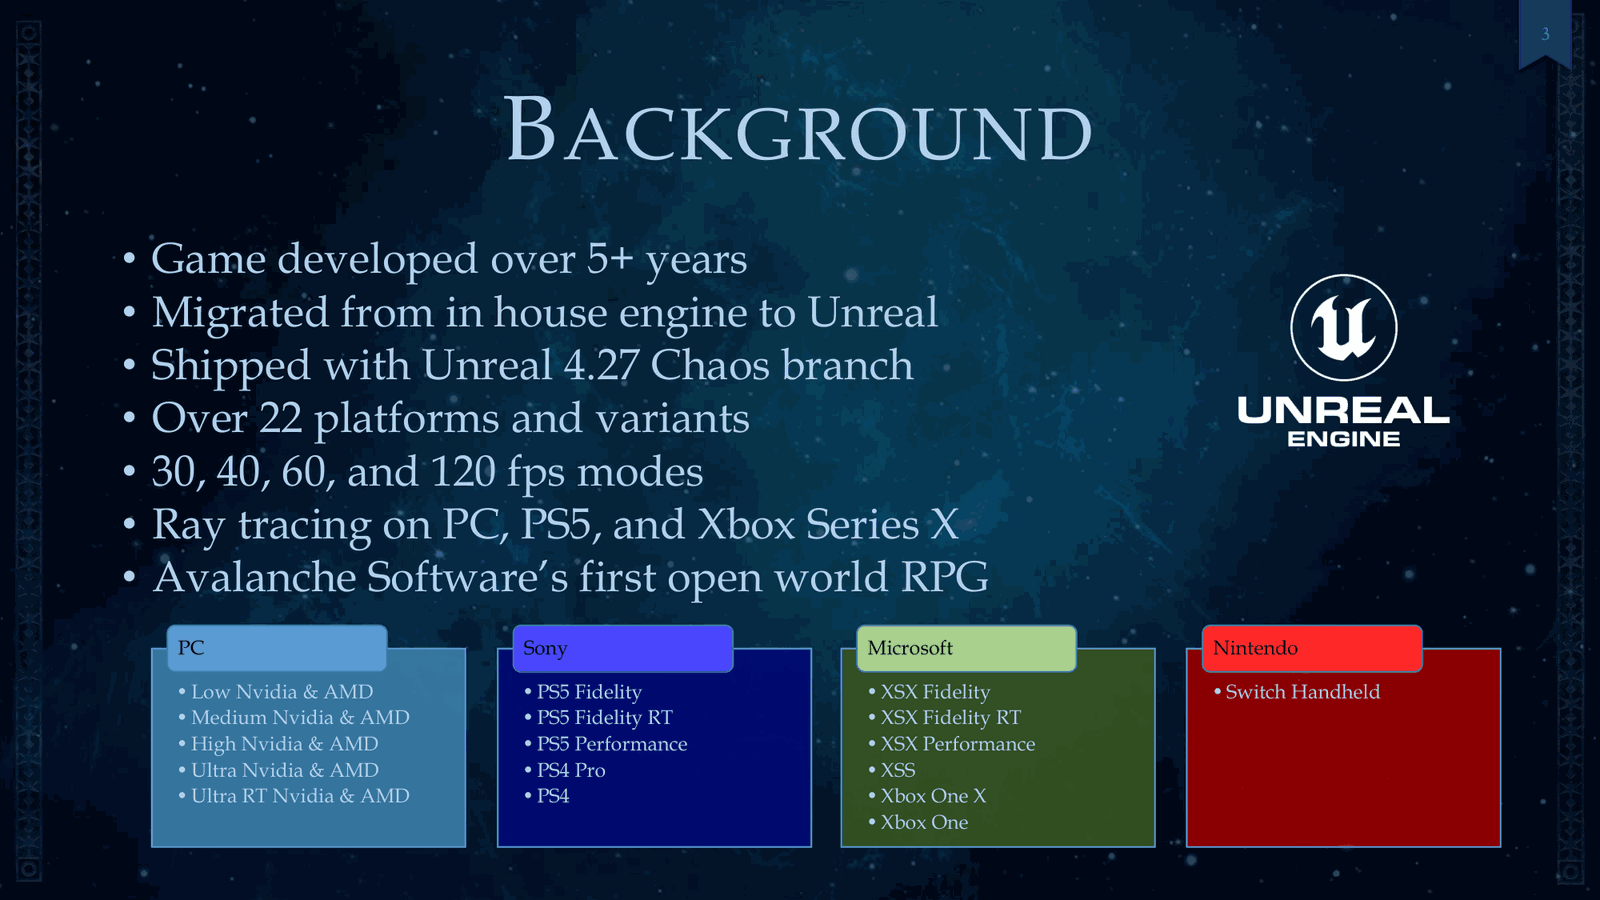
So the game was developed for over five years, and we migrated from an in-house engine to Unreal.
We shipped with Unreal.
Slide 6 — 00:03:01
📌 要点汇总
- Chaos 和 Shambalone 游戏支持超过 22 个平台和变种
- 包含多种 FPS 模式和光线追踪技术
- 这是 Avalanche Software 首款开放世界 RPG
- 演讲将概述开放世界复杂性等内容
Chaos and Shambalone are over 22 platforms and variants, various FPS modes, ray tracing, and this was also Avalanche Software’s first open-world RPG. So, in my talk, we have a high-level overview of what I’m going to be talking about. So, first of all, we’re doing open-world complexity, and the next.
Slide 7 — 00:03:23
📌 要点汇总
- 使用无绑定资源(bindless resources)降低段复杂度(seg complexity)
- 详细讲解无绑定阴影(bindless shadows)和无绑定布料区域(bindless cloth regions)
- 通过自动化优化 GPU 性能
- 展示《霍格沃茨遗产》(Hogwarts Legacy)的独特视觉技术
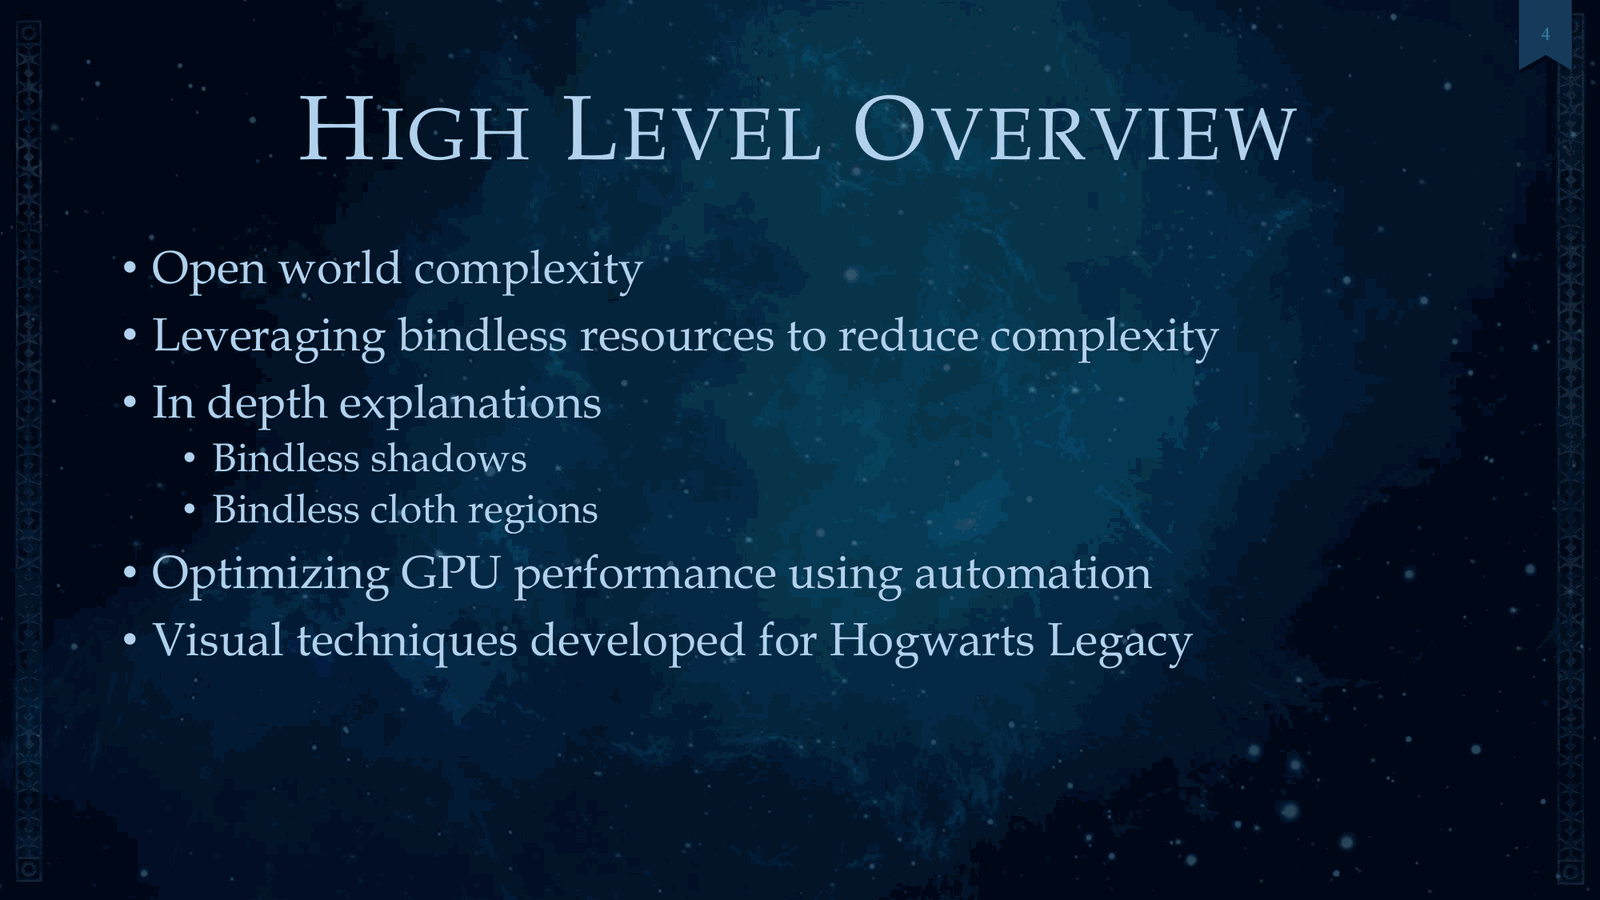
Next, we’re leveraging bindless resources to reduce seg complexity, with two in-depth explanations with bindless shadows and bindless cloth regions. We’re going to spend just a little bit of time on optimizing GPU performance using automation, and then last to show all the unique visual techniques developed for Hogwarts Legacy.
Slide 8 — 00:03:45
📌 要点汇总
- 游戏开放世界面积为九平方公里
- 红圈标记的是霍格沃茨城堡
- 绿圈标记的是霍格斯梅德村
- 游戏中所有门均可开启
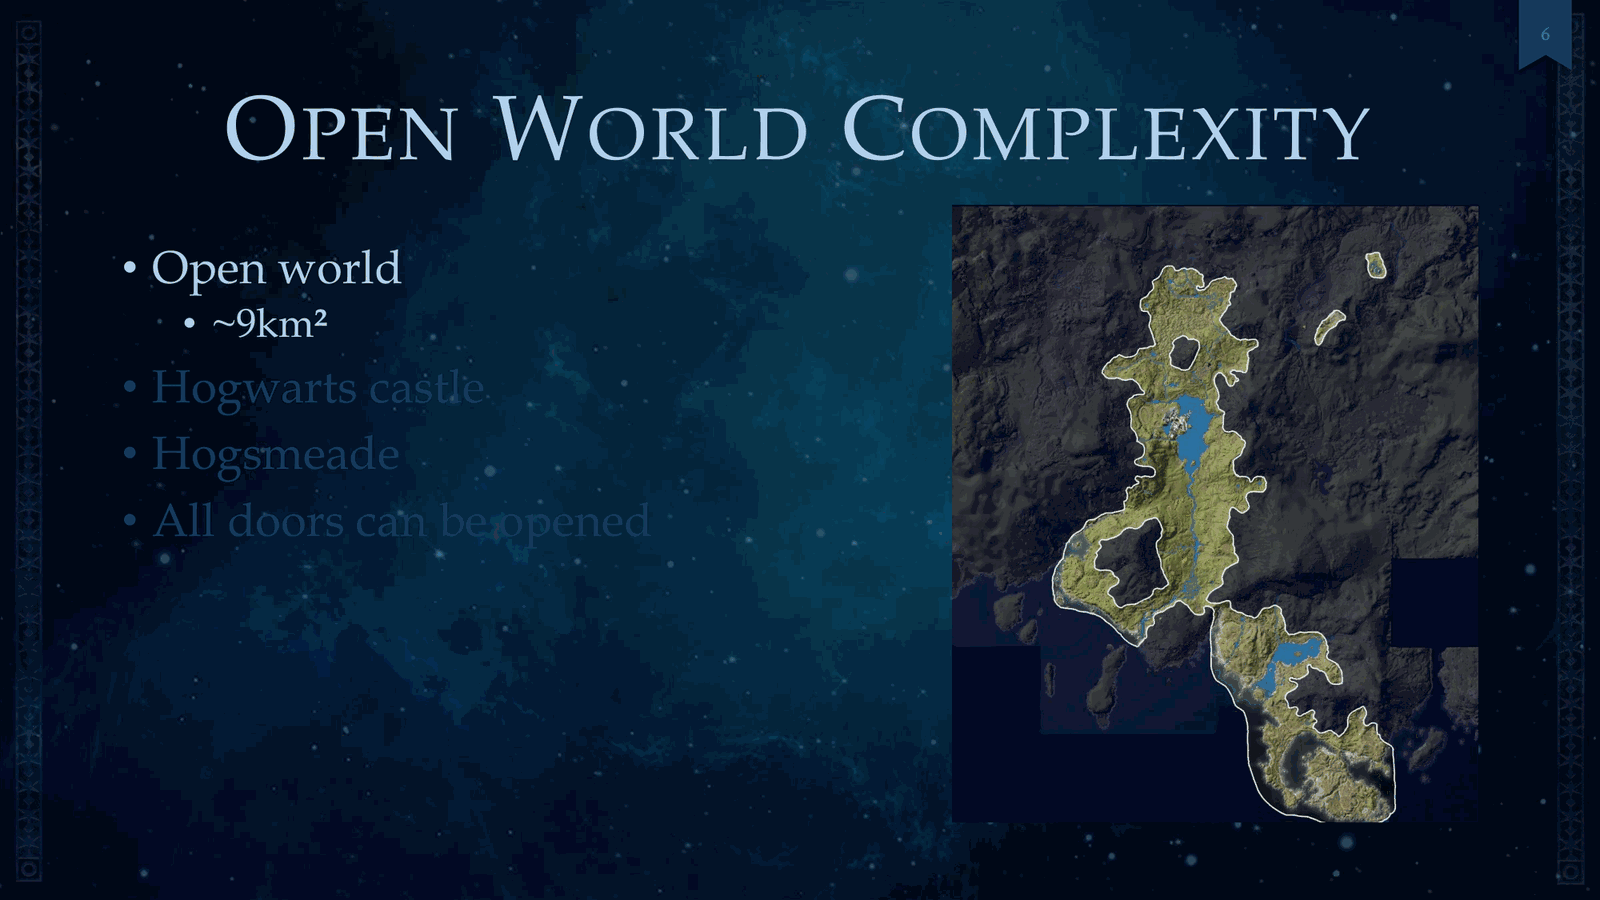
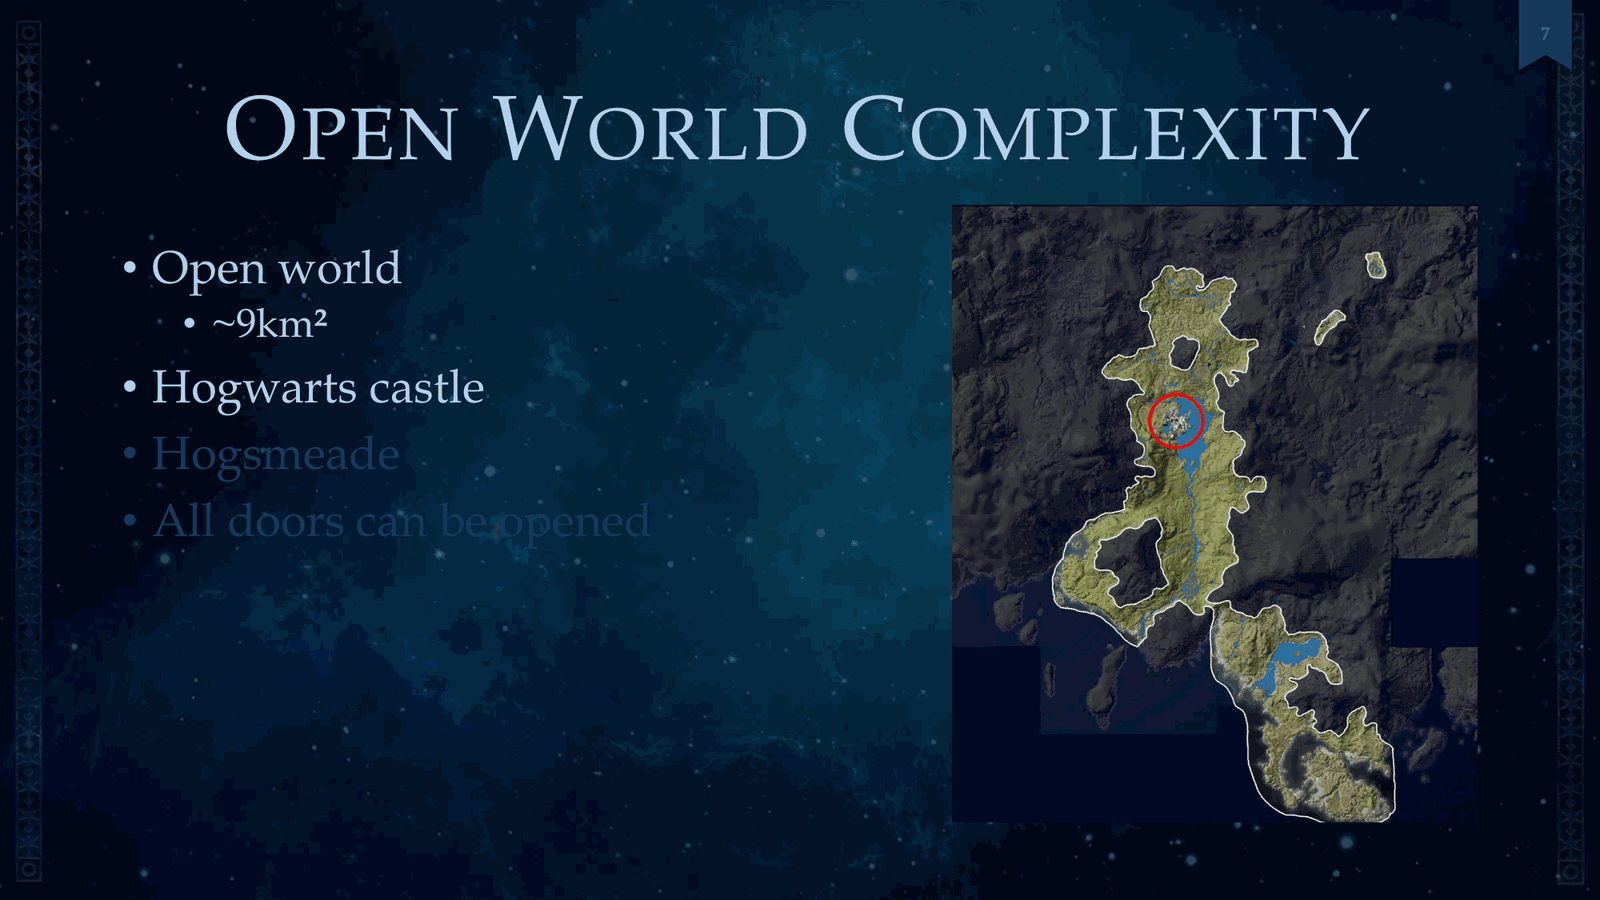
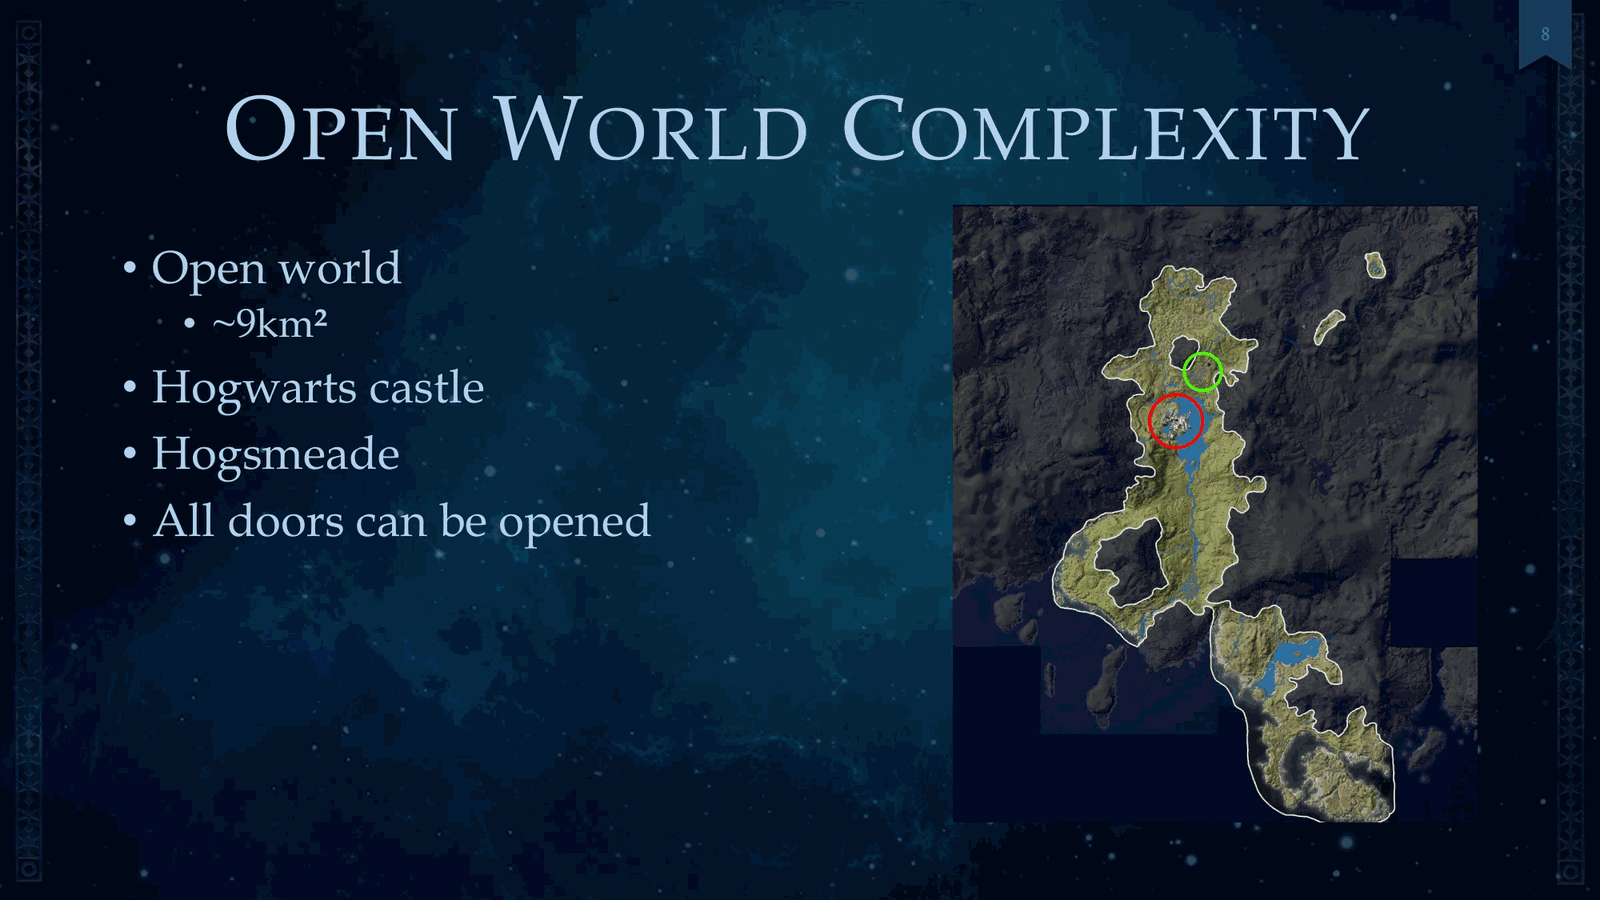
So first, we’re going to start with open-world complexity. In Hogwarts Legacy, we had an open world shown here in the map, nine square kilometers. Here, under red circle, is the Hogwarts Castle. Under green was Hogsmeade, and also all doors could be opened in the game.
Slide 9 — 00:04:07
📌 要点汇总
- 开放世界地图包含73个可玩区域和107个不可玩区域
- 地图上设有58个地牢、40个遗迹、47个强盗营地、11个村庄和113个宝库标记
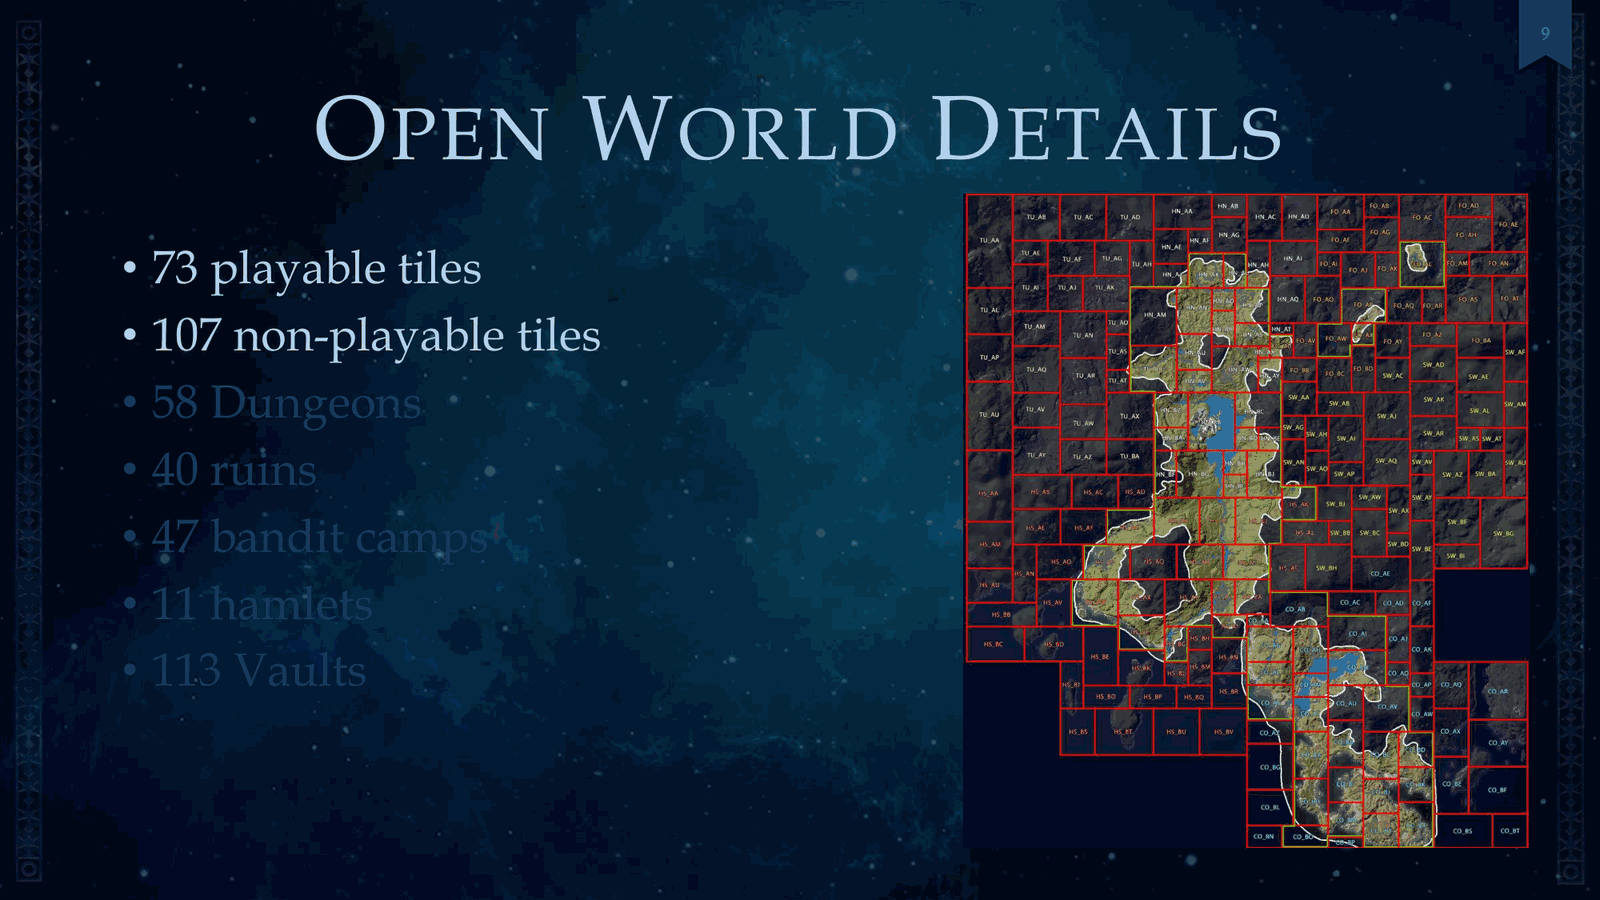
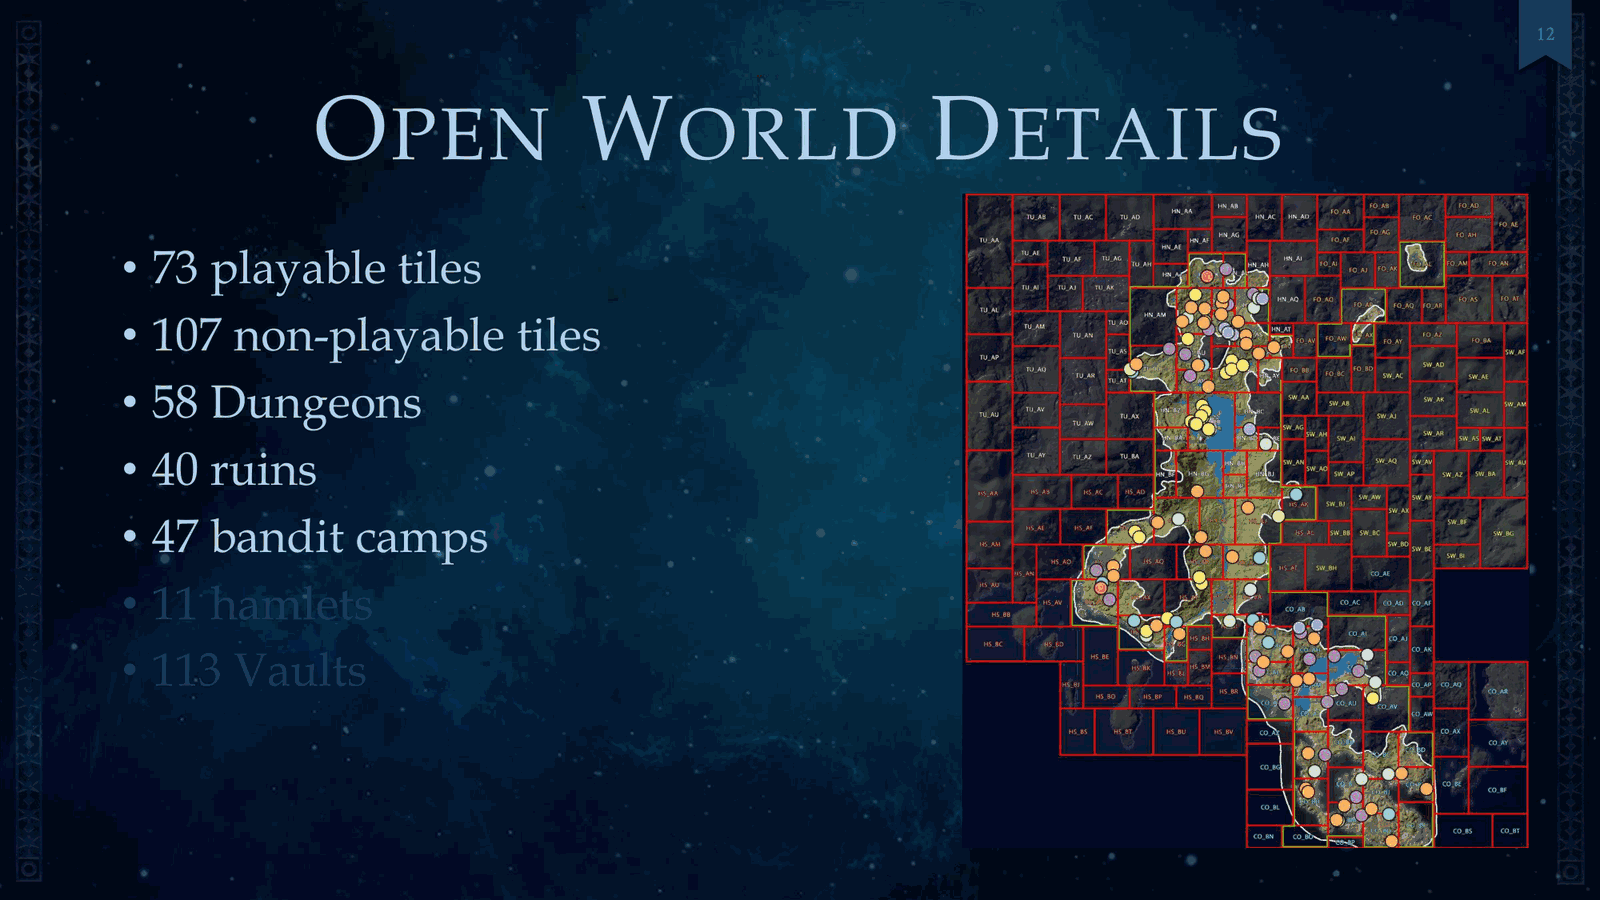
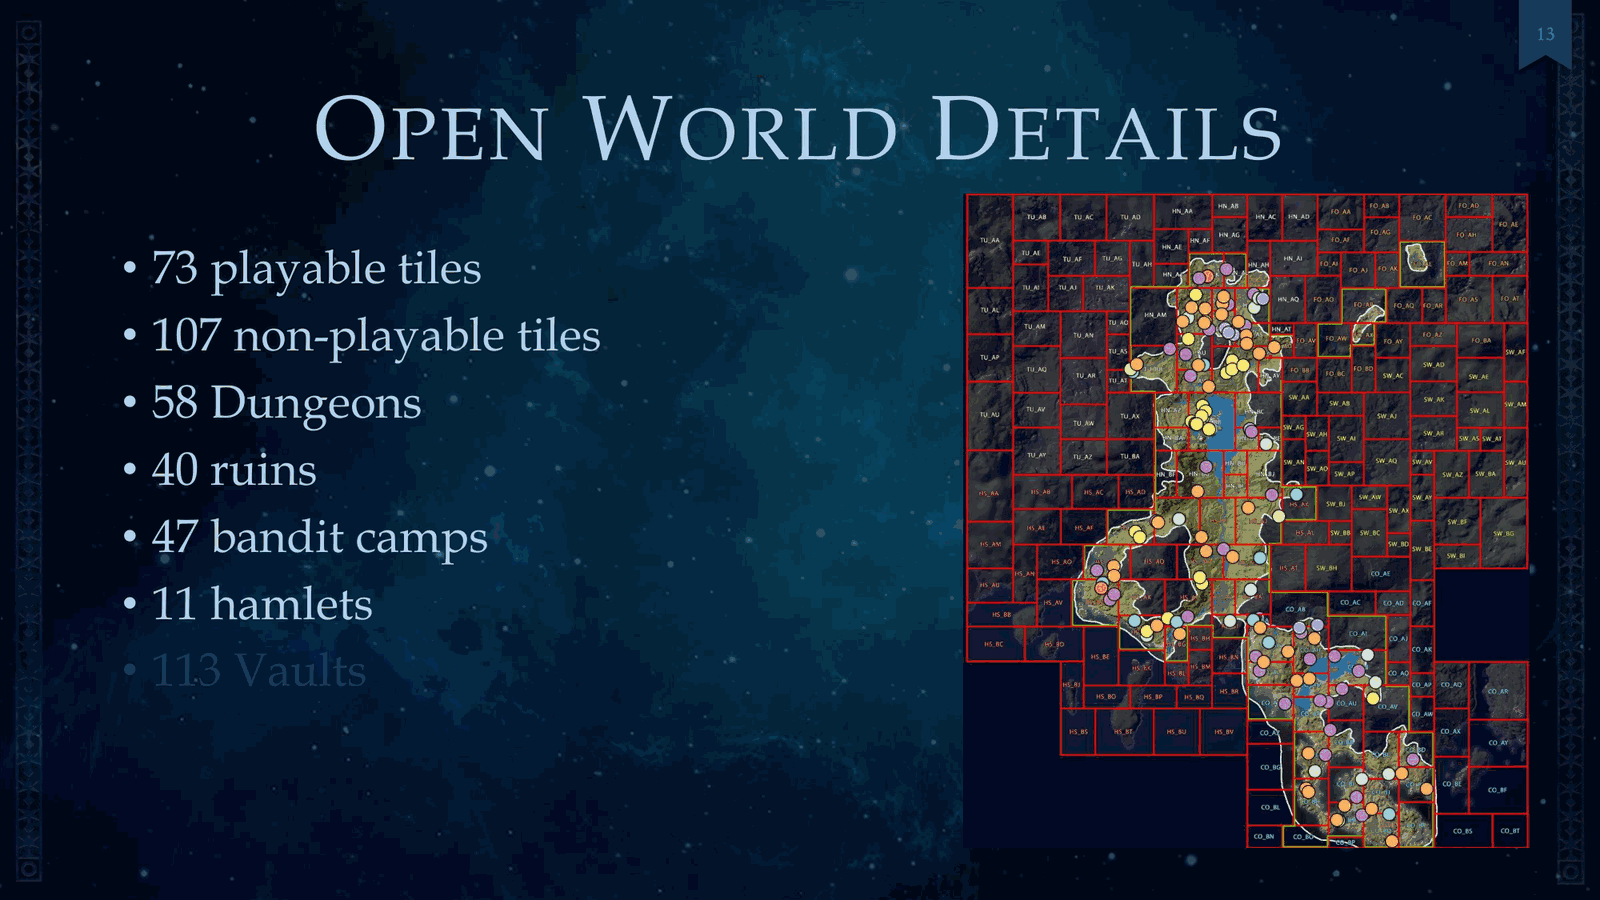
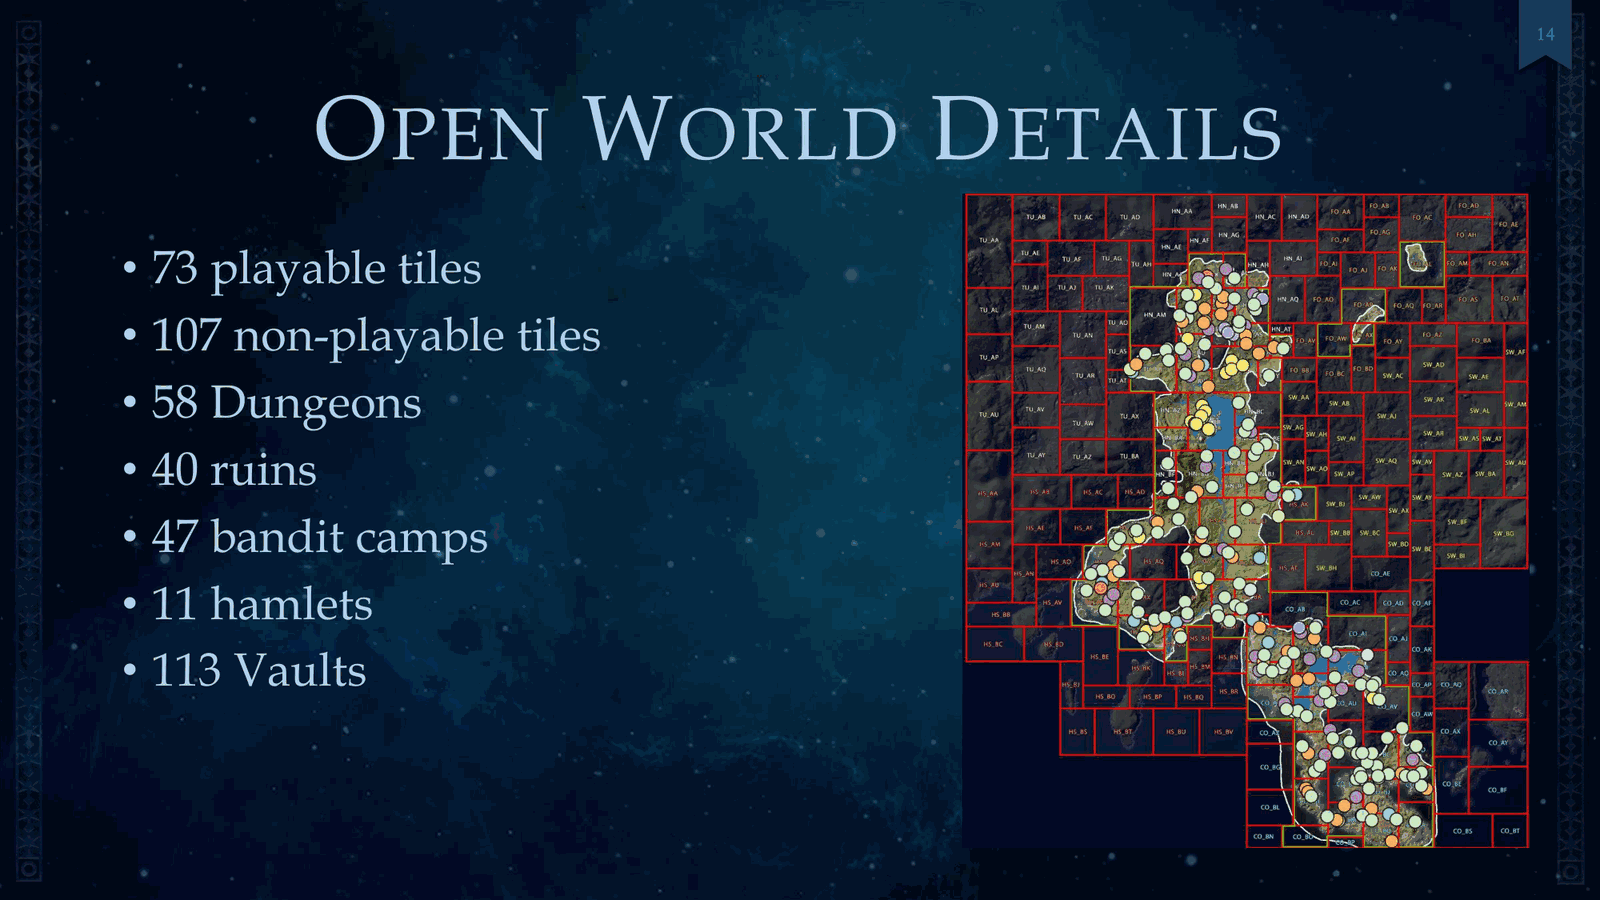
On just the open world itself, we had 73 playable tiles, 107 non-playable tiles, and then we have markers on these different places: 58 dungeons, 40 ruins, 47 bandit camps, 11 hamlets, and 113 vaults.
Slide 10 — 00:04:29
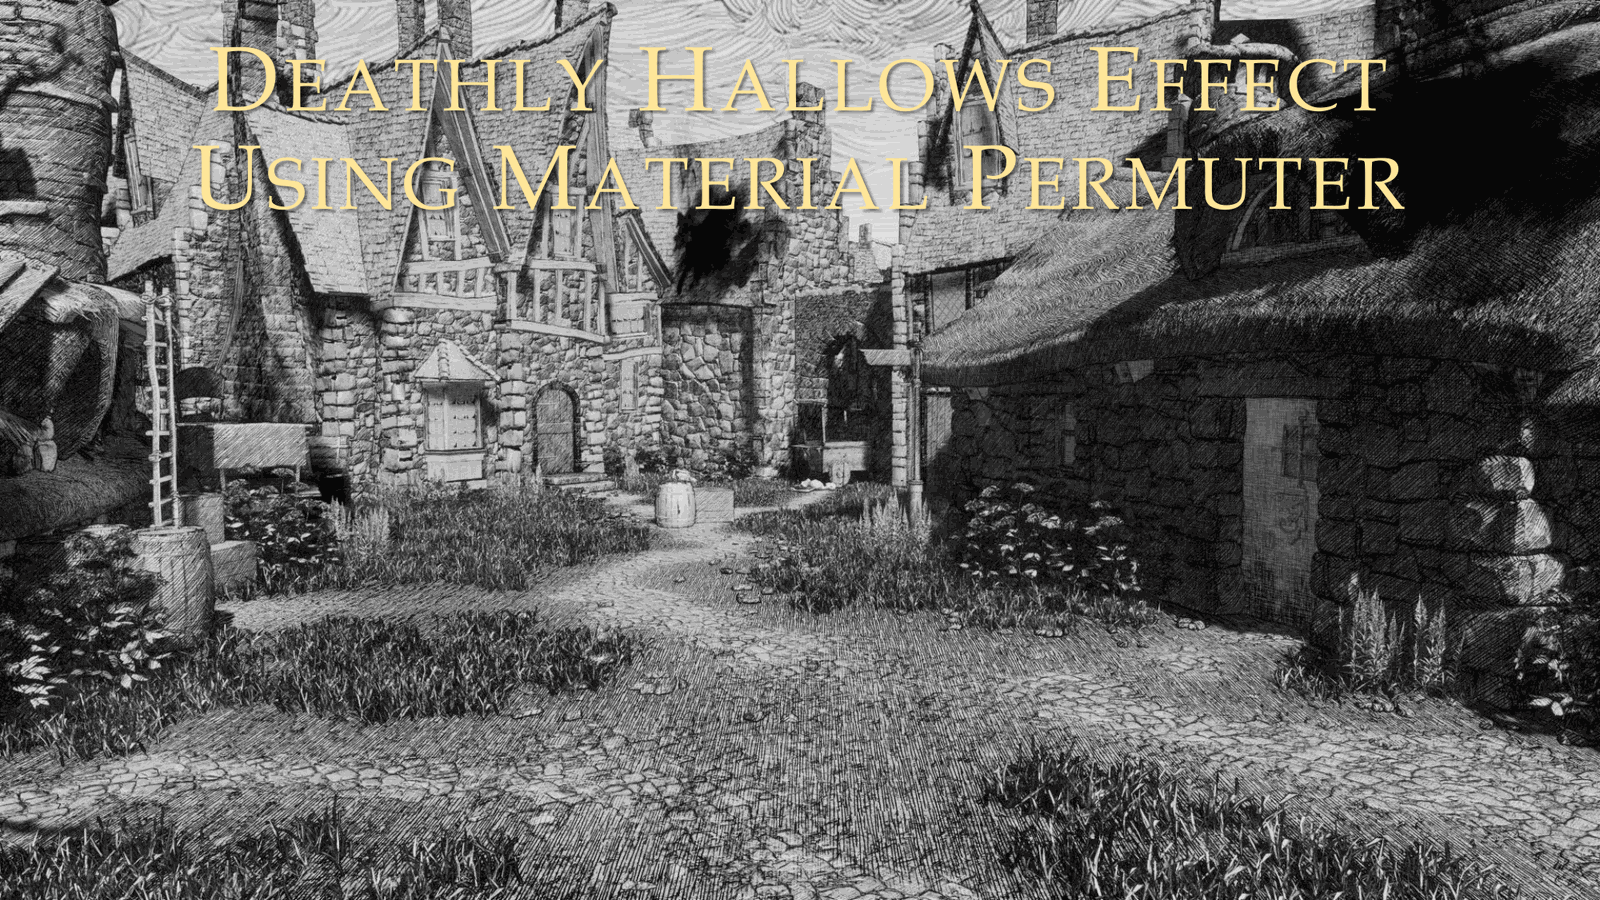
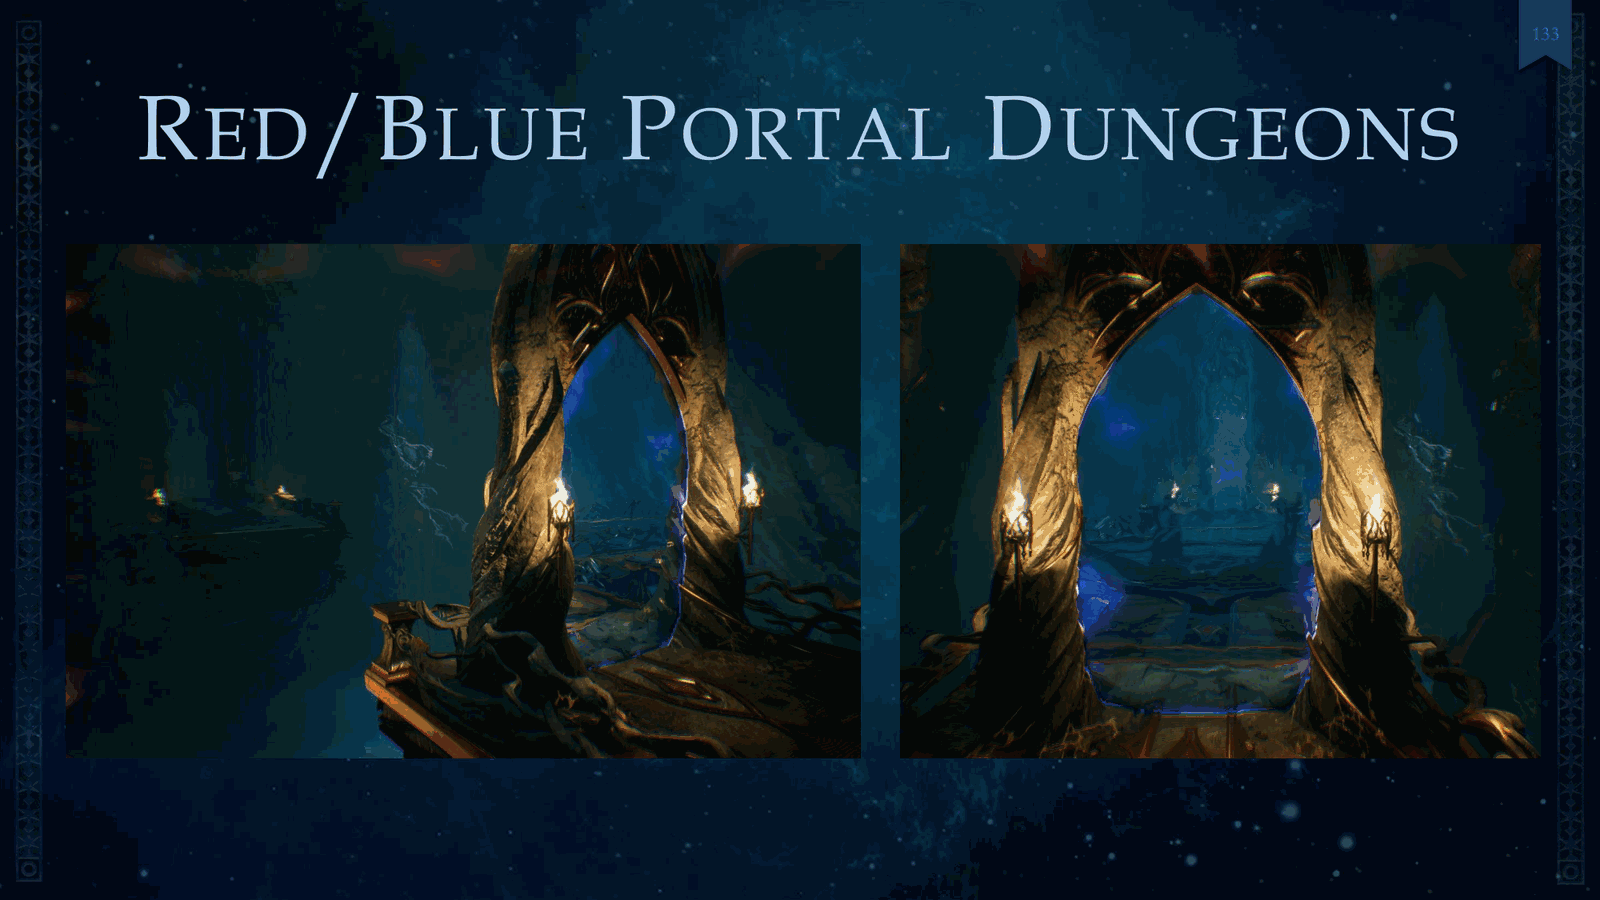
📌 要点汇总
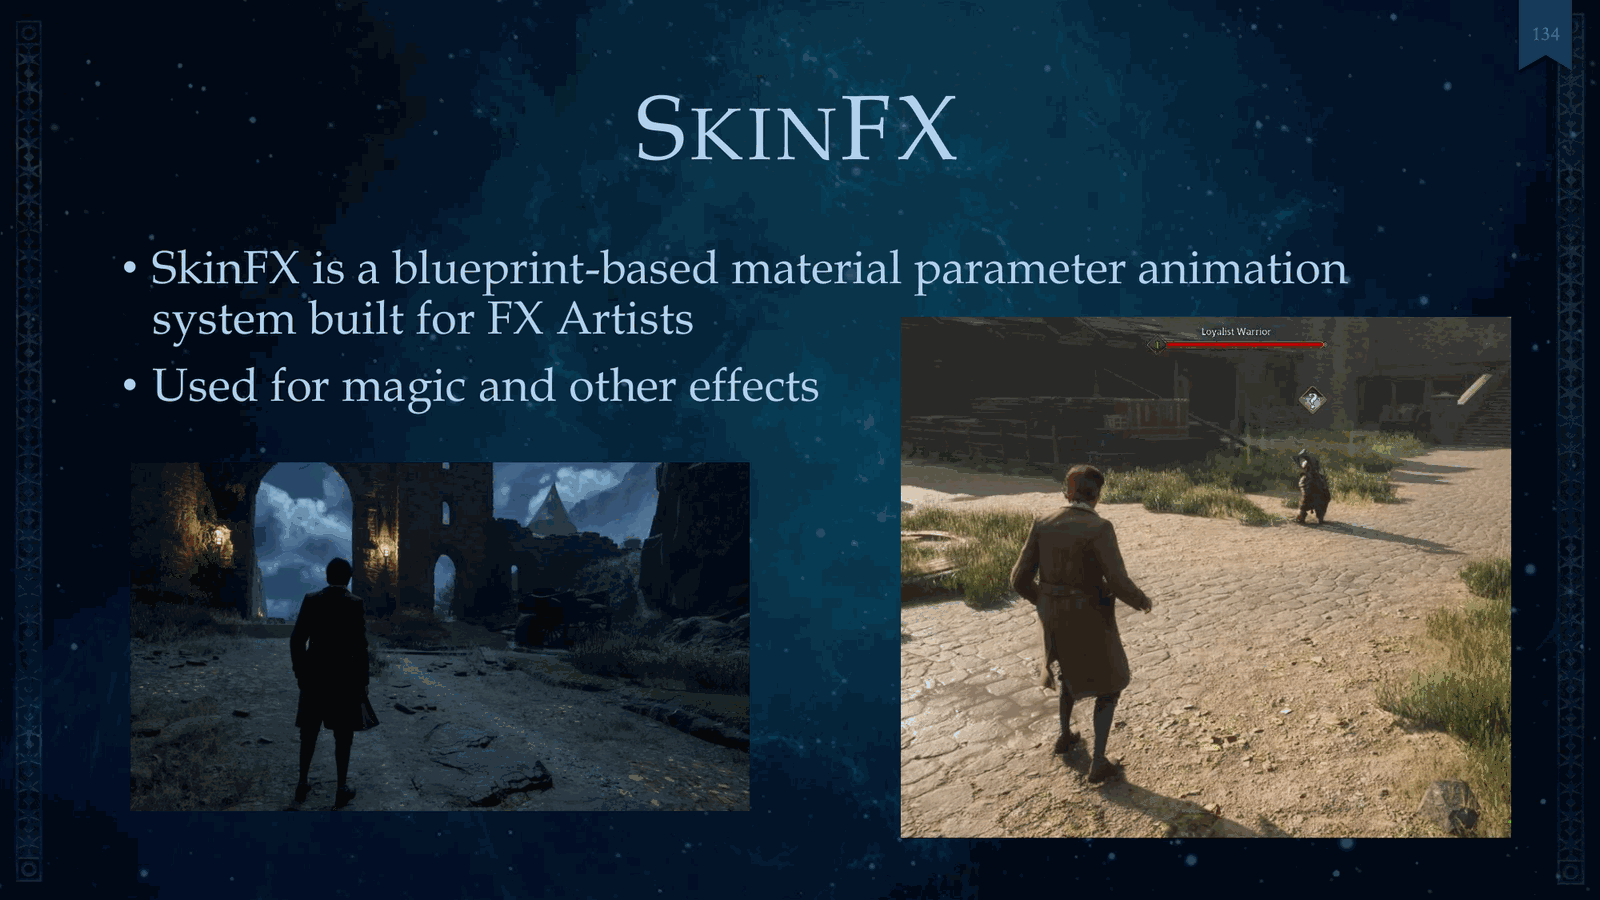
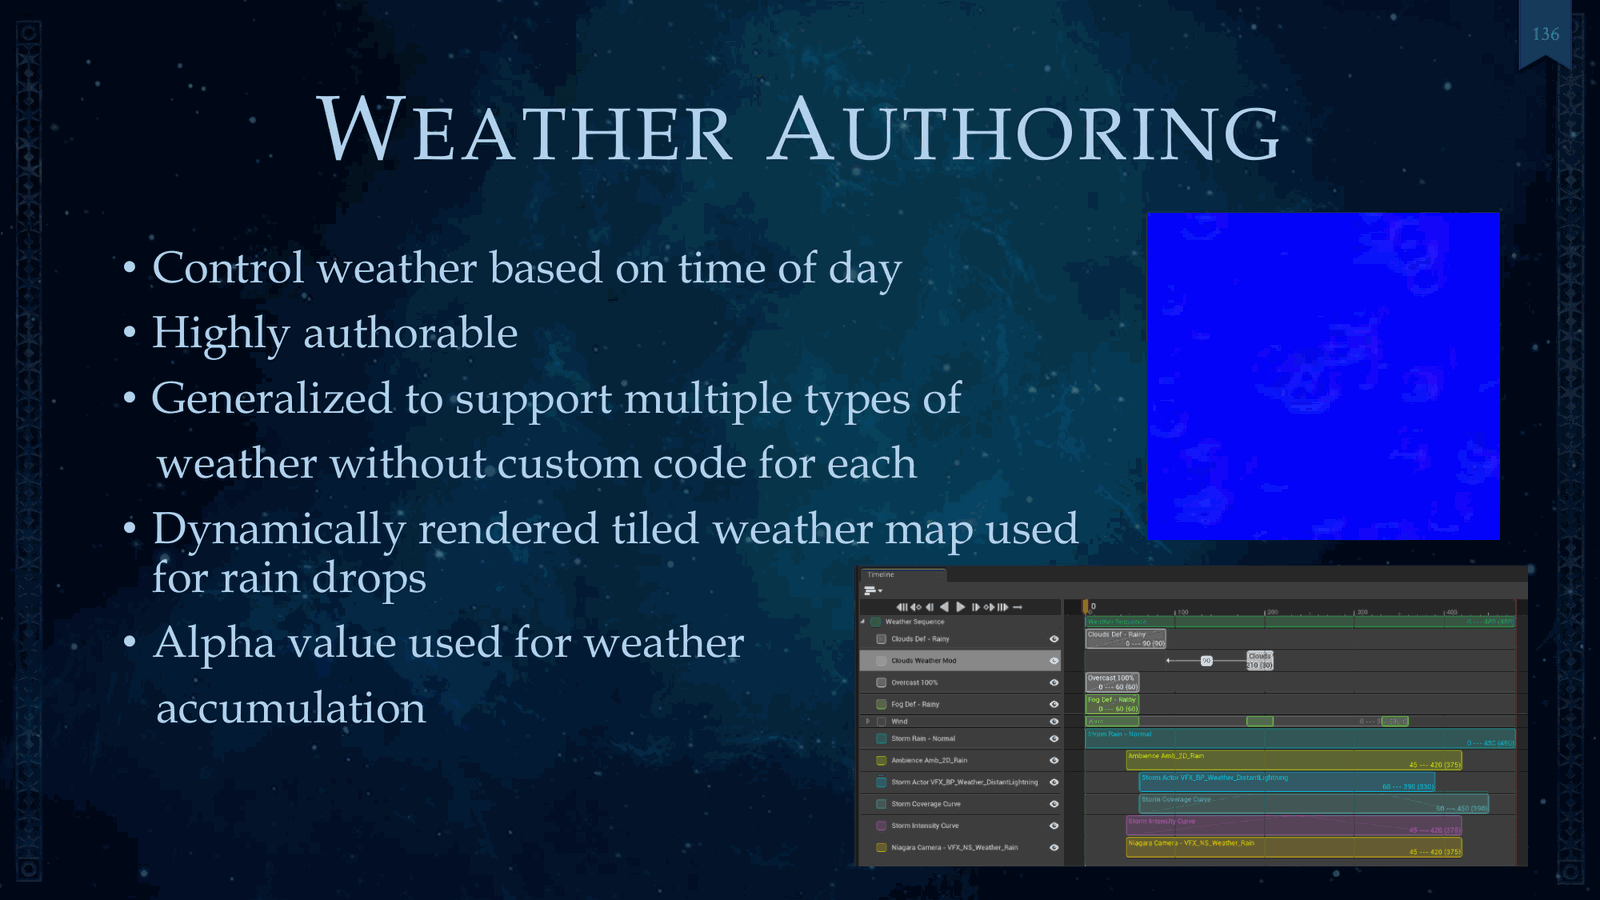
- 游戏场景复杂度极高,Hogsmeade 包含 40 多个独特建筑
- 开放世界仍需实时加载和渲染
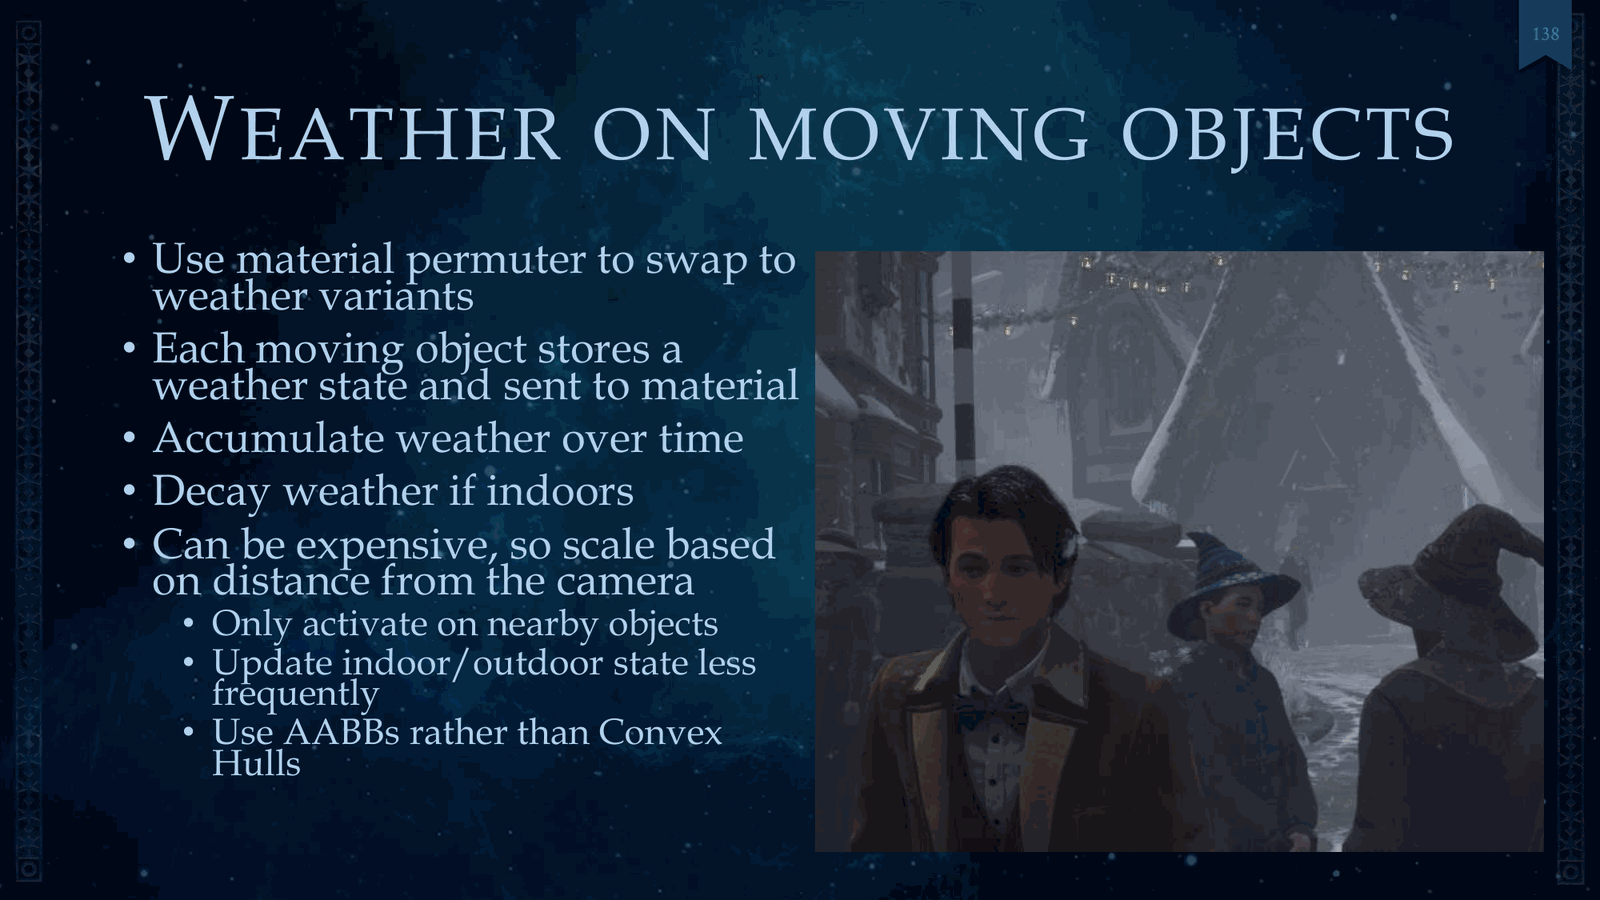
- Hogwarts Castle 包含 200 多个房间,规模庞大
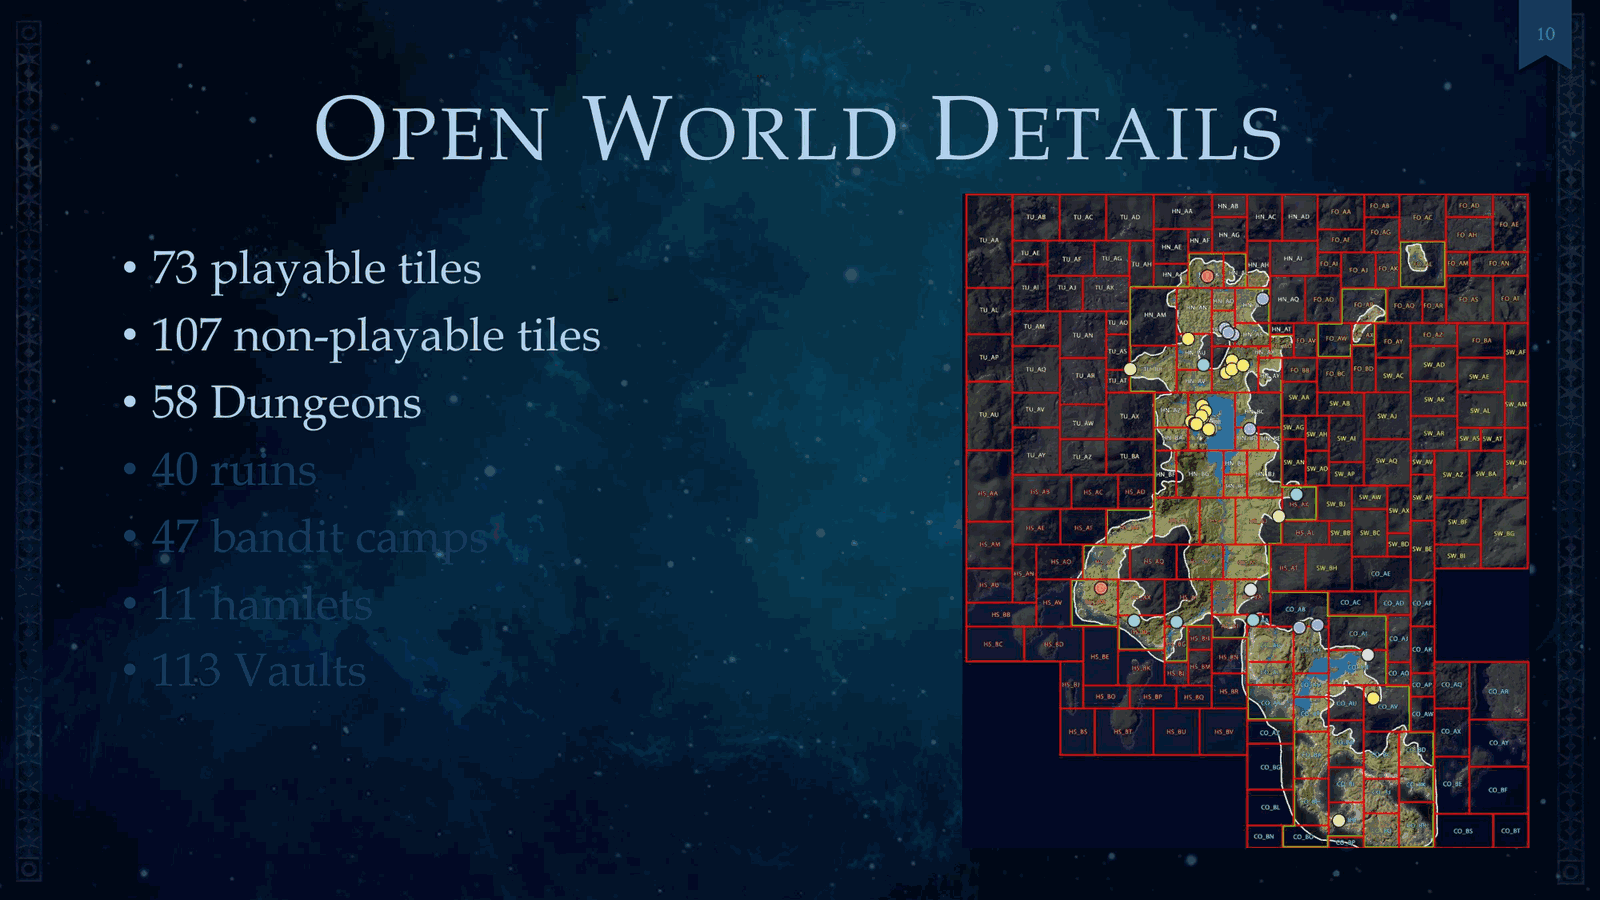
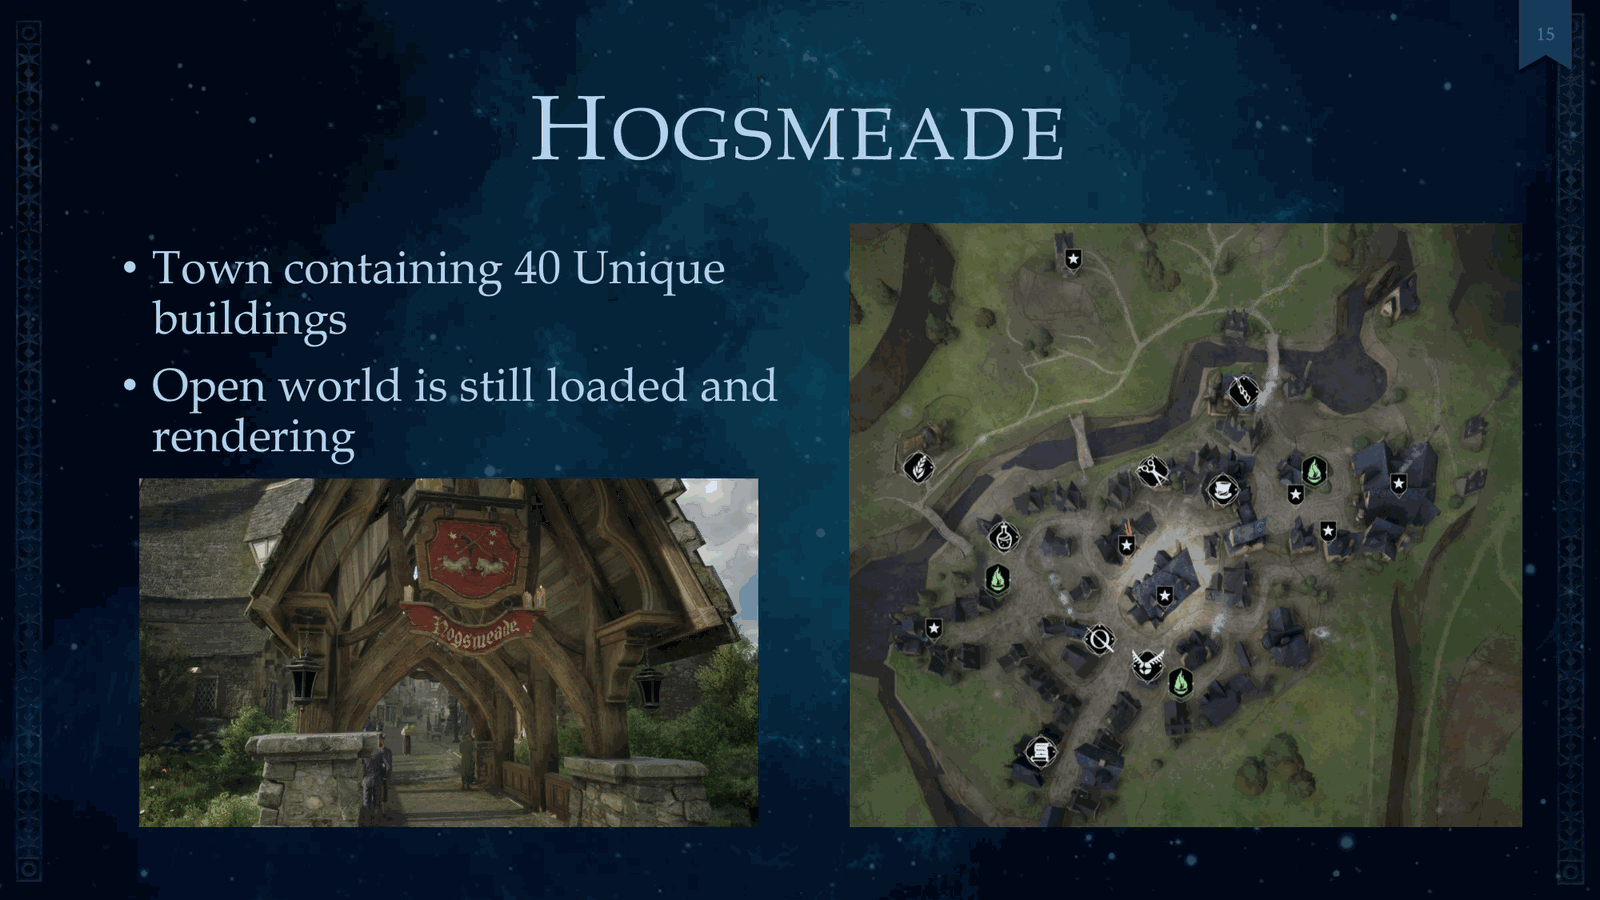
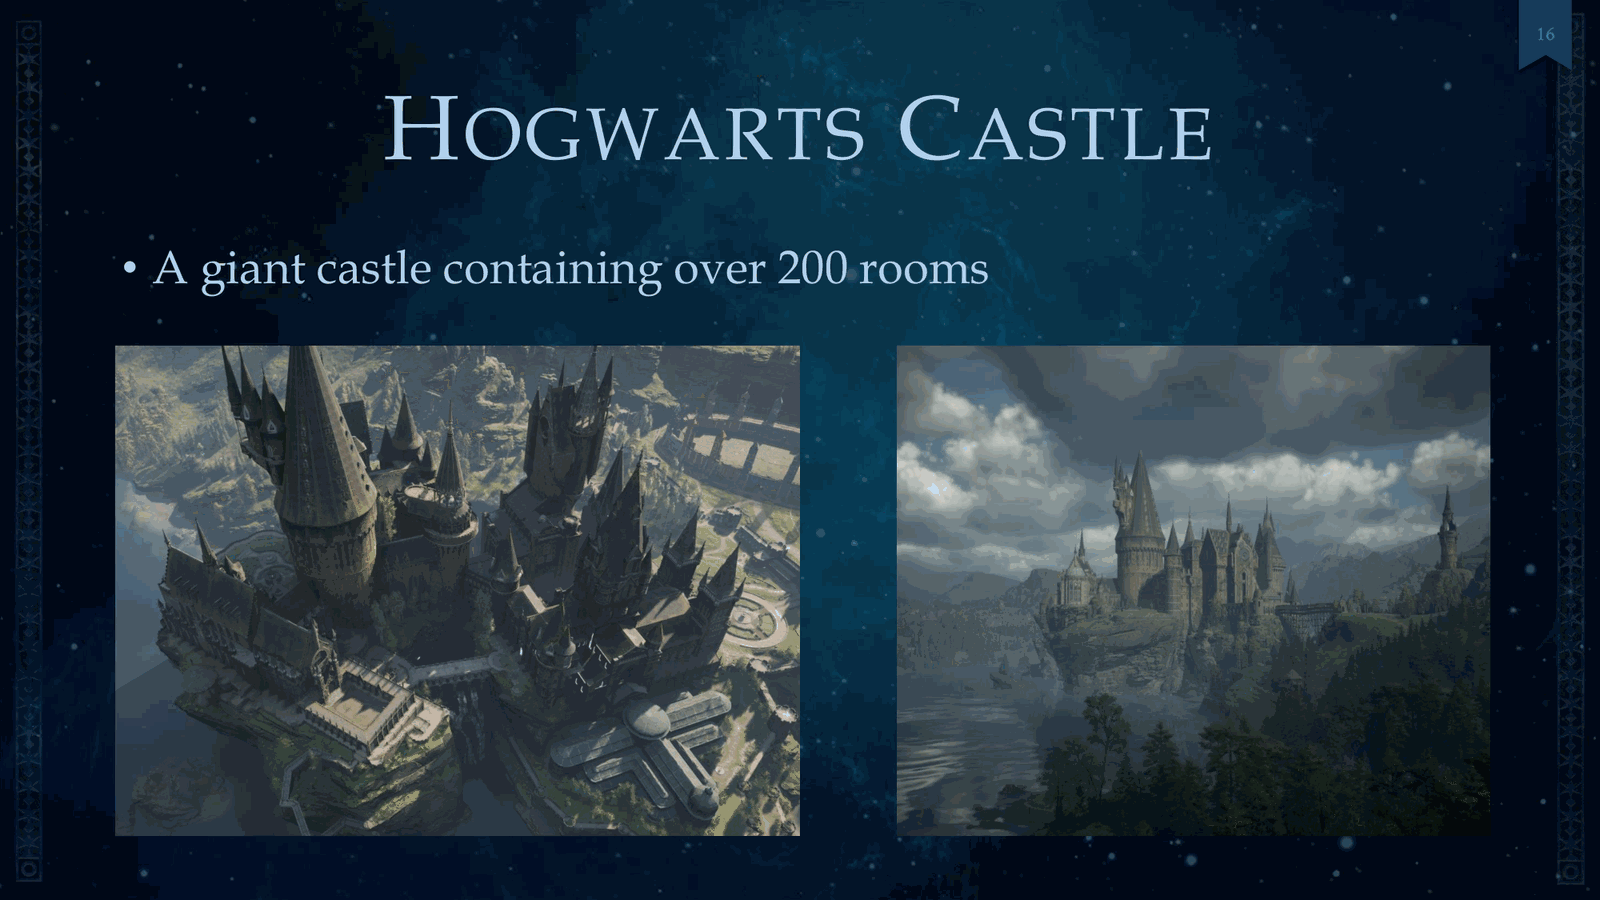
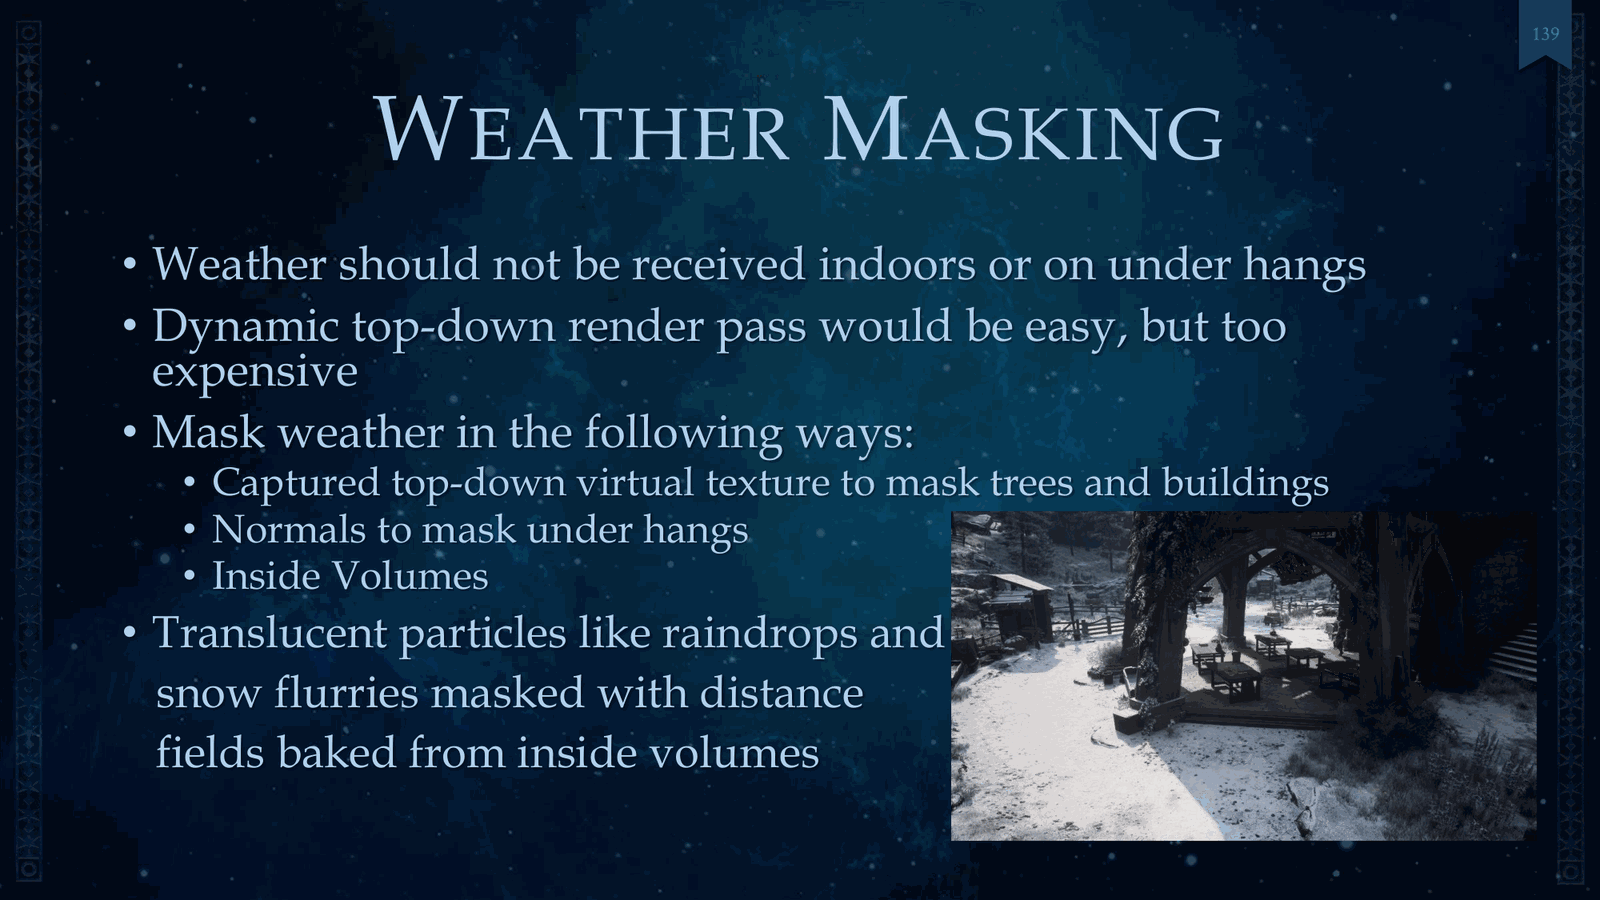
So you can see how complex our game could get. But then we consider Hogsmeade. It’s a town containing over 40 unique buildings, and the open world is still loaded and rendering. Last, we got the Hogwarts Castle. It’s a giant castle containing over 200 rooms.
Slide 11 — 00:04:51
📌 要点汇总
- 通过流式传输不可见内容来管理复杂性
- 使用 LOD(层次细节)技术优化渲染性能
- 所有内容必须具备可扩展性
- 实例化一切以提高效率
- Open World 中需处理大量“everything”相关内容
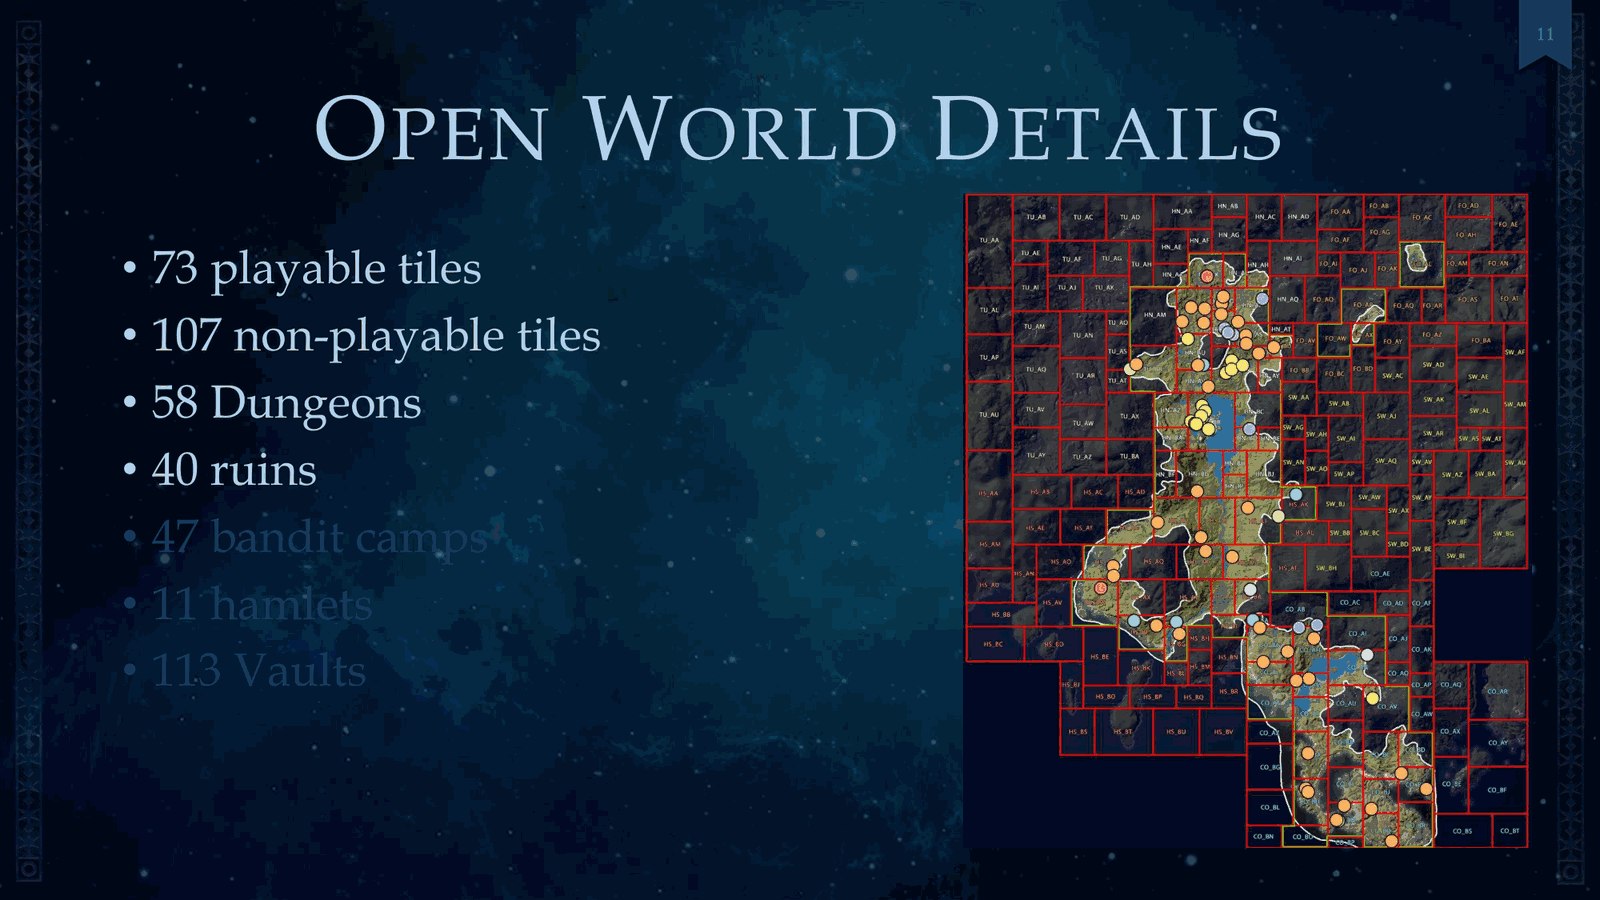
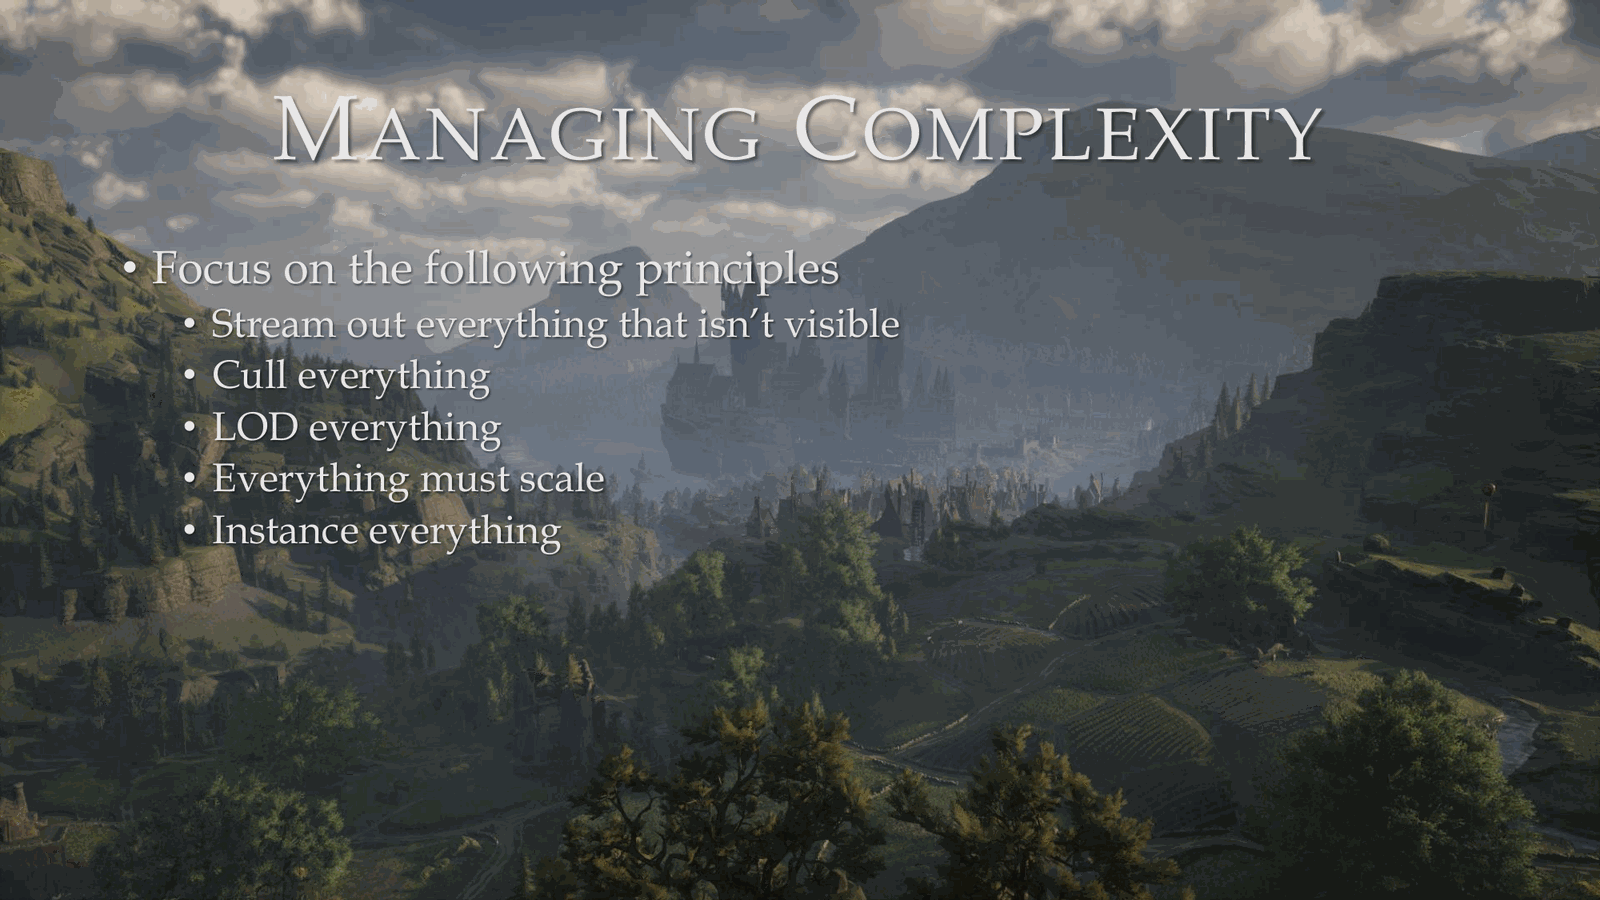
So, how do we manage this complexity? I’ll mention these principles, and we’ll discuss them a little bit further. So, first of all, we’re going to stream out everything that isn’t visible, cold everything, LOD everything, everything must scale, and instance everything. I mean, yeah, there’s a lot of things in everything with Open World.
Slide 12 — 00:05:13
📌 要点汇总
- 流式传输是保障GPU性能的第一道防线,仅在必要时进行流式传输
- Broom飞行增加了流式传输的负担
- 几乎没有加载屏幕,提升了用户体验
- 左侧是游戏摄像机视角,中间是带有流式传输的广角摄像机视角
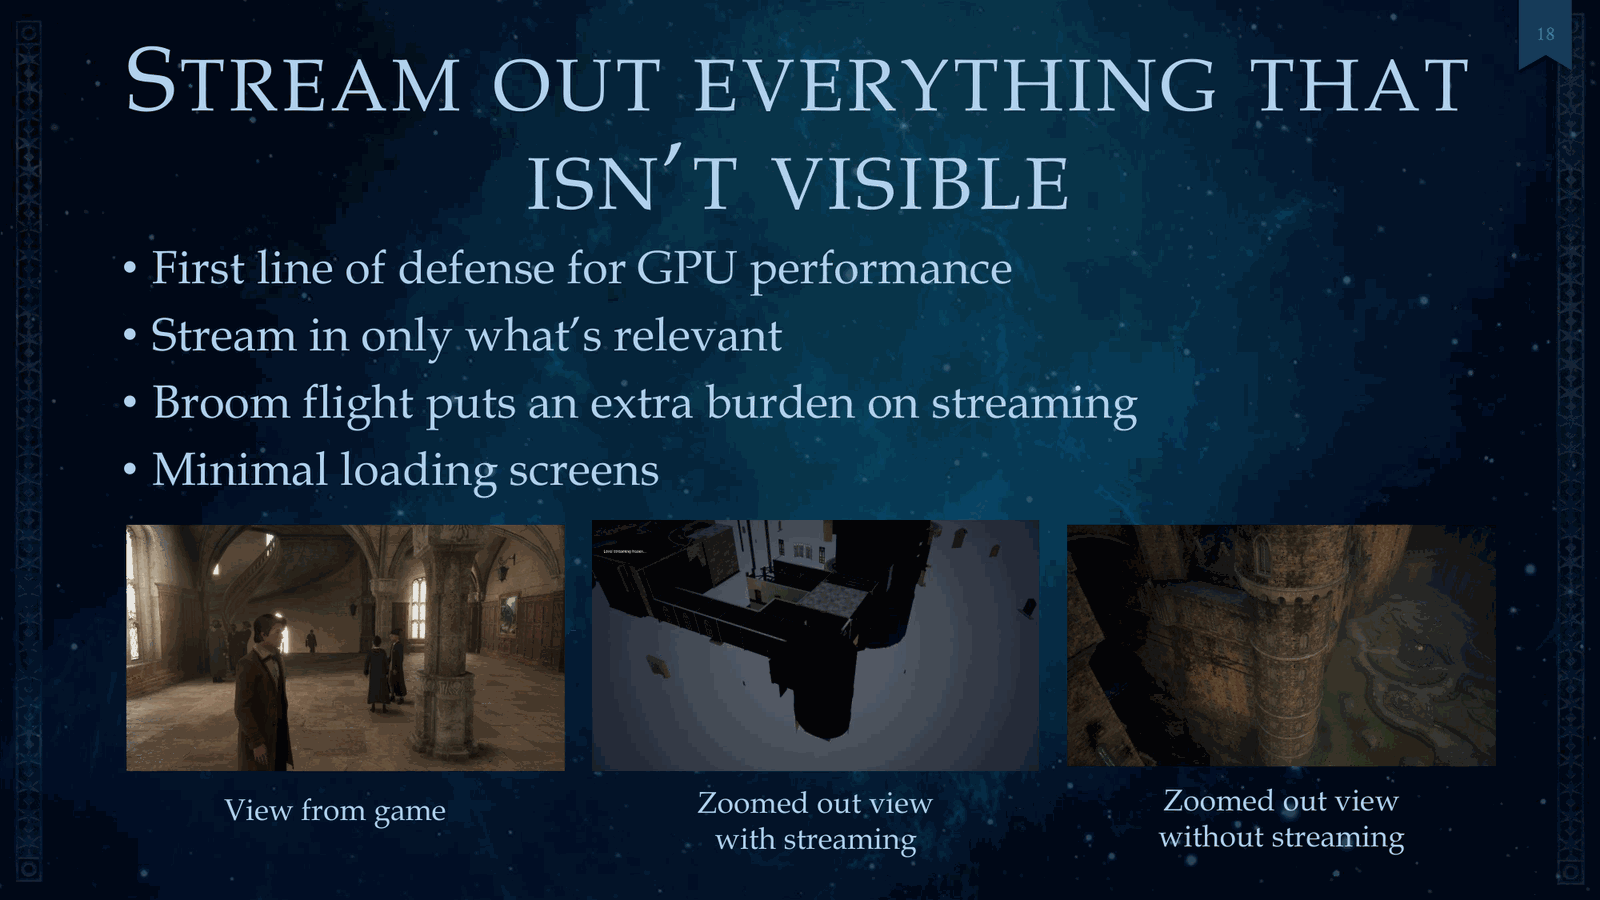
So, on streaming, this is our first line of defense for GPU performance, and we stream only in what’s relevant. Broom flight puts an extra burden on streaming, and we also had minimal loading screens. I have three pictures here. On the left is your game camera. In the middle is our zoomed-out camera with the stream.
Slide 13 — 00:05:35
📌 要点汇总
- 无需流式传输时,渲染内容大幅减少
- 所有不透明对象可使用通用抖动 alpha 渲染
- 避免因对象加载导致的视觉突变
- 支持小物体平滑淡出效果
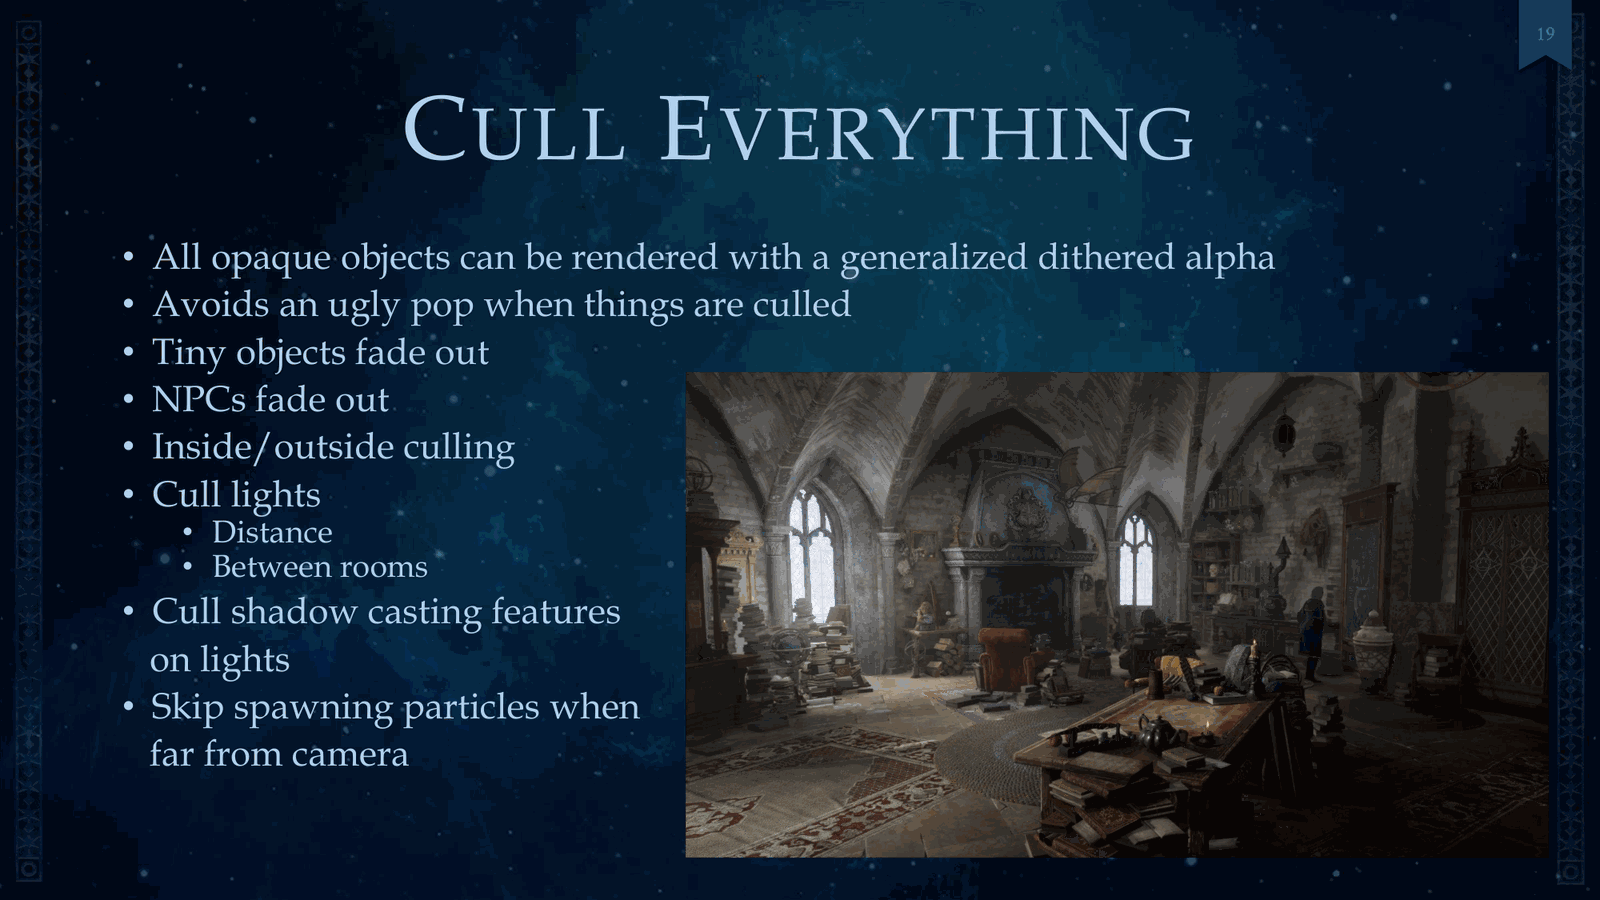
And the third would be the zoomed out without streaming. So the last two images, right? There’s a significantly less we have to render in game with streaming. Calling everything, all opaque objects can be rendered with a generalized dithered alpha, and this avoids an ugly pop when things are called. So that allows us to have tiny objects fade out.
Slide 14 — 00:05:57
📌 要点汇总
- 使用内外裁剪优化渲染性能
- 按类别调用灯光并启用阴影投射功能
- 远距离时不生成粒子效果以减少负载
- 所有模型必须包含完整的LOD层级以支持LOD切换
And also NPCs. In addition, we had inside/outside culling. We called lights based on various categories, and also shadow-casting features on said lights. And we also skip spawning particles when far from the camera. LODding everything—that means all mesh LODs have to be existent on every model.
Slide 15 — 00:06:20
📌 要点汇总
- 使用 LOD 流式传输技术,将不同 LOD 级别烘焙为 H LOD。
- 流式传输时用烘焙代理模型替换单个 LOD 级别,避免画面突变。
- 通过抖动和交叉渐变实现平滑过渡,提升视觉效果。
- 展示了霍格沃茨城堡实际模型与烘焙代理模型的对比。
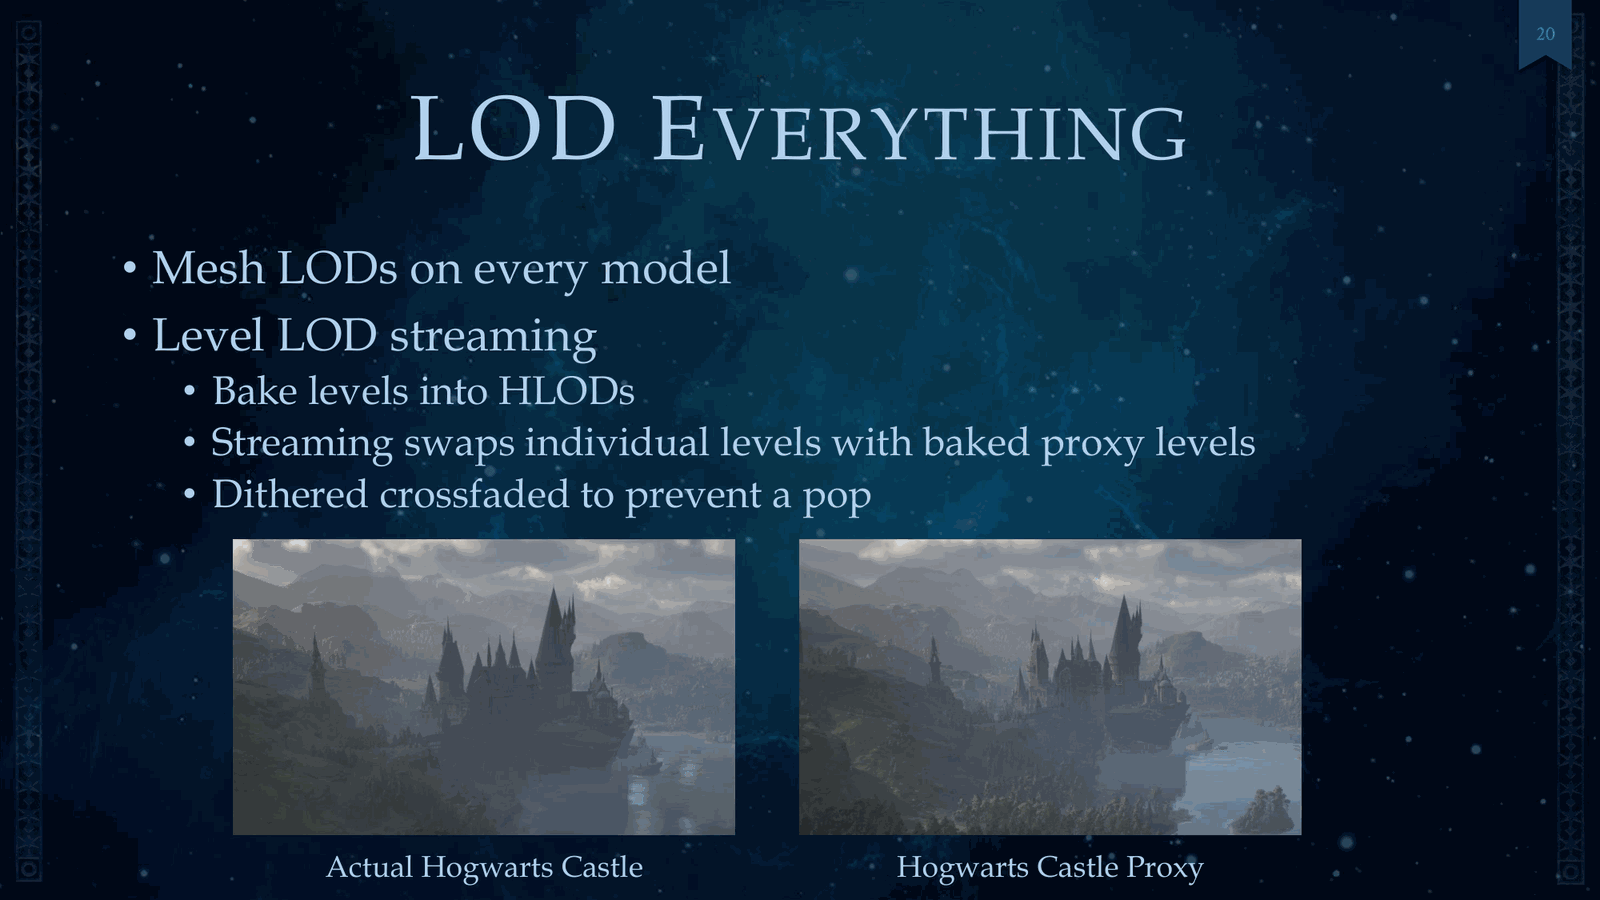
Also, level LOD streaming, and this consists consists of baking LOD levels into H LODs, and the streaming swaps individual levels with baked proxy levels. It was dithered, crossfaded to prevent a pop. And here I show a comparison of the actual Hogwarts Castle, and its baked proxy.
Slide 16 — 00:06:42
📌 要点汇总
- 所有图形功能必须具备可扩展性,否则无法实际运行。
- 图形功能需在各种场景下持续运行,而不仅仅是空房间中。
- 需要实现无视觉影响的开关控制功能。
- 高端平台需支持这些功能的稳定运行。
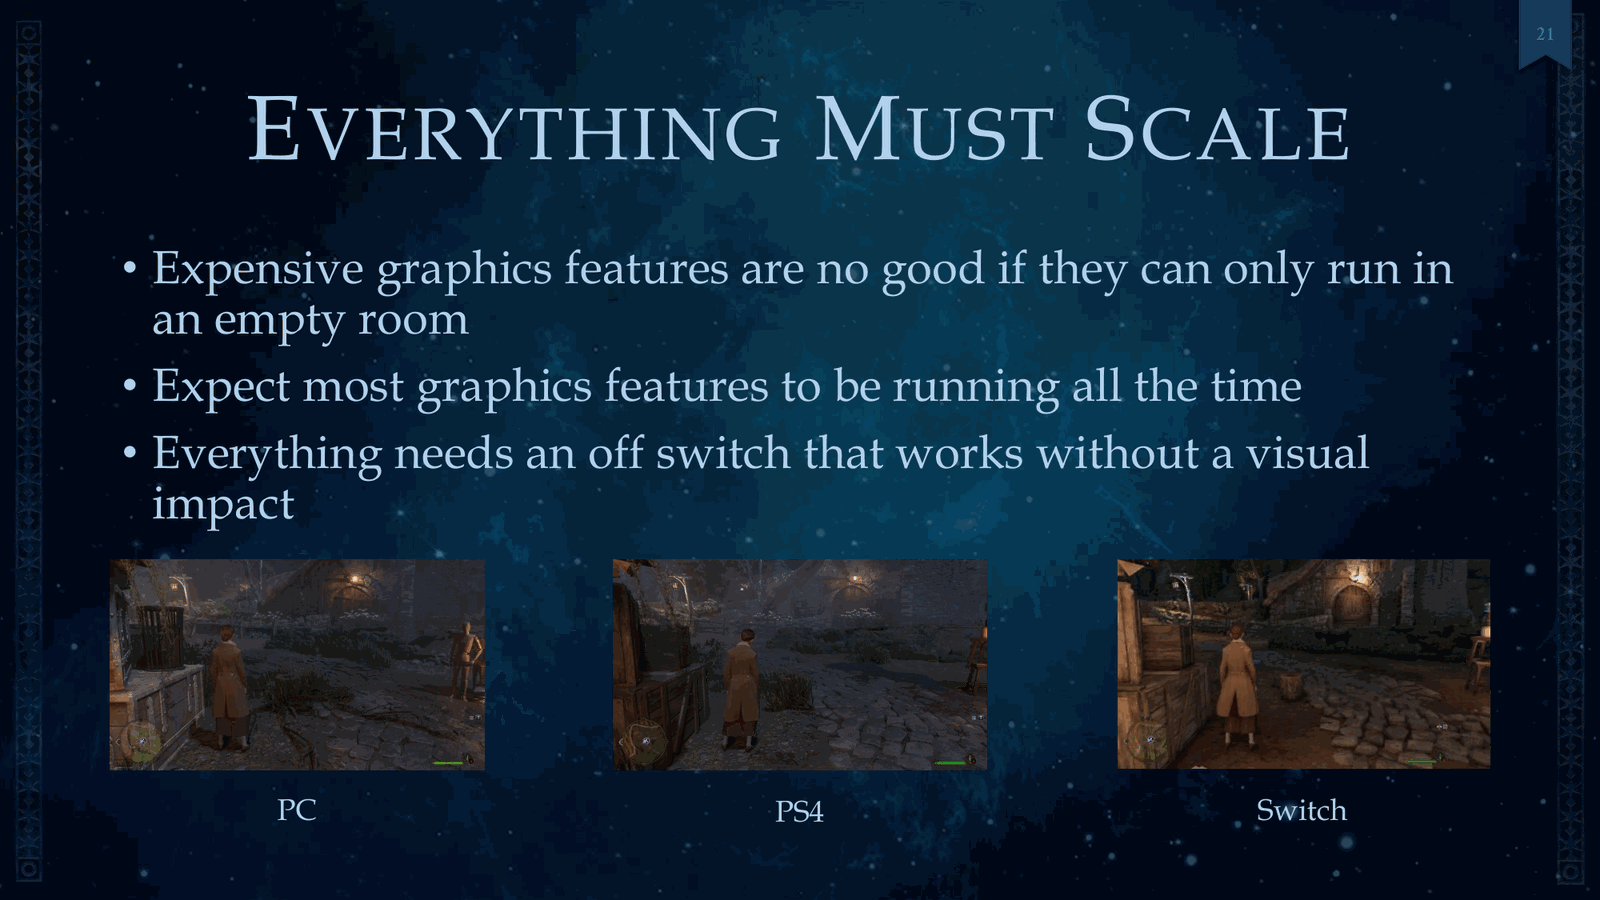
Everything must scale, so every graphics feature is no good unless it can run. If it only runs in an empty room, and so we expect most graphics features to be running all the time. And everything needs an on-off switch that works without a visual impact. So we show here the high-end platforms to the.
Slide 17 — 00:07:04
📌 要点汇总
- 渲染线程是性能瓶颈
- 使用 Unreal 4 时每帧限制约 10,000 个绘制调用
- 每帧可见性测试对象数量也受限于约 10,000 个
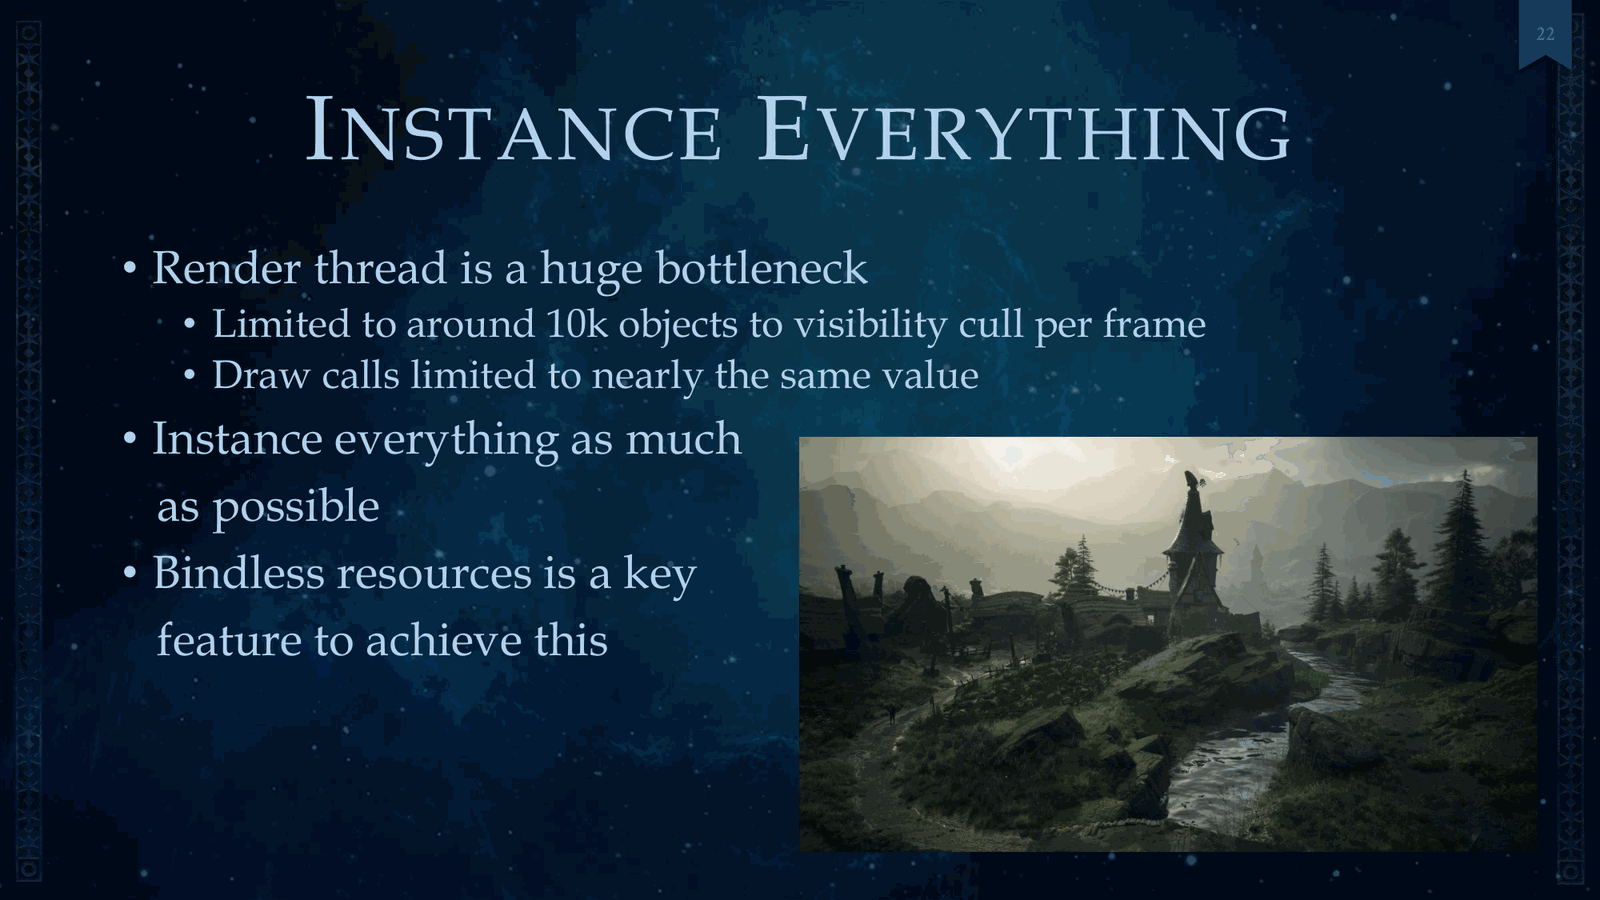
And yes, there is a bit of a difference, but you can see that the whole game is intact and still there. Instants everything, so our render thread’s a huge bottleneck. And this is Unreal 4, so we’re limited to around 10,000 draw calls and about that many objects to visibility tests per frame.
Slide 18 — 00:07:26
📌 要点汇总
- 尽可能多地实例化对象以提高性能
- 无绑定资源(bindless resources)是关键特性
- 需要对Unreal Four引擎进行多项修改
- 在整个渲染管线中添加了无绑定图形支持
And so that’s why we instance everything as much as possible. And for this reason, bindless resources is a key feature. So all of these required engine changes to Unreal Four. So I’m going to list some of the things just from a high-level view. So we added bindless graphics across the entire rendering pipeline.
Slide 19 — 00:07:48
📌 要点汇总
- 使用基于计算的分块延迟光照渲染技术
- 集成烘焙光照探针体积和体积光照与雾渲染
- 支持半透明水和体积材质,与不透明渲染管线功能一致
- 实现阴影等功能需对引擎进行大量修改
We had compute-based tiled deferred light rendering, baked light probe volumes, combined volumetric lighting and volumetric fog rendering, translucent water, and volumetric materials support the same major features as opaque render pipeline, including shadows, and all of this required engine changes.
Slide 20 — 00:08:10
📌 要点汇总
- Bindless资源是GPU硬件支持10年的特性,允许在着色器中通过索引访问资源数组
- 该特性允许实例化纹理,提升渲染灵活性和性能
So, I’m first going to talk about bindless resources. As a high-level overview, this is a hardware GPU feature fully supported on graphics hardware for the last 10 years, and this key feature is that you can instance textures. If you’re speaking about low-level, it’s just an array of resources in which you can index in the shader.
Slide 21 — 00:08:32
📌 要点汇总
- 该方法解锁了渲染管线中的新优化机会
- 不需要使用纹理图集(texture atlases)
- 每个纹理可以是不同尺寸
- 这是批量处理3D纹理的唯一方式
There’s a few advantages here. First, it unlocks new optimization opportunities across the entire rendering pipeline, and that includes no need for texture atlases. Each texture can be a different size, and this is the only way to batch 3D textures.
Slide 22 — 00:08:54
📌 要点汇总
- 可在着色器中动态读取纹理,支持发散纹理读取
- 可实例化共享相同着色器但纹理不同的对象
- 单光源单通道光照注入适用于体积光照和雾效
- 该方法也存在一些缺点需注意
You can also dynamically read textures in in shader with divergent texture reads, and we can instance objects that share the same shader but have different textures. And last, single light single pass light injection for volumetric lighting and fog. So there’s also a couple disadvantages.
Slide 23 — 00:09:16
📌 要点汇总
- 所有着色器都必须考虑无绑定(bindless)特性
- 不支持无绑定的GPU缺乏简单回退方案
- Unreal引擎4.27版本未支持该特性,需大量工作集成
- 每次版本升级都需要进行相应调整
All shaders have to be built with this in mind, and GPUs that don’t support this, bindless, have no easy fallback. Our shipping version of Unreal, four twenty-seven Chaos, that wasn’t supported, and so we had to spend a lot of effort integrating this into the engine. So every version upgrade that needed adjustment.
Slide 24 — 00:09:38

📌 要点汇总
- 硬件上不同纹理读取可能带来高昂开销
- 单次绘制调用最多只能访问约2,000个资源
- 与WB Games Montreal合作已有相关支持代码
And also new platforms. Also, divergent texture reads can be expensive on certain hardware, and still we’re limited to around 2,000 resources accessible in one draw call dispatch. So we also collaborated with WB Games Montreal. They already had code to support.
Slide 25 — 00:10:00
📌 要点汇总
- 使用 Bindless 技术并结合两家工作室的代码进行增强
- 涉及到的 Bindless 应用包括材质实例化、体积光照、正向渲染和光照探针
- 该技术在多个图形渲染环节中被应用,但仅讨论其中一部分
Bindless, and so we use theirs, and we add our own enhancements. And so, what I share with respect to Bindless is a combination of both studios’ code. So, this is where we use Bindless. I’ll list them out because there’s a lot of them. We’ll just discuss a few of them. So, material instancing, volumetric lighting, and forward rendering, light probes.
Slide 26 — 00:10:22
📌 要点汇总
- 该幻灯片概述了基于瓷砖的延迟渲染技术
- 提到该技术用于阴影、光照、反射捕捉和光照探针等特性
- 涉及多层布料、远处植被、代理对象、贴花和光照纹理等复杂渲染内容
Reflection captures, generalized rays and materials, shadows, multi-layered cloth, distant foliage, proxies, decals, and light textures. So, we’re going to give an overview of tiled deferred rendering, just as a refresher. Several bindless features use this, so shadows, lights, reflection captures, and light probes, and.
Slide 27 — 00:10:44
📌 要点汇总
- 屏幕被划分为 16x16 的瓦片(tiles)
- 每个瓦片记录阴影、光源、反射和探针的总数
- 右侧展示了两个不透明(opaque)D 瓦片和三个半透明(translucent)froxels
- 瓦片分类基于上述数据进行后续处理
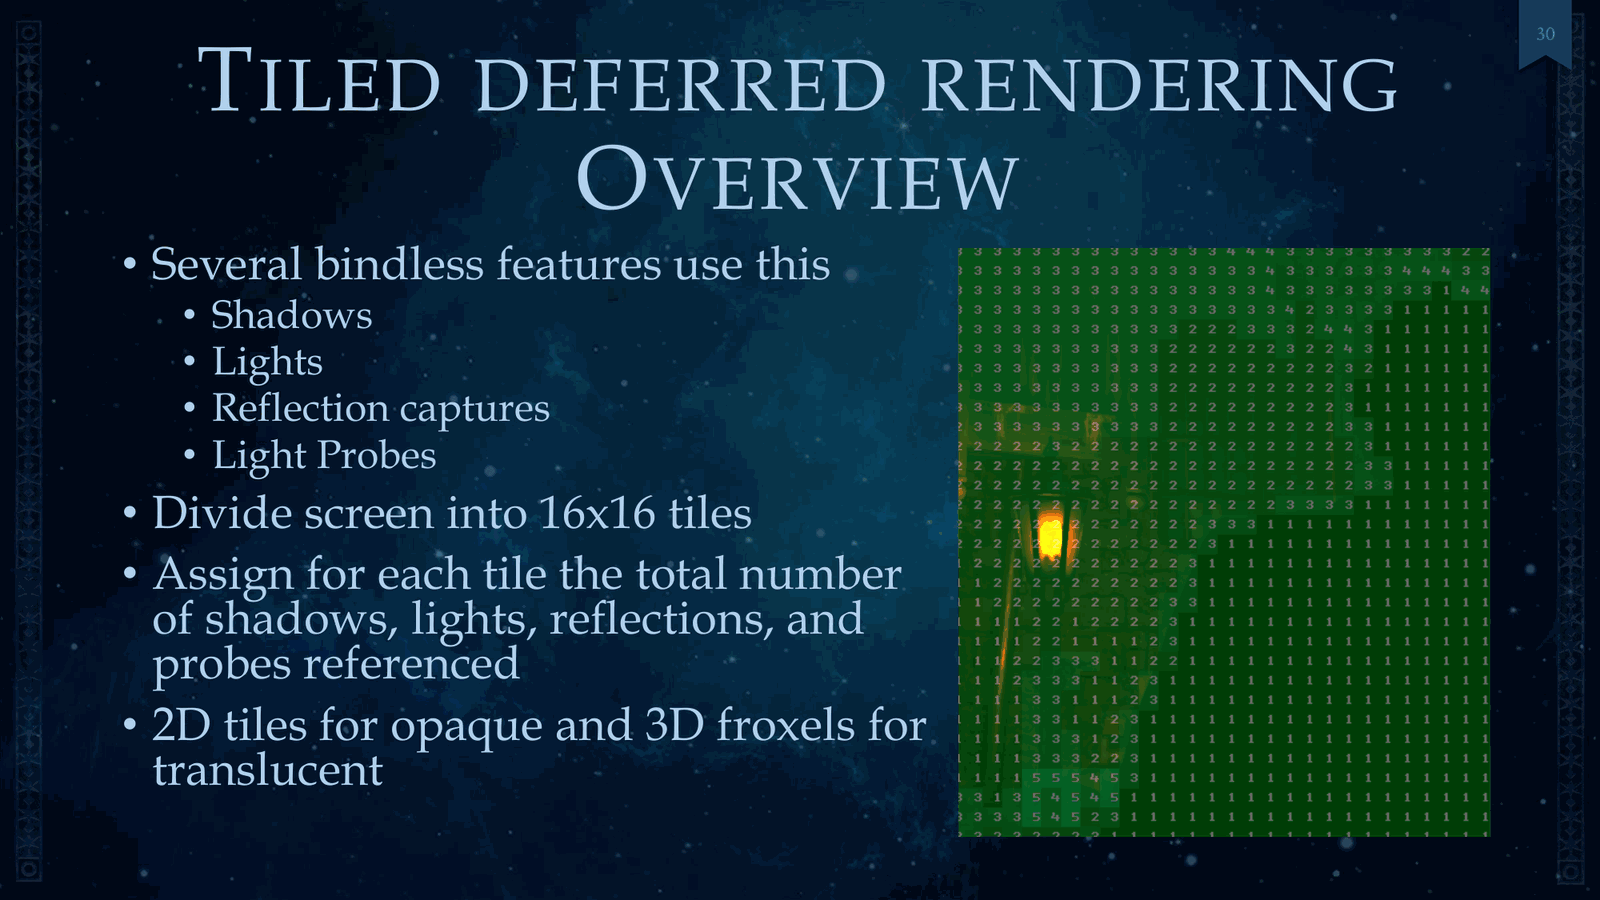
This consists of dividing the screen into 16 by 16 tiles, and we assign each tile the total number of shadows, lights, reflections, and probes referenced. We had two D tiles shown here on the right for opaque, and three froxels for translucent. Then, after this, we categorize each tile based on.
Slide 28 — 00:11:06

📌 要点汇总
- 光照特征按头发、皮肤和次表面散射进行分类
- 方向阴影基于传输、重叠级联和相机距离计算
- 每种分类类型执行一次间接计算调度
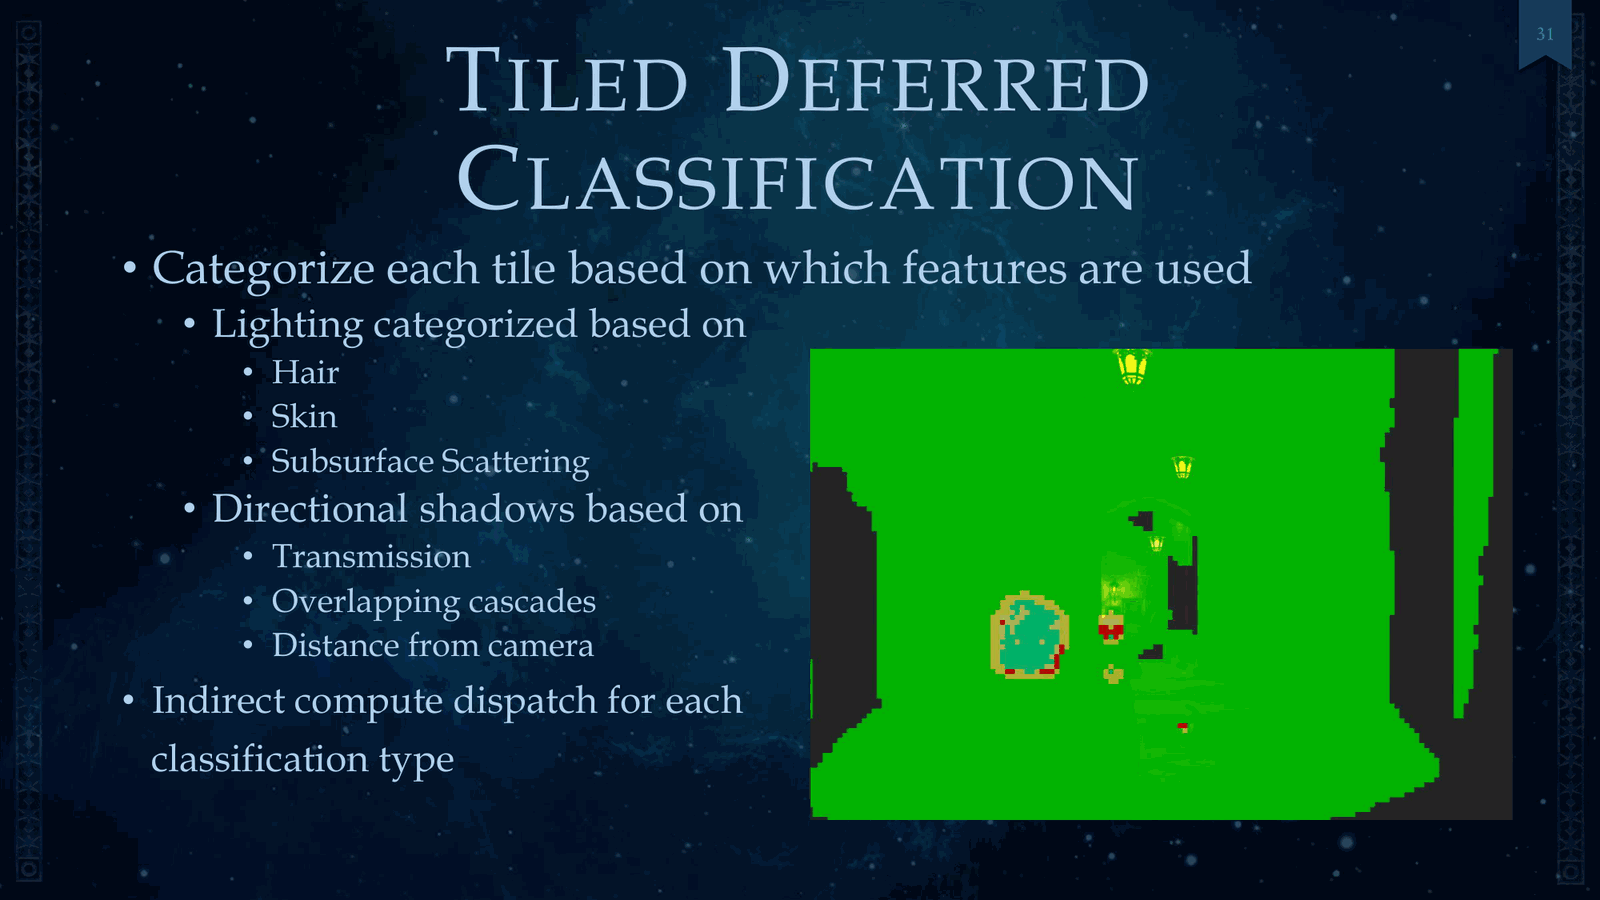
Which features are used? So, for lighting, we talked about you’re categorized by hair, skin, subsurface scattering. For directional shadows, it was based on transmission, overlapping cascades, and distance from camera. And then afterwards, you do one indirect compute dispatch for each classification type.
Slide 29 — 00:11:28
📌 要点汇总
- 材质实例化允许相同着色器的材质进行实例化,提升渲染效率
- 在图书馆场景中,大量书籍可通过实例化实现高效渲染
- 石头等对象也应用了实例化技术,显著优化性能
- 体积光照是接下来要介绍的重要渲染技术
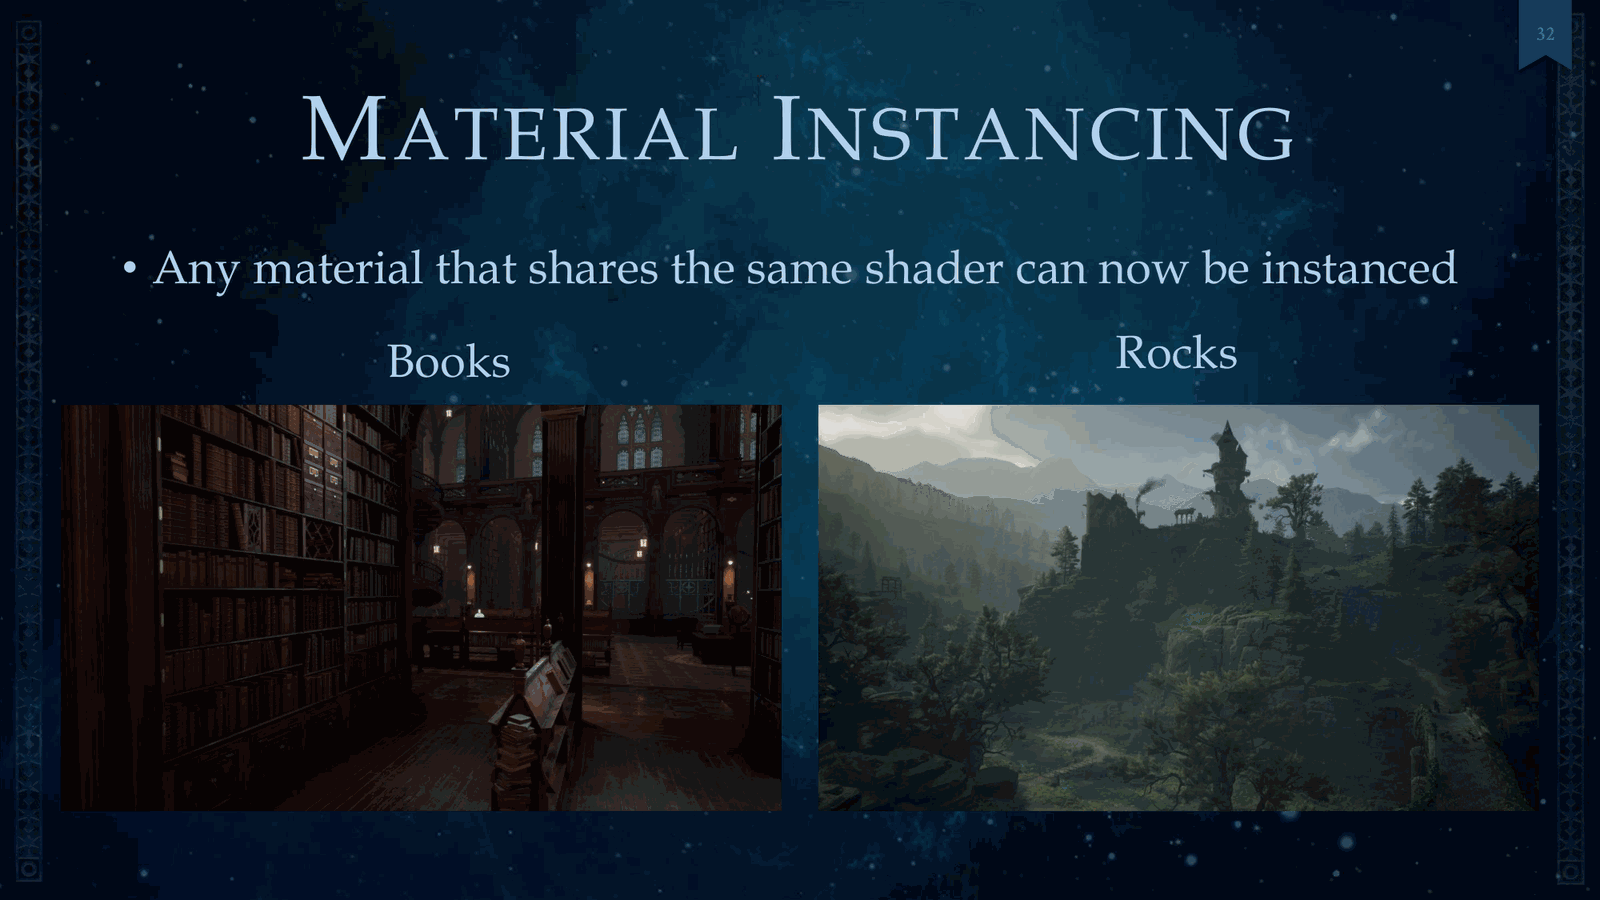
So we’ve got material instancing, and I’d just like to show what that that does. It was any material that shares the same shader can now be instanced. So it’s very evident in a library with I don’t know how many books, but you could instance them. That made a big deal, and of course rocks were also done. Next, we’ve got volumetric lighting.
Slide 30 — 00:11:50
📌 要点汇总
- 前向渲染支持阴影、反射捕获和探针等特性
- 前向着色计算成本较高,仍倾向于延迟渲染
- 所有材质已适配环境,附有测试图片示例
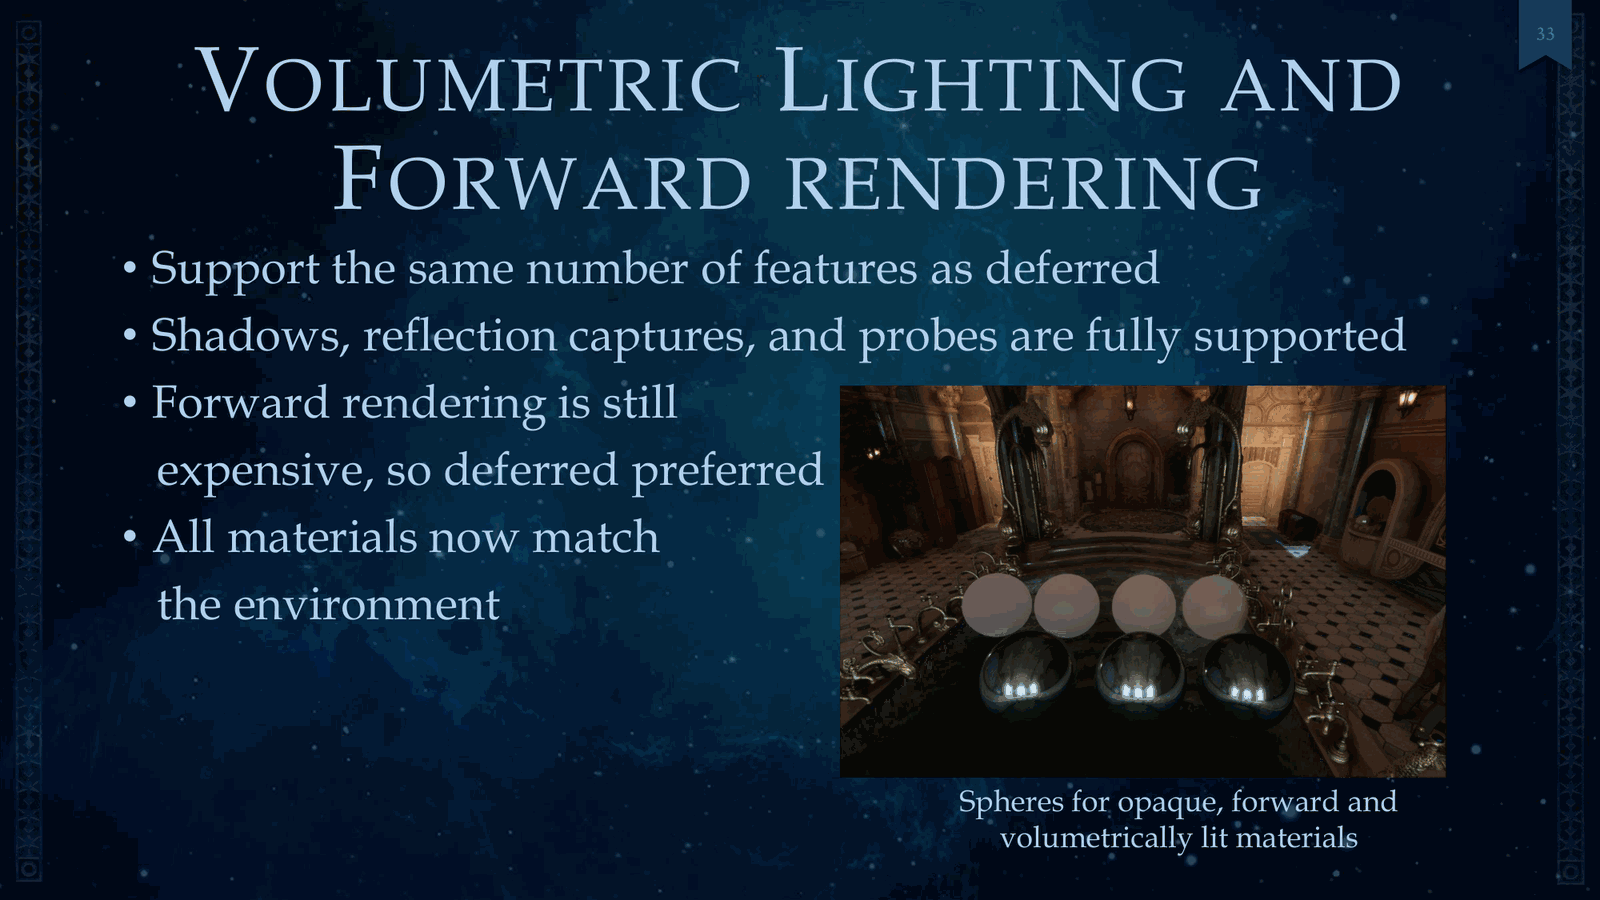
Lighting and forward rendering. We wanted to support the same number of features as deferred, and so shadows, reflection captures, and probes are fully supported. Forward shading is still expensive, so we still prefer deferred. And here we have all materials now match the environment, so we have a test picture here.
Slide 31 — 00:12:12
📌 要点汇总
- 演示了四个不透明球体和铬球体在体积光照下的效果
- 体积光照技术已进行优化提升
- 体积光照渲染需单独处理光照数据
Where we have four opaque spheres, right? Four opaque, forward volumetrically lit materials, and also chrome spheres, and you can see they closely match each other. We made some enhancements for volumetric lighting, and just as a reminder for those that are not familiar, for this you just render the lighting data and.
Slide 32 — 00:12:34
📌 要点汇总
- Screen-space froxels 数据可用于体积光照和半透明材质
- 由于成本限制,通常仅限于短距离使用
- 通过性能优化,将距离扩展至 500 米
- 实现此目标需要多个质量层级的优化策略
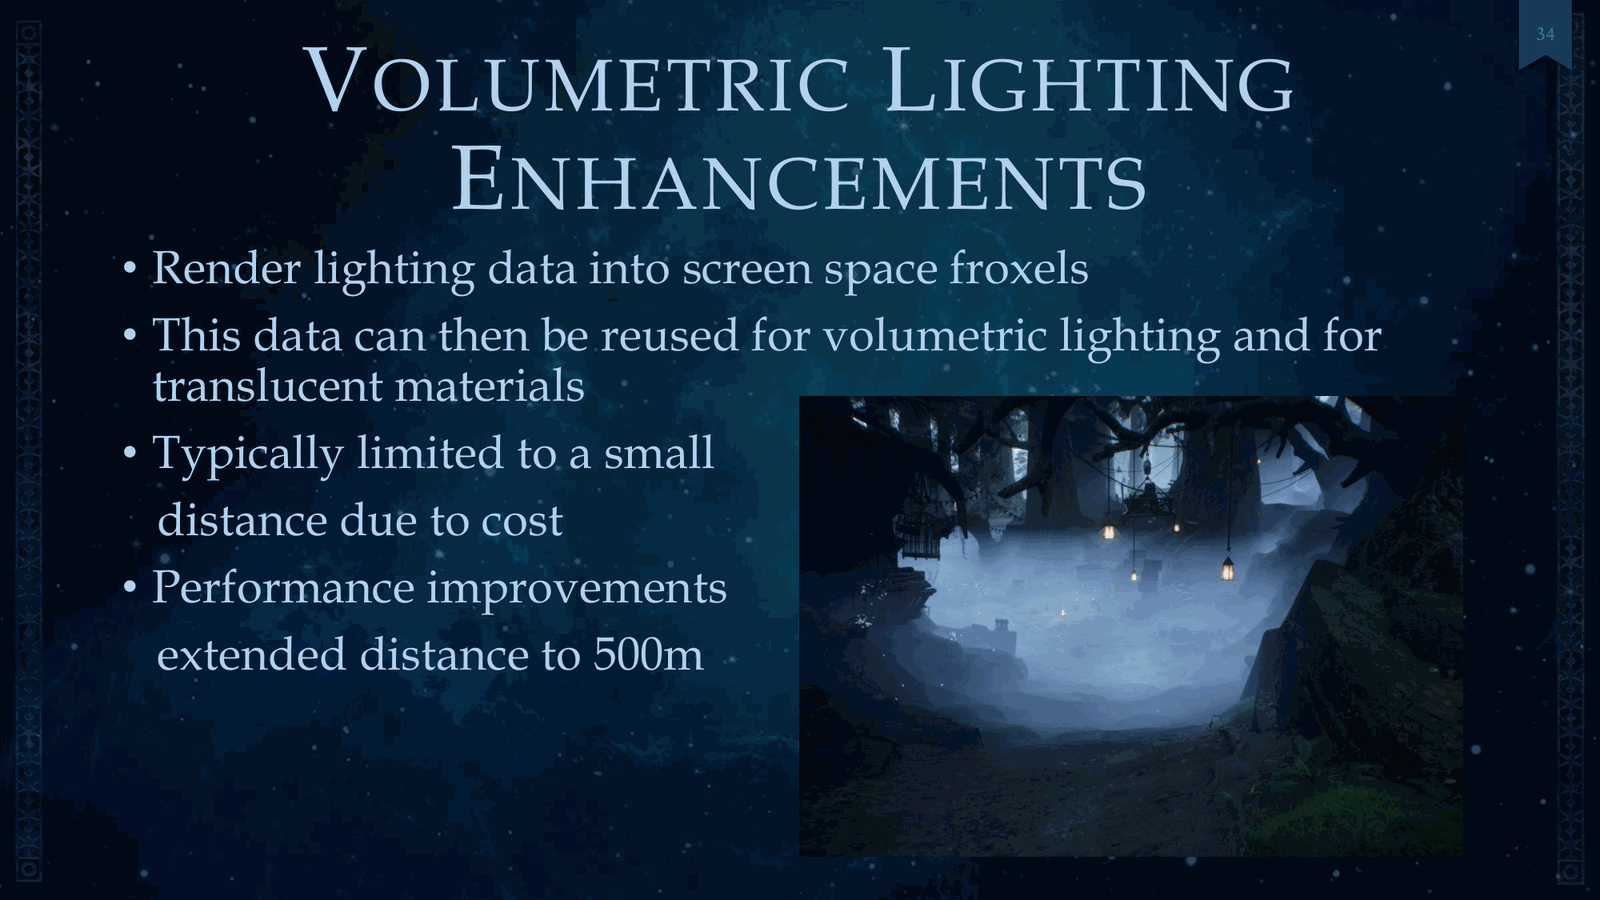
Screen-space froxels, and this data can be reused for volumetric lighting and for translucent materials. It’s typically limited to a small distance due to cost, but we made performance improvements to extend this distance to 500 meters. So to achieve this, we had several quality tiers.
Slide 33 — 00:12:56
📌 要点汇总
- 该技术基于 Z 距离和 Z 切片实现
- 从相机到 70 米使用全光照质量
- 500 米仅使用定向光并渲染四分之一样本
- 最后阶段禁用体积雾以优化性能
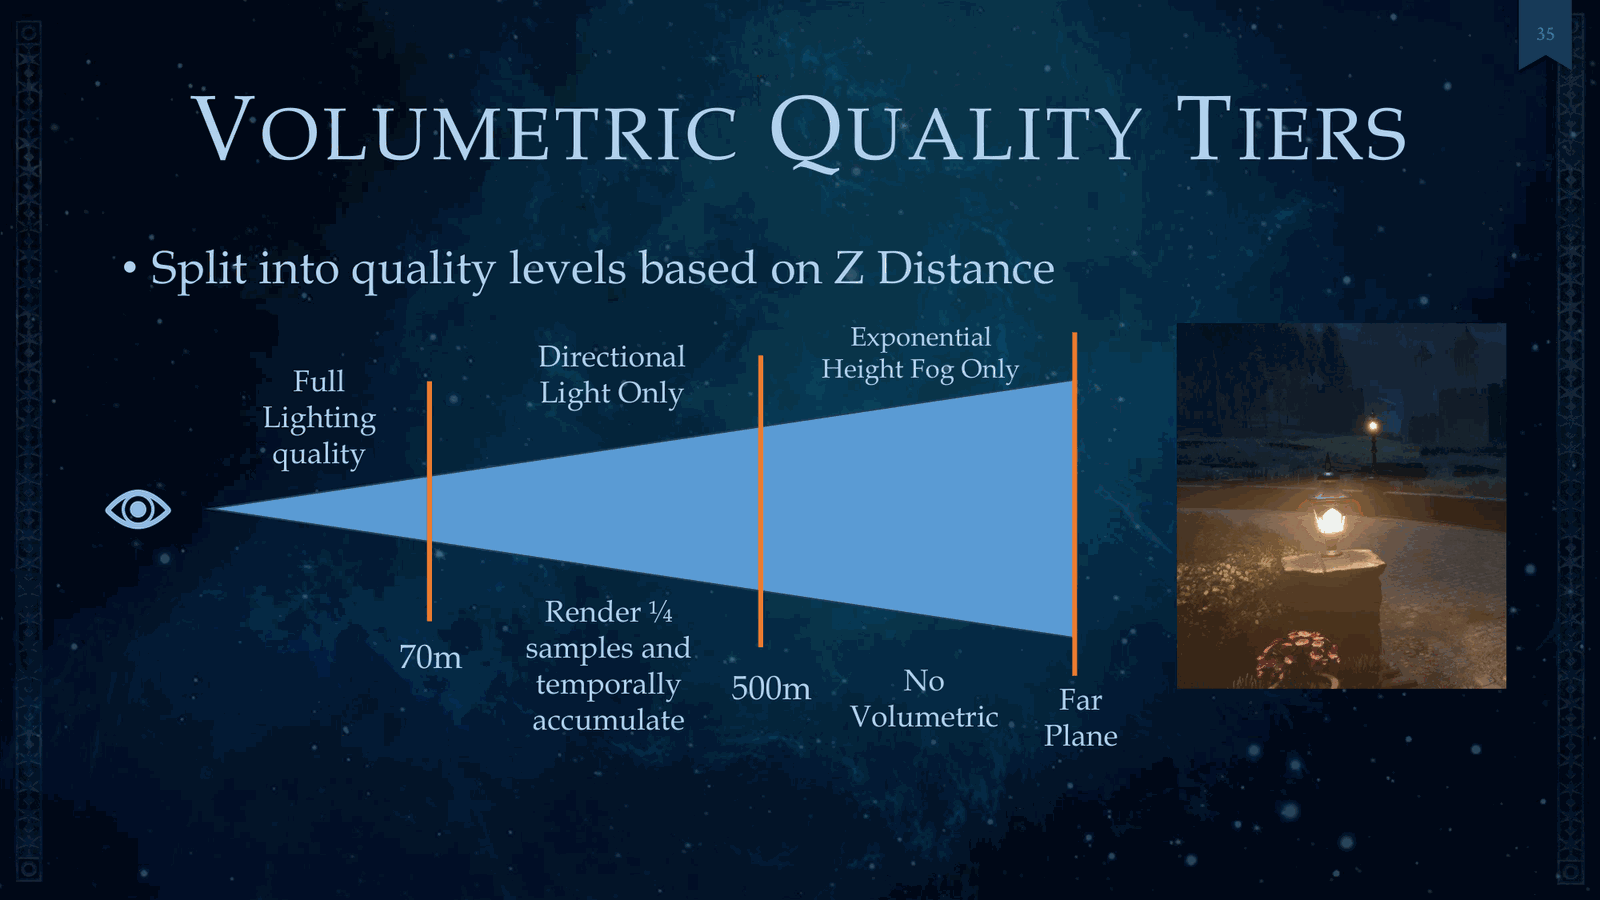
And this is based on Z distance, and low level it’s Z slices. And so, from the camera to 70 meters, it was full lighting quality. To 500 meters, we just had the directional light only, and we rendered a quarter of the samples until we temporally accumulate. And then last, no volumetric fog, just.
Slide 34 — 00:13:18
📌 要点汇总
- 使用无网格(binless)光照探针以适应霍格沃茨非对齐结构
- 无网格方式支持着色器中访问多个探针体积
- 该方法提高了光照计算的灵活性和精度
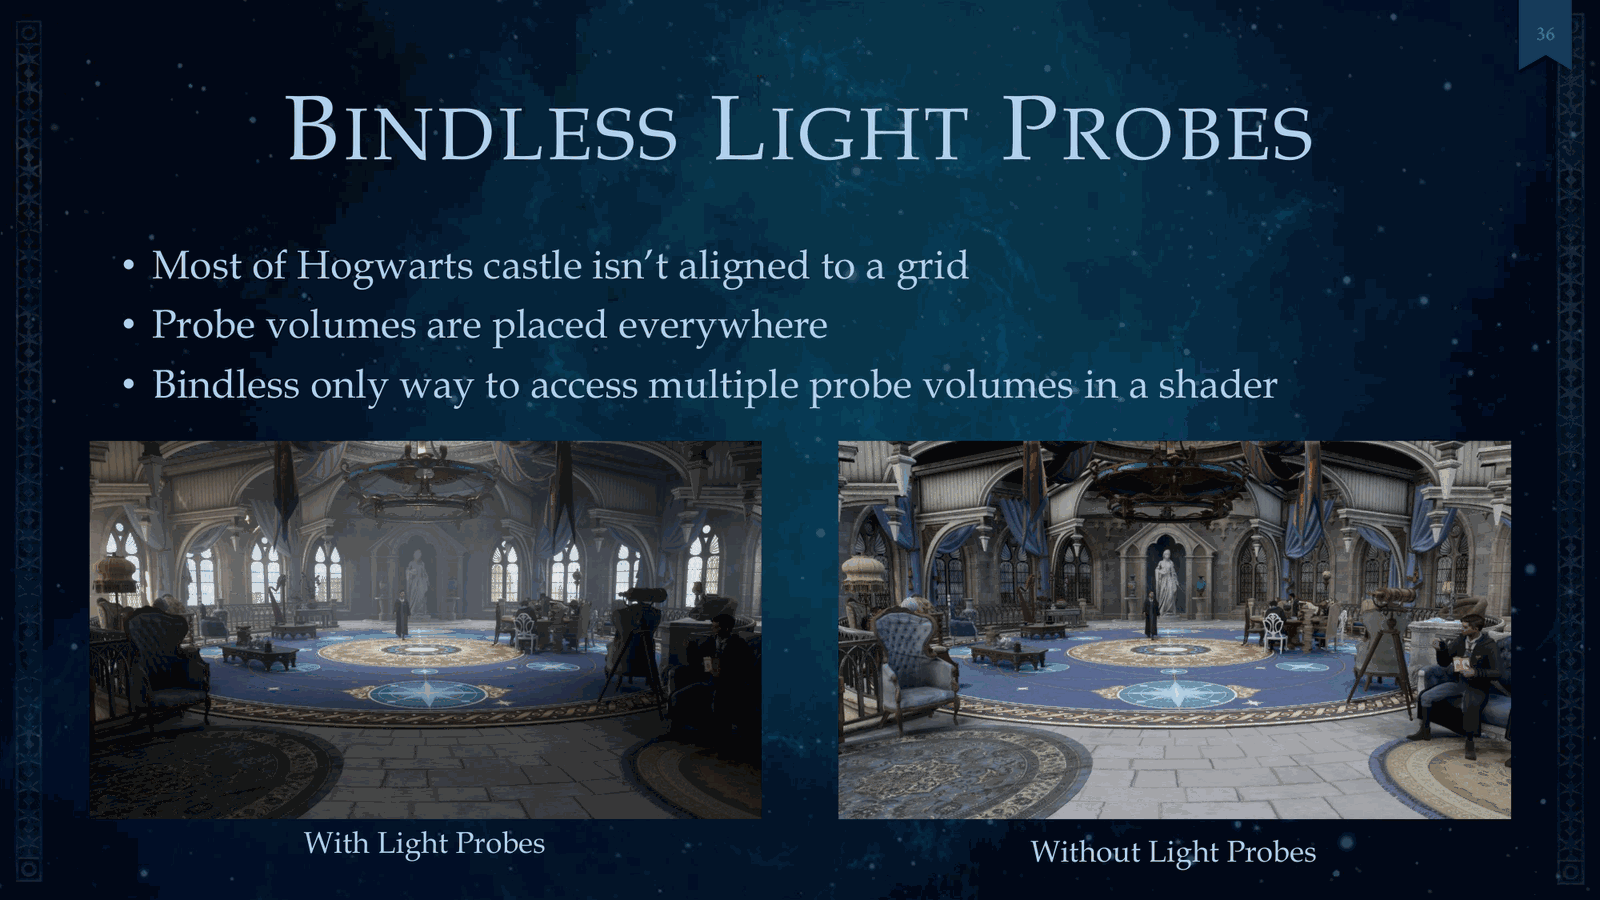
Exponential height fog. Next, we’ve got binless light probes. Since most of Hogwarts isn’t aligned to a grid, probes were preferred, and so we place them everywhere. And binless is the only way to access multiple probe volumes in a shader. I don’t have much to talk.
Slide 35 — 00:13:40
📌 要点汇总
- 展示了使用和不使用 light probes 对游戏视觉效果的影响
- 右侧显示了 probe volumes 的分布情况
- 以 Gryffindor Tower 为例说明 probe 的数量和布局
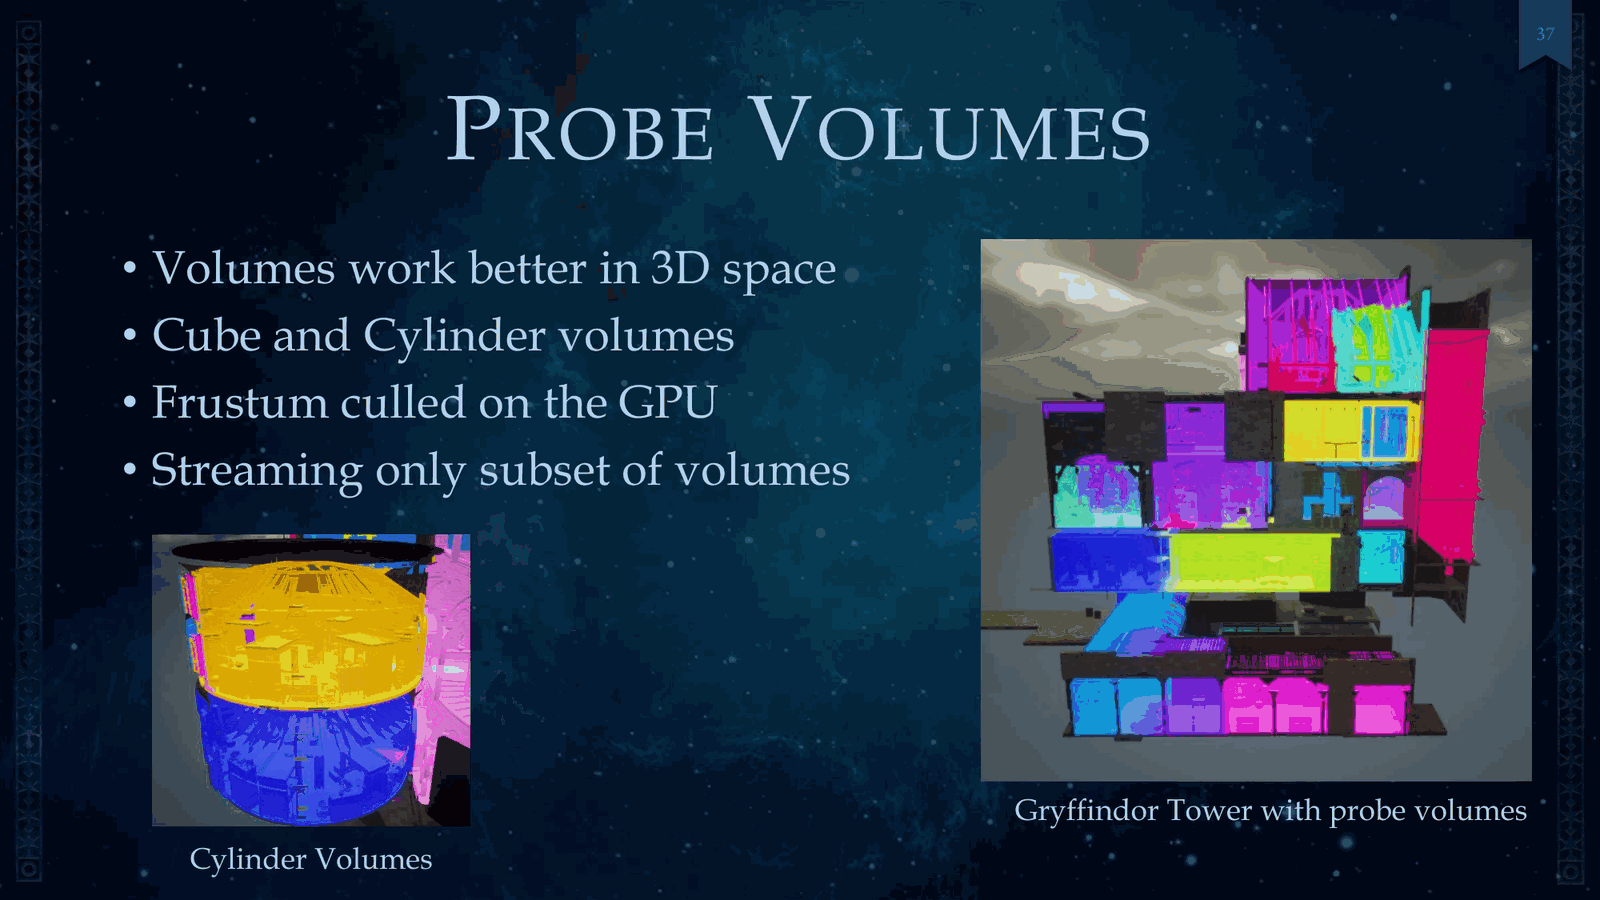
About probes, because they could be its own talk, but I’d like to show you guys what visually it does to this game. So on the left is with light probes, and on the right is without. So shown here on the right, we’ve got our probe volumes. This is the Gryffindor Tower, and you can see how many.
Slide 36 — 00:14:02
📌 要点汇总
- 使用立方体和圆柱体作为探测体积以适应不同场景
- 霍格沃茨有许多圆柱形塔楼,因此增加了圆柱体积
- 由于数量过多,使用了截头圆锥体并在 GPU 上进行冷却处理
- 仅流式传输部分体积以提高性能
Different probe volumes we had there to get get things to kind of fit, and so we use both cube and cylinder volumes. There are a lot of cylindrical towers in Hogwarts, and so we also added cylindrical volumes here. There are so many that we also had to frustum, cool them on the on the GPU, and we only stream in a subset.
Slide 37 — 00:14:24
📌 要点汇总
- 在探针和阴影处理中,增加了无处不在的间接阴影效果
- 阴影是沿着探针中主光源方向的接触阴影轨迹
- 使用了主光源遮挡公式来实现阴影效果
- 提供了一张标准示例图用于说明
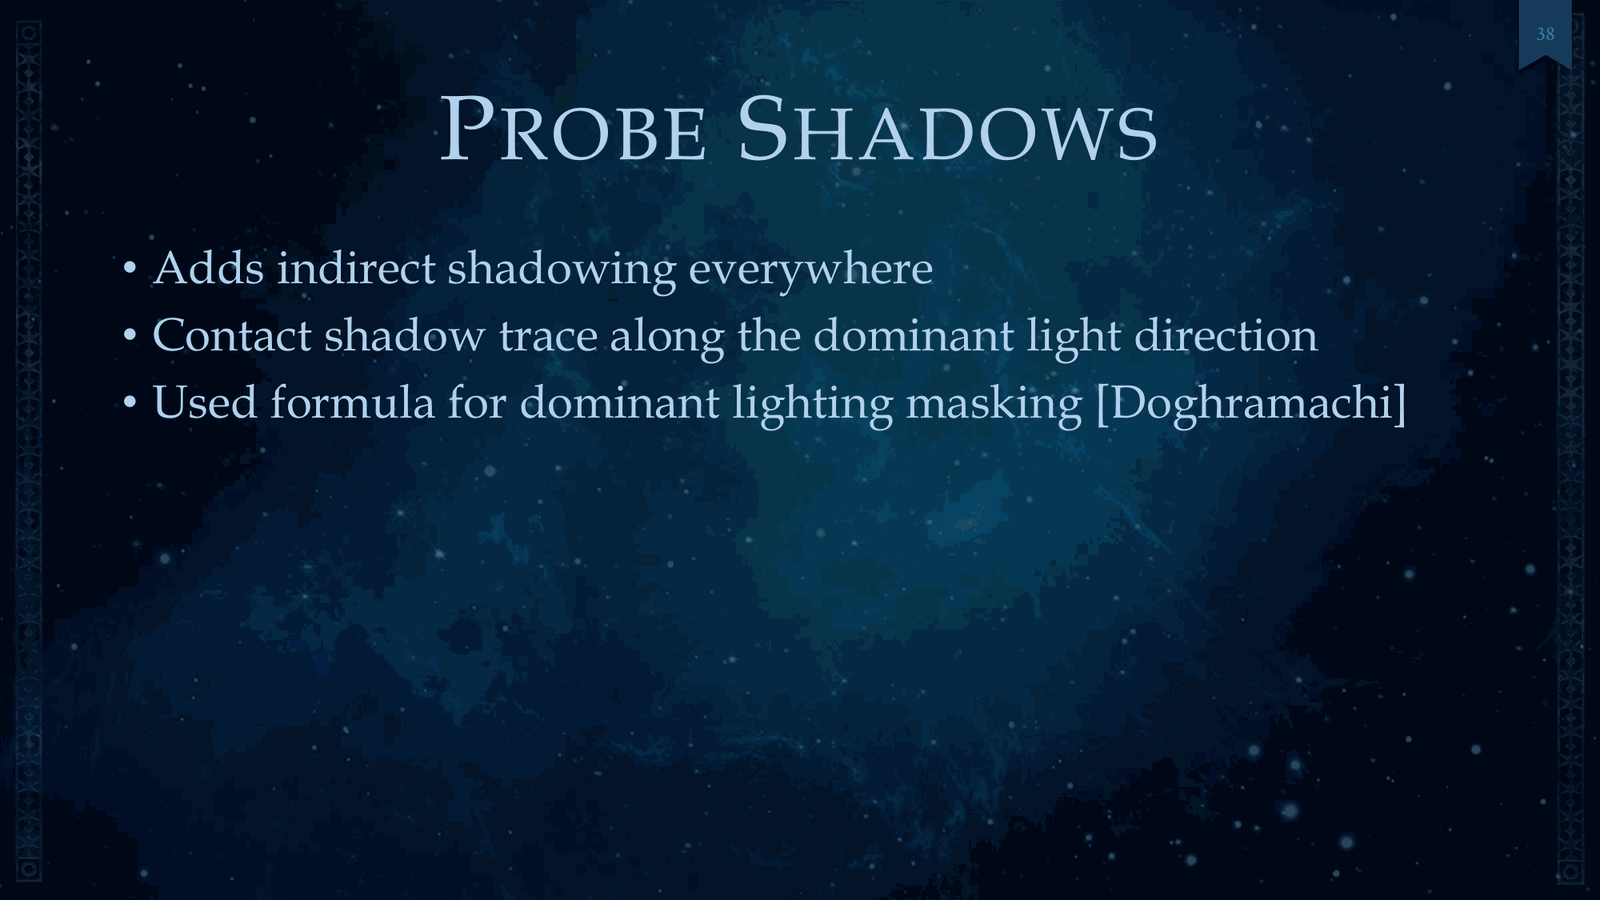
For probes, shadows, we added indirect shadowing everywhere, and just basically, it’s a contact shadow trace along the dominant light direction in your probes, and we used a formula for dominant light masking. So here is a picture of a standard.
Slide 38 — 00:14:46
📌 要点汇总
- 注意角色下方的阴影,它们未被直接照亮
- 展示有无阴影效果的对比图片
- 接下来介绍无绑定反射捕获技术
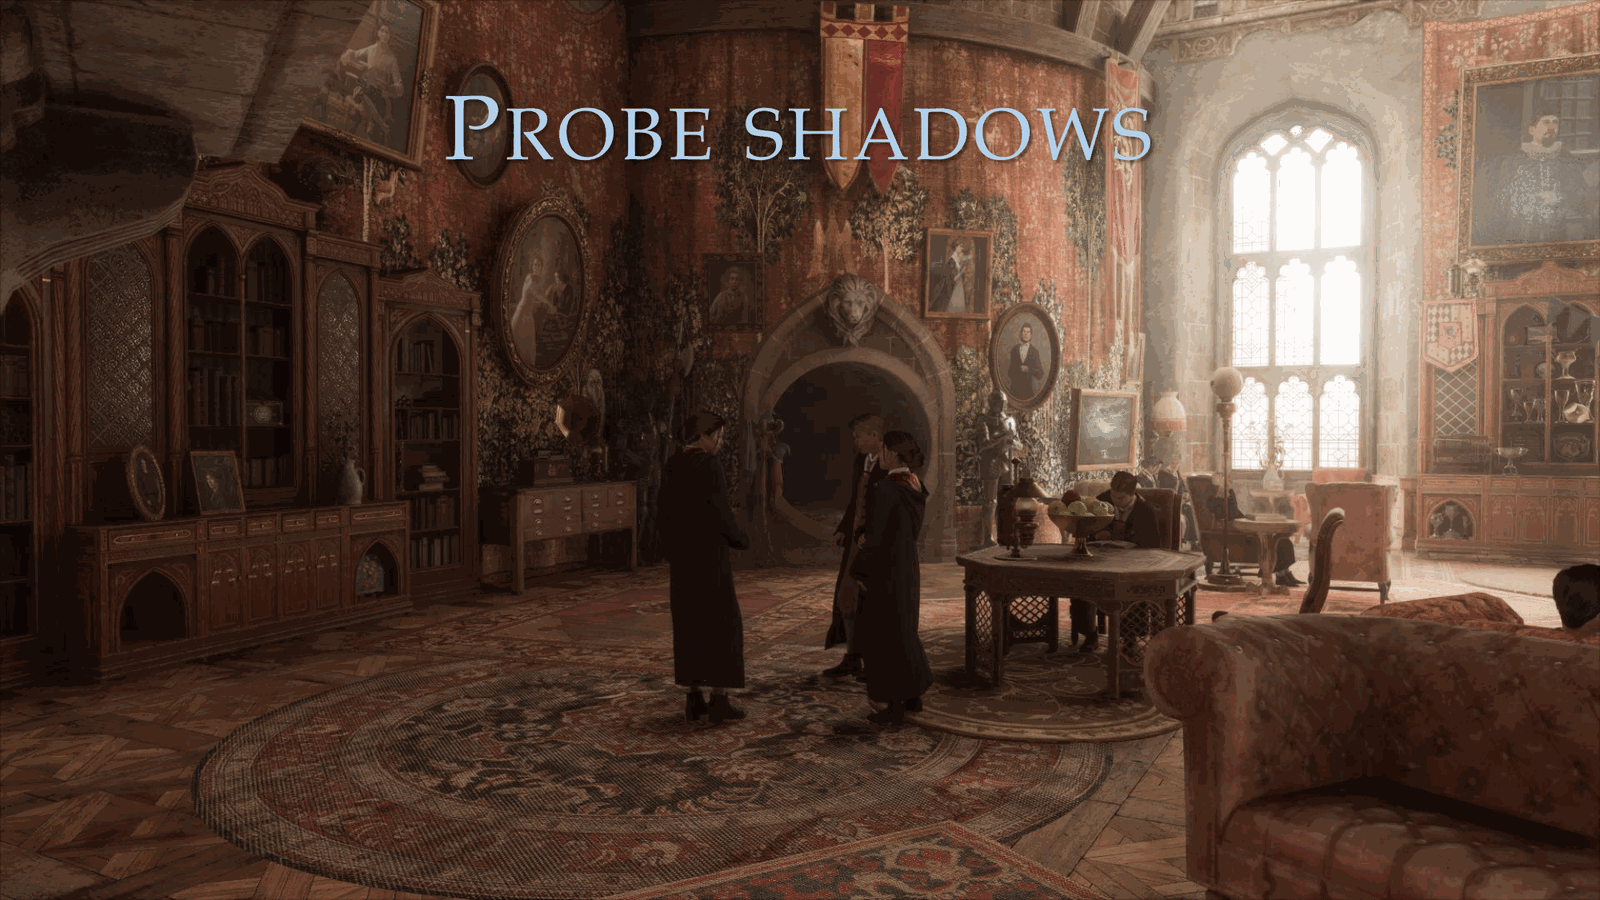
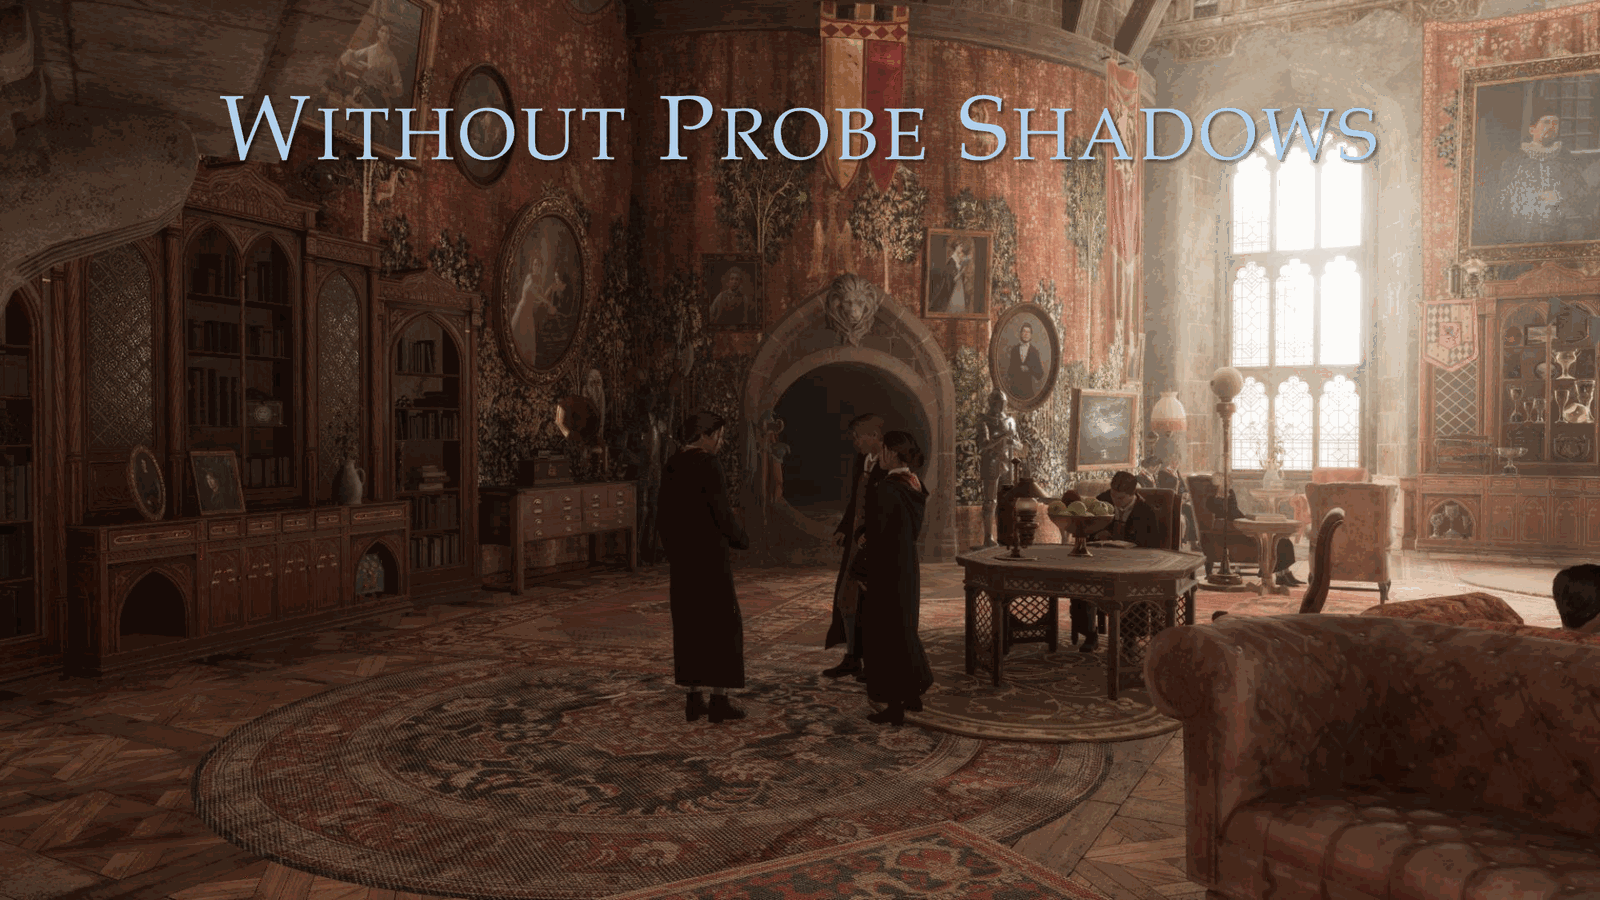
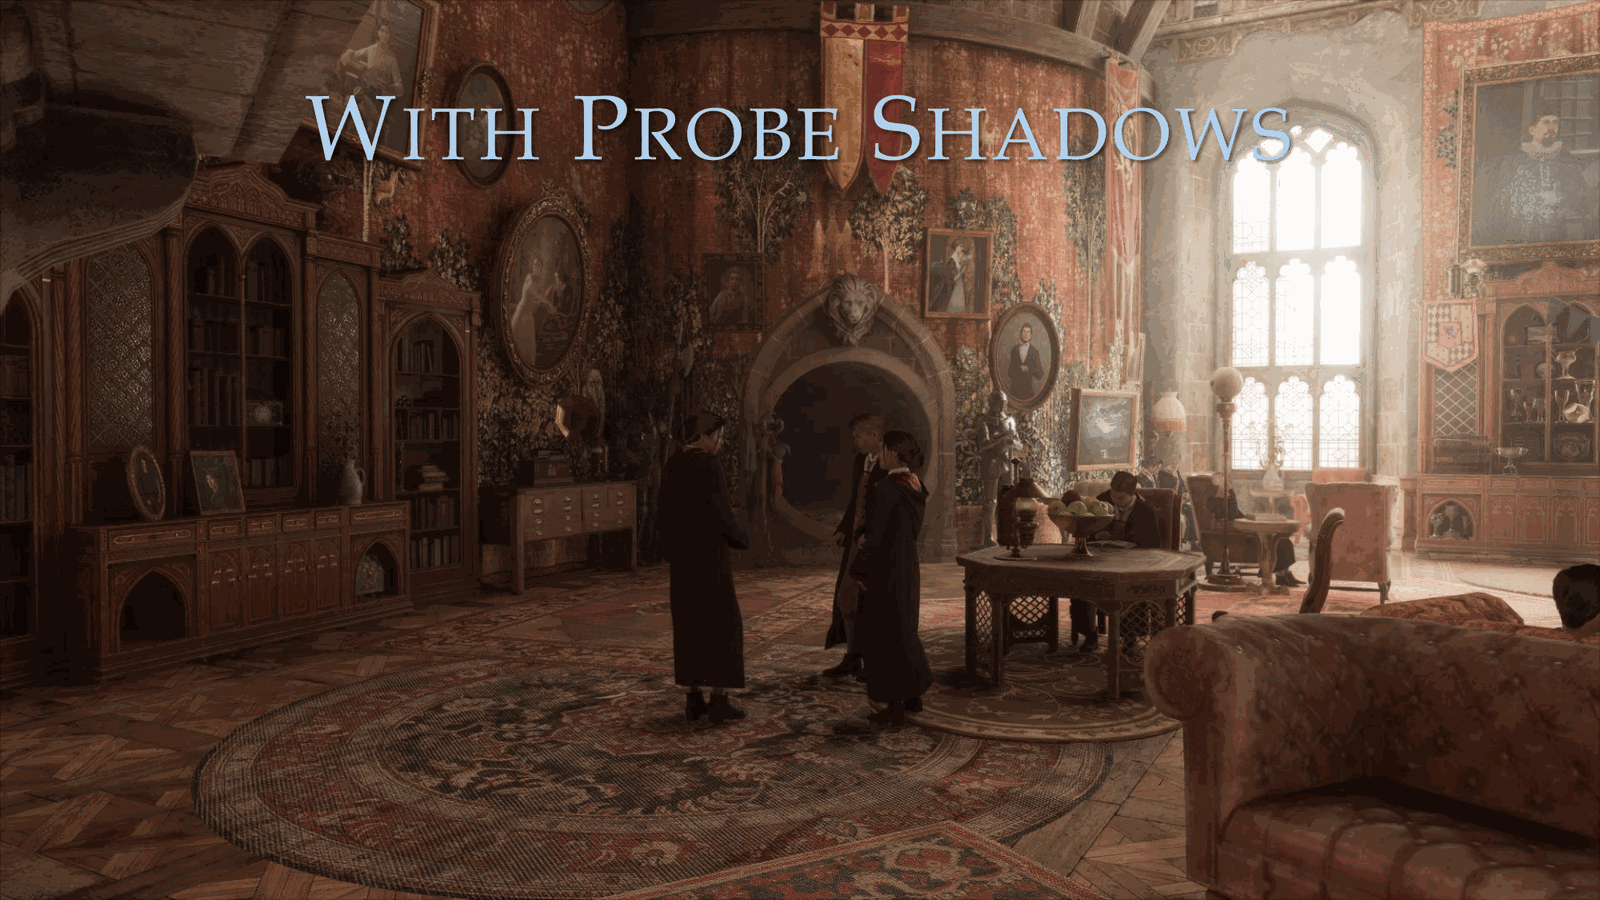
Standard view with probe shadows on. So please pay attention to the shadows underneath the characters; they’re not directly lit. And here’s a picture without. And then show you guys what it looks like with. Next, we’ve got bindless reflection captures.
Slide 39 — 00:15:08
📌 要点汇总
- 使用 bindless 技术避免了对所有反射捕获进行 atlasing,从而支持大量反射捕获
- 哈格沃茨城堡有超过 500 个反射捕获,但每帧通常仅显示 50 个
- 前向渲染材质支持与延迟渲染相同数量的反射
We leverage bindless to skip having to atlas all reflection captures, and this allowed us to support a massive amount of reflection captures. The Hogwarts castle is over 500 of these, but usually only 50 are visible each frame. And forward-rendered materials also support the same number of reflections as deferred.
Slide 40 — 00:15:30
📌 要点汇总
- 水的渲染存在特殊问题,因为视差校正贴图在水表面会产生接缝
- 为解决水的渲染问题,采用非视差校正的立方体贴图
- 通过将最近的反射捕获分配给摄像机并进行交叉淡入淡出实现效果
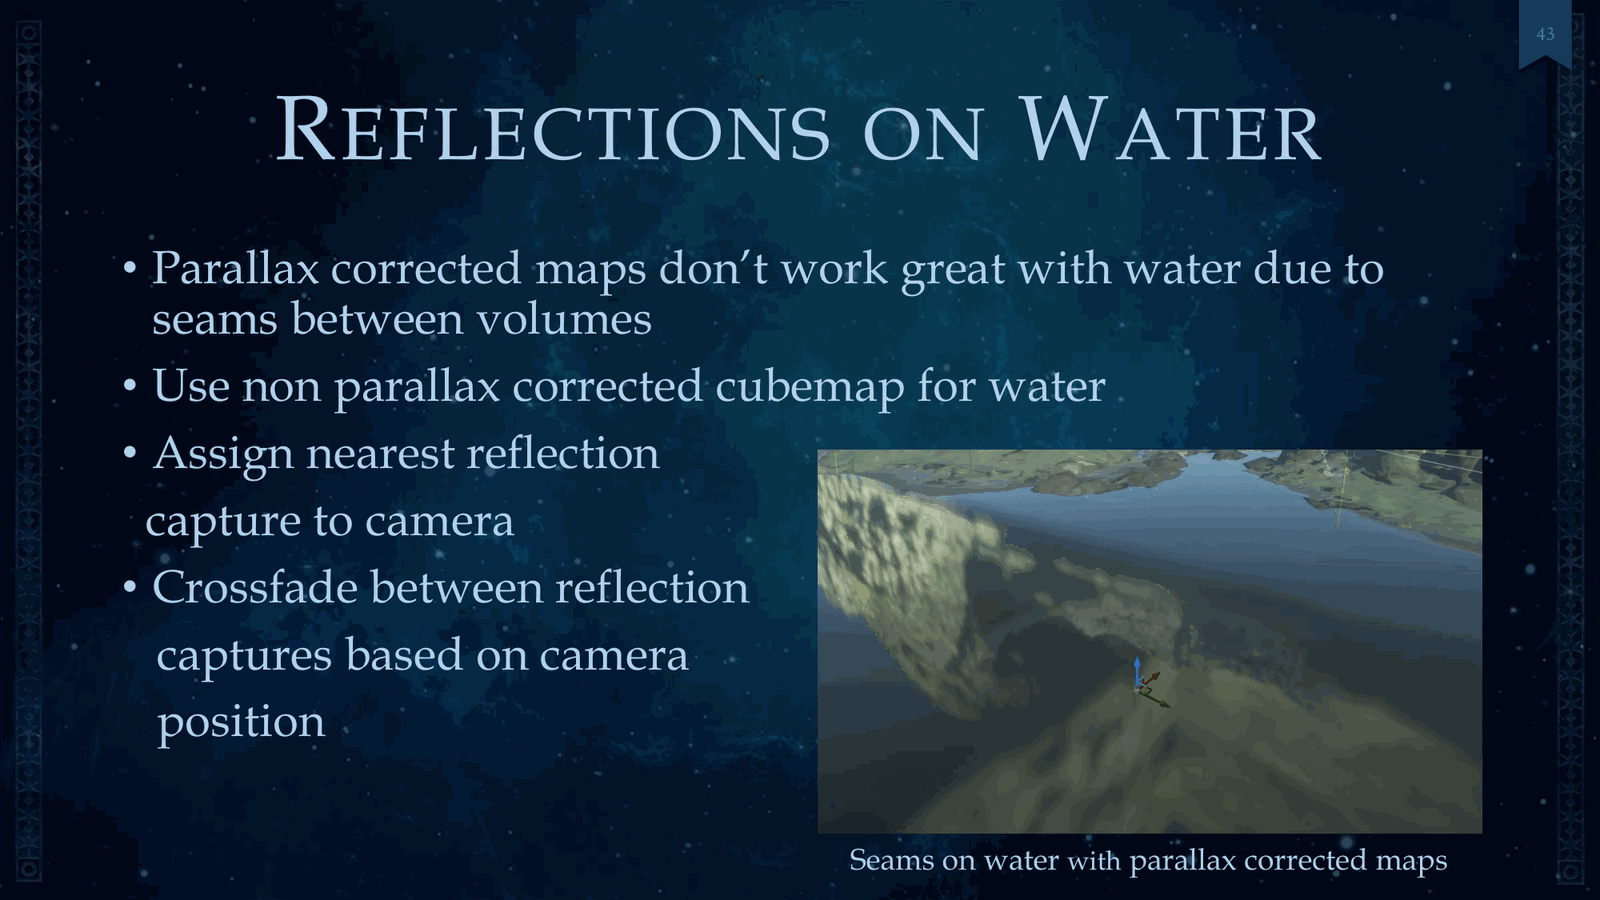
For water, we had a unique case here because parallax-corrected maps don’t work great with water due to seams shown here on the right. And so, for these cases, we used a non-parallax-corrected cube map for water, and this consisted of just assigning the nearest reflection capture to the camera and crossfade between reflection captures.
Slide 41 — 00:15:52
📌 要点汇总
- 基于相机位置进行渲染优化
- 引入通用材料数组,支持参数化数组使用
- 提供了Unreal Engine中的实际应用案例
- 新增功能替代了原有实现方式
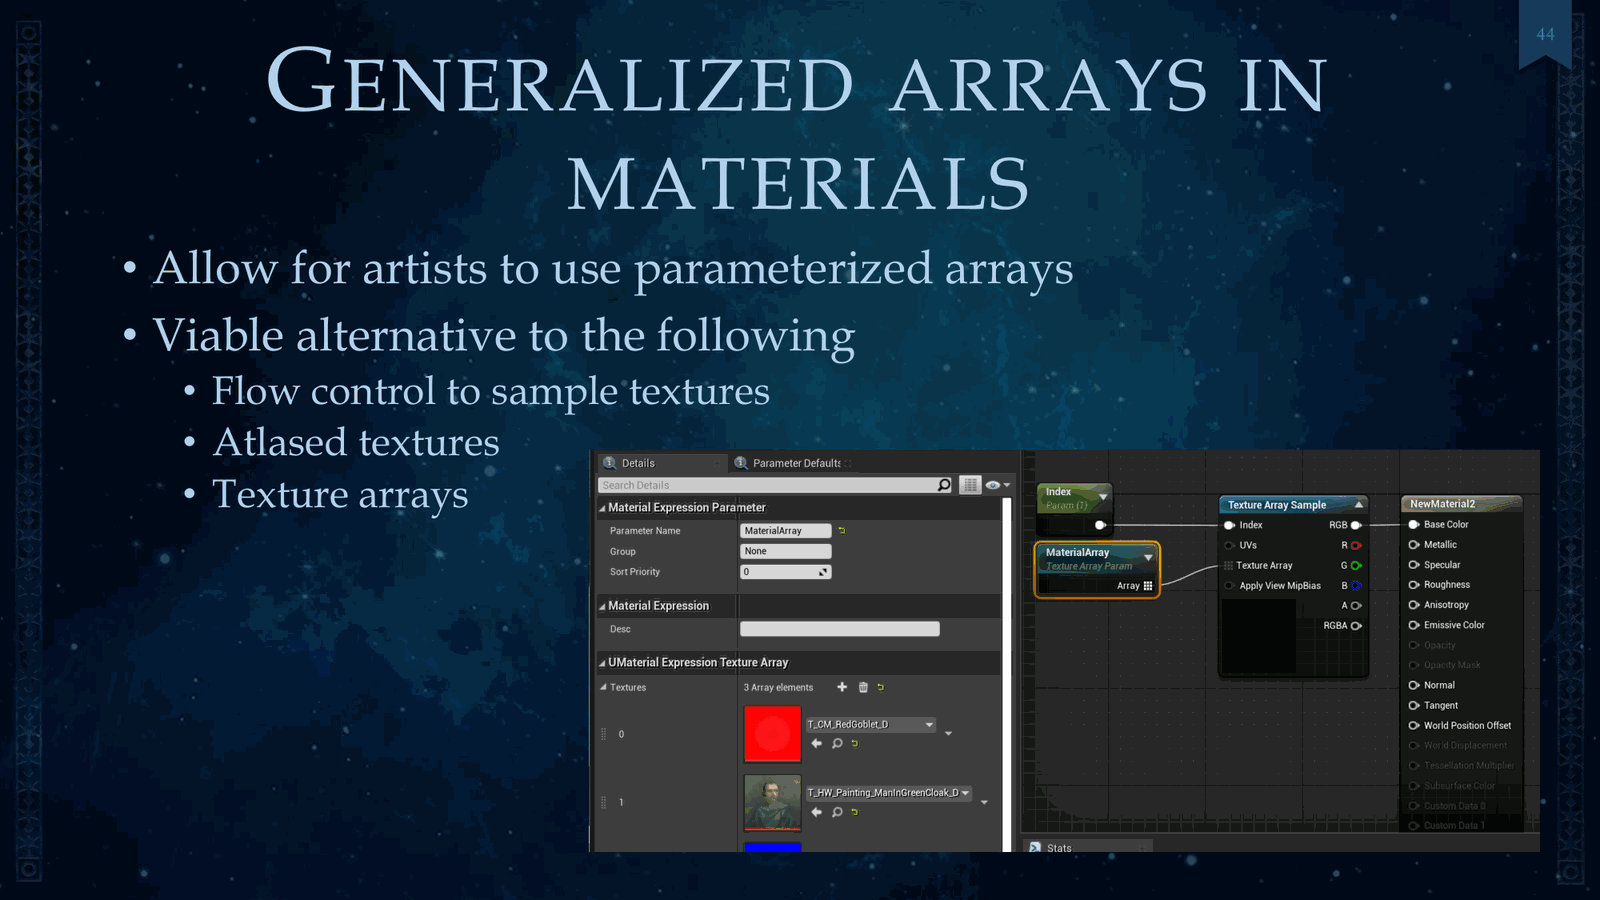
Based on camera position. Now we’ve got generalized arrays of materials, and this was a big one for allowing for artists to use parameterized arrays. Here’s an example from Unreal Engine. This is all unique stuff we added to support this, and this allowed for using this instead of doing.
Slide 42 — 00:16:14
📌 要点汇总
- 使用流控制采样纹理、图集纹理和纹理数组技术
- 可通过索引选择纹理数组中的特定纹理
- 远距离植被代理用于渲染远处的树木
Things like flow control to sample textures, atlas textures, texture arrays. You could pretty much choose which of the texture in the array just by an index. It’s pretty neat. Here we’ve also got distant foliage proxies, and this is used to render trees at a very far away distance.
Slide 43 — 00:16:36
📌 要点汇总
- 该步骤在生成植被代理后进行,用于进一步减少绘制调用
- 通过批处理将远处植被实例化,提高渲染效率
- 右侧图片展示了远处大量小树的实例化效果
- 该过程有助于优化大规模植被的渲染性能
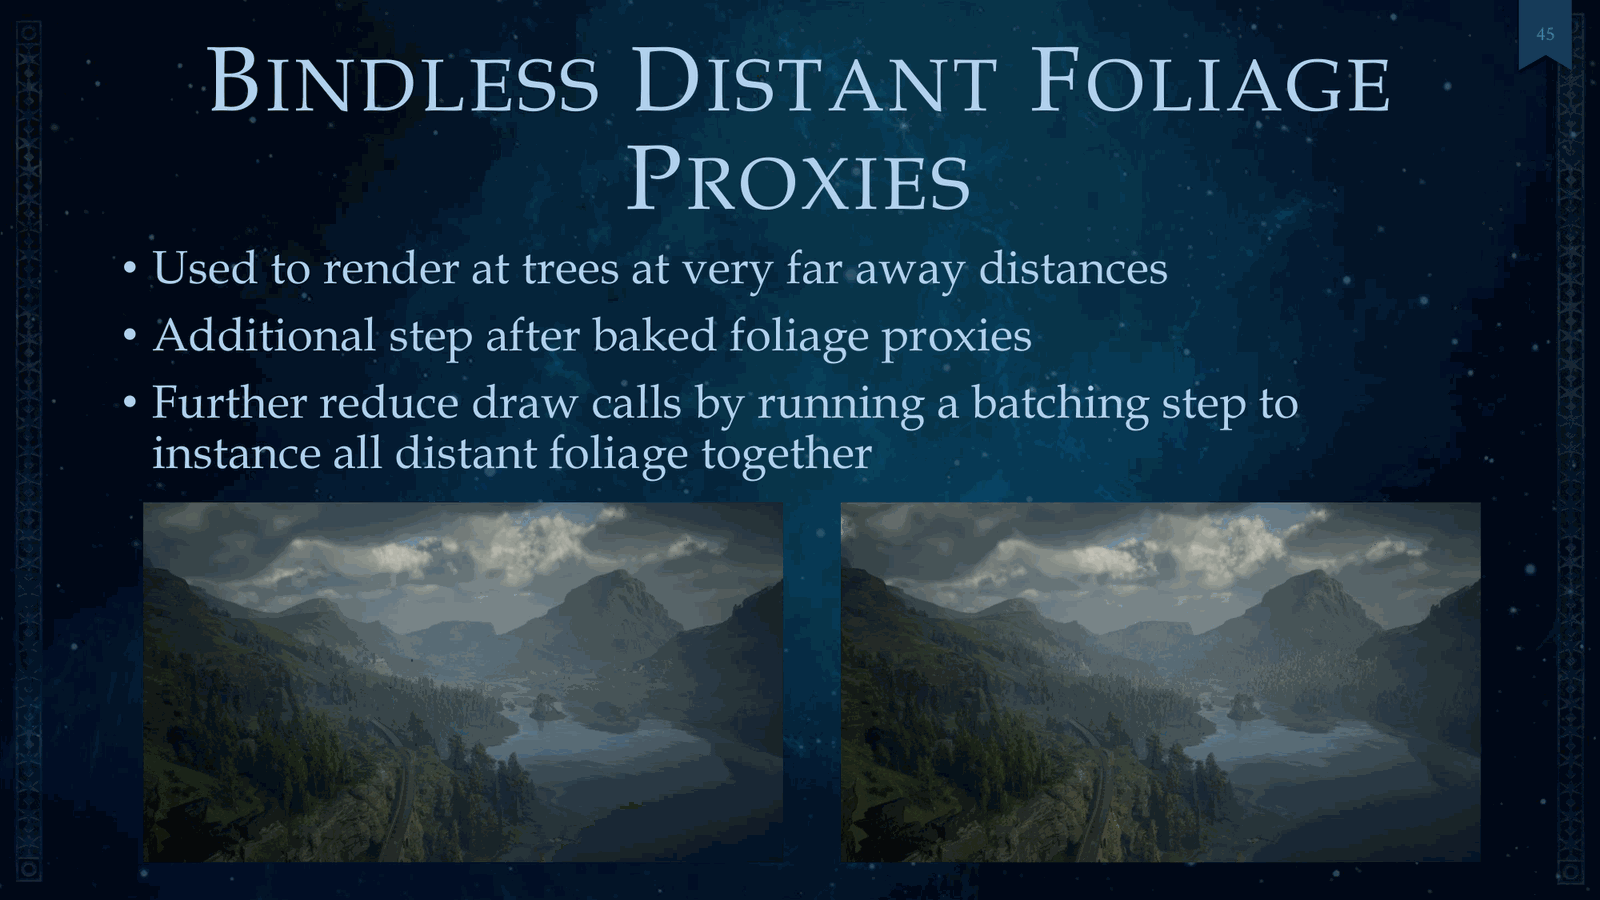
This is an additional step after baked foliage proxies, and this further helps reduce draw calls by running a batching step to instance all distant foliage together. If you look closely, the picture on the right has all these little tiny trees in the distance. So now we’re going to do an in-depth.
Slide 44 — 00:16:58
📌 要点汇总
- 提到延迟光照技术能有效处理大量光源重叠问题
- 提出如何渲染数百个阴影投射光源的问题
- 引入无绑定阴影(bindless shadows)作为解决方案
- 表示无绑定阴影技术应用广泛
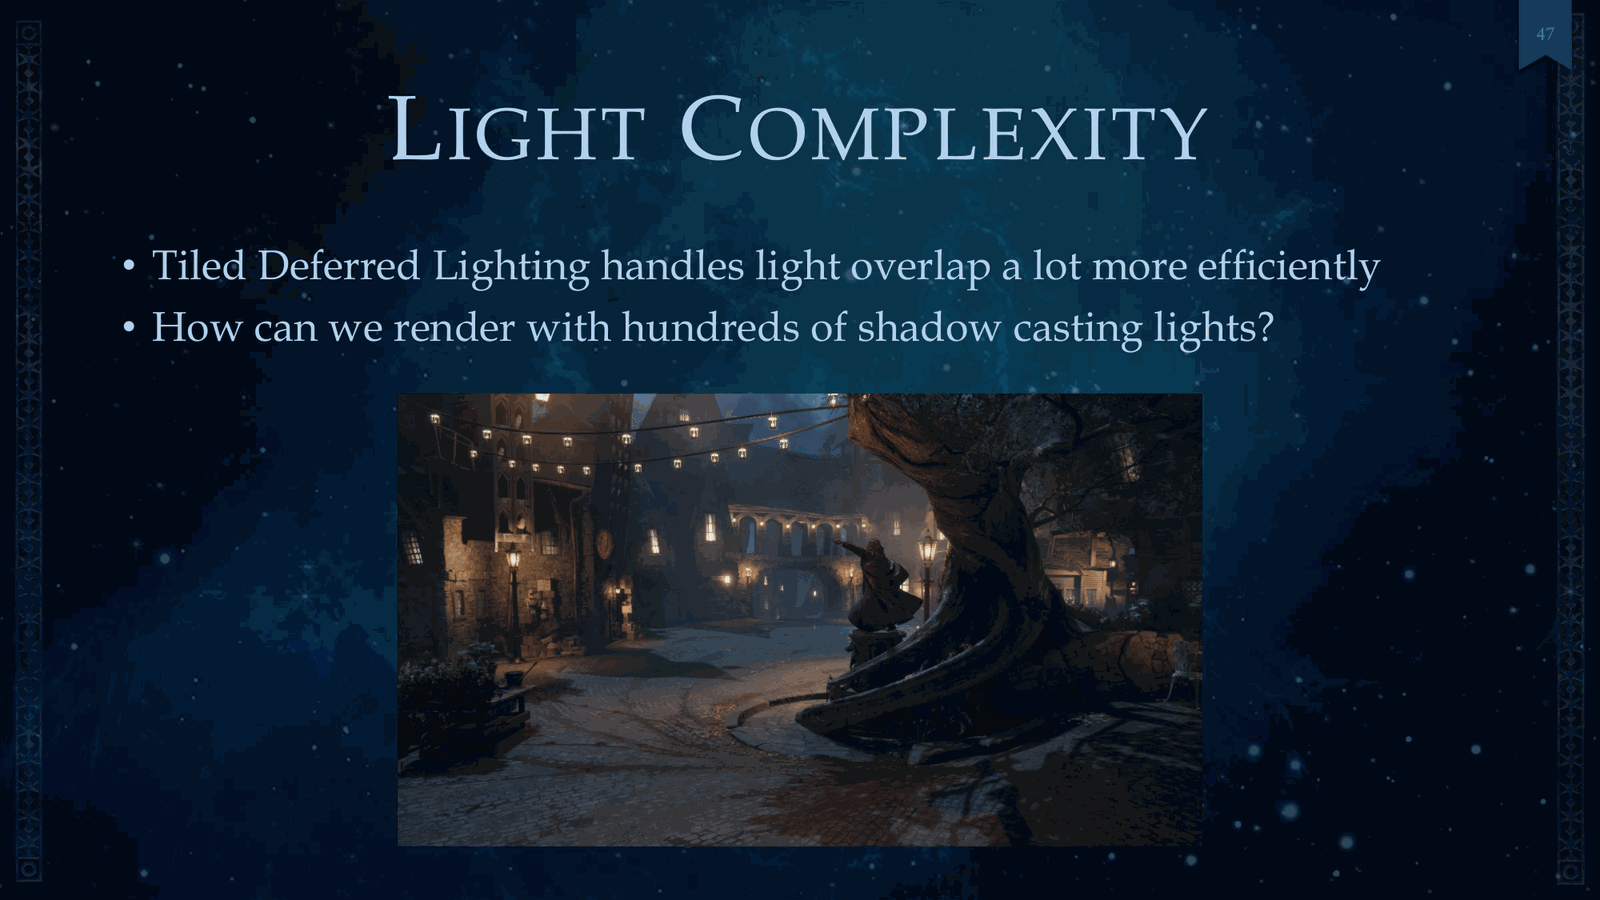
Overview or end of explanation on bindless shadows. So we mentioned deferred lighting and how it handles a lot of overlap. It’s way more efficient. So the question here is, how can we render with hundreds of shadow-casting lights? So we’ve got bindless shadows. There’s a lot of this.
Slide 45 — 00:17:20
📌 要点汇总
- 同一渲染通道中可访问大量阴影贴图
- 不透明材质通过独立计算通道生成阴影
- 每种灯光类型对应一个计算调度
- 阴影数据打包到 SRV 中供计算光照通道使用
- 所有阴影贴图均需通过此方式处理
Add access a significant number of shadow maps in the same rendering pass. For opaque materials, we use a compute shadow via a separate compute pass. There’s one compute dispatch per light type. This data is packed into an SRV, which is then looked up in the compute light pass. It also means all shadow maps.
Slide 46 — 00:17:42
📌 要点汇总
- 该场景中单帧使用超过250个阴影贴图
- 点光源和聚光灯阴影需动态生成,但无法全部实现
- 采用特定功能优化阴影表现与性能平衡
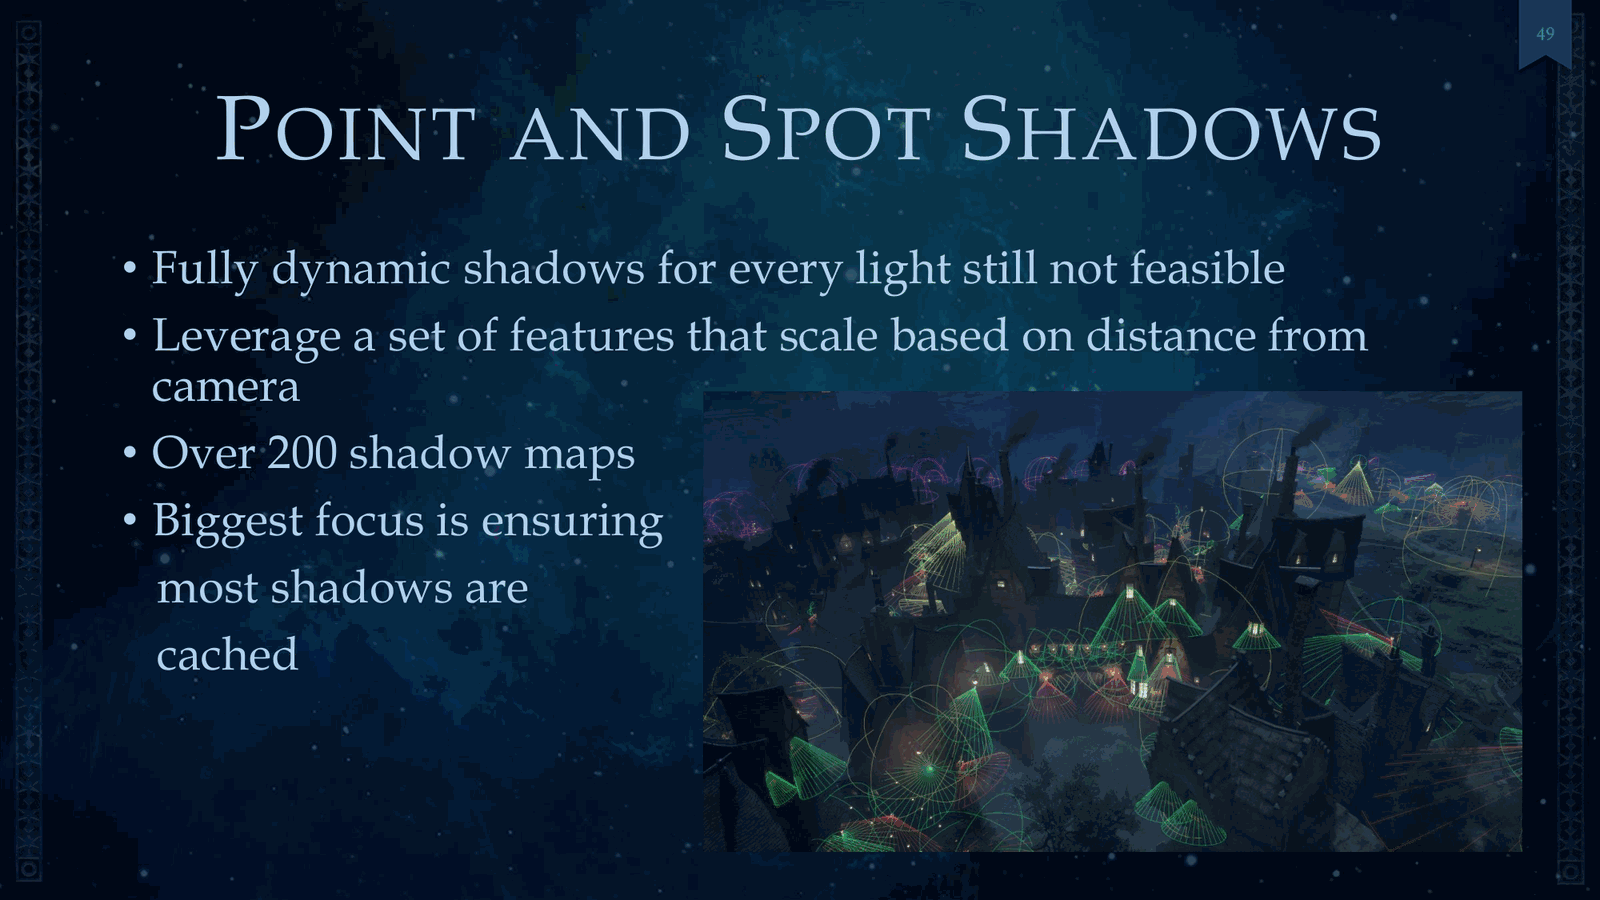
Are available in volumetric and forward render passes. In this instance, we observed over 250 shadow maps used in one frame in several parts of the game. Specifically for point and spot shadows, fully dynamic shadows for every light is still not feasible, so we leveraged a set of features that.
Slide 47 — 00:18:04
📌 要点汇总
- 使用阴影映射技术处理超过200个阴影地图
- 重点优化阴影缓存以提高渲染效率
- 通过调试视图展示夜间霍格沃茨的阴影分布情况
And distance from the camera. Even then, we still had over 200 shadow maps. Especially on this view here, the biggest focus is ensuring that most of these shadows are cached. You can see the light cones. This is a debug view, and that’s a number of shadows that were available at night in Hogsmeade.
Slide 48 — 00:18:27
📌 要点汇总
- 每个光源都有独立的特性矩阵,支持开关控制
- 大多数阴影使用投射阴影贴图(cast shadow maps)实现
- 阴影贴图分辨率根据屏幕尺寸动态计算
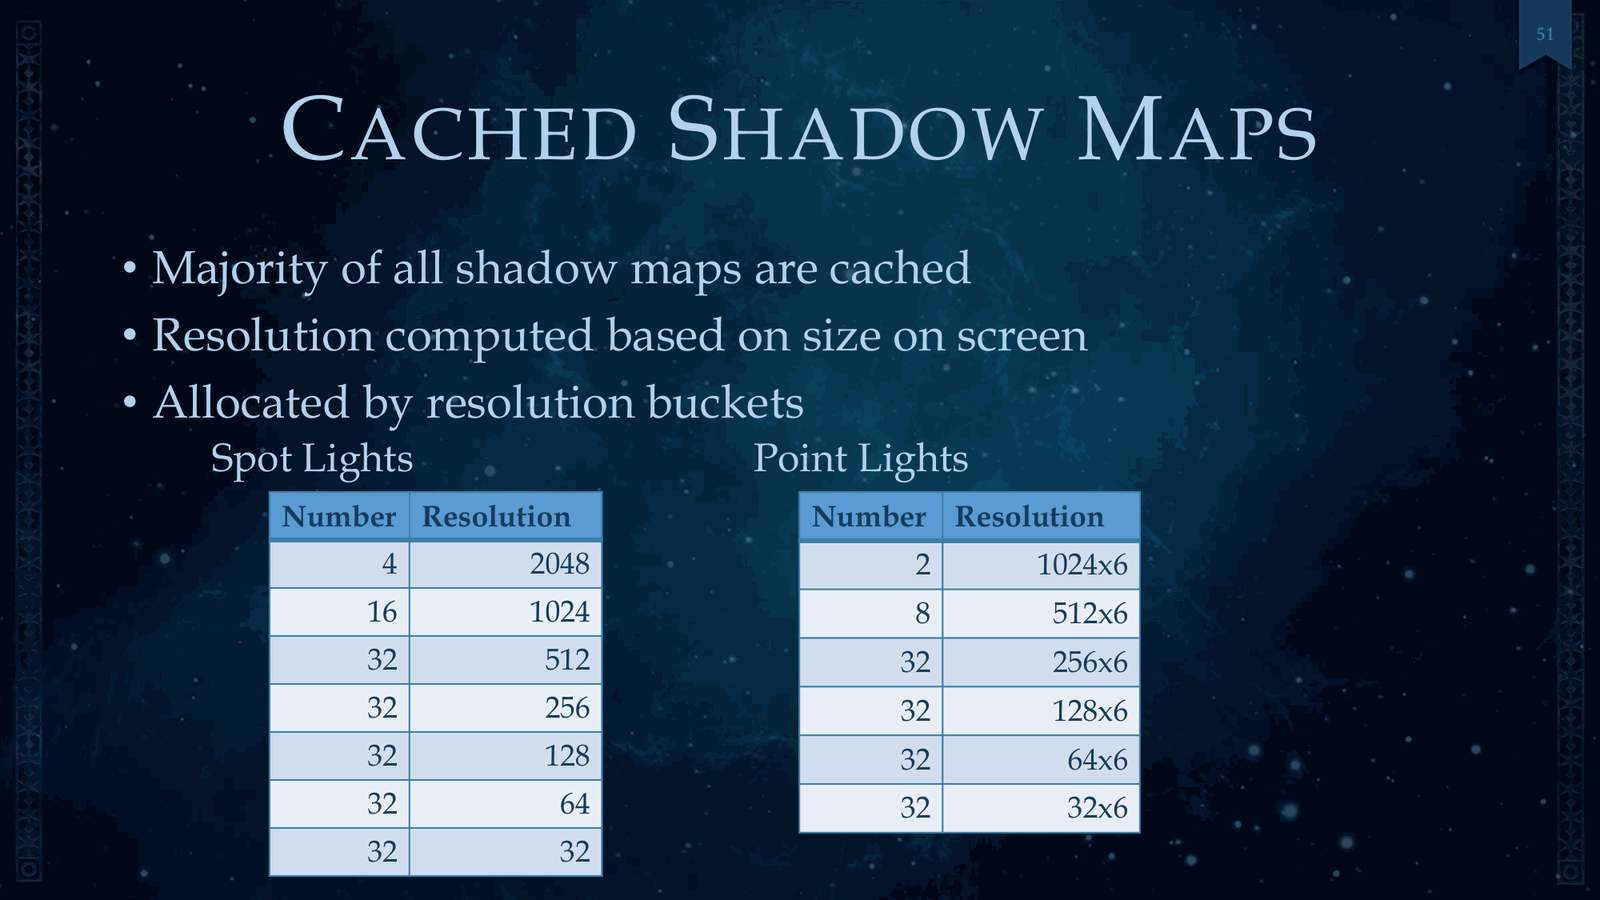
So this consisted of feature matrix per light, and by that we have several of these features that can be turned on and off independently, and we’ll discuss each of these. So for our cast shadow maps, this is the vast majority of our shadows, and we use a resolution computed based on size of screen.
Slide 49 — 00:18:49
📌 要点汇总
- 光源分配基于分辨率区间,距离越远分辨率越低
- 可移动阴影贴图每帧仅渲染最近的可移动物体
- 非重要光源会关闭此功能以提升性能
And these are all allocated based on resolution buckets. So even though you have a significant number of lights, the farther away the distance, the low resolution you’ll get. For movable shadow maps, we only render the nearest moveables per frame. This is also explicitly turned off on non-important lights, and there was a boost.
Slide 50 — 00:19:11
📌 要点汇总
- 在4K阴影贴图的影视制作中,需要实现非常清晰的阴影效果
- 通过输出1/32分辨率的UAV,加速阴影融合过程
- 该技术可用于跳过阴影贴图的渲染或读取步骤
- 接触阴影的实现方式在此基础上进一步优化
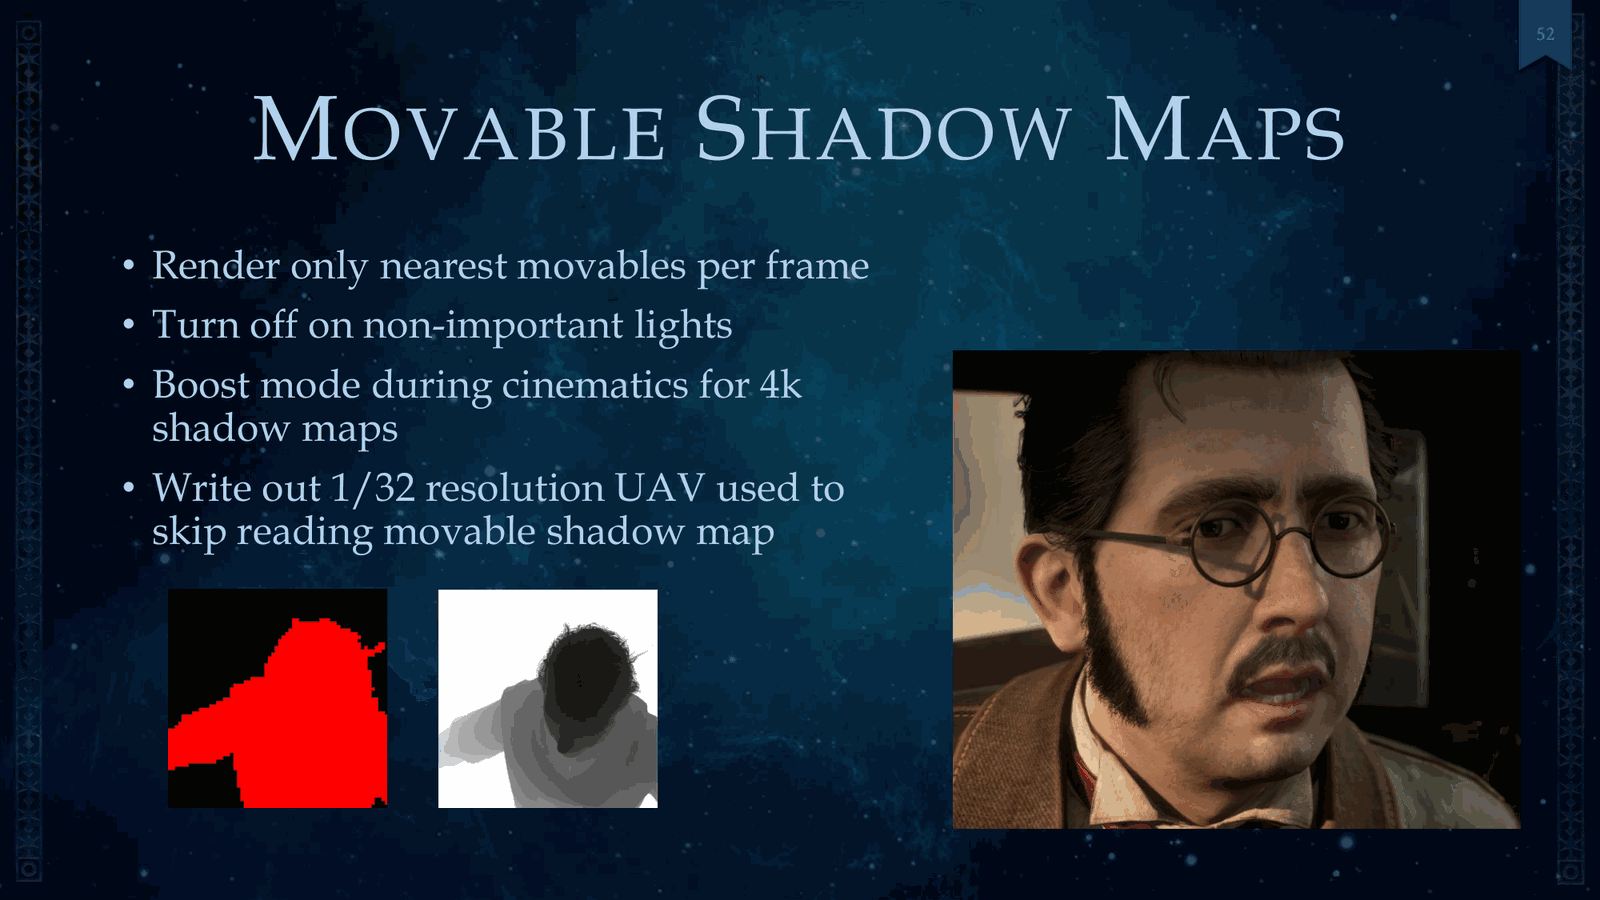
During cinematics for 4K shadow maps, so you can see the glasses, we had to get that very sharp shadow for those. To help make it blend faster, we also write out a 1/32 resolution UAV that’s used to skip rendering or skip reading the movable shadow map. For contact shadow, this.
Slide 51 — 00:19:33
📌 要点汇总
- 使用胶囊阴影作为皮肤几何体的代理,以在不启用可移动阴影时实现阴影效果
- 远处阴影通过简化方法实现,无需渲染完整阴影贴图
- 该方法适用于非关键光源,提升性能同时保持视觉效果
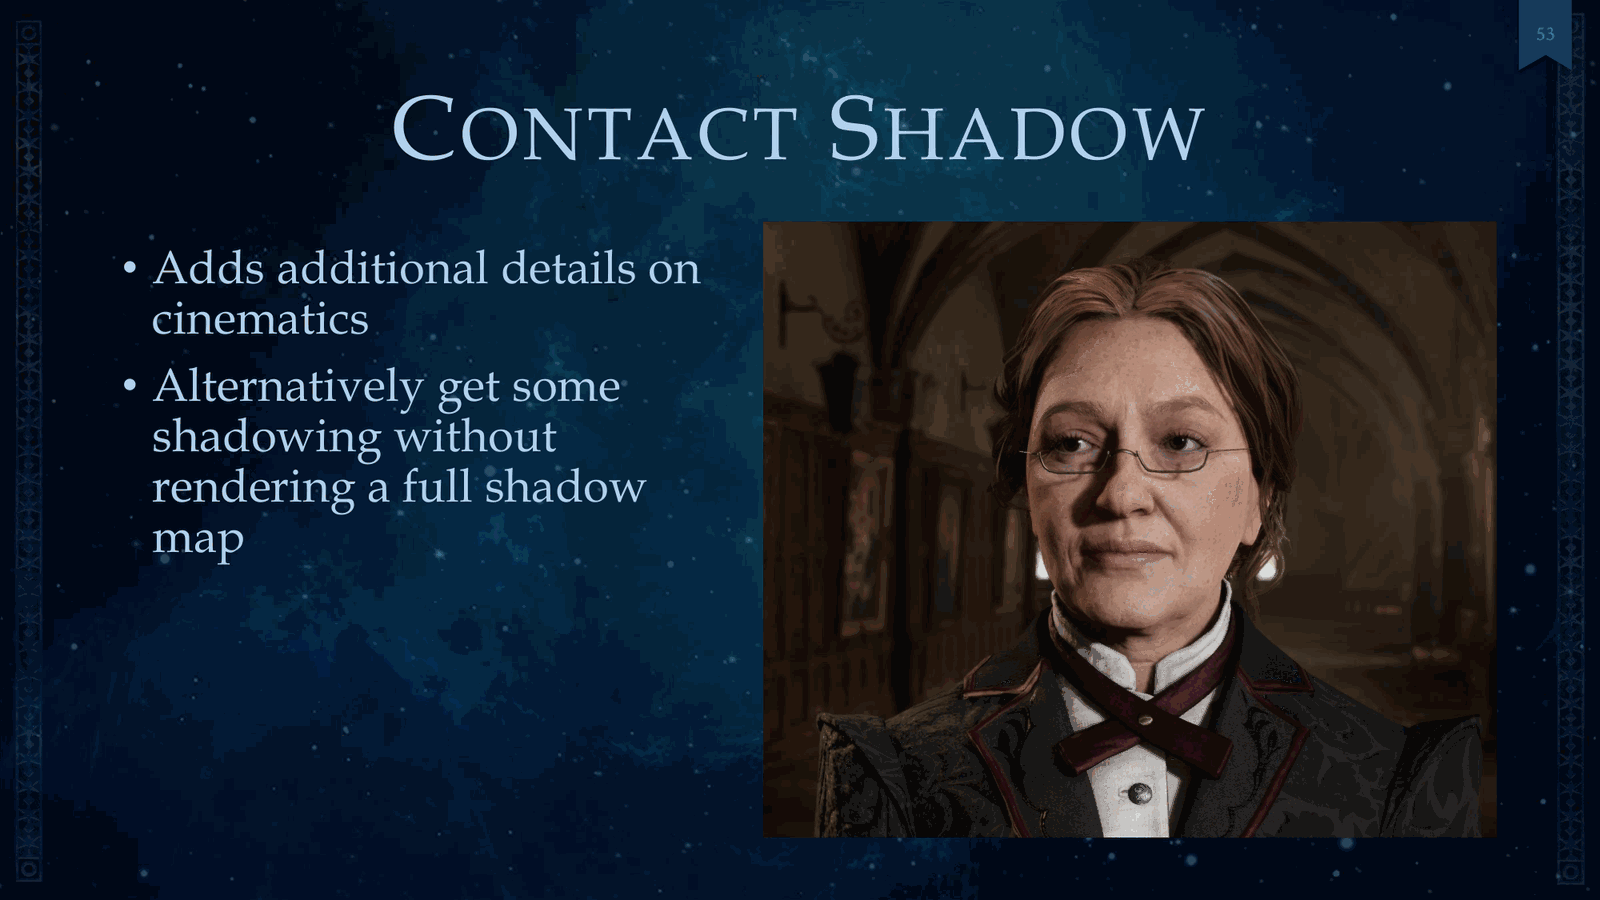
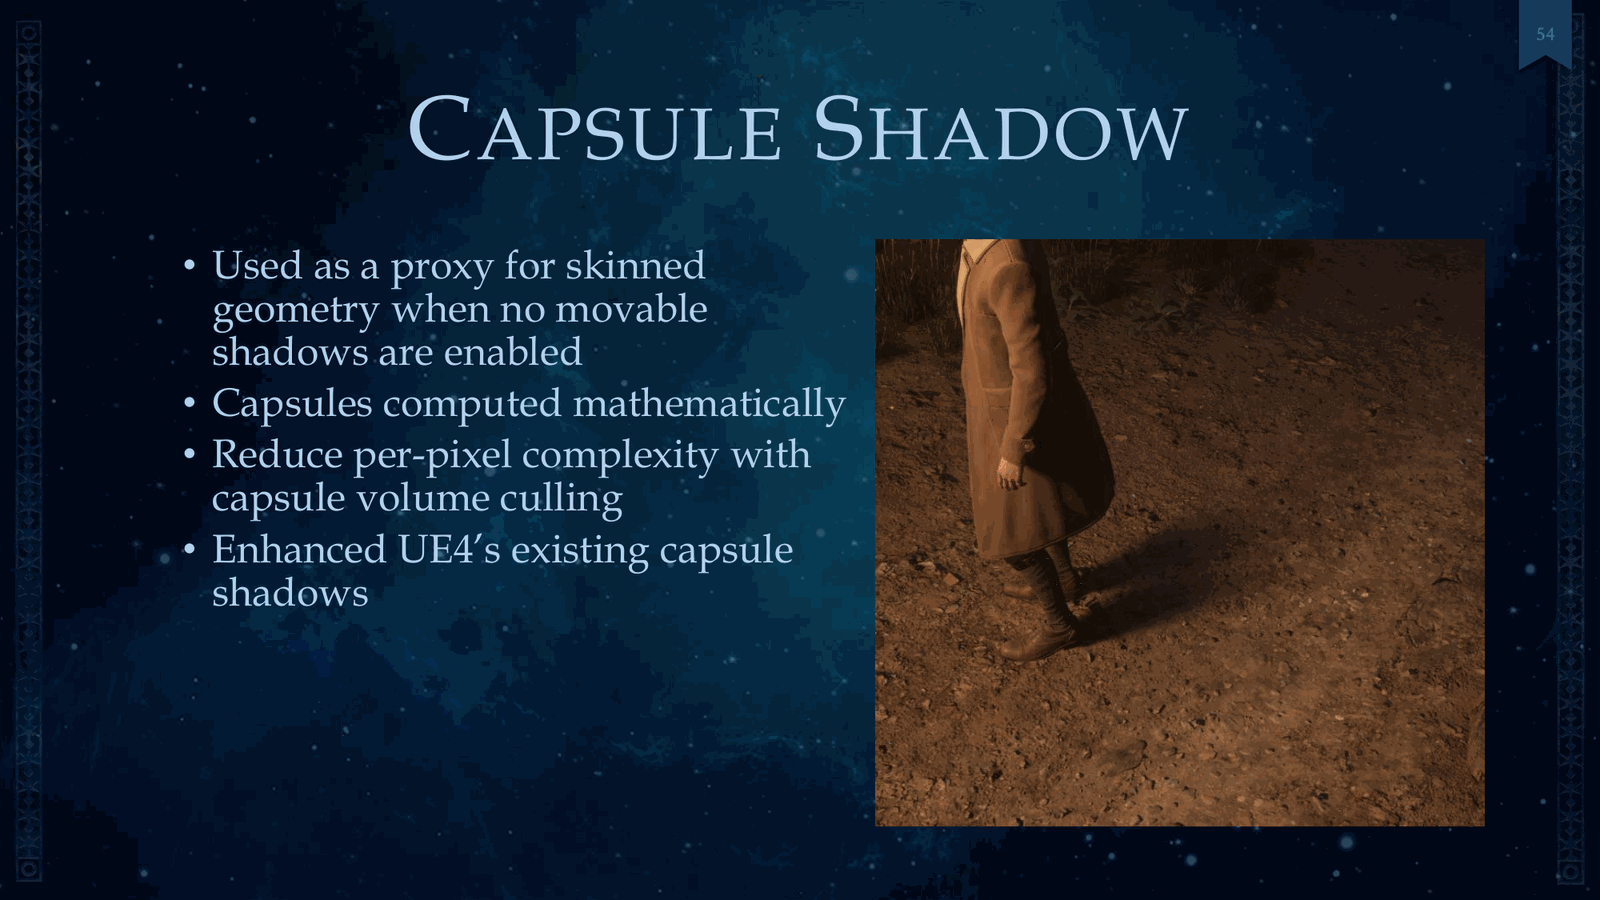
Adds additional details on cinematics. Also, in the distance, that was another option to get some shadowing without rendering a full shadow map. Capsule shadows were used as a proxy for skin geometry when no movable shadows are enabled. This is great for all those non-essential lights.
Slide 52 — 00:19:55
📌 要点汇总
- 通过数学计算降低每像素复杂度,使用胶囊体积剔除技术
- Lumo阴影是对Unreal Four现有胶囊阴影的改进
- Lumo是用于在魔杖上生成光源的咒语名称
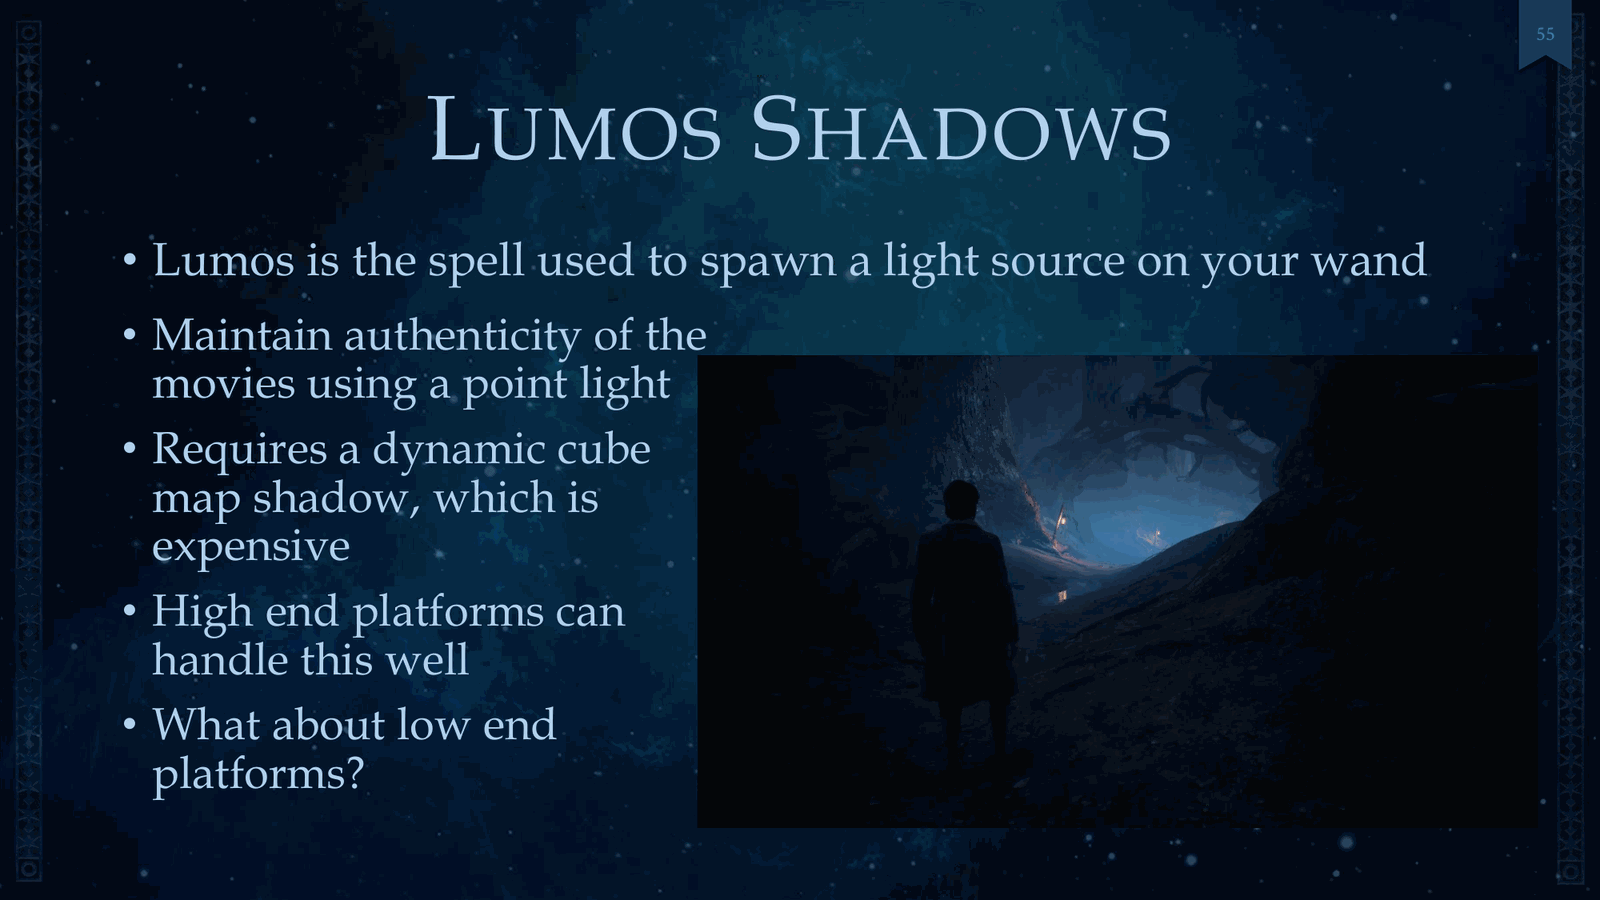
This was computed mathematically, and we reduced the per-pixel complexity with capsule volume culling. And this was an enhance from Unreal Four’s existing capsule shadows. So Lumo shadows is review. Lumo is the spell used to spawn a light source on your wand, shown here.
Slide 53 — 00:20:17
📌 要点汇总
- 使用点光源保持电影的真实性,需要动态立方体贴图阴影,但计算成本较高
- 高端平台可良好处理,但低端平台需通过可扩展性优化阴影效果
- 阴影最初是启用状态,后续根据平台性能进行调整
Here, and we wanted to maintain the authenticity of the movies using a point light, and this requires a dynamic cube map shadow, which is, which is pretty expensive. And high-end platforms can handle this well, but what about for low-end platforms? So we use scalability for this. So first of all, the shadows were active.
Slide 54 — 00:20:39
📌 要点汇总
- 使用 SV Render Target Array 索引在顶点着色器中处理 Lumos 和其他 NPC 的光照
- 一 pass 点光源无需在几何着色器中渲染
- 几何着色器中跳过阴影贴图缓存,因其始终在移动
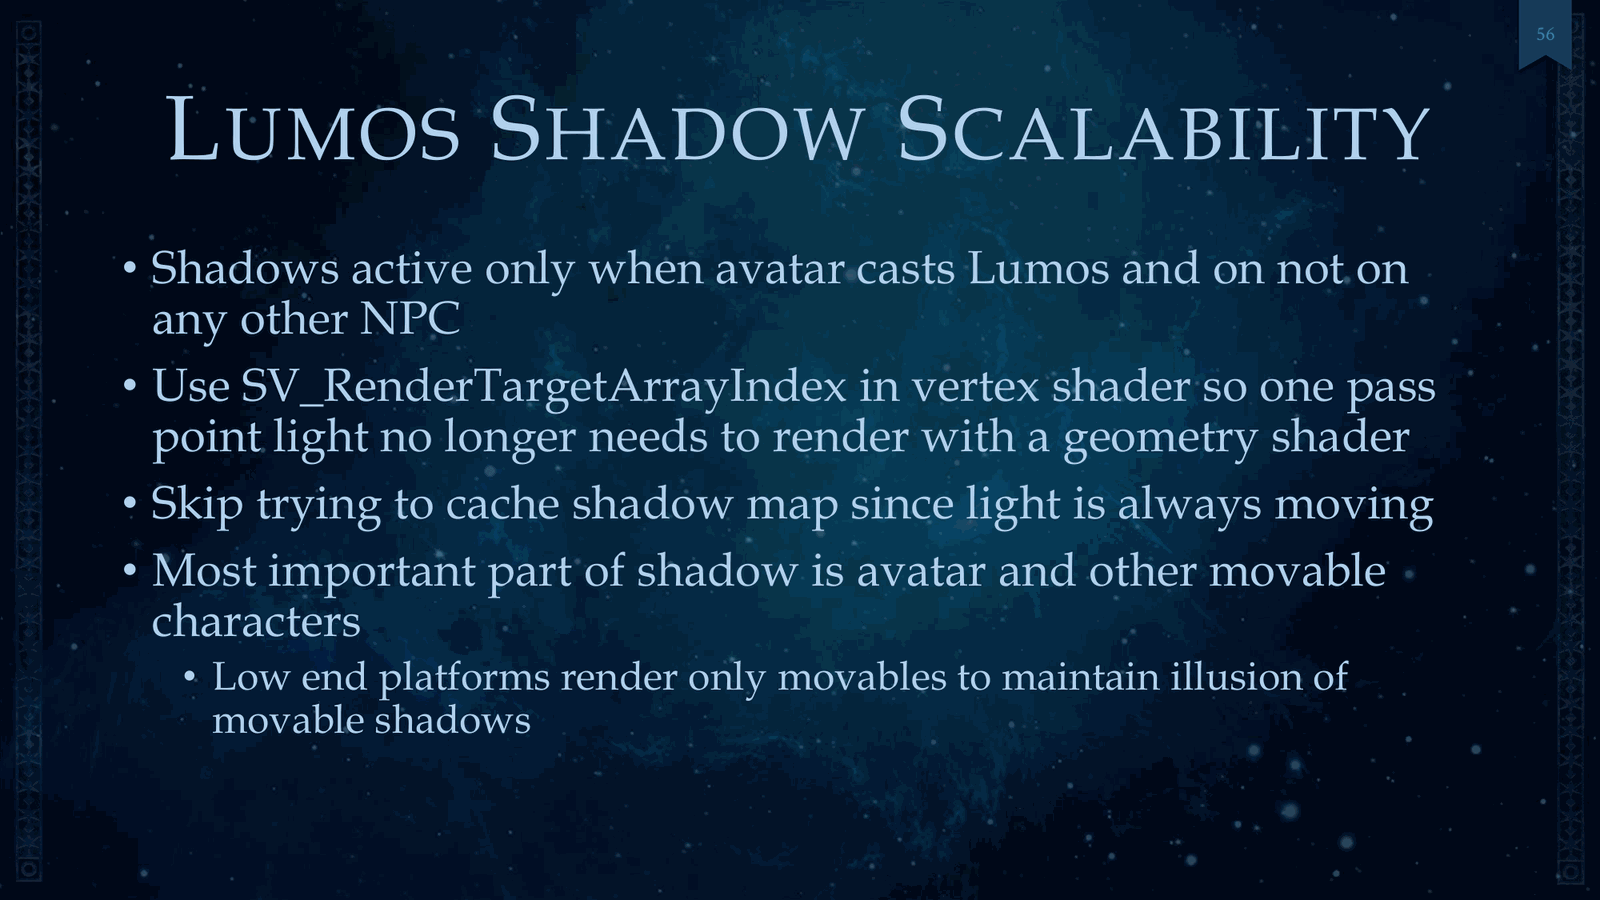
Only when the avatar class Lumos and on any other NPC, we also use this SV Render Target Array index in the vertex shader, so the one-pass point light no longer needs to render in the geometry shader. With the geometry shader, we also skipped trying to cache the shadow map since it’s always moving, and.
Slide 55 — 00:21:01
📌 要点汇总
- Lumos 的阴影效果中,最核心的是角色和移动物体的阴影
- 在低端平台,仅渲染移动物体以维持阴影的动态感
- 方向光阴影是当前最大的性能消耗项
One thing to realize on this is the most important part of this shadow for Lumos is the avatar and other moving characters. So on low-end platforms, we just render the moveables to maintain the illusion of movable shadows. Now we’ve got the big one for shadows. This is the directional light shadows. This is one of the largest expenses.
Slide 56 — 00:21:23
📌 要点汇总
- 游戏中使用单向光源,限制了光照复杂度
- 动态阴影级联最大范围为45米
- 缓存方向阴影可扩展至500米
- 接触阴影用于增强近景细节表现
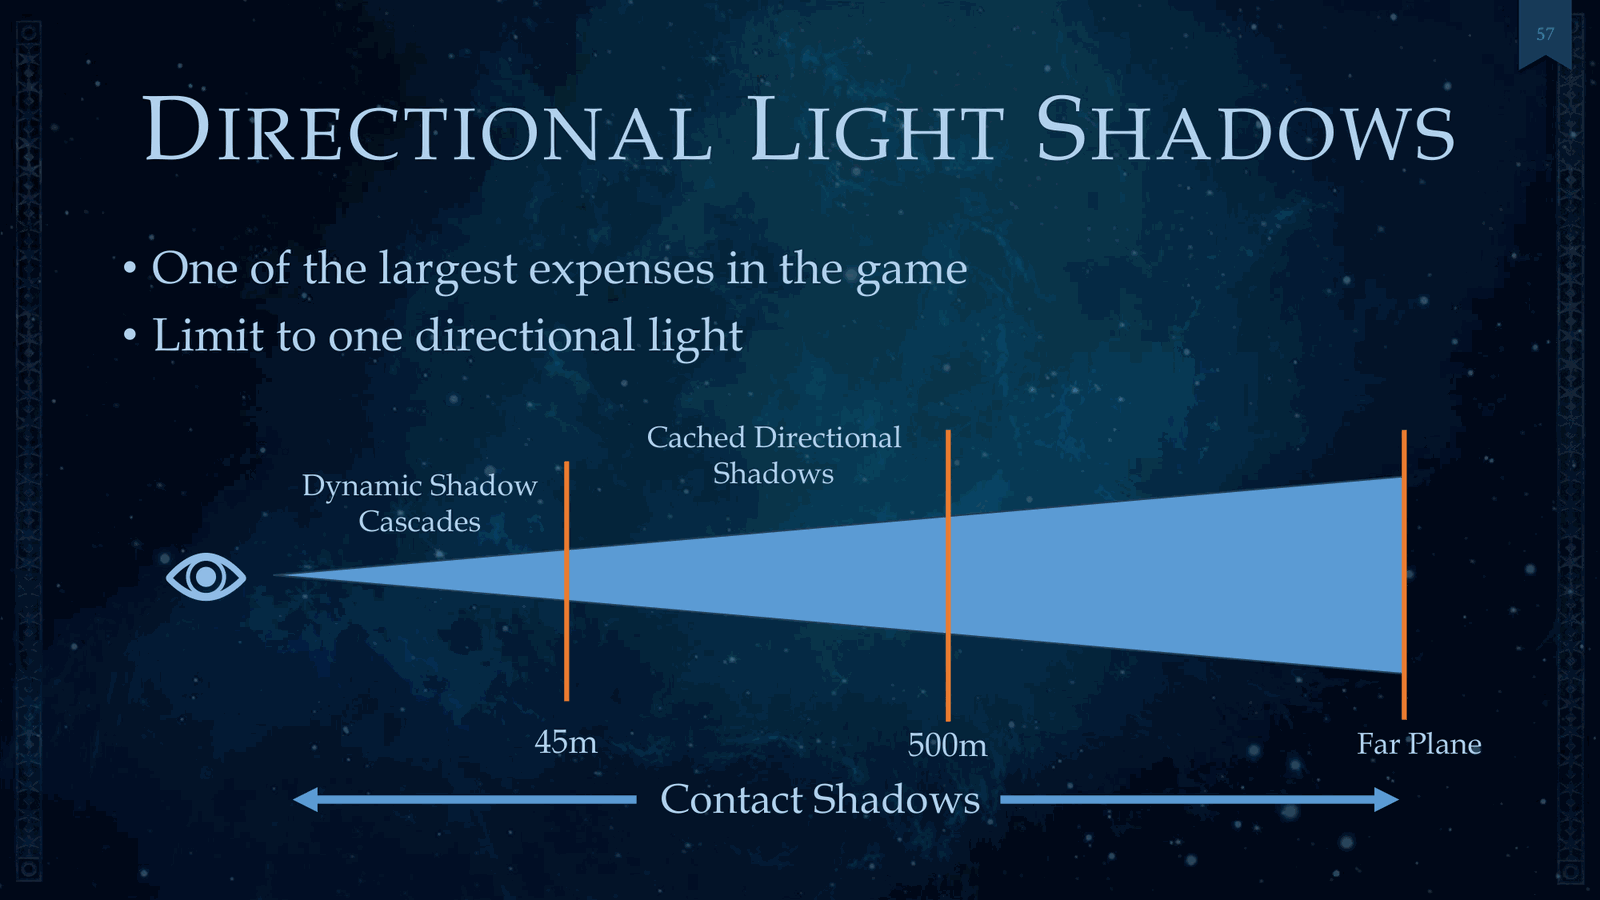
In the game, right? With a lot of complexity, and we limited to just one-directional light. The the quality settings are here, and you’ve got up close to the camera. You’ve got your dynamic shadow cascades up to around 45 meters. Next, we’ve got cached directional shadows to 500 meters, and then we’ve got contact shadows. The
Slide 57 — 00:21:45
📌 要点汇总
- 动态级联阴影支持最多三个级联层级
- 阴影随时间变化动态调整
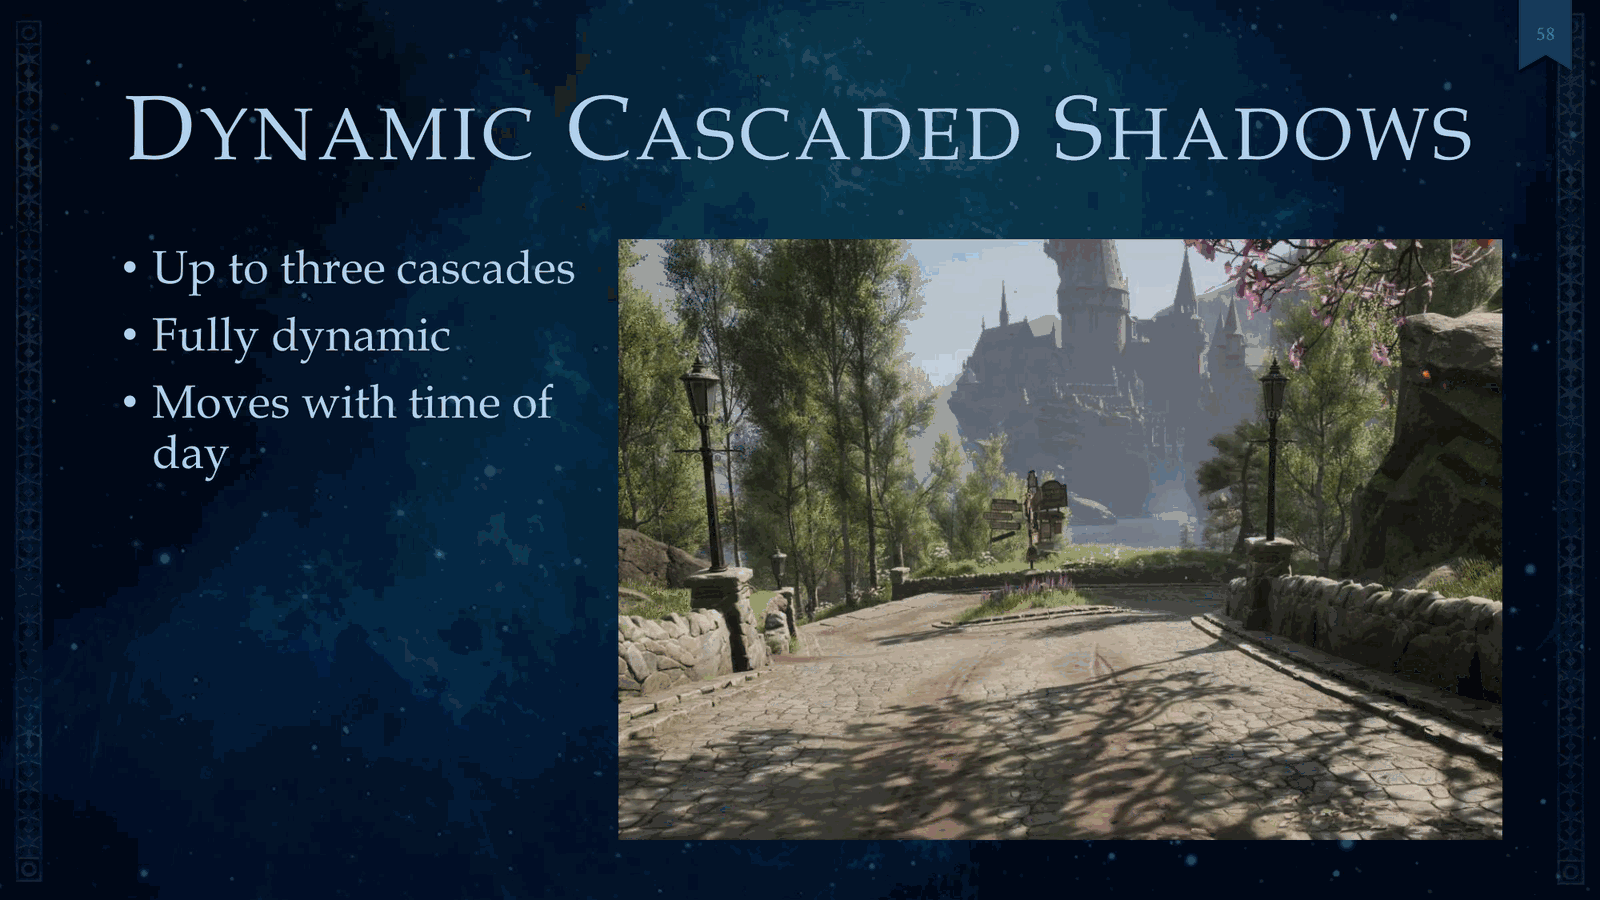
- 实现方式为标准级联阴影技术
Work regardless of where you are. That worked great in the distance, and so we’ll go go through listing each of these and how they work together. So the dynamic cascaded shadows—that’s your standard cascade shadows. There’s you can have up to three cascades. It’s fully dynamic. It also moves with the time of day. We’ve got.
Slide 58 — 00:22:07
📌 要点汇总
- 接触阴影技术通过跳过小物体(如草和石头)的渲染显著提升性能
- 可在无阴影贴图的远处添加阴影,增强视觉效果
- 图片展示了接触阴影的实际效果
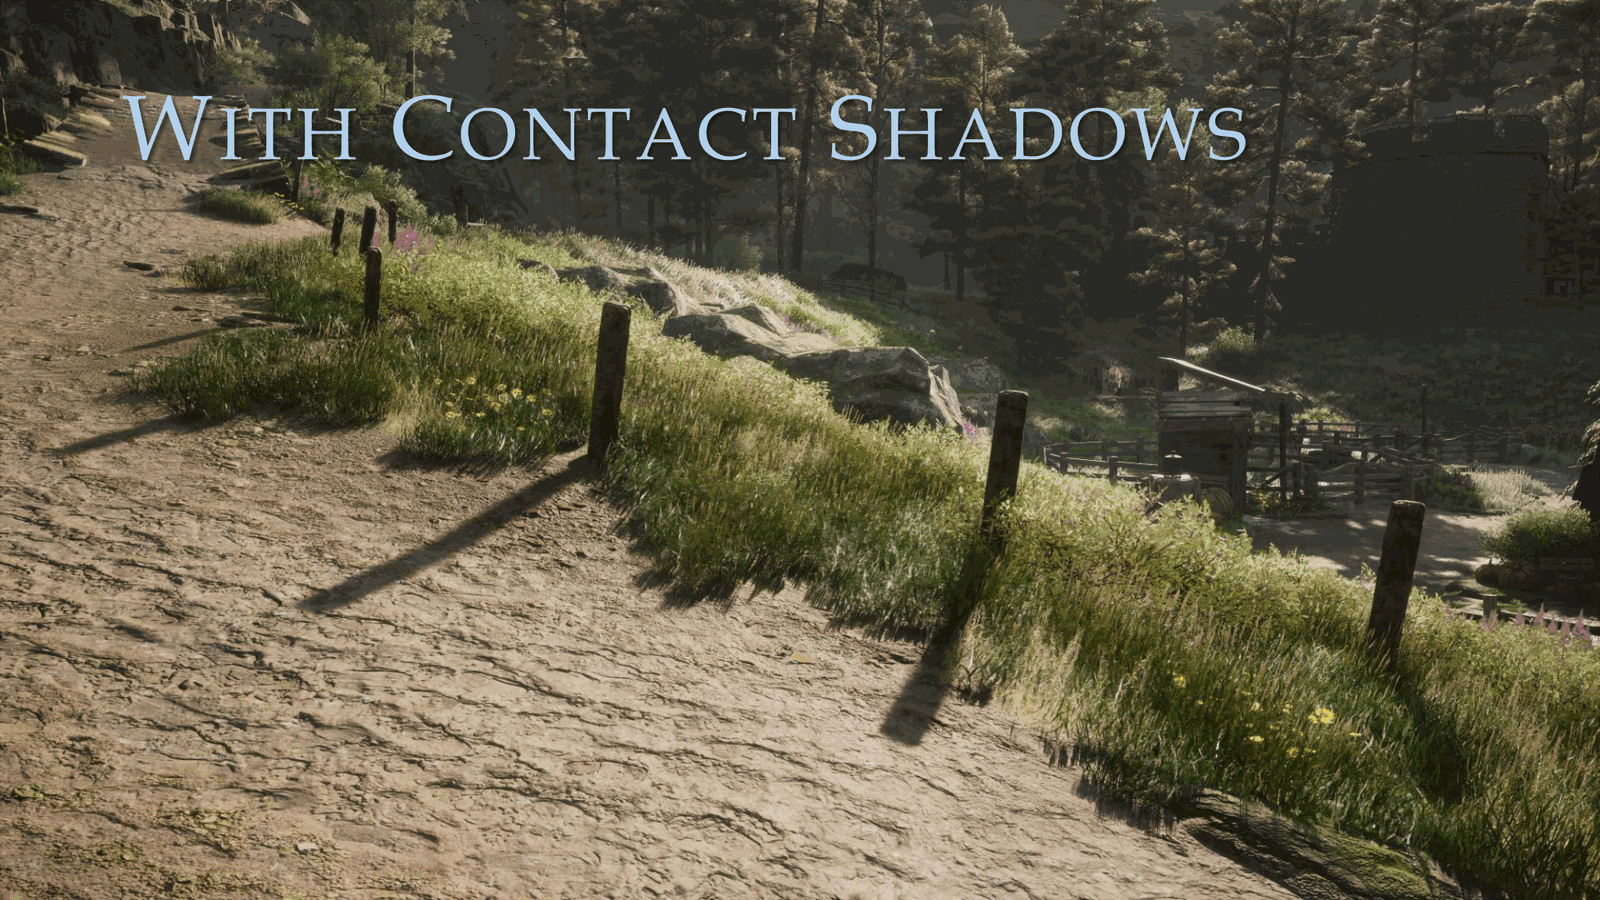
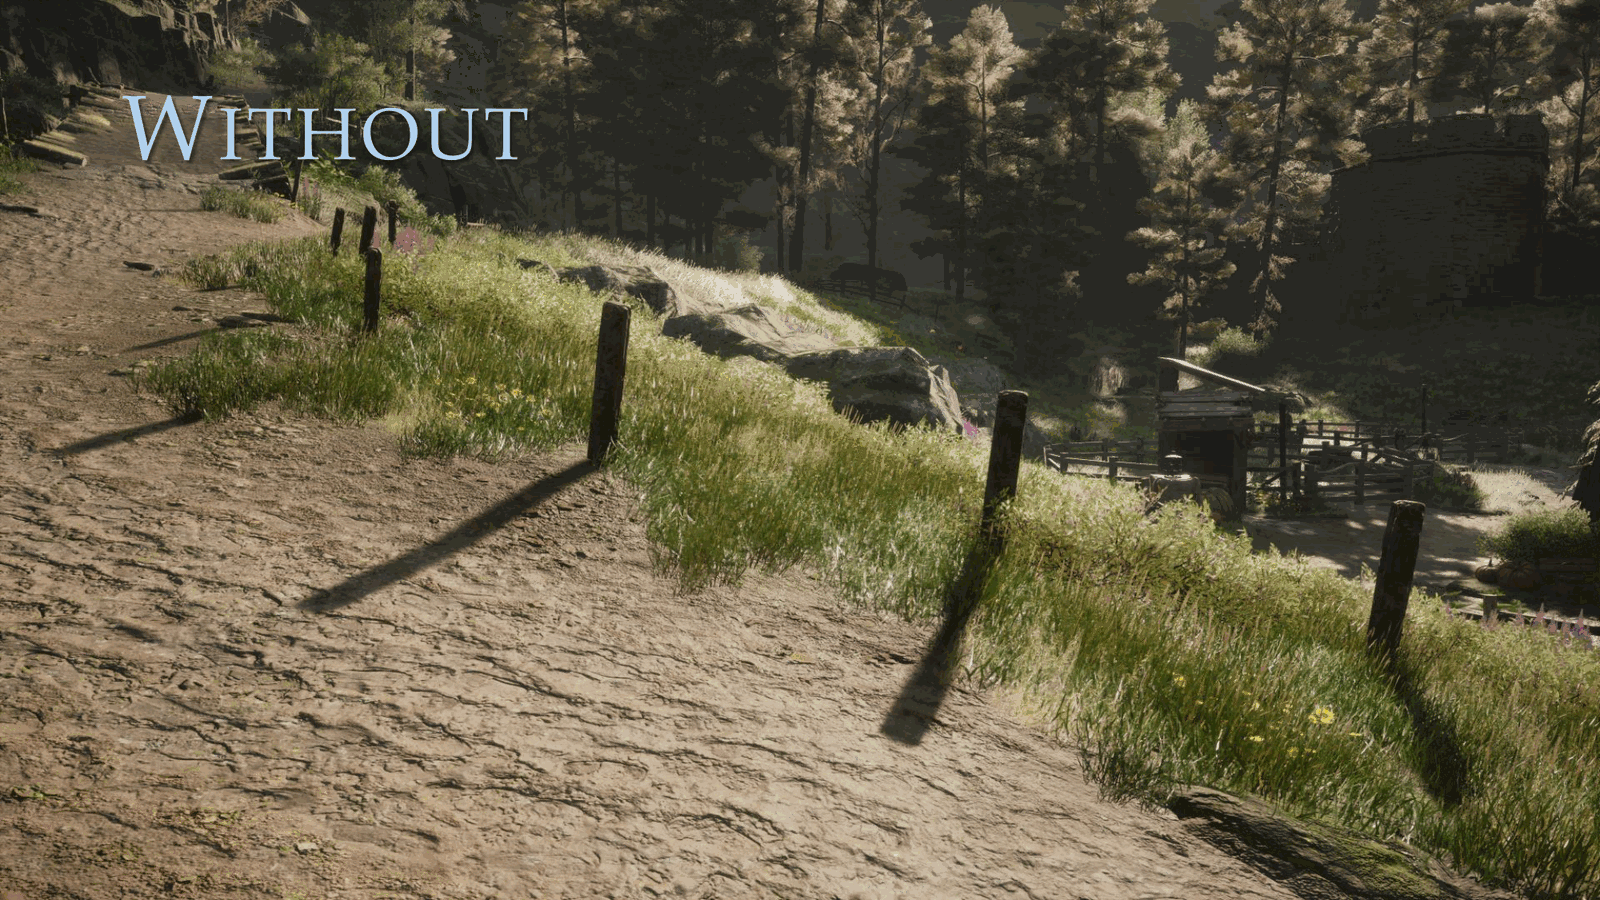
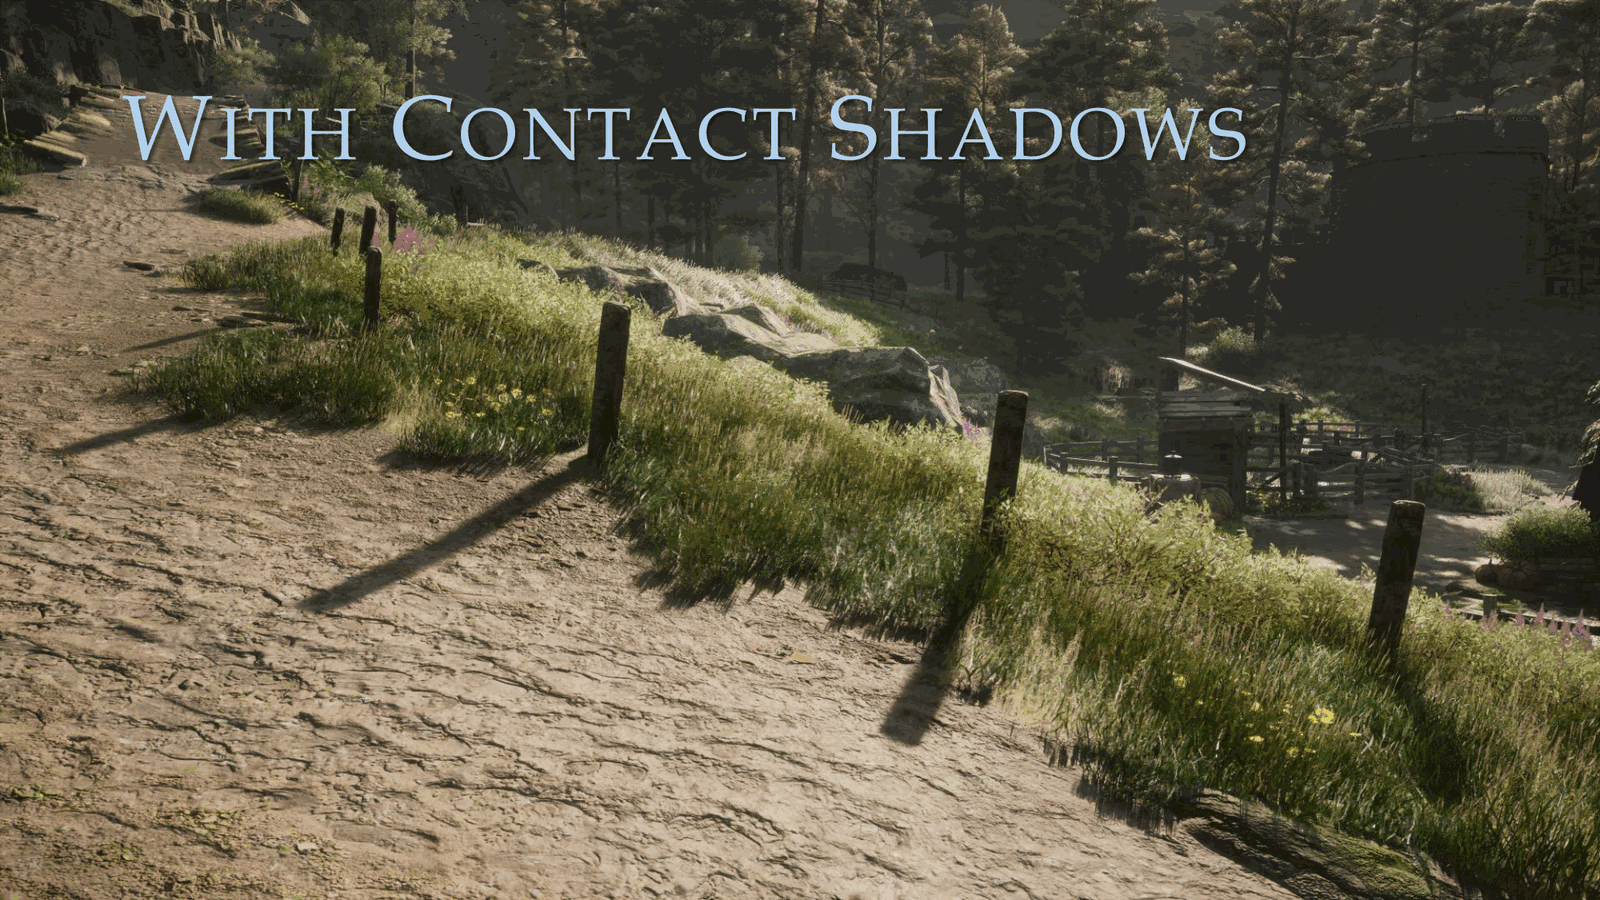
The video here of why that’s important. Next, we’ve got contact shadows. This saves a significant amount of performance by not rendering small objects like grass and rocks, and we can also add shadows in the distance where there’s no shadow maps. So here’s a picture of what contact shadows looks like.
Slide 59 — 00:22:29
📌 要点汇总
- 注意草地的视觉效果,需在有无情况下进行调整
- 本游戏独有定向阴影技术
- 阴影渲染成本随距离相机越远而显著增加
- 实现该技术具有较大难度
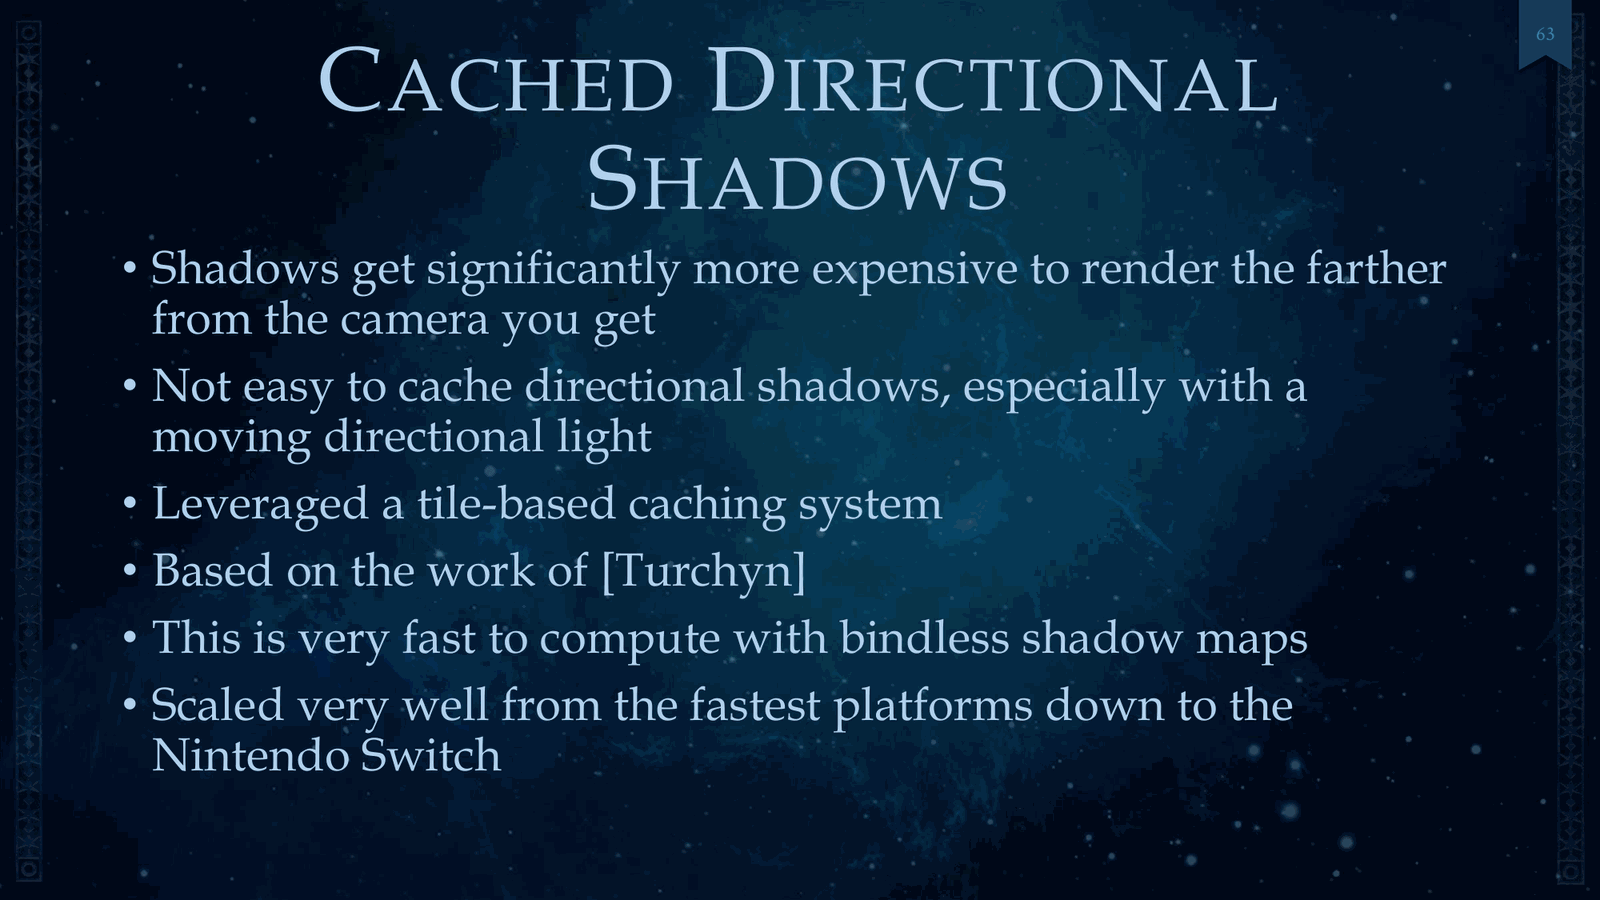
And then pay attention to where the grass looks, and we go without, and then with. Next, we’ve got cast directional shadows. This is wholly unique to our game. Shadows get significantly more expensive to render the farther from the camera you get. It’s not easy.
Slide 60 — 00:22:51
📌 要点汇总
- 使用基于瓦片的缓存系统来缓存定向阴影,尤其适用于移动光源
- 该系统基于 Turchin 的研究,计算速度快且兼容性良好
- 支持 bindless shadow maps,性能在不同平台上表现优异
- 成功适配从高端平台到 Nintendo Switch 等多种设备
To cache directional shadows, especially with a moving light, which is our game, and so we used a tile-based caching system. This is based on the work of Turchin. This is very fast to compute with bindless shadow maps, and it scaled very well from the fastest platforms down to the Nintendo Switch. So how we.
Slide 61 — 00:23:13
📌 要点汇总
- 首先将相机视锥体点投影到光照空间
- 然后围绕这些点创建光照空间凸包
- 将凸包划分为128米×128米的网格瓦片
- 瓦片可重复使用以提高效率
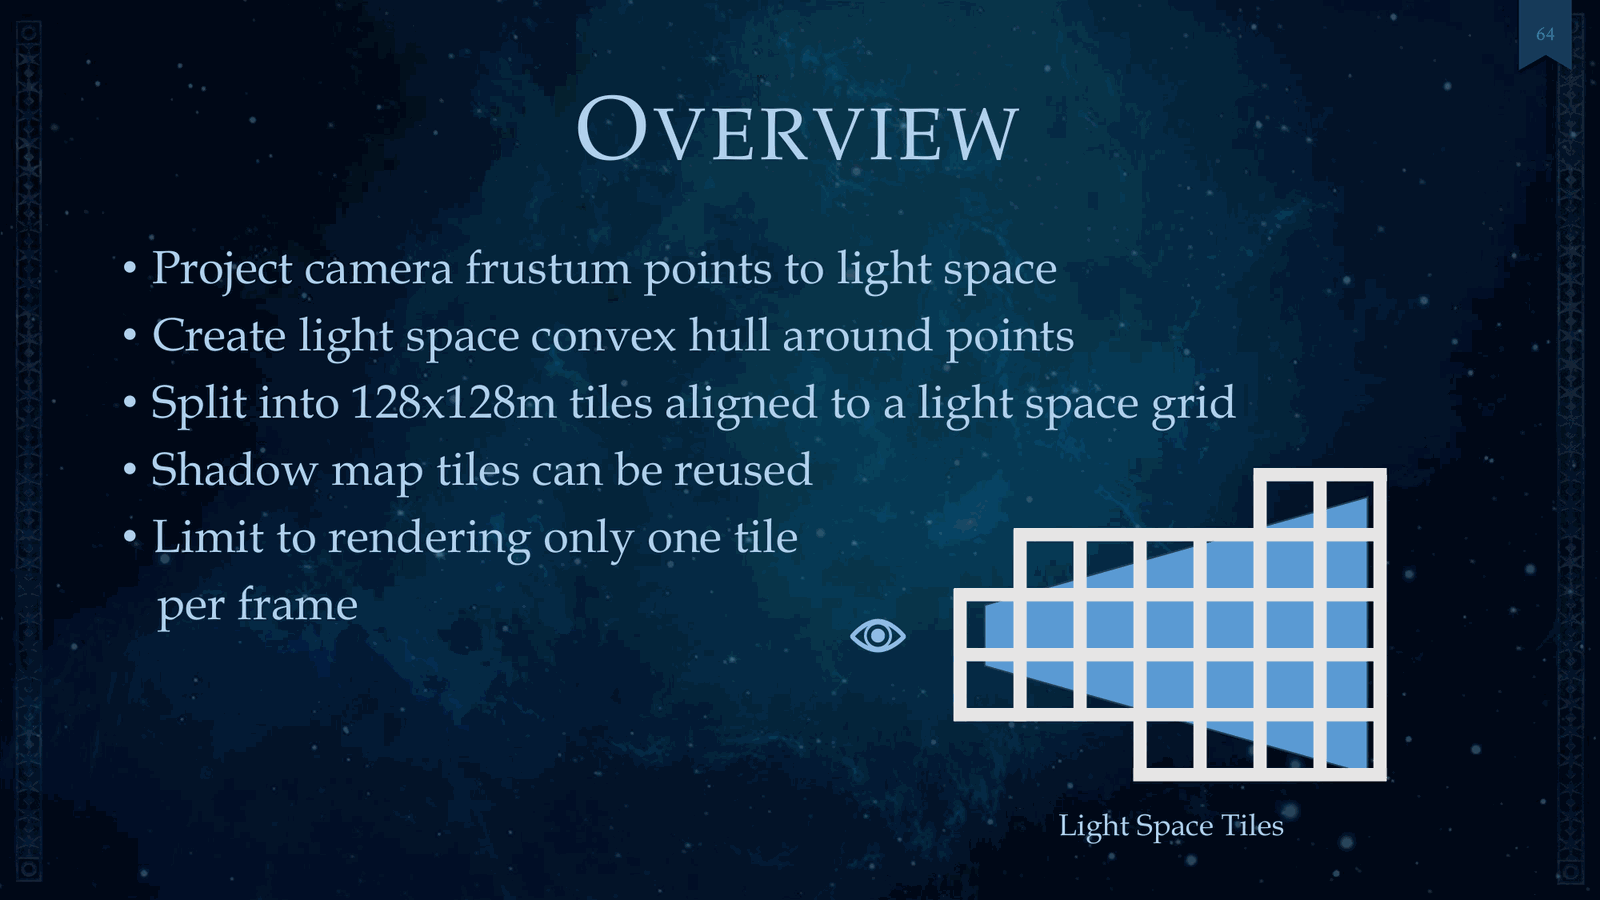
Do this. You first start by projecting the camera frustum points to light space. Next, you create the light space convex hull around the points. We split this into 128 meter by 128 meter tiles aligned to a light space grid. At this point, each of these tiles can be reused.
Slide 62 — 00:23:35
📌 要点汇总
- 每帧仅渲染一个瓦片以限制性能开销
- 阴影投影时根据相机距离对瓦片进行预排序
- 使用计算任务为每个屏幕空间瓦片分配碰撞的阴影贴图瓦片
- 再运行计算任务进行逐像素阴影计算
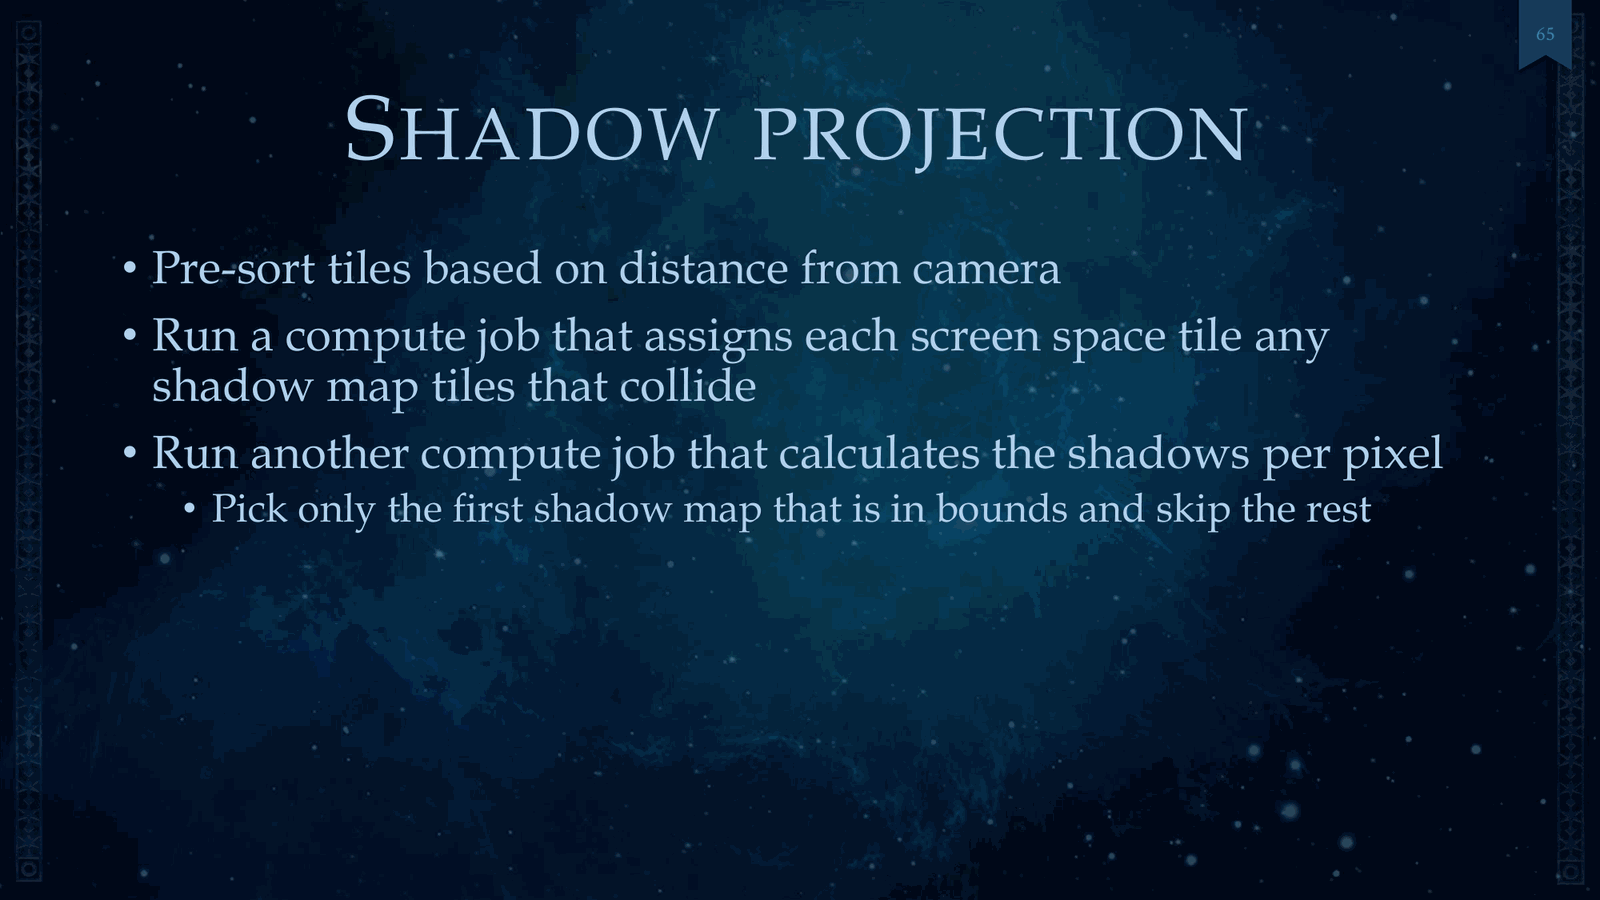
But we still limit rendering to only one tile per frame. Then, on the shadow projection side, we pre-sort these tiles based on distance from the camera. Then we run a compute job that assigns each screen space tile any shadow map tiles that collide, and then we run the compute job that calculates the shadows per pixel.
Slide 63 — 00:23:57
📌 要点汇总
- 选择第一个有效阴影贴图并跳过其余处理
- 介绍了瓦片延迟分类的具体实现方式
- 排列组合方法有助于减少计算量
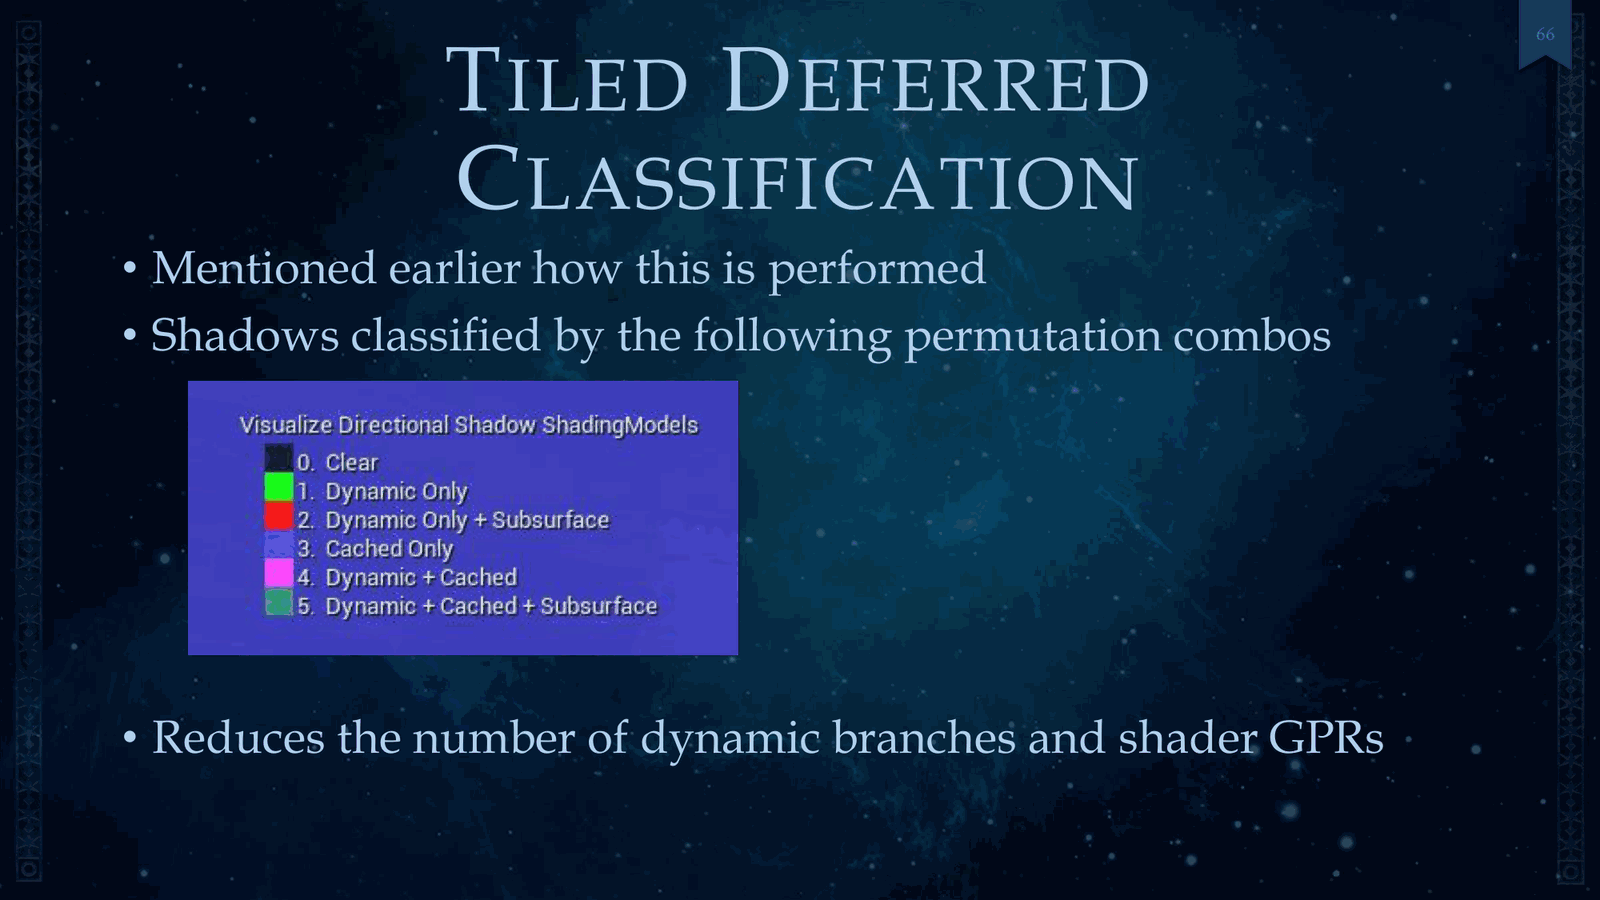
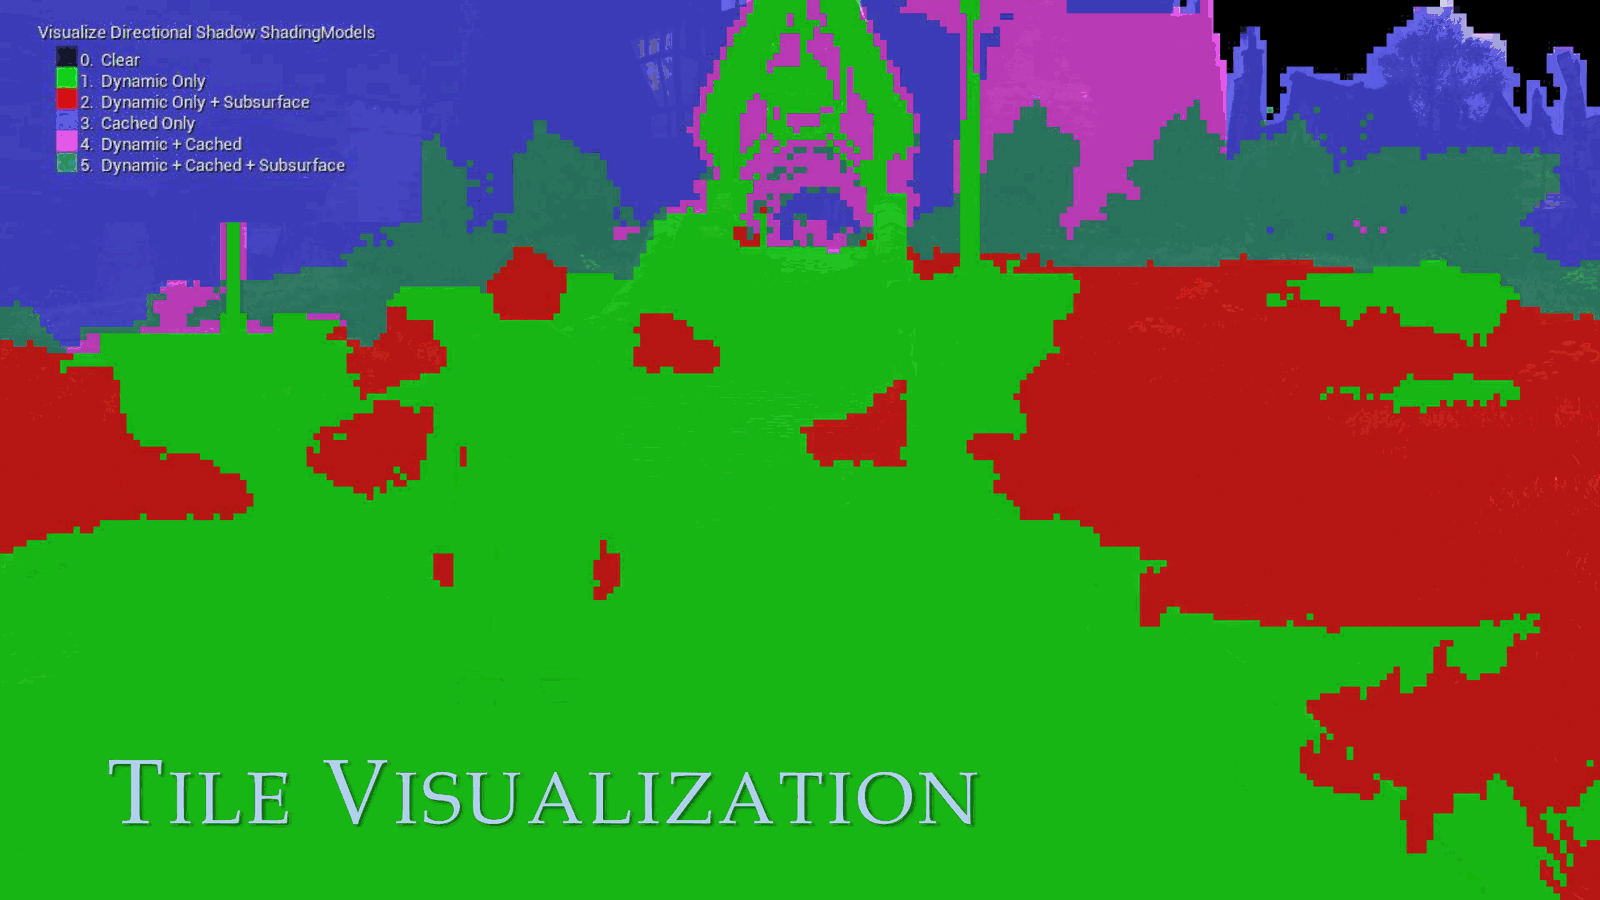
The unique part here is we just pick the first shadow map that is in bounds, and we skip the rest. So we’ve already mentioned tile deferred classification. I’d just like to show detailed what this looks like. Here’s our permutation combos, and this is very useful for reducing the.
Slide 64 — 00:24:19
📌 要点汇总
- 动态分支和着色器 GPR 数量对性能有显著影响
- 全屏可视化展示了使用中的瓦片分布情况
- 植被导致大量次表面和其他效果,影响阴影投影性能
Number of dynamic branches and shader GPRs, and here’s a full-screen visualizer of those tiles in use. And you can see that there’s a significant number of subsurface and other things because of foliage. So for the performance for shadow projection, this.
Slide 65 — 00:24:41
📌 要点汇总
- 计算成本低廉,通过可扩展性设置弥补平台差异
- 时间统计包含动态级联、投射阴影和接触阴影的渲染
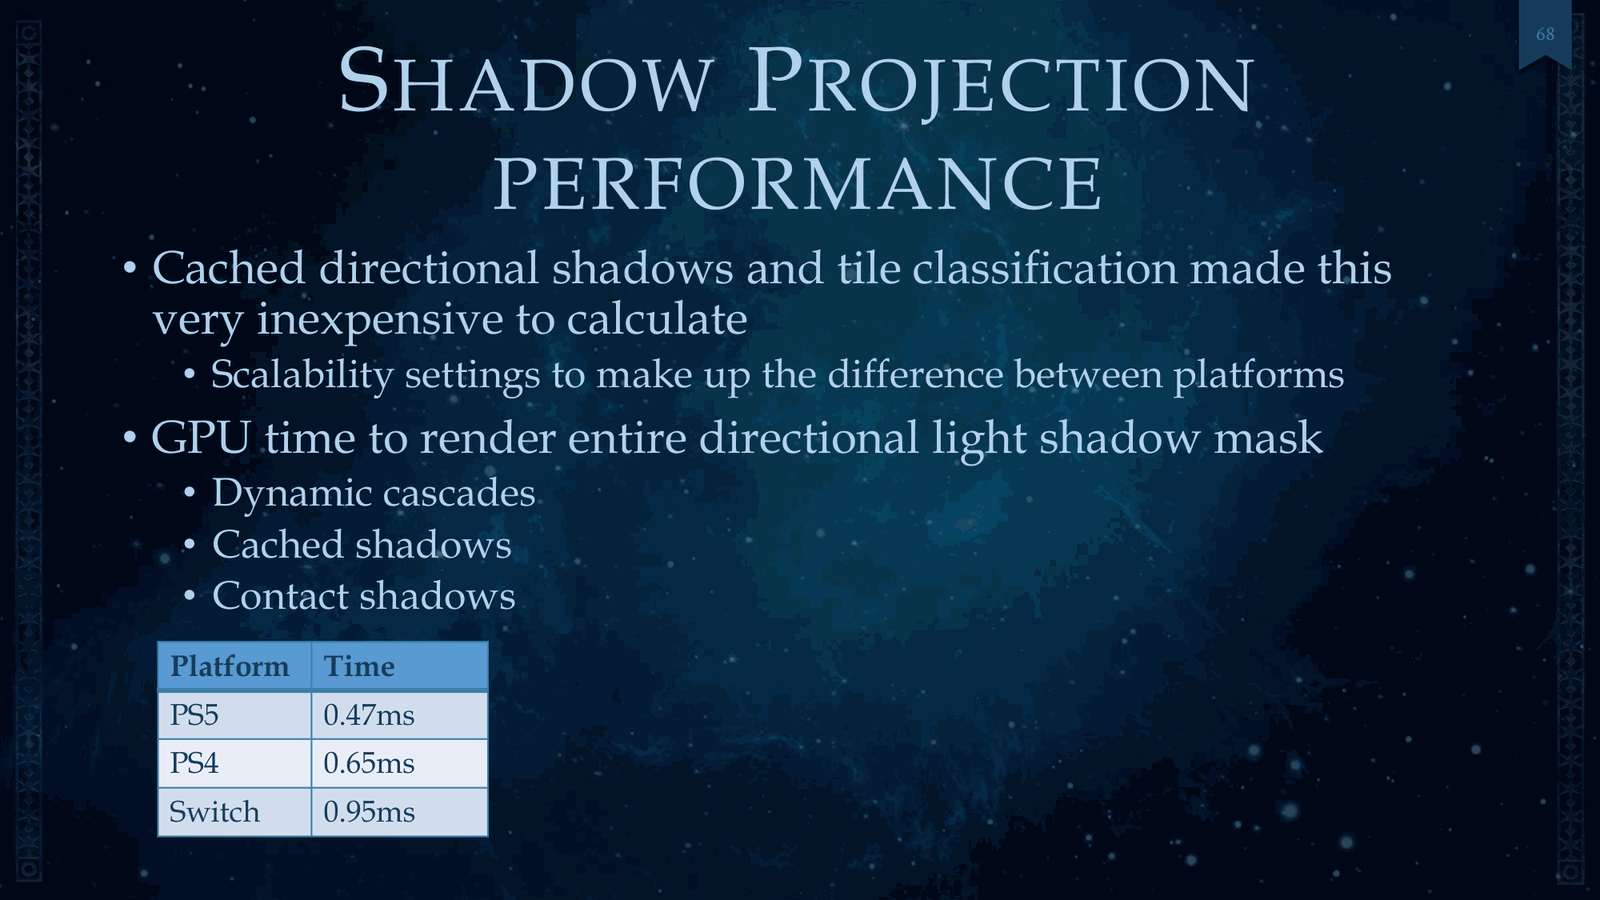
- PS5 上渲染方向光阴影遮罩耗时 0.5 毫秒
- Switch 上未提及具体时间,但同样适用该统计方式
It’s very inexpensive to calculate, and we use scalability settings to make up the difference between platforms. So the numbers I have below includes the time to render the entire directional light shadow mask. So that includes dynamic cascades, cast shadows, and contact shadows. So on the PS5, that was a half millisecond. On the Switch.
Slide 66 — 00:25:03
📌 要点汇总
- 每帧仅缓存一个瓦片,通常不足以满足需求
- 首先渲染最近的未缓存瓦片以提高效率
- 相机切换可能导致渲染问题需额外处理
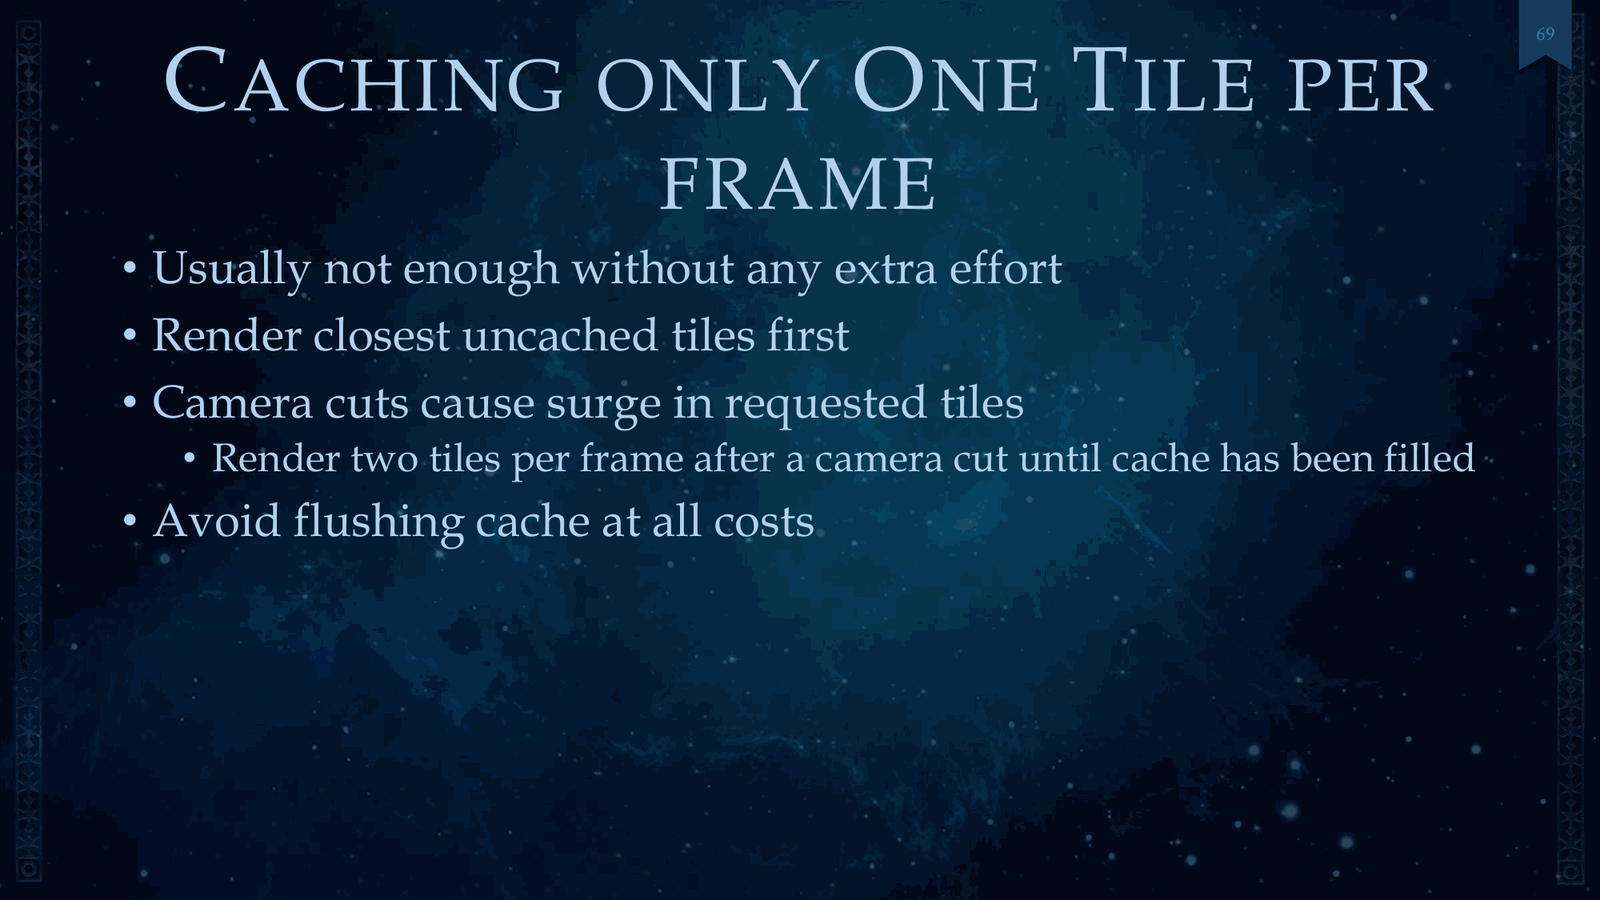
That was one millisecond, so that’s pretty fast. And so I mentioned earlier that we cache only one tile per frame. Usually, this is not enough without any extra effort, and so obviously, you first render only the closest uncached tiles first. For camera cuts, that can cause us.
Slide 67 — 00:25:25
📌 要点汇总
- 每帧渲染两个瓦片以应对请求激增
- 避免清空缓存以提高性能
- 缓存失效条件包括移动物体和时间变化
Significant surge in the number of tiles requested, and so we render two tiles per frame after camera cut until the cache has been filled, and we avoid flushing this cache at all costs. So we’ve got several instances or conditions where the cache is invalidated. This includes moving objects, time of day.
Slide 68 — 00:25:47
📌 要点汇总
- 移动对象在缓存中跳过渲染以提高性能
- 草木随风摆动时仍渲染但忽略缓存失效
- 由于40的可见性限制,效果不明显
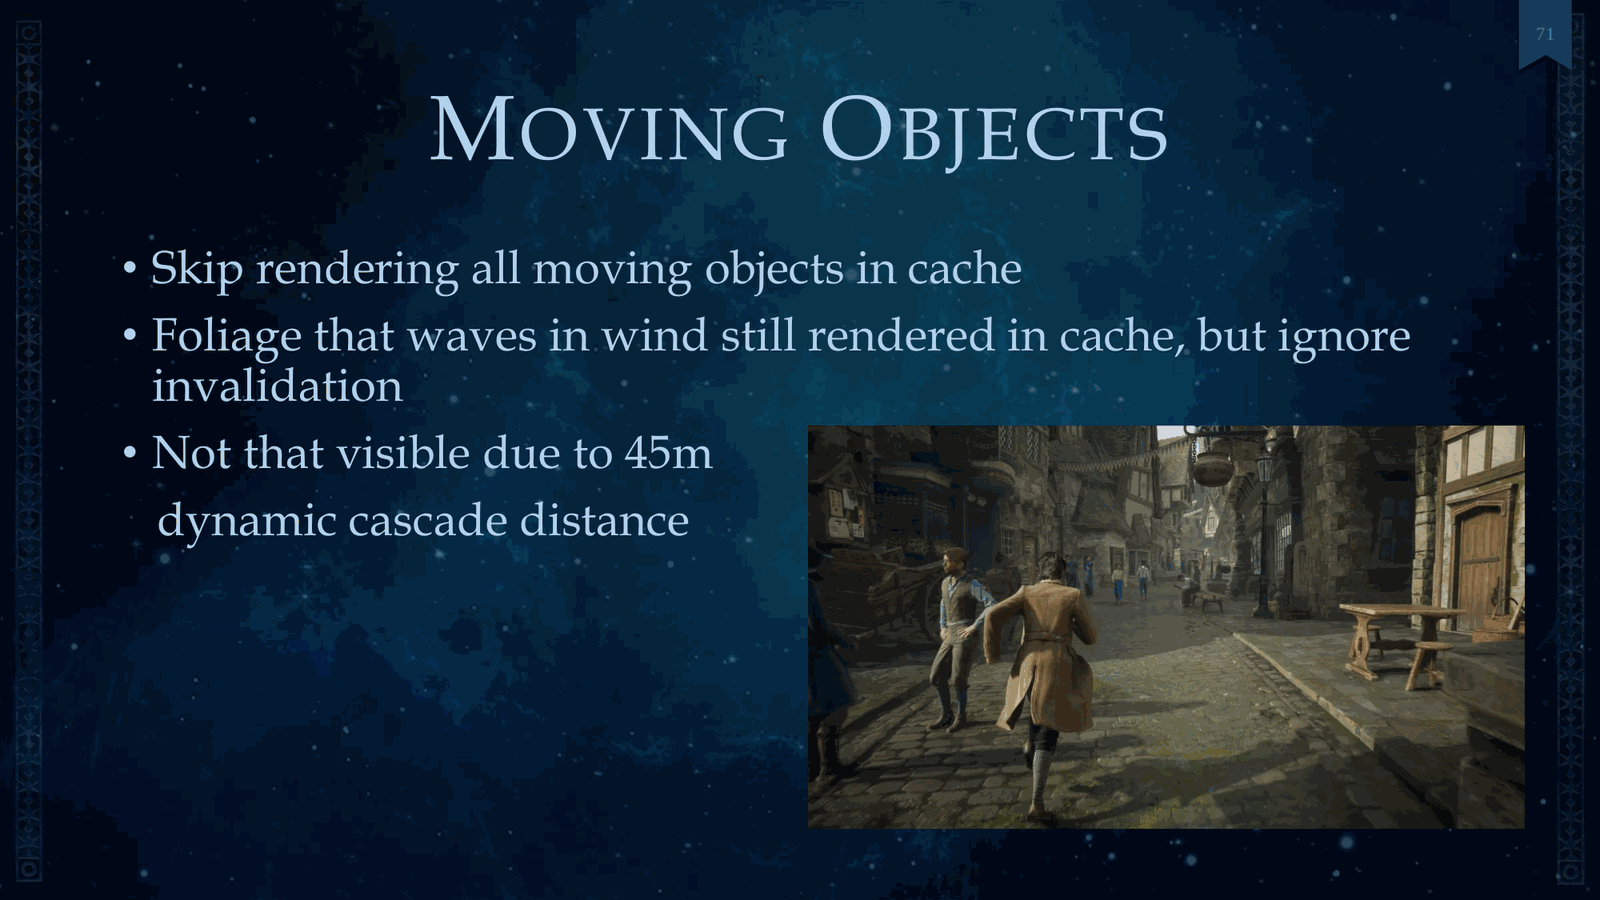
Streaming in and out objects and LOD transitions, and so we’re going to discuss each of these. So first, we’ve got our moving objects shown here, and we just skip rendering these moving objects in the cache. For foliage that waves in wind, they’re still rendered in cache, but they ignore invalidation, and it’s not that visible due to 40.
Slide 69 — 00:26:09
📌 要点汇总
- 动态级联距离为5米,直接影响视觉效果
- 游戏支持完整昼夜循环,耗时48分钟
- 光线方向持续变化,防止光照缓存
- 仅对阴影部分缓存光线方向以优化性能
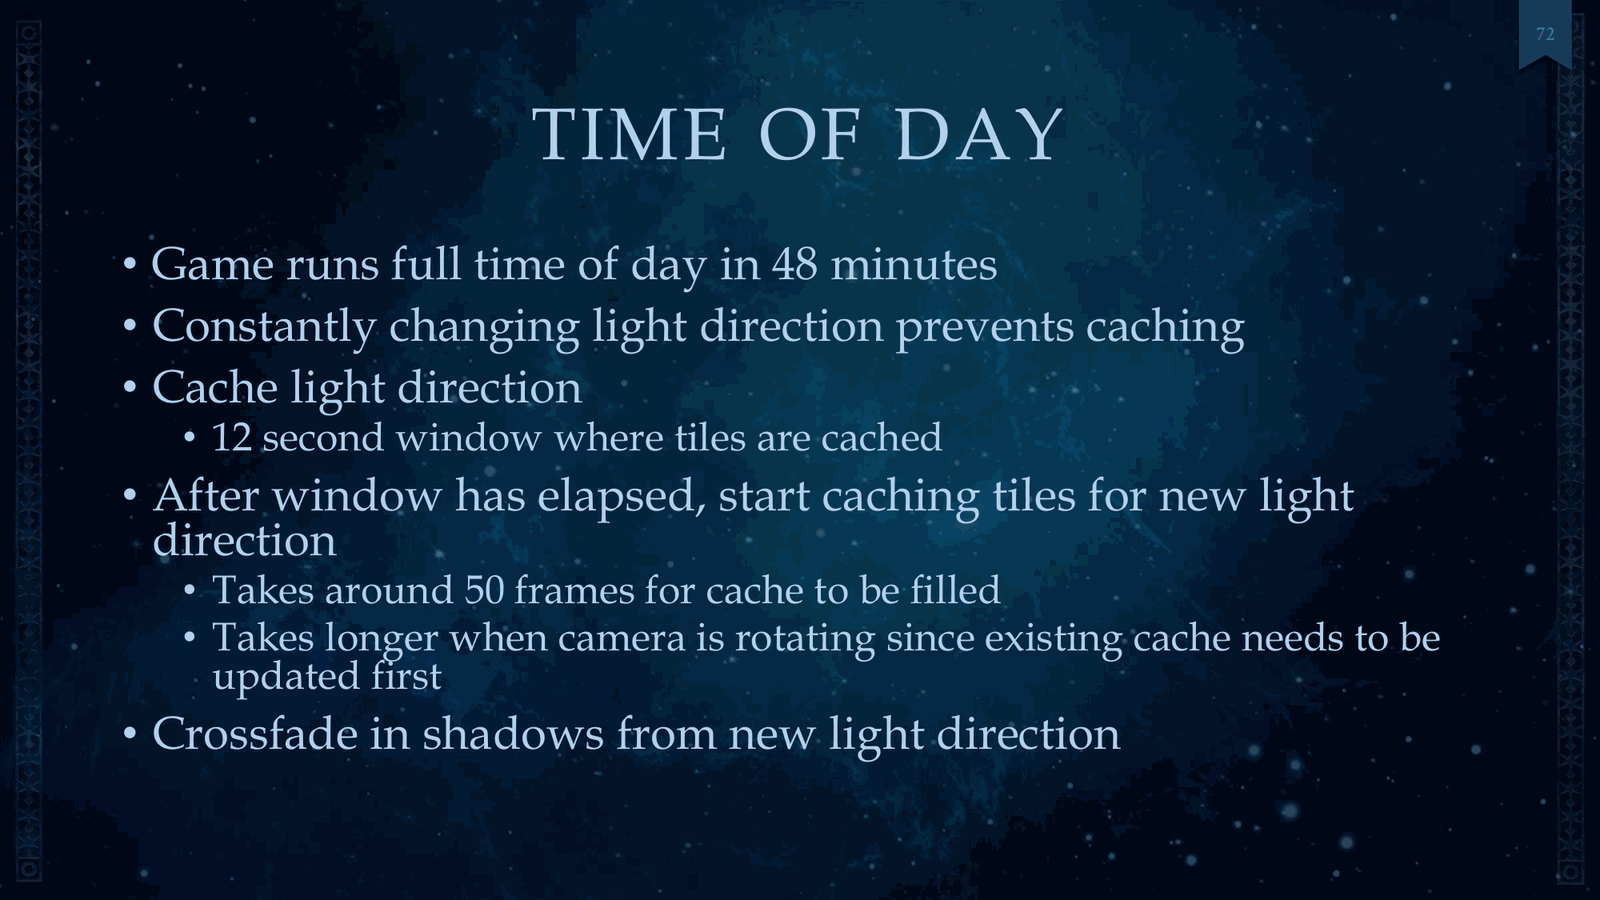
Five-meter dynamic cascade distance that’s right in front of you. The next, we’ve got our time of day. So I mentioned before, the game runs full time of day in 48 minutes, with a constantly changing light direction. This prevents caching, and so thus we cache the light direction, just for shadows.
Slide 70 — 00:26:31
📌 要点汇总
- 缓存瓦片的有效窗口为12秒
- 新光照方向的缓存填充大约需要50帧
- 相机旋转时缓存填充时间会延长
- 现有阴影缓存更新具有更高优先级
And this gives us a 12-second window where the tiles can be cached. After this window has elapsed, we start caching tiles for a new light direction. This can take around 50 frames for the cache to be filled. It’ll take longer when your camera is rotating because we prioritize existing shadow cache updates first.
Slide 71 — 00:26:53
📌 要点汇总
- 使用缓存填充后,通过渐变方式引入新光源方向的阴影
- 渐变过程较为微妙,需仔细观察阴影变化
- 该技术用于实现更自然的光照过渡效果
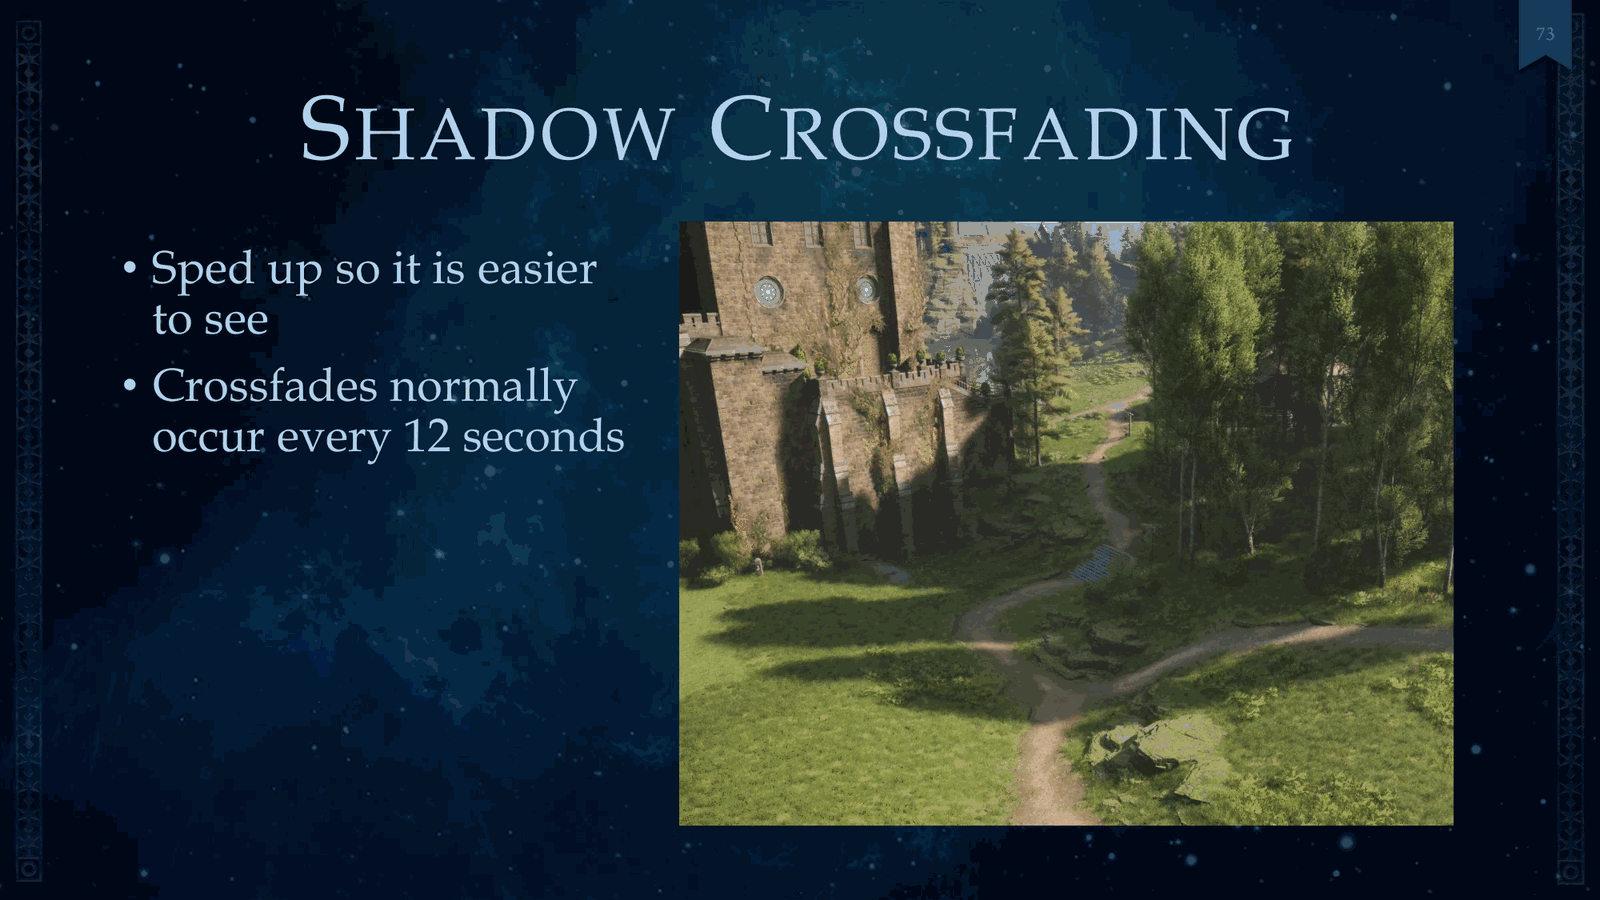
And then, once it’s ready, once that cache has been filled, we crossfade in the shadows with a new light direction. So the crossfading looks like so. I sped it up so you guys can see, and just pay attention to the shadows. It’s pretty subtle.
Slide 72 — 00:27:15
📌 要点汇总
- 通过检查流对象与缓存瓦片的边界交集,判断是否需要更新瓦片
- 每次交集发生时,对应瓦片的“dirty”值会增加
- 当“dirty”值达到阈值时,触发瓦片的重新渲染
- 该机制用于优化动态内容的渲染效率和准确性
All that alone helped get get that looking pretty convincing for time of day. Next, we’ve got things streaming in and out. So for each streaming object, we check if its bounds intersect with the existing tiles in cache, and we increment a dirty value for that tile. Then we re-render tiles if the existing
Slide 73 — 00:27:37
📌 要点汇总
- 仅当缓存已满且无交叉淡入效果时,才会根据时间阈值和脏值阈值进行优先级排序
- 不对单个瓦片进行交叉淡入,因为远处不易察觉
- LED变化会导致自遮挡问题
Only if the existing cache is full and there’s no crossfading active, meaning extra work, we prioritize them based on a time threshold, dirty value threshold. We don’t do any individual tile crossfading, as you tend to not notice it in the distance. For LED changes, this causes self-occlusion.
Slide 74 — 00:27:59
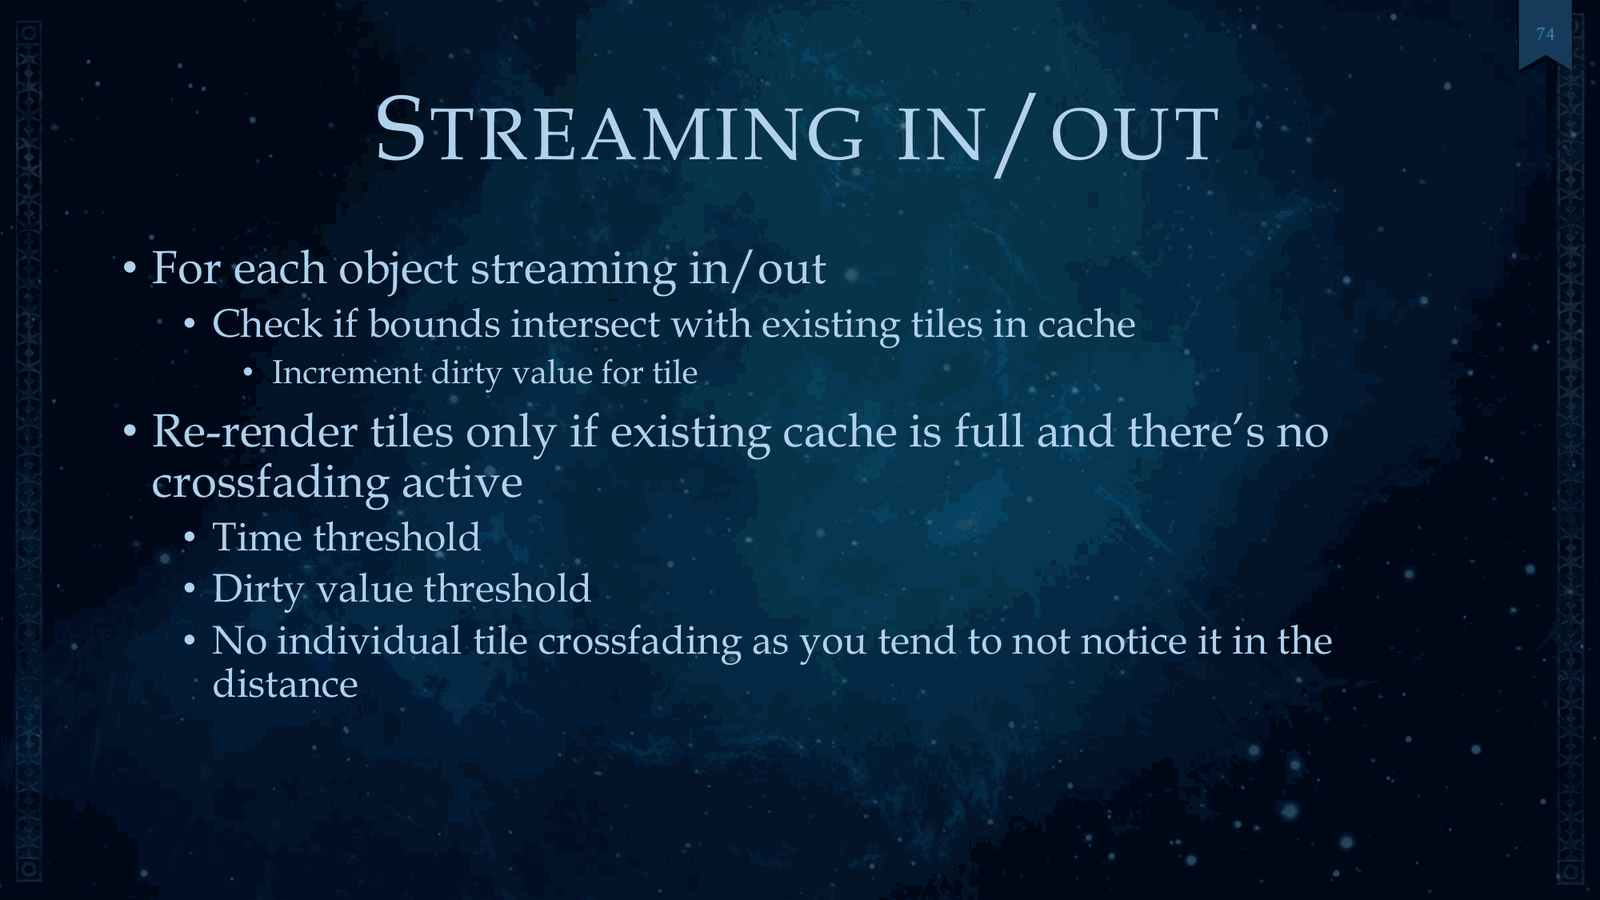
📌 要点汇总
- 影子地图 LOD 与主摄像机不匹配会导致视觉瑕疵
- 石头中间出现瑕疵是 LOD 不匹配的典型表现
- LOD 切换频繁,无法持续验证所有情况
- 仅关注较大的 LOD 差异以优化性能与视觉效果
Artifacts when the shadow map LOD is mismatched from the main camera. Shown here on the right is we have a mismatched LOD. You can see a blemish in the middle of the rock. Unfortunately, LODs are always swapping, so it’s not feasible to invalidate all the time. And so, only the large LODs discrepancies are noted.
Slide 75 — 00:28:21
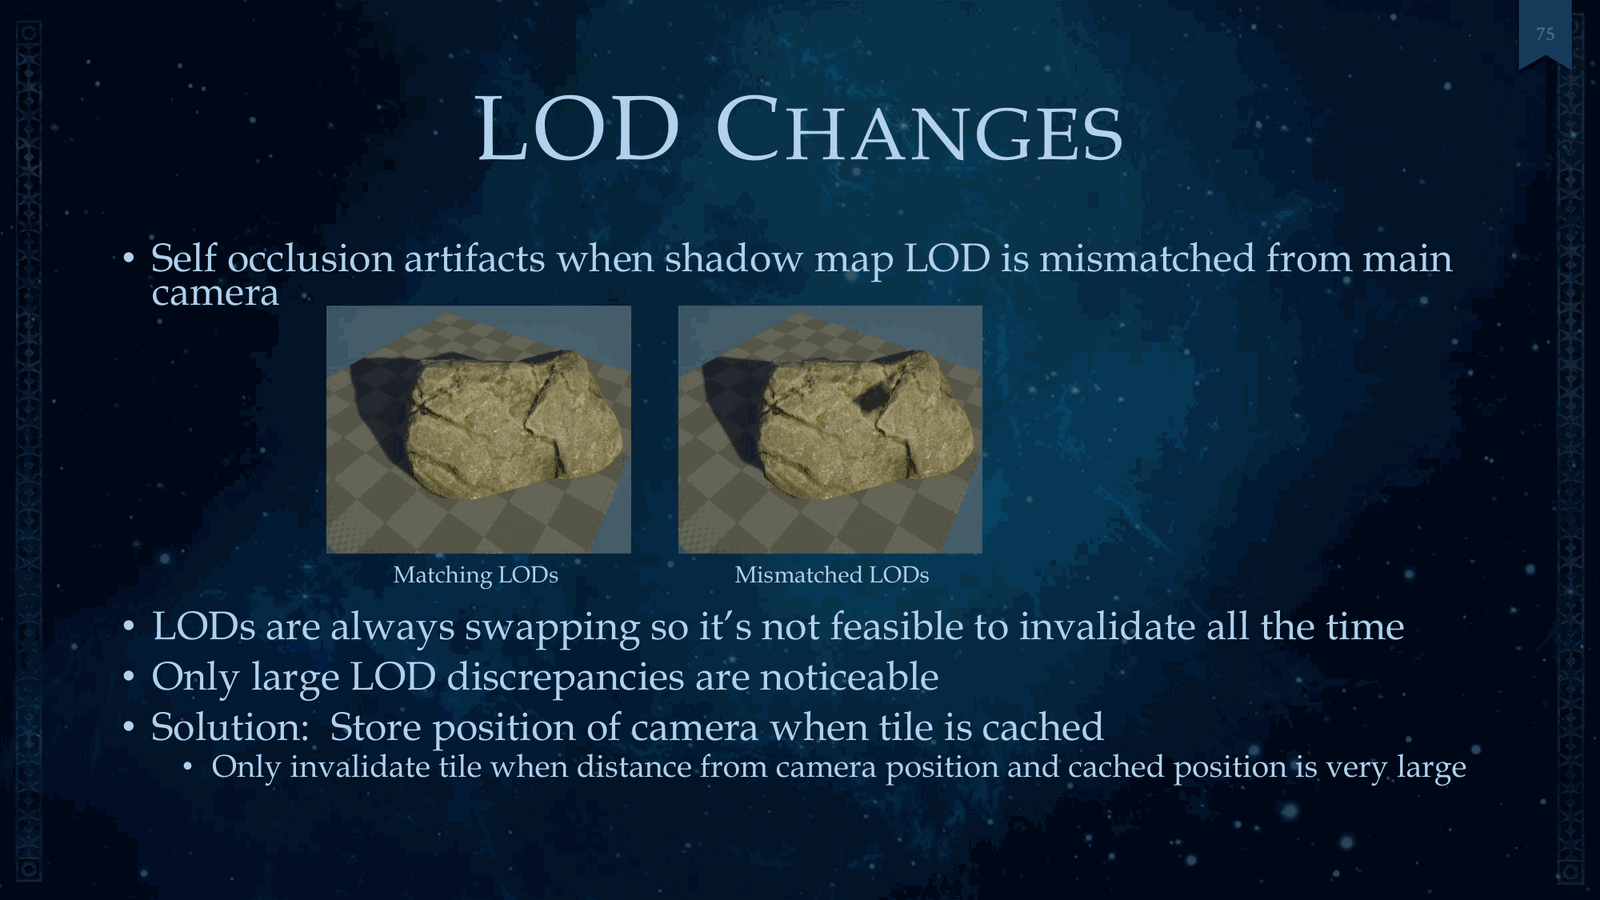
📌 要点汇总
- 通过记录相机位置来缓存瓦片,减少不必要的更新
- 当相机与缓存位置距离过大时才失效瓦片
- 日出日落时阴影处理存在特殊挑战
The solution we had was to store the position of the camera when the tile is cached, and we only invalidate the tile when the distance from the camera position and the cached position is very large. Next, we’ve got a unique situation: we’ve got shadows at sunrise and sunset, grazing.
Slide 76 — 00:28:43
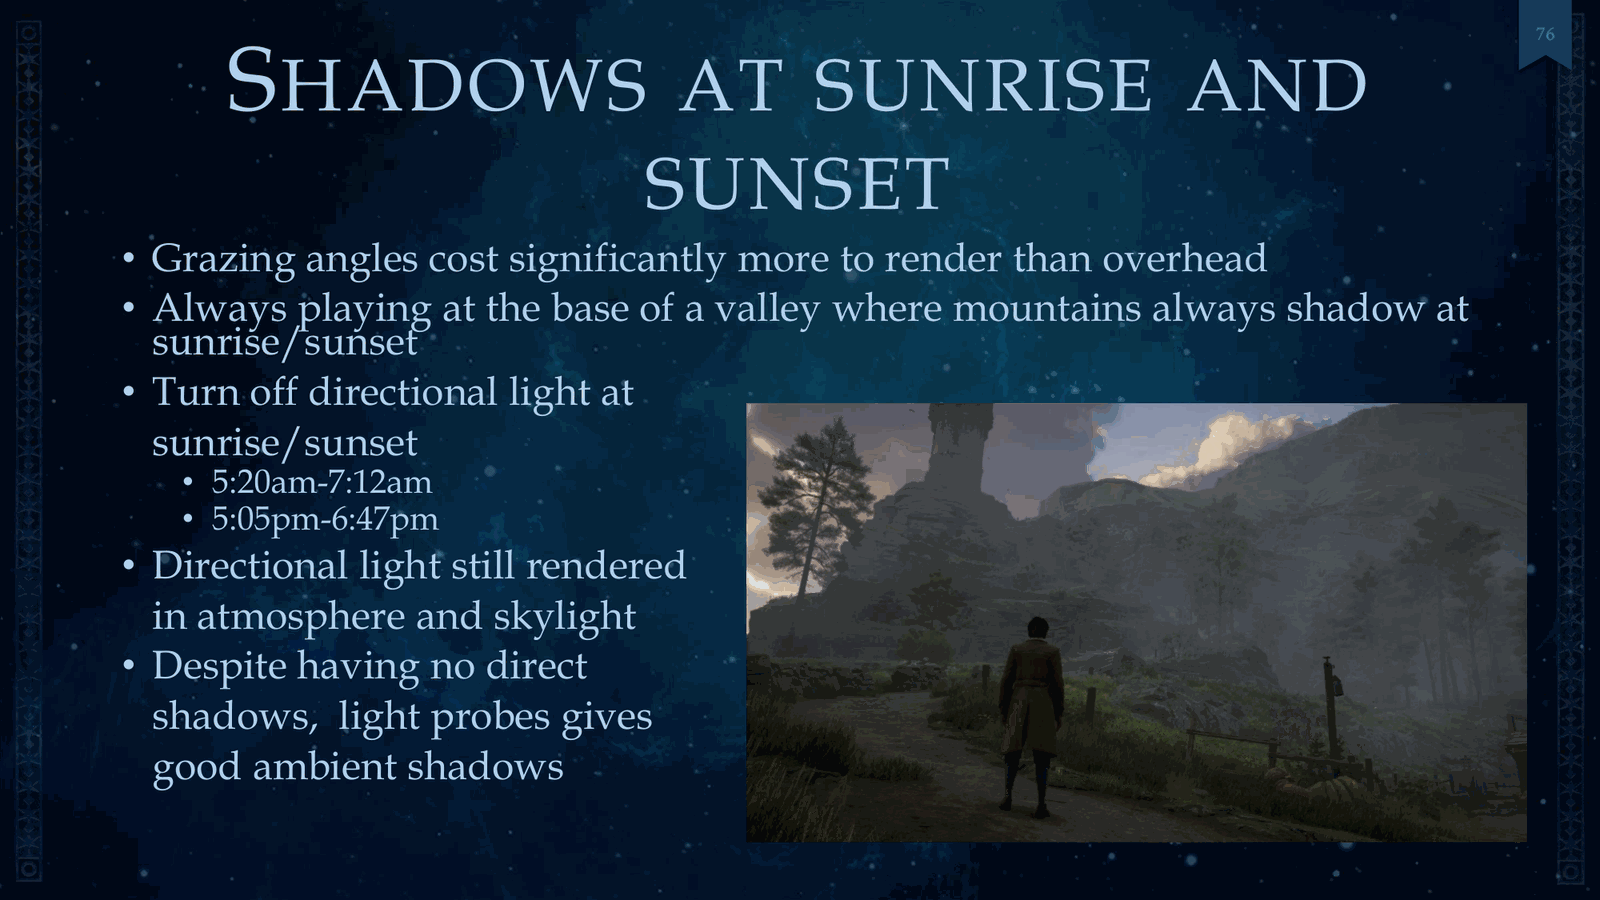
📌 要点汇总
- 角度阴影在阴影图中渲染成本比顶面高,有时高达四倍
- 游戏场景常处于山谷底部,日出日落时山脉阴影覆盖
- 在这些时段关闭方向光以优化性能
- 方向光对阴影渲染成本影响显著
Angles cost significantly more to render in the shadow map than overhead, sometimes by four times. And we notice that we’re always playing at the base of a valley, where the mountains always shadow at sunrise and sunset. So we just turn off the directional light at those times. Just to highlight that directional light is.
Slide 77 — 00:29:05

📌 要点汇总
- 光探针(light probes)在无直接阴影时仍能提供良好的环境阴影
- 角色下方可见阴影,说明光探针有效渲染了间接光照效果
- 未直接接触光源的区域(如大气和天光)仍能呈现可见光照效果
- 涉及无绑定布料区域(bindless cloth regions)的深入解释
Still rendered in the atmosphere and the skylight because those are still visible, and despite having no direct shadows during this time, light probes gives a good amount of ambient shadows. You can see the shadow on the character down below. So another in-depth explanation is bindless cloth regions.
Slide 78 — 00:29:27
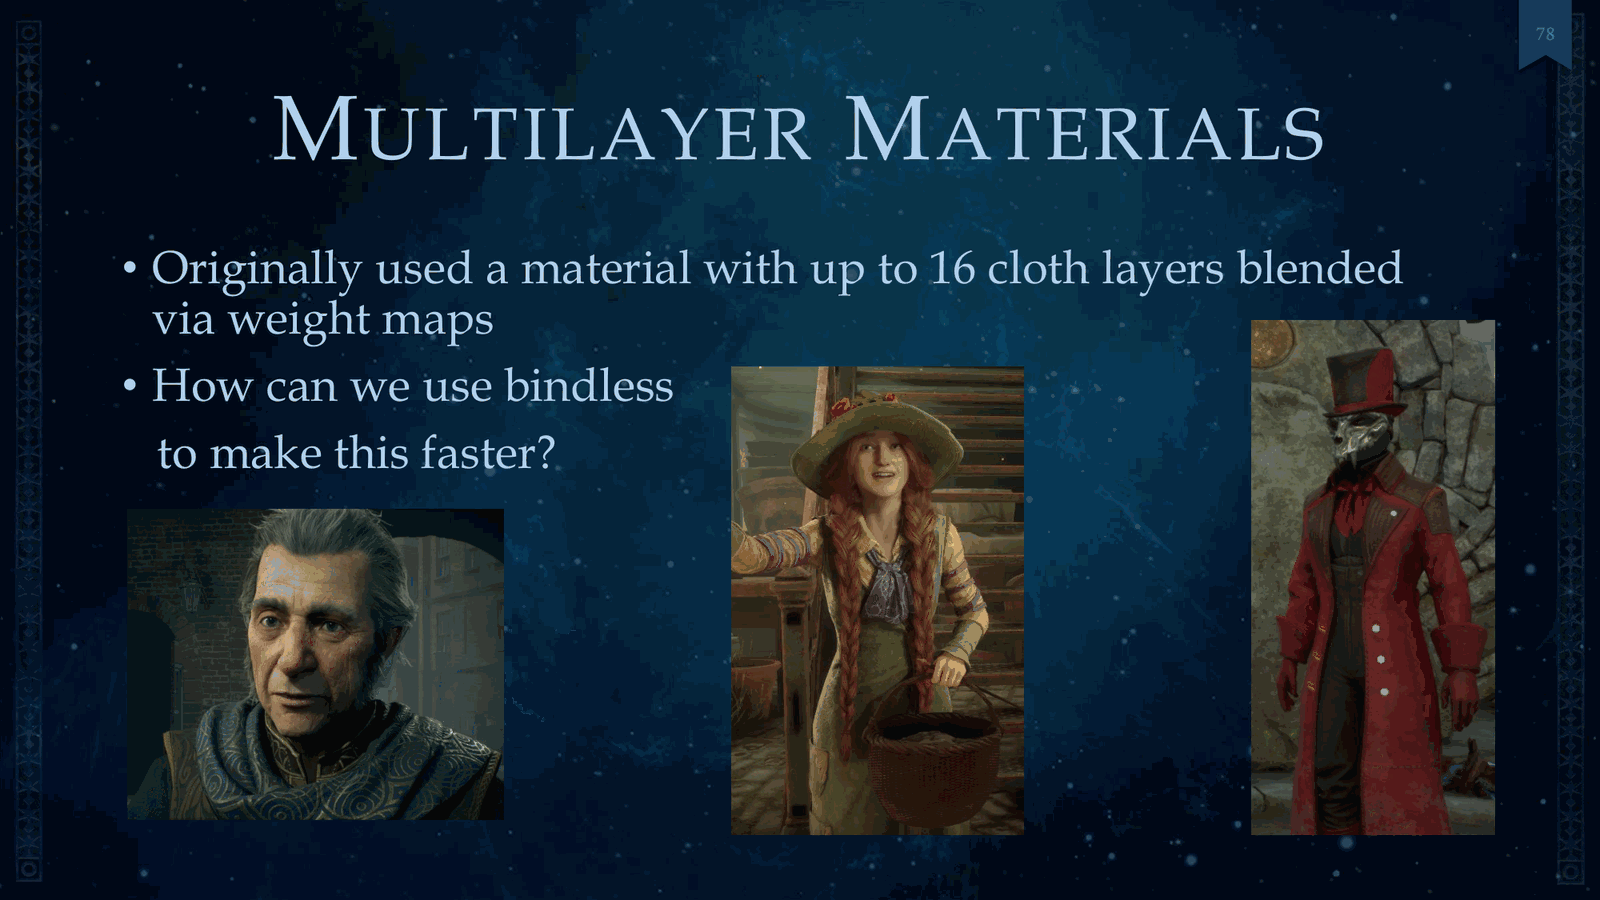
📌 要点汇总
- 使用最多16层布料材质并通过权重图混合,计算成本较高
- 问题是如何通过bindless技术提升性能
- 正在描述该布料材质的细节
So, I give an overview of multilayer materials, especially for cloth. Our character artist used a material with up to 16 cloth layers blended via weight maps, and that’s pretty expensive. So, the question we had was, how do you make this faster using bindless? So, to describe what this cloth.
Slide 79 — 00:29:49
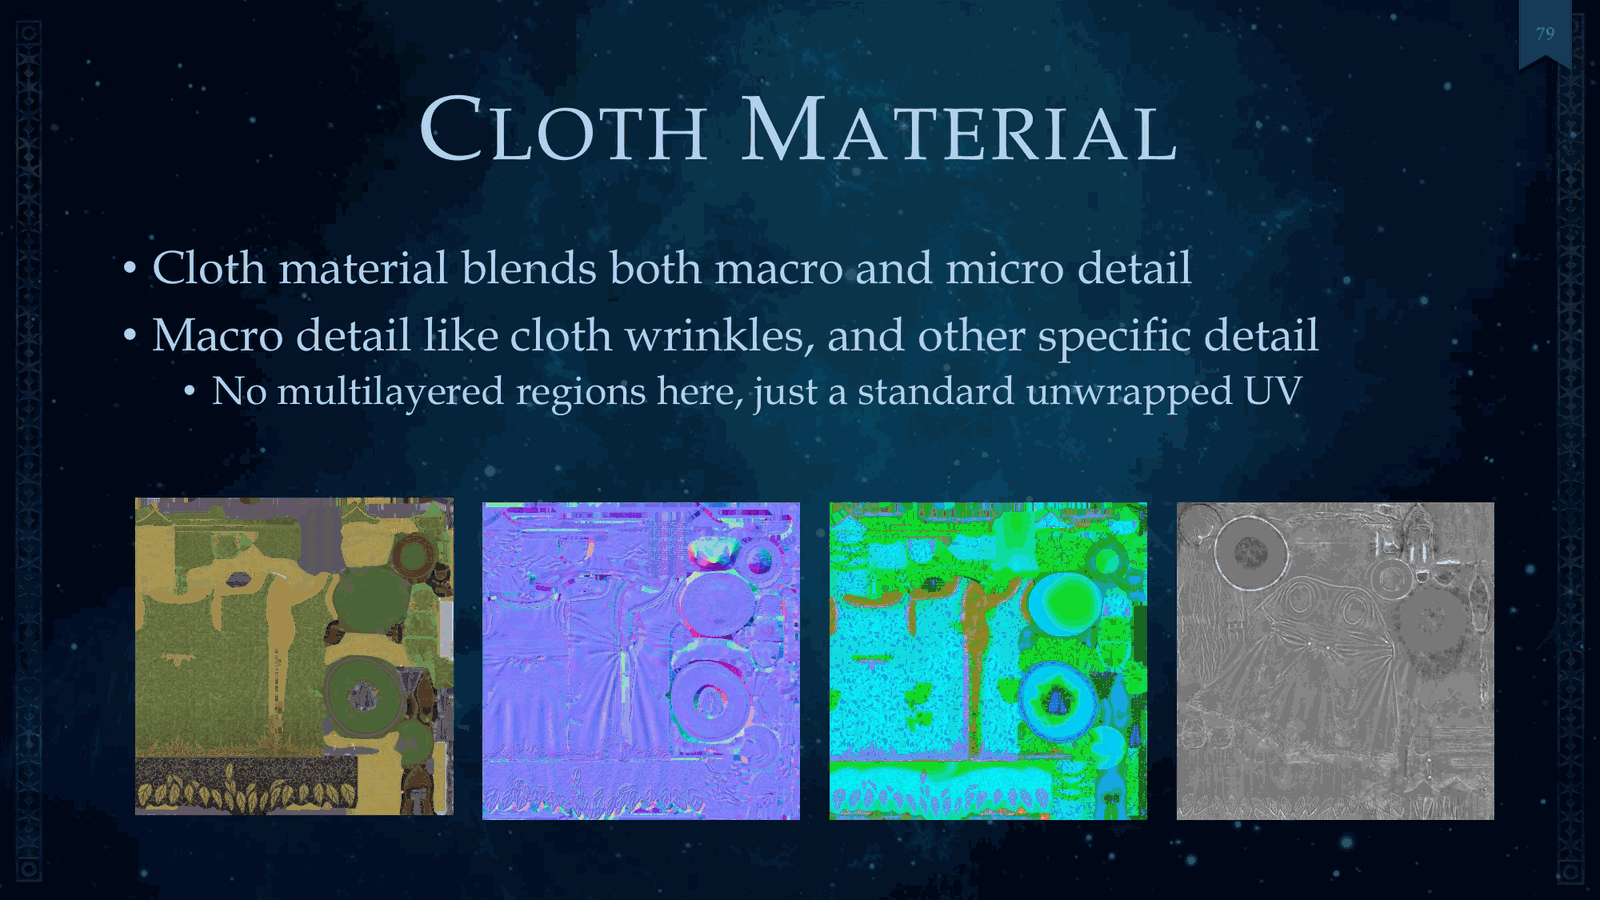
📌 要点汇总
- 布料材质融合宏观和微观细节
- 宏观细节包括褶皱等特征,不涉及多层区域
- 微观细节使用多层技术实现更精细表现
Cloth material consists of. The cloth material blends both macro and micro detail. The macro detail is consists of things like cloth wrinkles and other specific detail. There’s no multi-layered regions here. It’s just a standard unwrapped UV. For micro detail, we use multi.
Slide 80 — 00:30:12
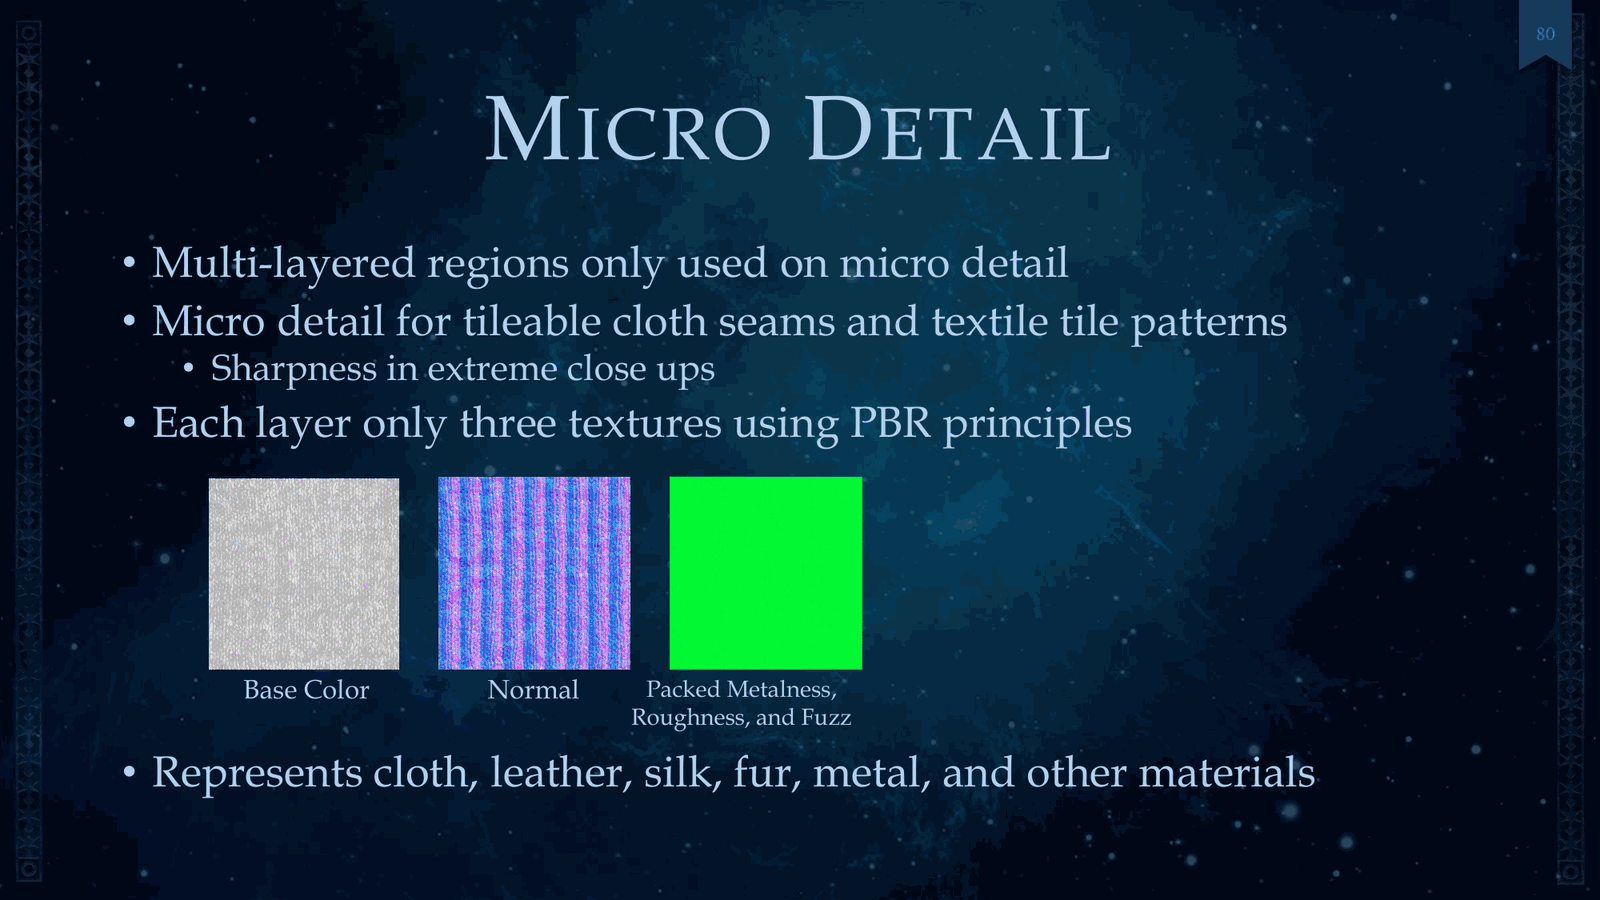
📌 要点汇总
- 使用多层区域技术实现可平铺的布料接缝和纺织品图案
- 每层仅使用三种基于 PBR 原理的纹理,提升细节表现
- 通过该方法可单独表现布料、皮革、丝绸、毛皮等材质
- 在特写镜头下能保持清晰度和真实感
Multi-layered regions, and this micro detail is tileable cloth seams and textile tile patterns. This gives us sharpness in extreme close-ups, and each layer only has three textures using PBR principles shown here. And with just just alone, we represented cloth, leather, silk, fur.
Slide 81 — 00:30:34
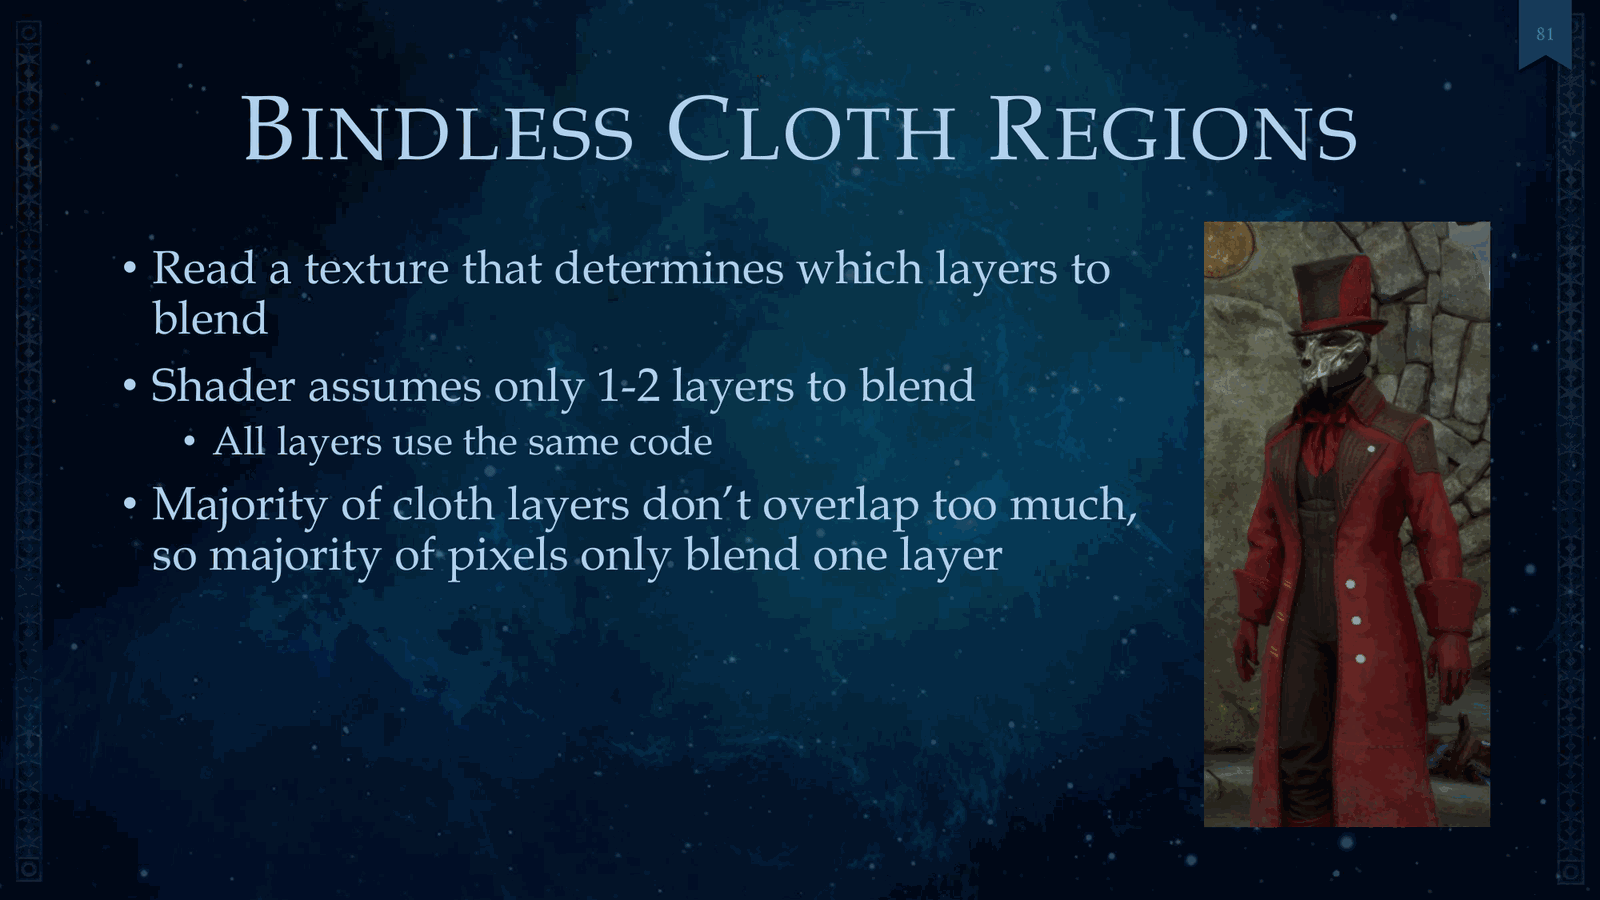
📌 要点汇总
- 使用无绑定布料区域(bindless cloth regions)处理金属和其他材料
- 通过纹理确定要混合的图层,每像素进行处理
- 着色器假设最多混合1到2层,所有图层必须满足此限制
Metal and other materials. So this is where we use something called bindless cloth regions. So first we we read a texture that determines which layers to blend. This is per pixel, and then the shader assumes that we only have two one to two layers to blend, and that means all layers must.
Slide 82 — 00:30:56
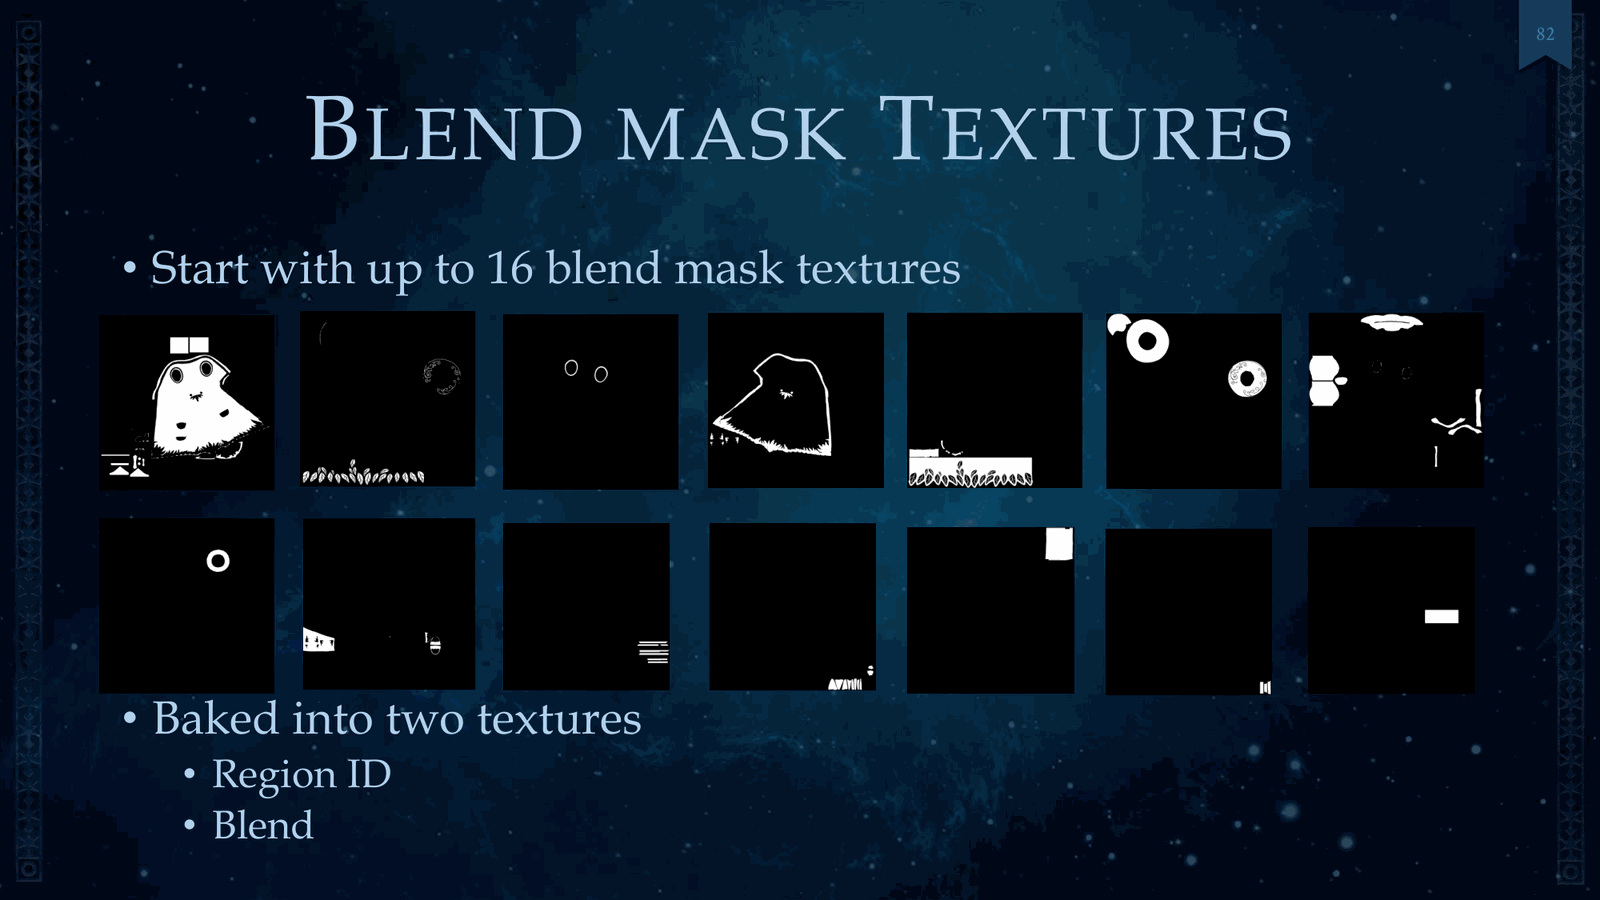
📌 要点汇总
- 大多数布料层之间重叠较少,大部分像素仅混合一层
- 因此需要进行烘焙处理以优化性能
- 使用了十六张混合遮罩纹理实现效果
Use the same code. Since the majority of cloth layers don’t overlap too much, the majority of pixels only blend one layer. So, doing this, we had to to do some baking here. And so, here are the sixteen blend mask textures. We’ll.
Slide 83 — 00:31:18
📌 要点汇总
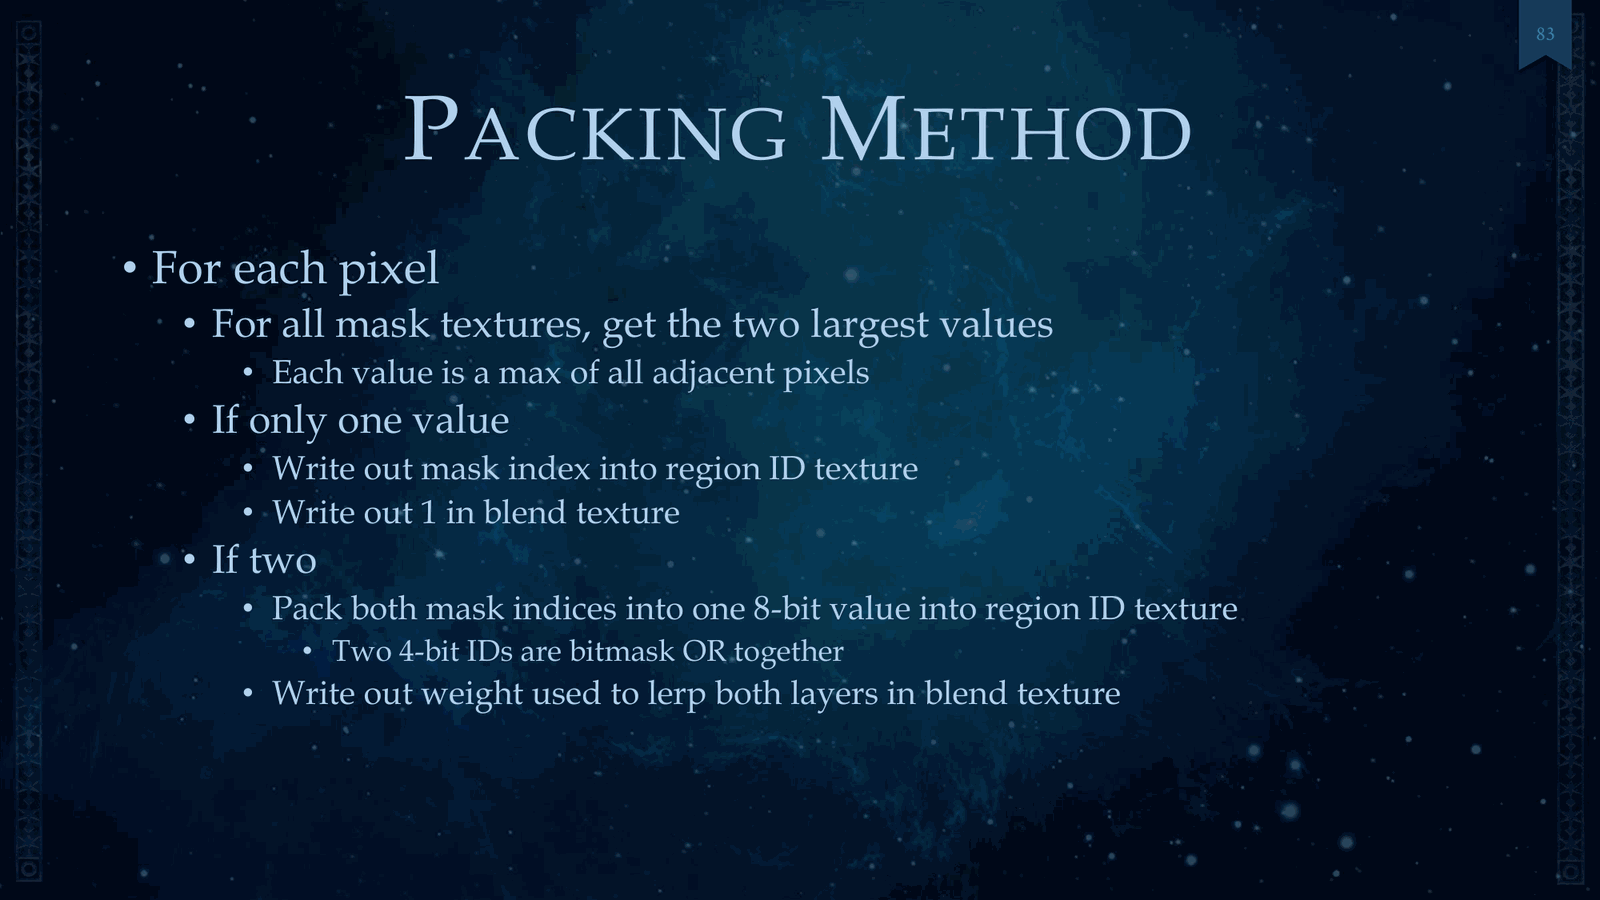
- 最多支持 16 个混合遮罩纹理
- 将这些纹理烘焙到两个纹理中:区域 ID 纹理和混合纹理
- 每个像素处理所有遮罩信息以实现纹理打包
Up to 16 blend mask textures, and we take these textures and we bake them into two of them, called the region ID texture and a blend texture. And I’ll explain this in detail. So the packing method for this: for each pixel, we take all the mask.
Slide 84 — 00:31:40
📌 要点汇总
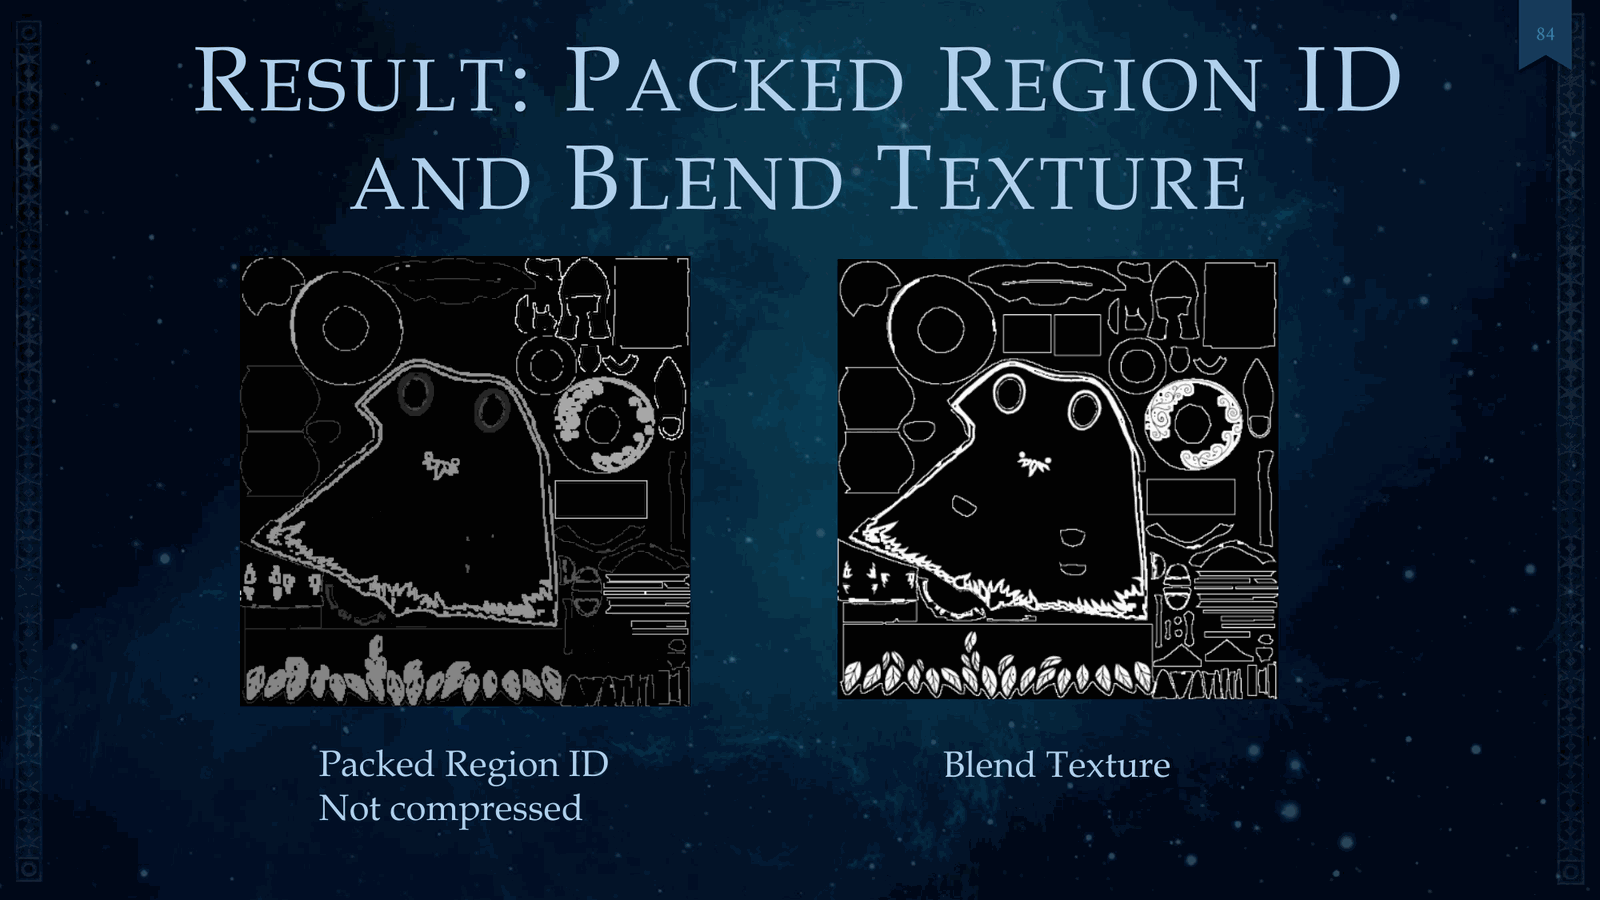
- 选取两个最大值作为图层,每个值是相邻像素的最大值
- 若只有一个值,将掩码索引写入区域ID纹理,并在混合纹理中写入1
- 若有两个值,将两个掩码索引打包为一个八位值写入区域ID
We get the two largest values, right? Those are your two layers, and each value is a max of all adjacent pixels. I’ll explain later why. And if there’s only one value, you write out the mask index into the region ID texture, and then write out one for the blend texture. If it’s two, you pack both mask indices into one eight-bit value into the region ID.
Slide 85 — 00:32:02
📌 要点汇总
- 使用两个四位ID通过位掩码或运算组合成纹理信息
- 通过权重值在混合纹理中进行线性插值
- 最终生成区域ID和混合纹理两个输出结果
- 打包后的区域ID无法进一步分解
Texture. This consists of two four-bit IDs that are bit-masked ORed together, and then at that point you write out a weight used to lerp between both layers in the blend texture. So the result here are these two textures. We’ve got our region ID and our blend texture. The packed region ID can’t.
Slide 86 — 00:32:24
📌 要点汇总
- 位掩码压缩导致双线性过滤无法直接应用
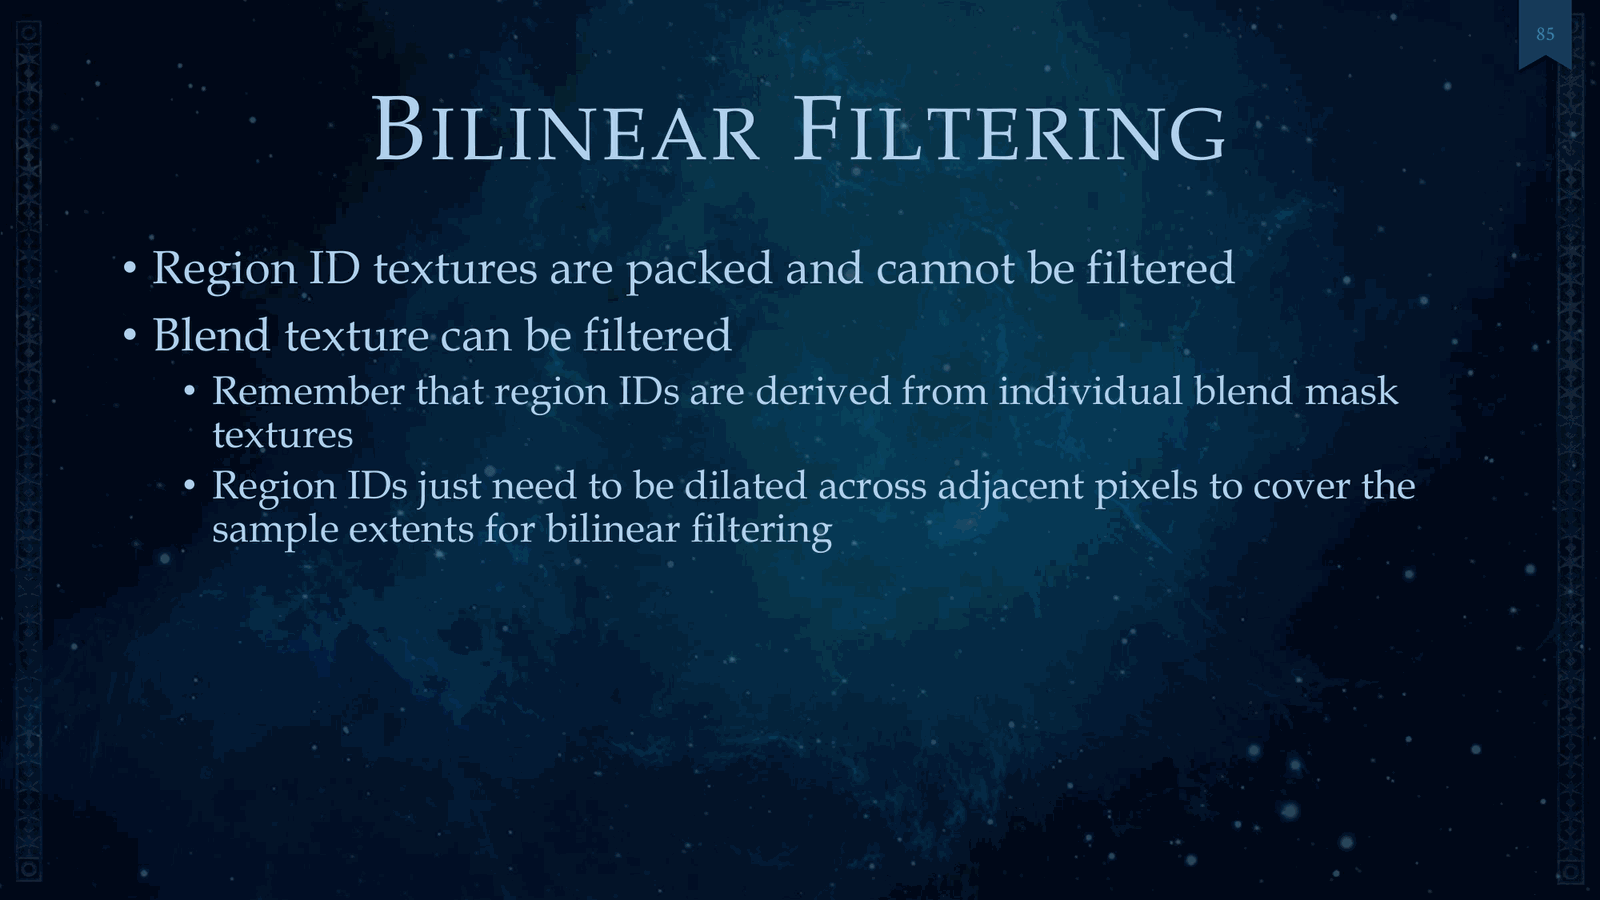
- 区域ID纹理无法进行过滤处理
- 通过正确方法可使混合纹理实现有效过滤
- 需要特别注意纹理压缩与过滤的兼容性问题
Be compressed because it’s a packed bit mask. So the question here is bilinear filtering, right? That’s not going to work. And of course, we can’t filter the region ID textures. But if we do a couple right things, the blend texture can be. So as a reminder here.
Slide 87 — 00:32:46
📌 要点汇总
- 区域ID和混合值由单个混合掩码纹理驱动
- 需要对区域ID进行膨胀处理以覆盖双线性过滤的采样范围
- 膨胀后混合纹理即可进行有效过滤
That the region IDs and the blends, right, is drive from an individual blend mask texture. So all we need to do is dilate the region IDs across adjacent pixels to cover the sample extents for bilinear filtering. So as soon as you dilate those, then the blend texture can be filtered.
Slide 88 — 00:33:08
📌 要点汇总
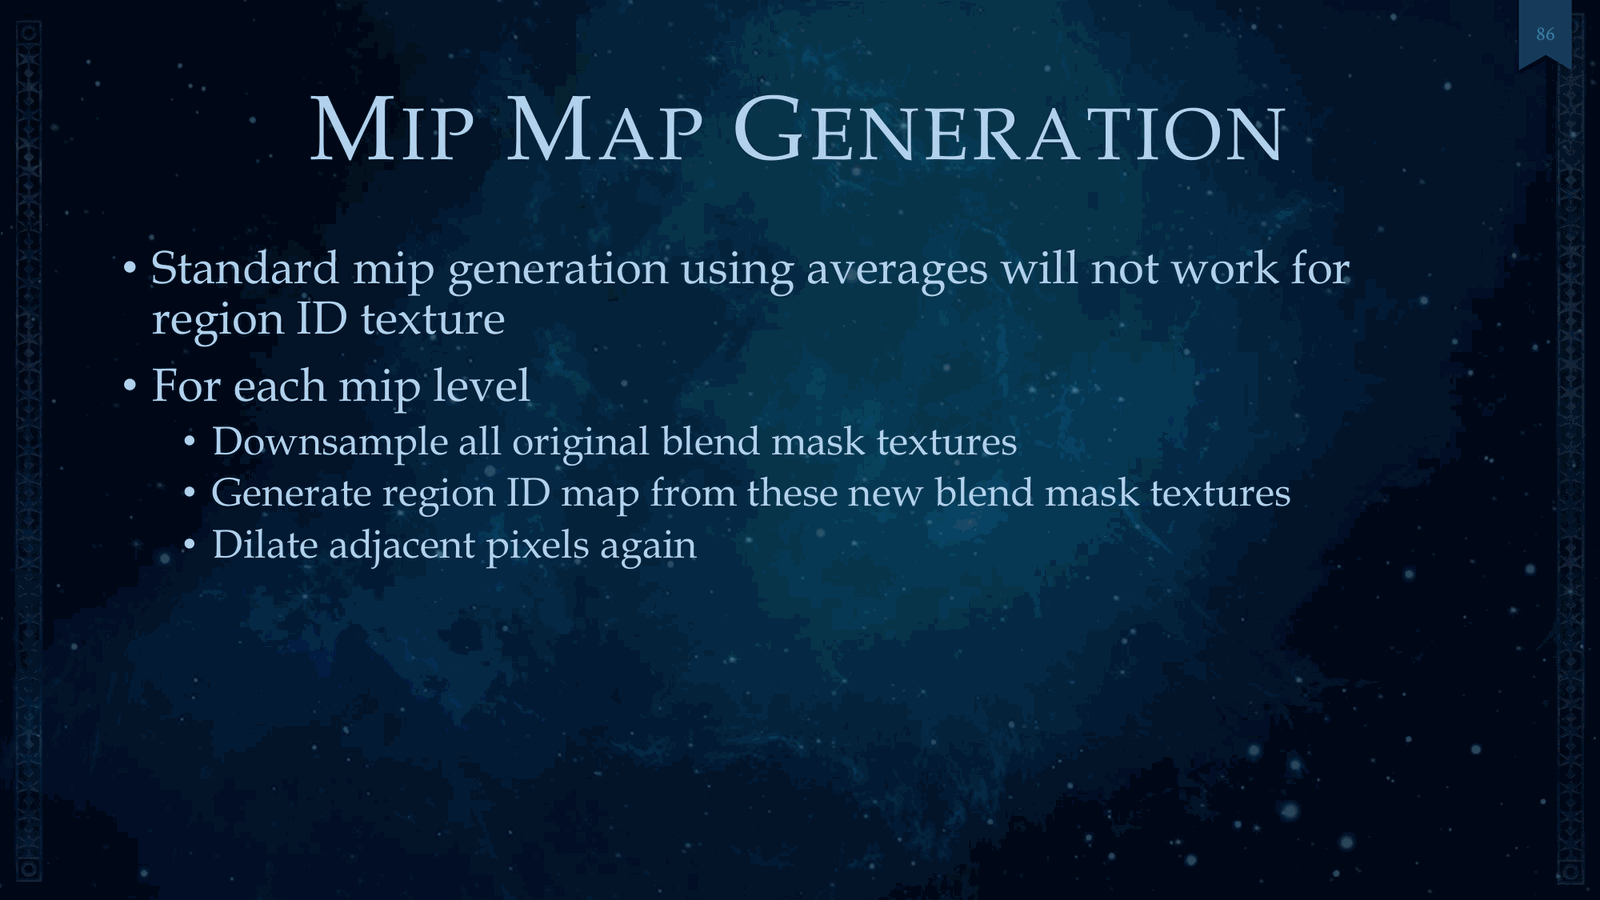
- Mip map生成时简单平均方法效果不佳
- 每个mip层级需重新开始处理
- 需对原始混合遮罩纹理进行下采样
- 从新生成区域ID地图并再次膨胀像素
Also, mip map doesn’t work so great, and so we we can’t just use a simple average to to generate these. And so, what we do here is we start over on each mip map level. You downsample the original blend mask textures. You generate a region ID map from these new blend mask textures, and then you dilate the pixels again.
Slide 89 — 00:33:30
📌 要点汇总
- 每个像素仅采样两个布料区域,尽管有十六个可用
- 代码示例展示了发散纹理读取的实现
- 在 HLSL 中需使用特定方法处理发散纹理读取
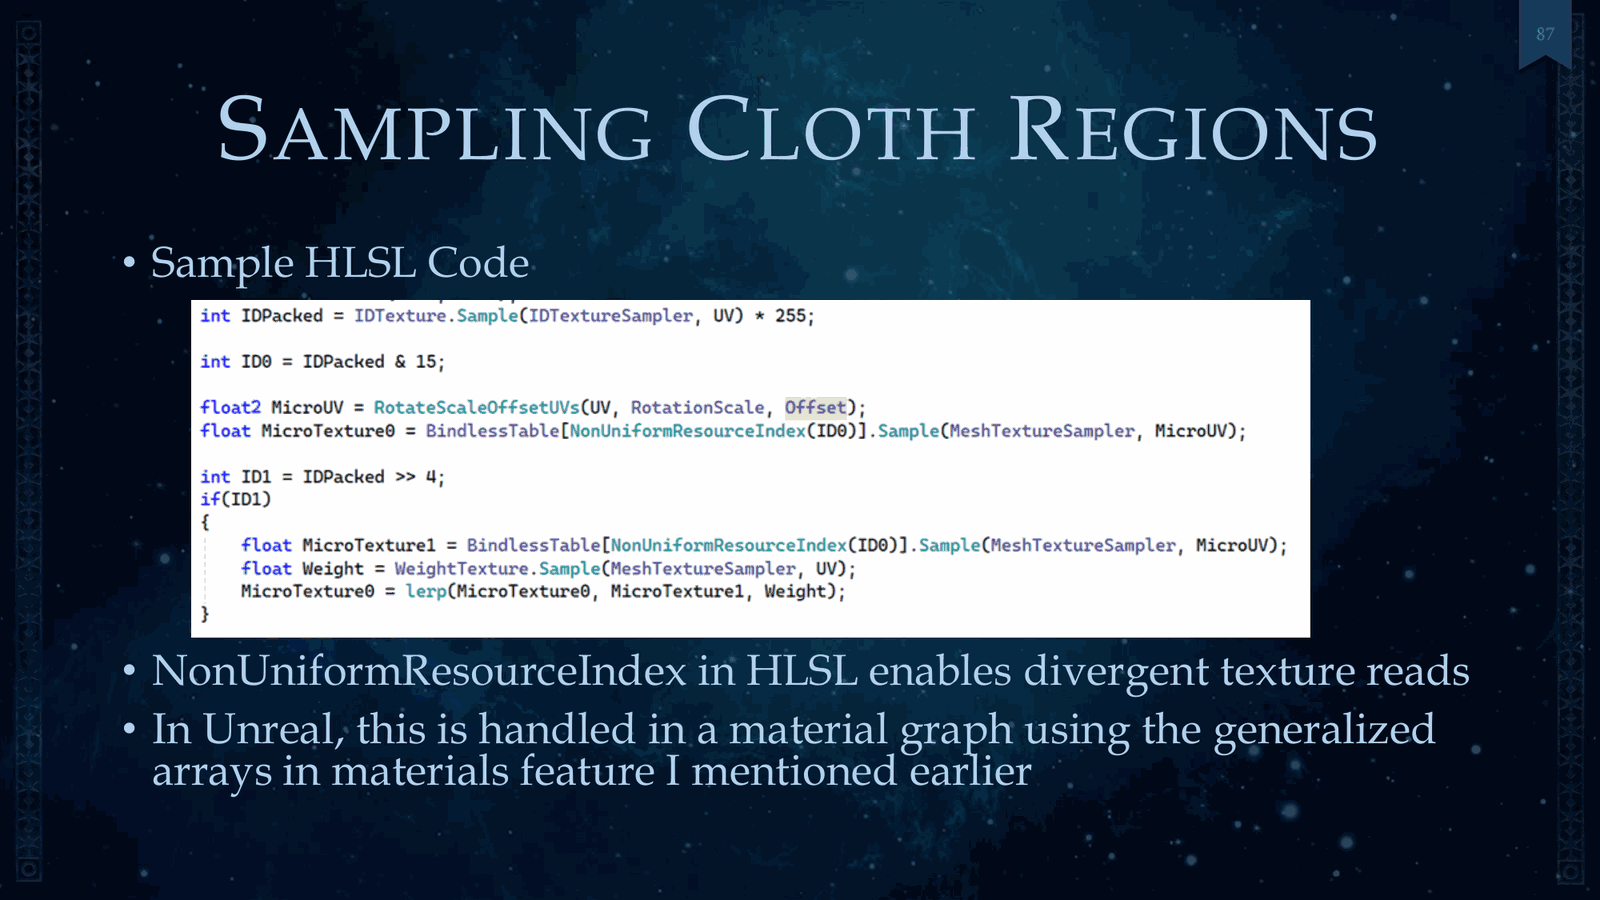
So, sampling these cloth regions, right? I mean, we have sixteen available, but we only sample two of these per pixel. And so, here’s some example code of this in action. The thing to note here is it’s a divergent texture read. So, in HLSL, we had to use.
Slide 90 — 00:33:52
📌 要点汇总
- 使用 non-uniform resource index 可实现分散的纹理读取
- Unreal 中通过材质图中的通用数组功能处理该特性
- 需要对材质层和层信息进行泛化处理
Use the following keyword: non-uniform resource index. And this enables divergent texture reads. In Unreal, this is handled in a material graph using the generalized arrays in the materials feature that I mentioned earlier. So, as part of this, we have to generalize the layer, the layer info.
Slide 91 — 00:34:14
📌 要点汇总
- 需要保持相同的代码以确保UV变换的一致性
- 采用2x2旋转缩放矩阵和偏置来简化变换过程
- 提供了一个简单的代码示例用于实现
- 依赖PBR(基于物理的渲染)概念以支持多种布料材质
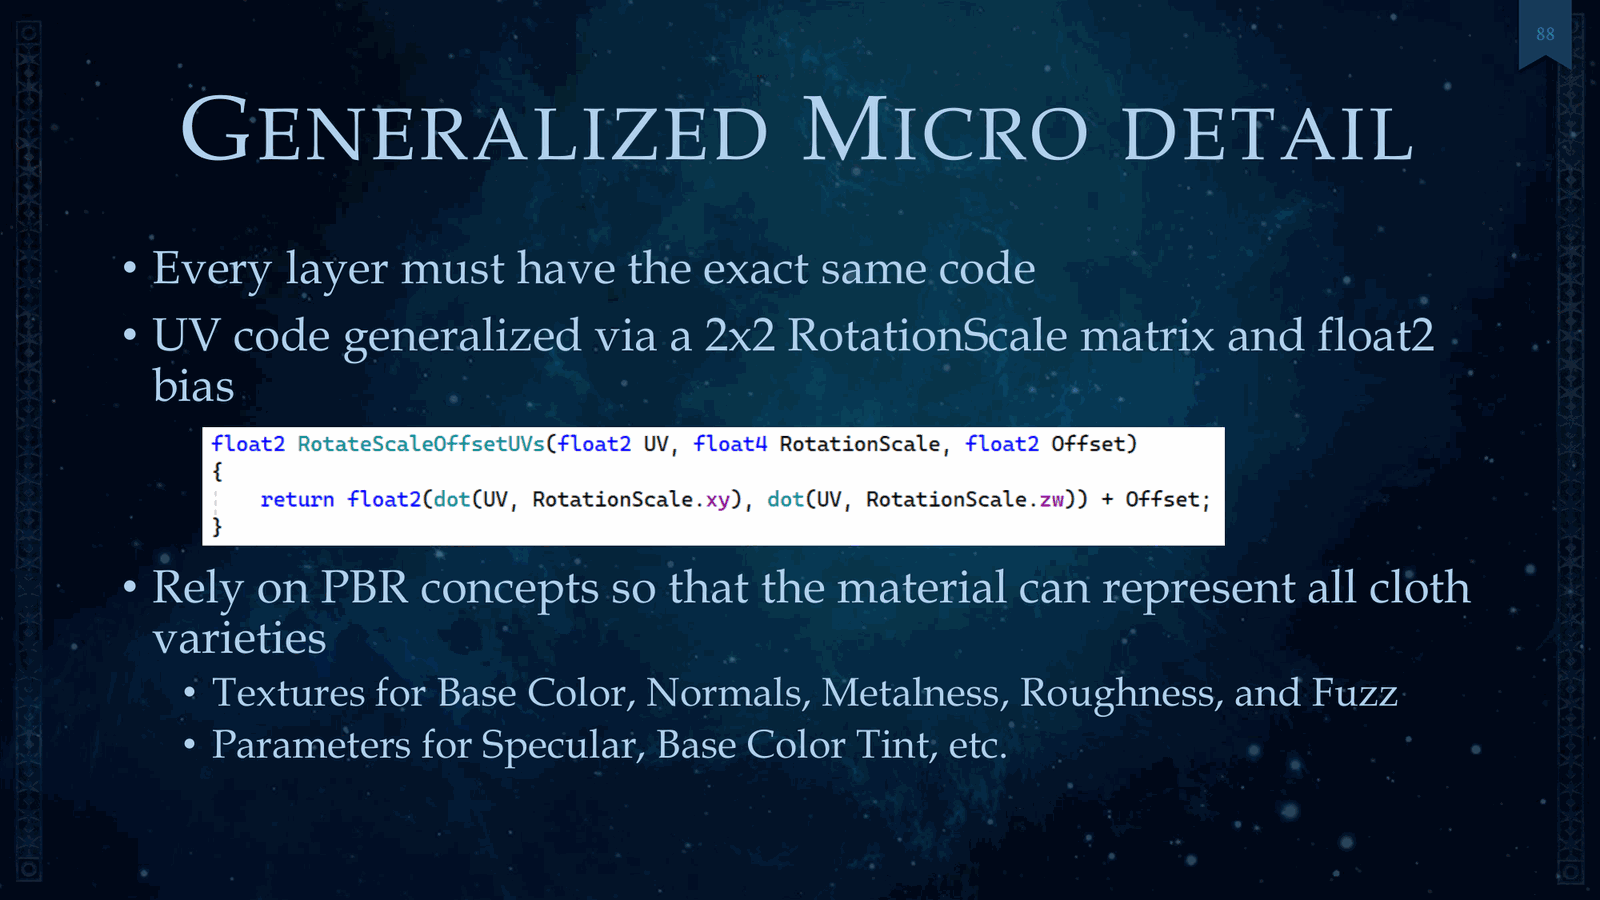
It must have the same code, and so for UVs, we wanted all the number of transformations that were reasonable. And so you just bake it to a 2x2 rotation scale matrix and a bias, and a very simple code example below. And then we also rely upon PBR concepts, so the material can represent all cloth varieties. I mentioned that before.
Slide 92 — 00:34:36
📌 要点汇总
- 当前仅支持基础颜色、法线、金属度、粗糙度和模糊度等纹理参数
- 包含高光颜色、基础颜色色调等参数的设置
- 左侧展示了绘制区域的遮罩图,用于控制材质应用范围
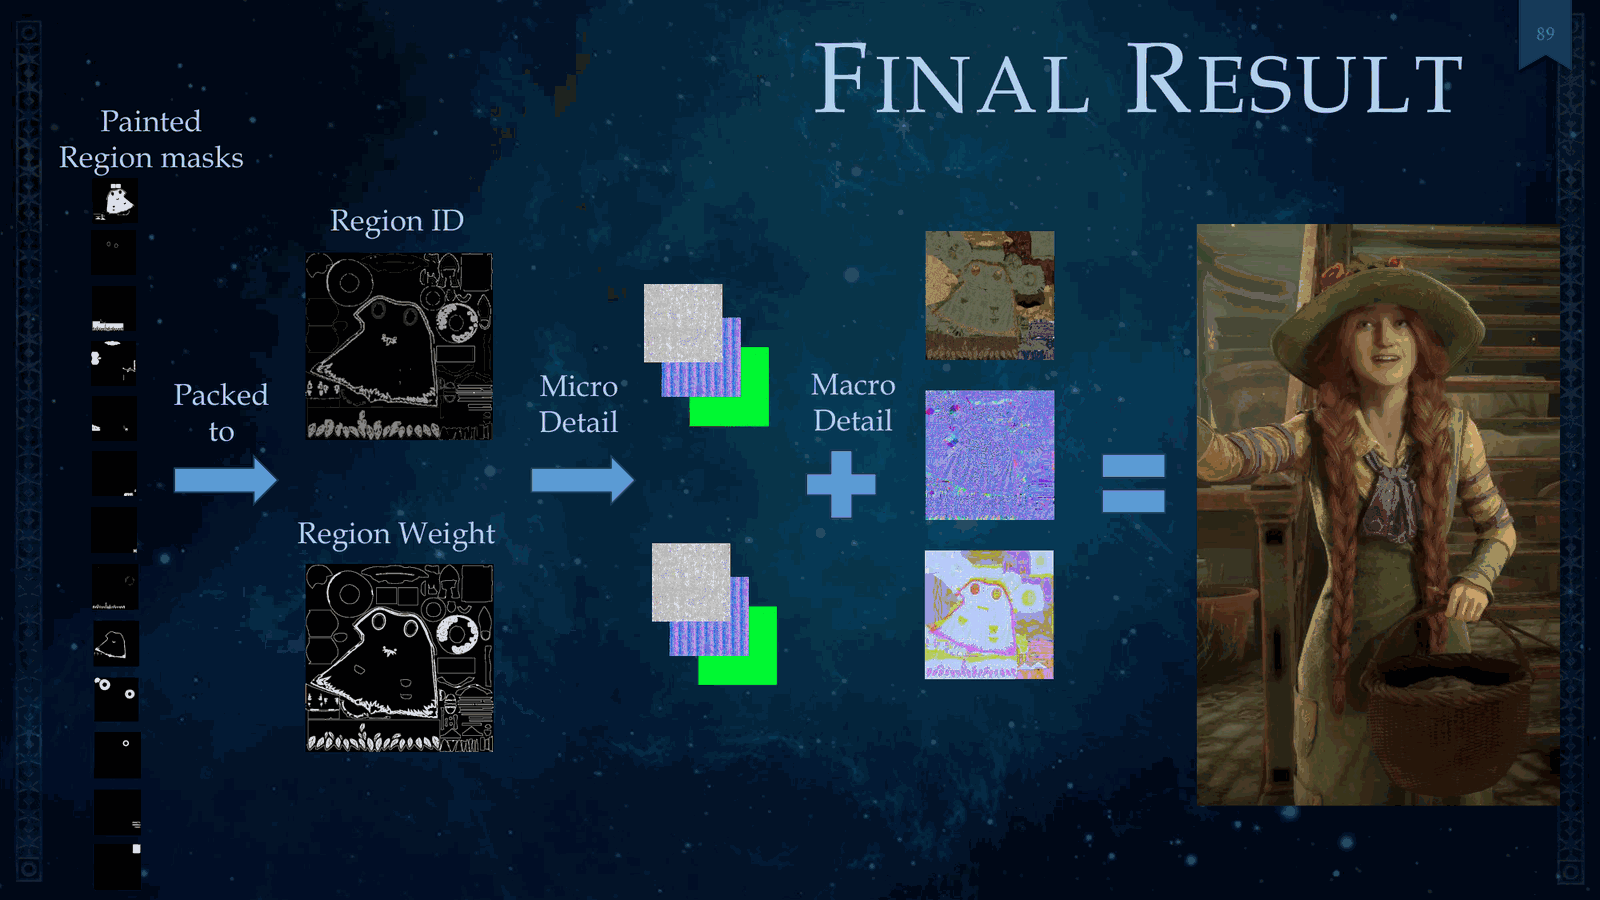
But we just have textures for base color, normals, metalness, roughness, and fuzz, and then parameters for specular color, base color tint, etc. So now we’ve got a top-level view of exactly what happened to do all this. So we have our painted region mask on the left, and.
Slide 93 — 00:34:58

📌 要点汇总
- 使用区域ID和权重纹理来离线打包微细节层
- 在像素着色器中读取并用于索引微细节层
- 微细节层与宏观细节结合生成最终渲染结果
Those are offline packed, right, to the region ID and the region weight textures. Those are read in the pixel shader, and those are used to index into the two micro-detail layers for that pixel, combined with the macro-detail, and you’ve got the result on the right.
Slide 94 — 00:35:20
📌 要点汇总
- 使用发散纹理读取可能导致部分图形硬件性能下降
- 展示了领结等细节的拼贴图,用于视觉呈现效果
- 存在性能优化的挑战,需关注硬件兼容性问题
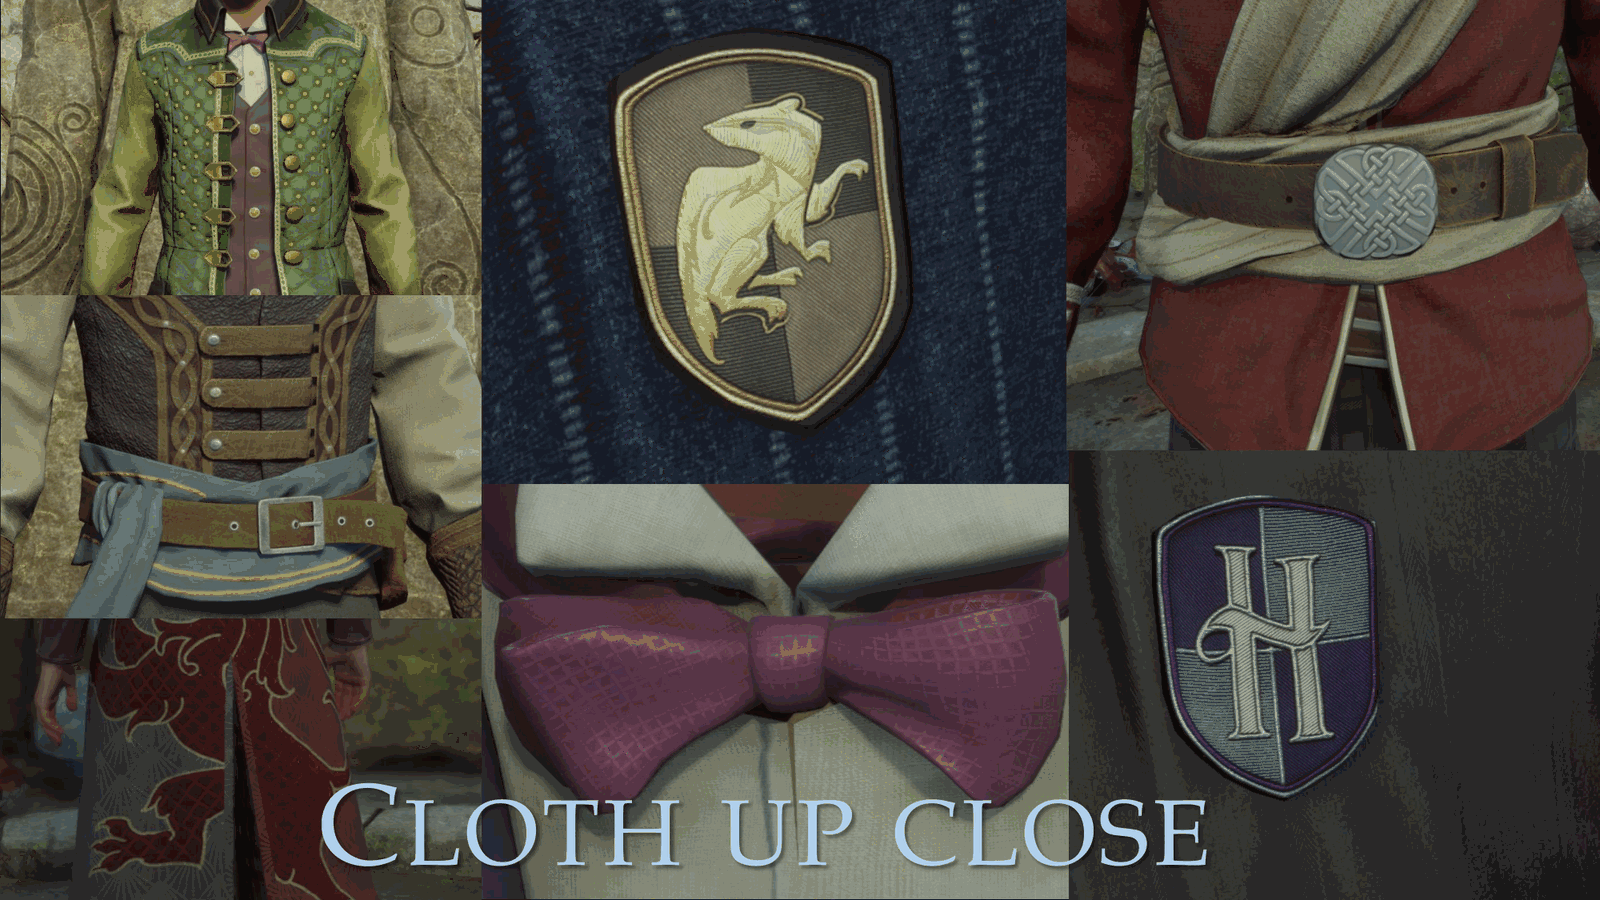
And to also show how cool that looks, I’ve got a collage of all the different details that we have on these, especially the bow tie. So there’s a couple disadvantages here, right? We’re using divergent texture reads, and this can be slow on on some graphics hardware.
Slide 95 — 00:35:42
📌 要点汇总
- 低 mip 映射在区域边缘可能出现渗色问题
- 使用四边形点时,仅两层像素难以实现良好混合
- 为节省性能,只能绕过这些问题
- 该方法仍具有显著优势
Also, your low mip maps can have bleeding problems on region edges. Also, try or quad points between regions don’t blend well with only two layers per pixel. And because of the performance saves and everything else, we just had to work around those. There are some pretty big advantages to this approach.
Slide 96 — 00:36:04
📌 要点汇总
- 不再对材质中的16层进行采样
- 非打包版本包含3个PBR纹理和1个遮罩纹理,乘以16层最多产生64个纹理采样
- 打包版本中,两个层共使用3个PBR纹理
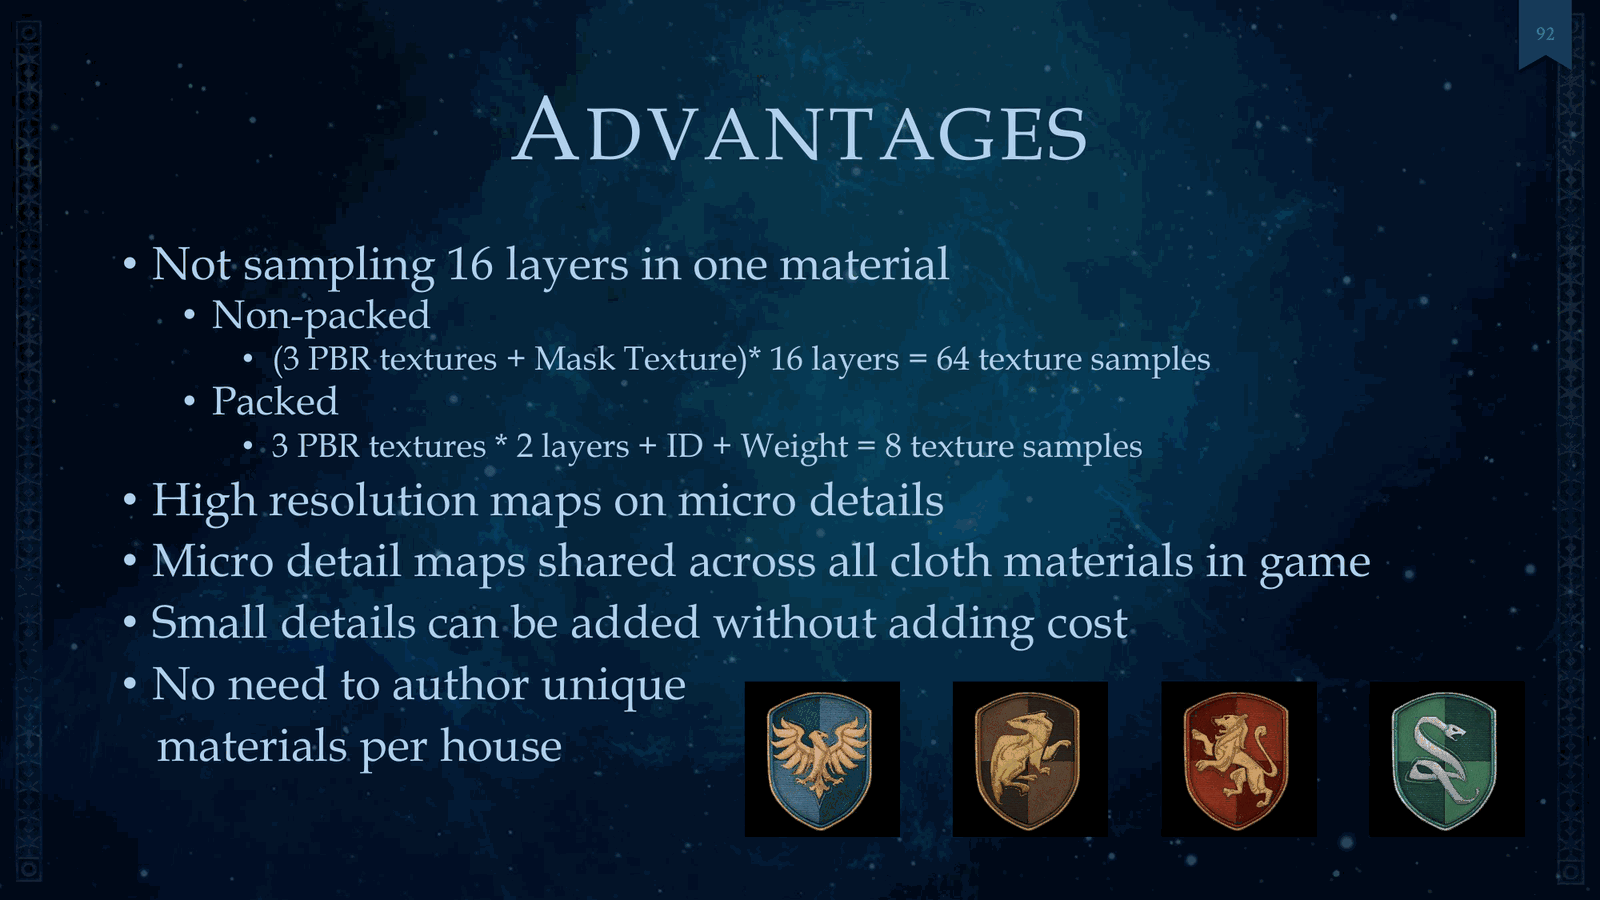
First of all, we’re not sampling 16 layers in a material anymore. If you consider the non-packed version, you have three PBR textures and your mask texture. That’s multiplied by 16 layers. You’ve got up to 64 texture samples. With the packed version, we’ve got three PBR textures for two layers, right?
Slide 97 — 00:36:26
📌 要点汇总
- 最坏情况下,需要一个 ID 和一个权重纹理,总共需要八次纹理采样
- 该方法可生成高分辨率的微细节贴图
- 微细节贴图可跨所有服装材质共享
- 项目中共使用了超过一千张贴图
Worst case, an ID and a weight texture, and that adds up to eight texture samples. Also, using this approach, we get high-resolution maps on your micro details. Also, we can share those micro detail maps across all cloth materials in the game. And as to note, we had over a thousand.
Slide 98 — 00:36:48
📌 要点汇总
- 可以在不增加成本的情况下添加小细节
- 通过使用新的区域 ID 来实现额外细节层
- 每个学院可提供独特的材质,无需额外成本
Of these textures used for Hogwarts Legacy, and also small details can be added without adding cost. So, someone saying, “Hey, I need an extra detail layer here,” I’ve got a new region ID, right? You paint it in, right? There’s there’s not a significant increase in cost for that. It also allowed us to offer unique materials per house, shown here. No no need to.
Slide 99 — 00:37:10

📌 要点汇总
- 需要为每个房屋创建独特素材
- 通过自动化优化GPU性能
- 已有优化仍需进一步改进内容与代码
- 游戏规模庞大,优化工作复杂
Author unique materials per house. So that was a lot. We’re going to now just spend a little bit of time optimizing GPU performance using automation. So despite all of these mentioned optimizations, more optimizations were needed from both content and code. It’s a really big game, and so.
Slide 100 — 00:37:32
📌 要点汇总
- 使用自动化测试来确保性能预算达成
- Avalanche 拥有独立的自动化测试系统,每天运行多次
- 测试覆盖全球,数量超过 300 项
- 每天三次使用录制视频进行摄像头旋转测试
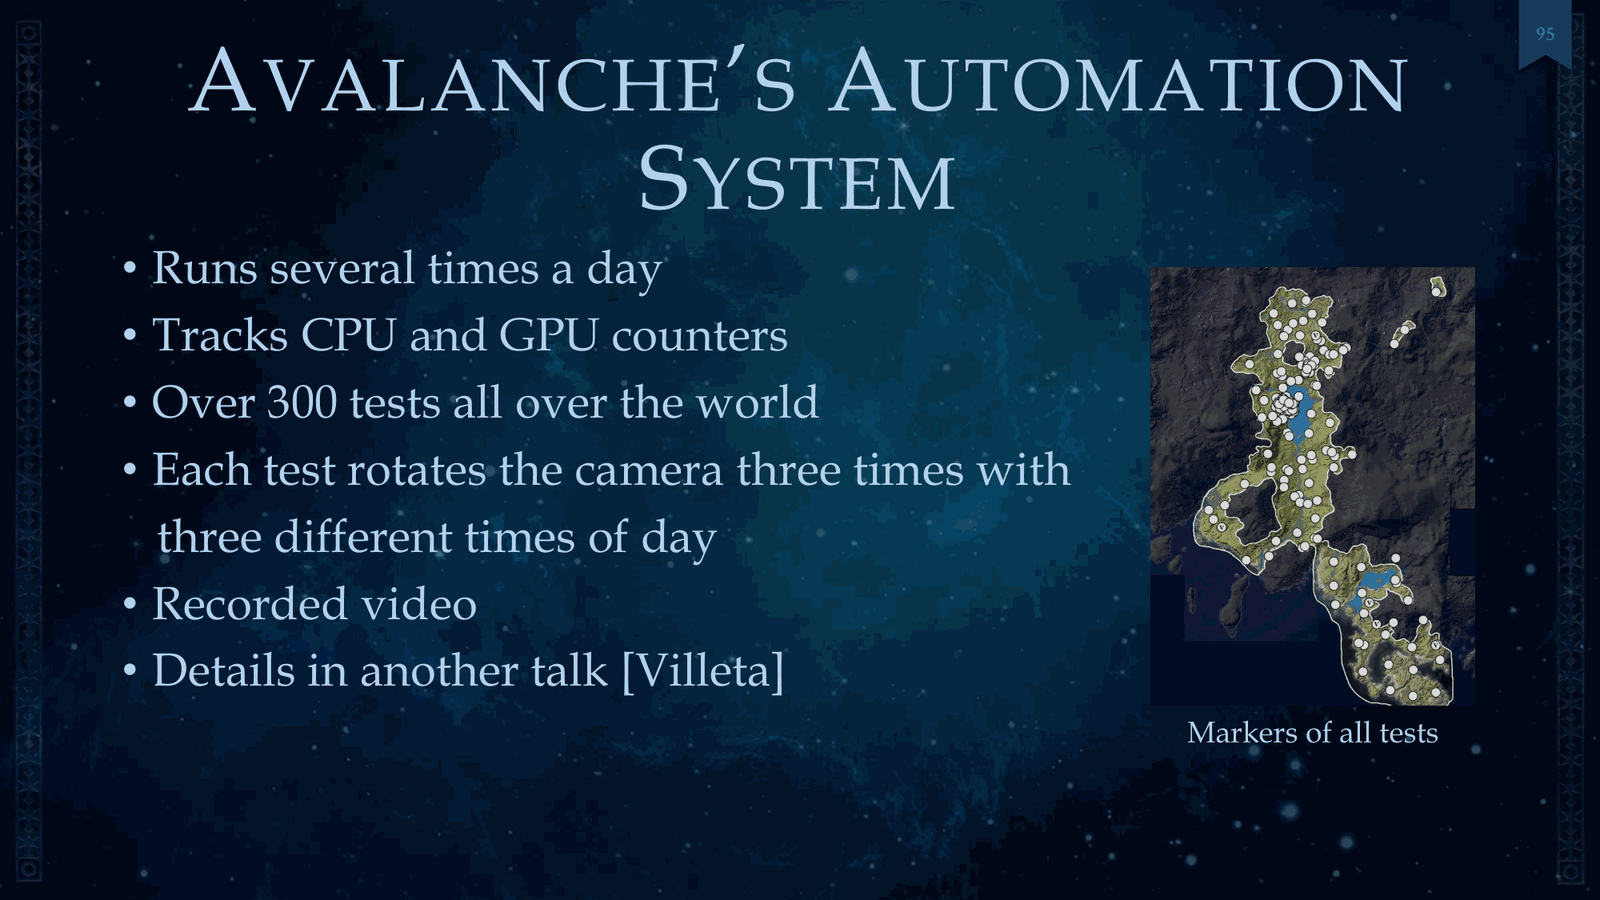
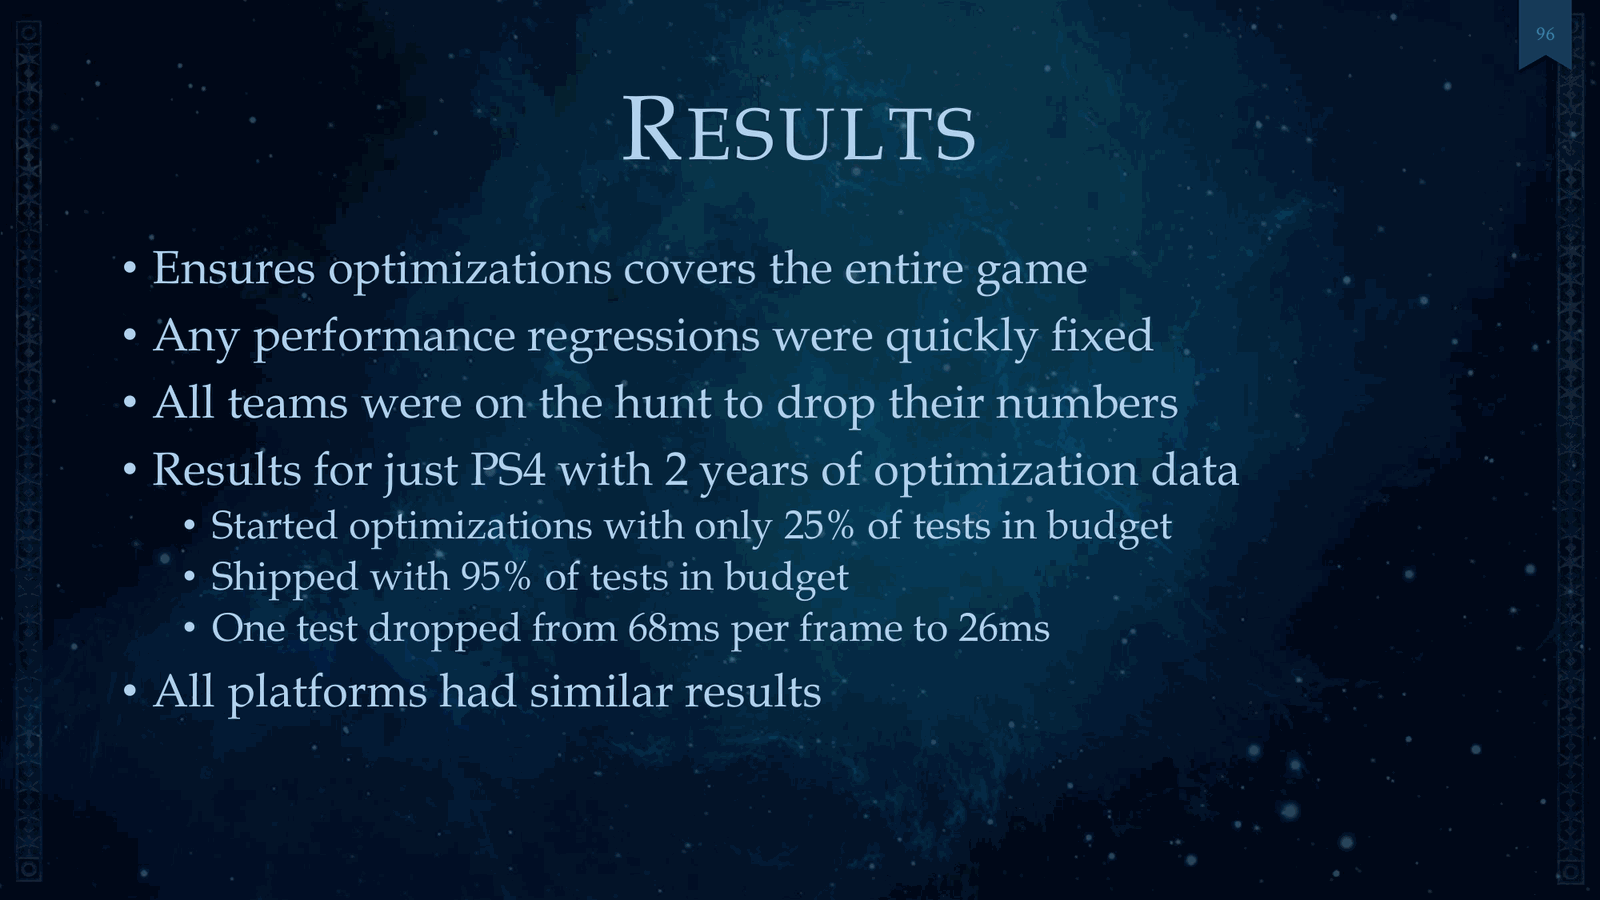
We use automation tests to help us reach our performance budgets. So Avalanche had their own automation system. This is ran several times a day. It tracks CPU and GPU counters. There’s over 300 tests all throughout the world. You can see that on the right. We rotate the camera with three times a day with recorded video. And.
Slide 101 — 00:37:54
📌 要点汇总
- 由于细节在另一场演讲中,此处仅分享结果
- 优化覆盖了游戏所有区域,包括不常关注的部分
- 所有性能退化问题均被迅速修复
I can’t share too much because all those details are in another talk. So I’m just going to share the results. So this ensures optimizations cover the entire game, even those weird areas, right, that no one looks at. Any performance regressions were quickly fixed, right? All.
Slide 102 — 00:38:16
📌 要点汇总
- 项目团队致力于降低开发成本并优化资源分配
- 初始阶段仅有25%的测试在预算范围内
- 经过两年优化后,95%的测试均控制在预算内
Teams were also on the hunt to drop their numbers. Everyone was assigned a spot, and they’re looking over it. Results here for PS4: We had I just narrowed it around two years of optimization data. We started with only 25% of our tests in budget. After that time, 95% of our tests were in budget, and.
Slide 103 — 00:38:38
📌 要点汇总
- 某次测试将每帧处理时间从68毫秒降至26毫秒
- 该优化方案适用于所有平台
- VFX性能波动问题需要特别关注和解决
To show like really extreme examples, one test went from sixty-eight milliseconds per frame to twenty-six, and we could use this across all platforms. Right, we can get pretty good results. VFX was another interesting development because how do you fix your VFX spikes, right? Especially since this.
Slide 104 — 00:39:00
📌 要点汇总
- 自动化检测出50毫秒的性能尖峰问题
- 通过测试和优化,将尖峰时间降低至3毫秒以下
- 图表展示了GPU渲染半透明物体的时间变化情况
- 优化前后数据对比用于验证改进效果
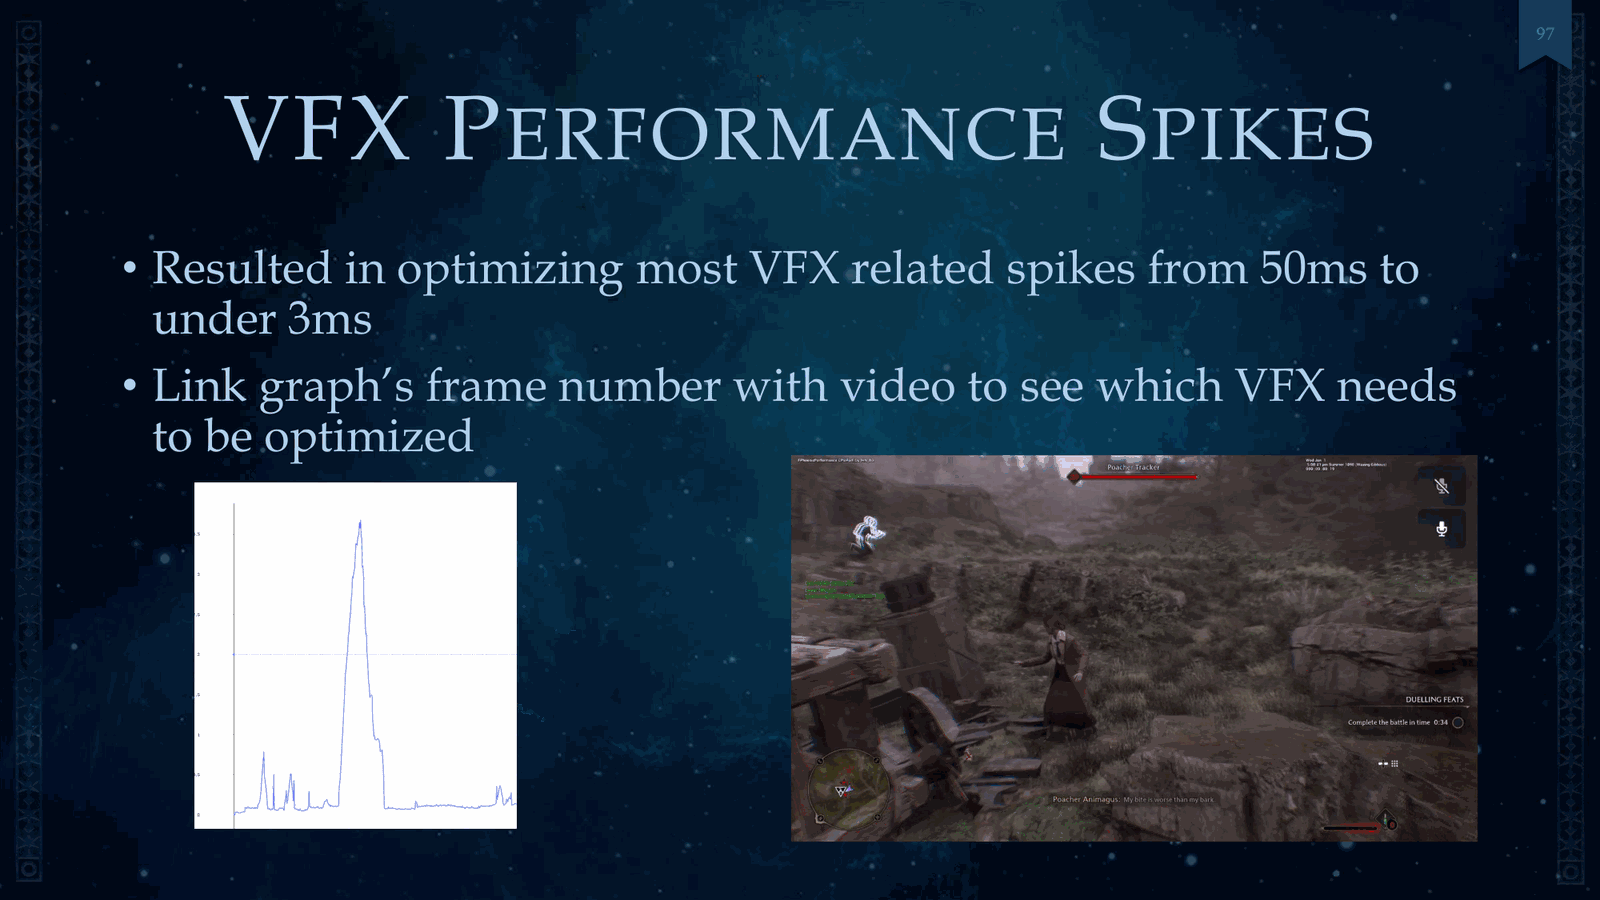
No one may know what they are, and so automation exposed these. So places where we had 50 millisecond spikes, with this information and additional testing and and everything else, we were able to reduce these to under three milliseconds. And shown here is a graph of the GPU time for rendering translucent, and we correlated that with our.
Slide 105 — 00:39:22
📌 要点汇总
- 视频自动化用于优化艺术家工作流程
- 平台自动化对系统调整和扩展至关重要
- 可在不同平台间调整可扩展性设置
- 平台再次被用于展示自动化效果
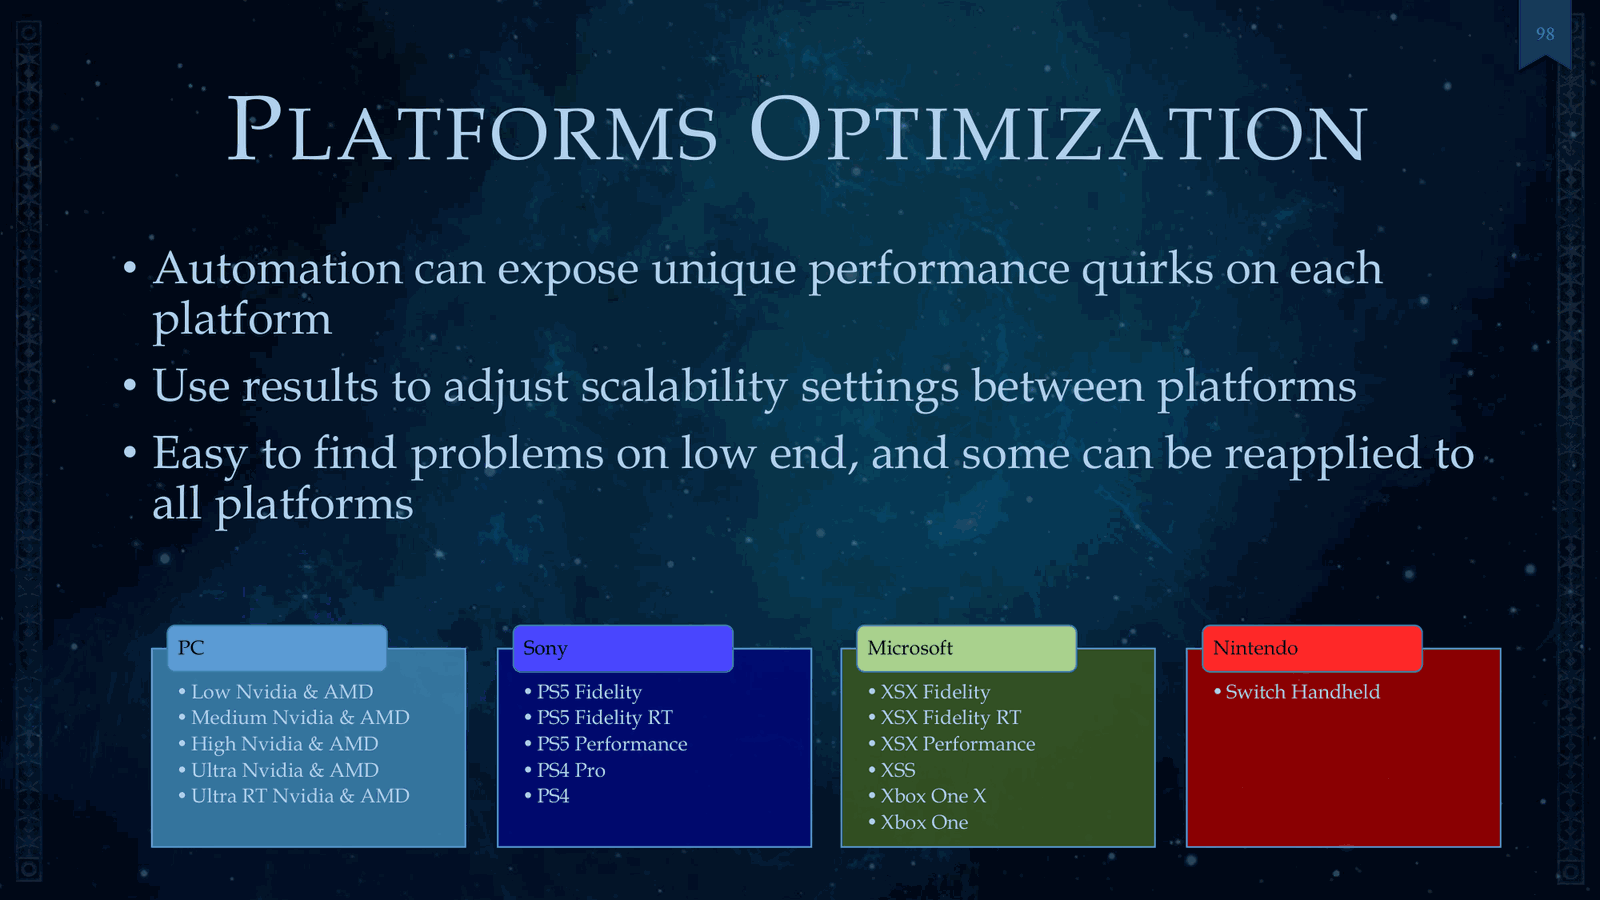
Our video in automation, and the artists use that to optimize. Platforms automation was also really important with automation. This allowed us to adjust scalability settings between platforms. And shown here are platforms again. So we use.
Slide 106 — 00:39:44
📌 要点汇总
- 通常选择低端平台进行性能问题排查,便于发现和优化
- 优化措施大多可适用于所有平台,带来显著好处
- 此后内容将减少技术细节,更多展示游戏本身
Usually, take the low-end platform. They’re really easy to find performance problems, and then we reapply those optimizations. And most could be also applied to all of them, so that was a big benefit too. So now we’ve got the part where we show off the game a little bit more, a little bit less technical details. I’d like to share our.
Slide 107 — 00:40:06
📌 要点汇总
- 时间周期为48分钟,太阳轨迹固定不变
- 提到视觉技术包括时间、季节、材质变换、天气、动态画作和云层
- 每个功能将分别详细介绍
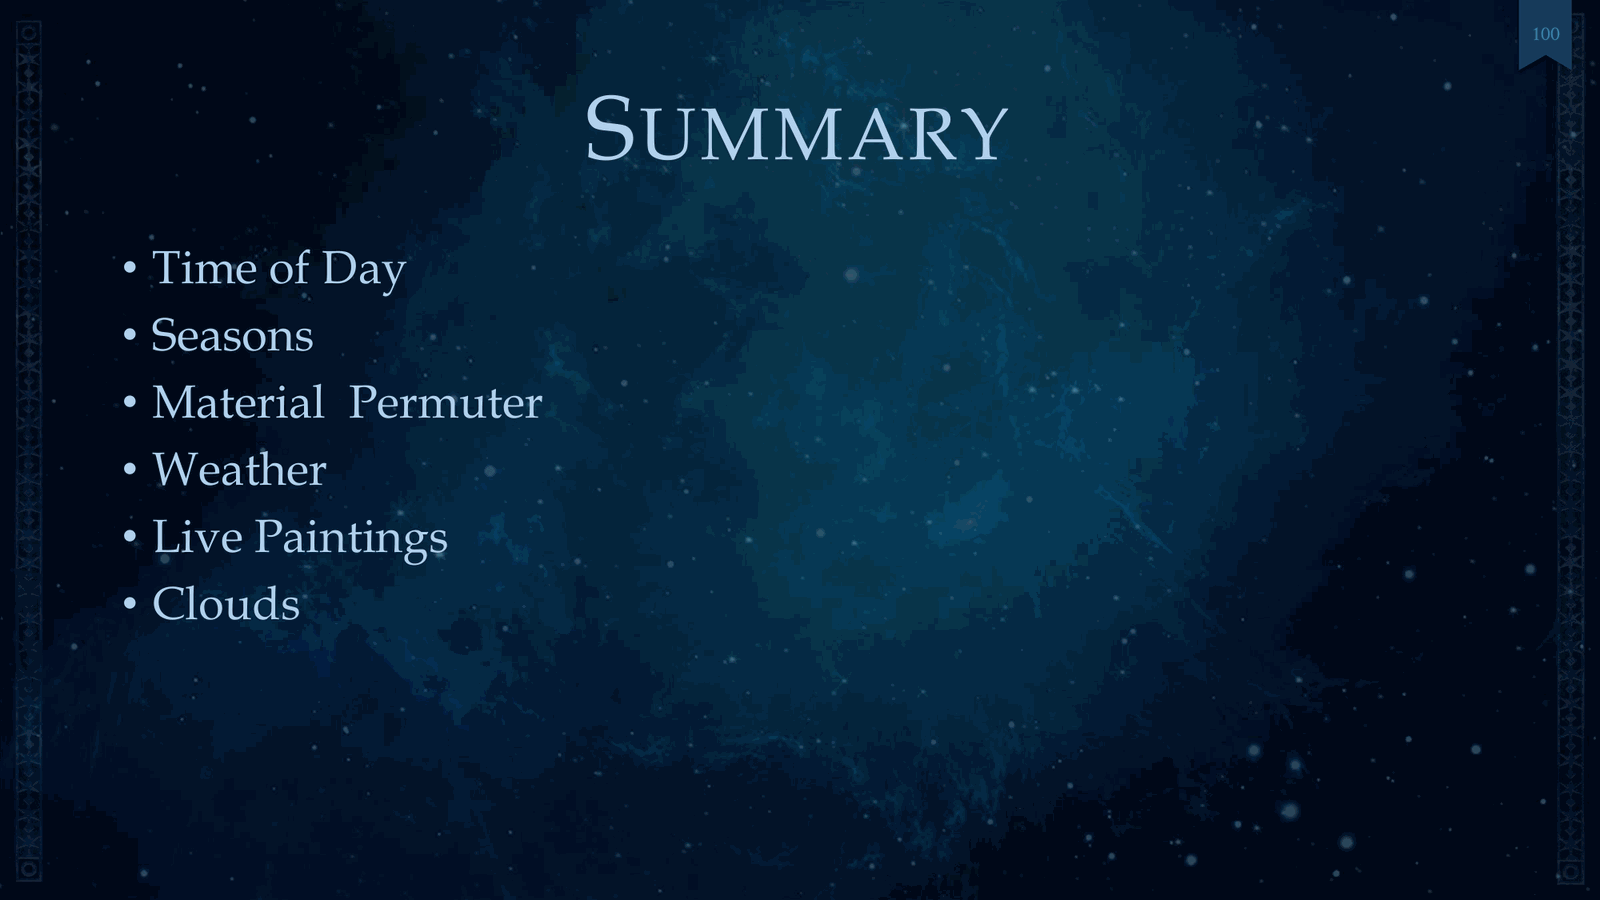
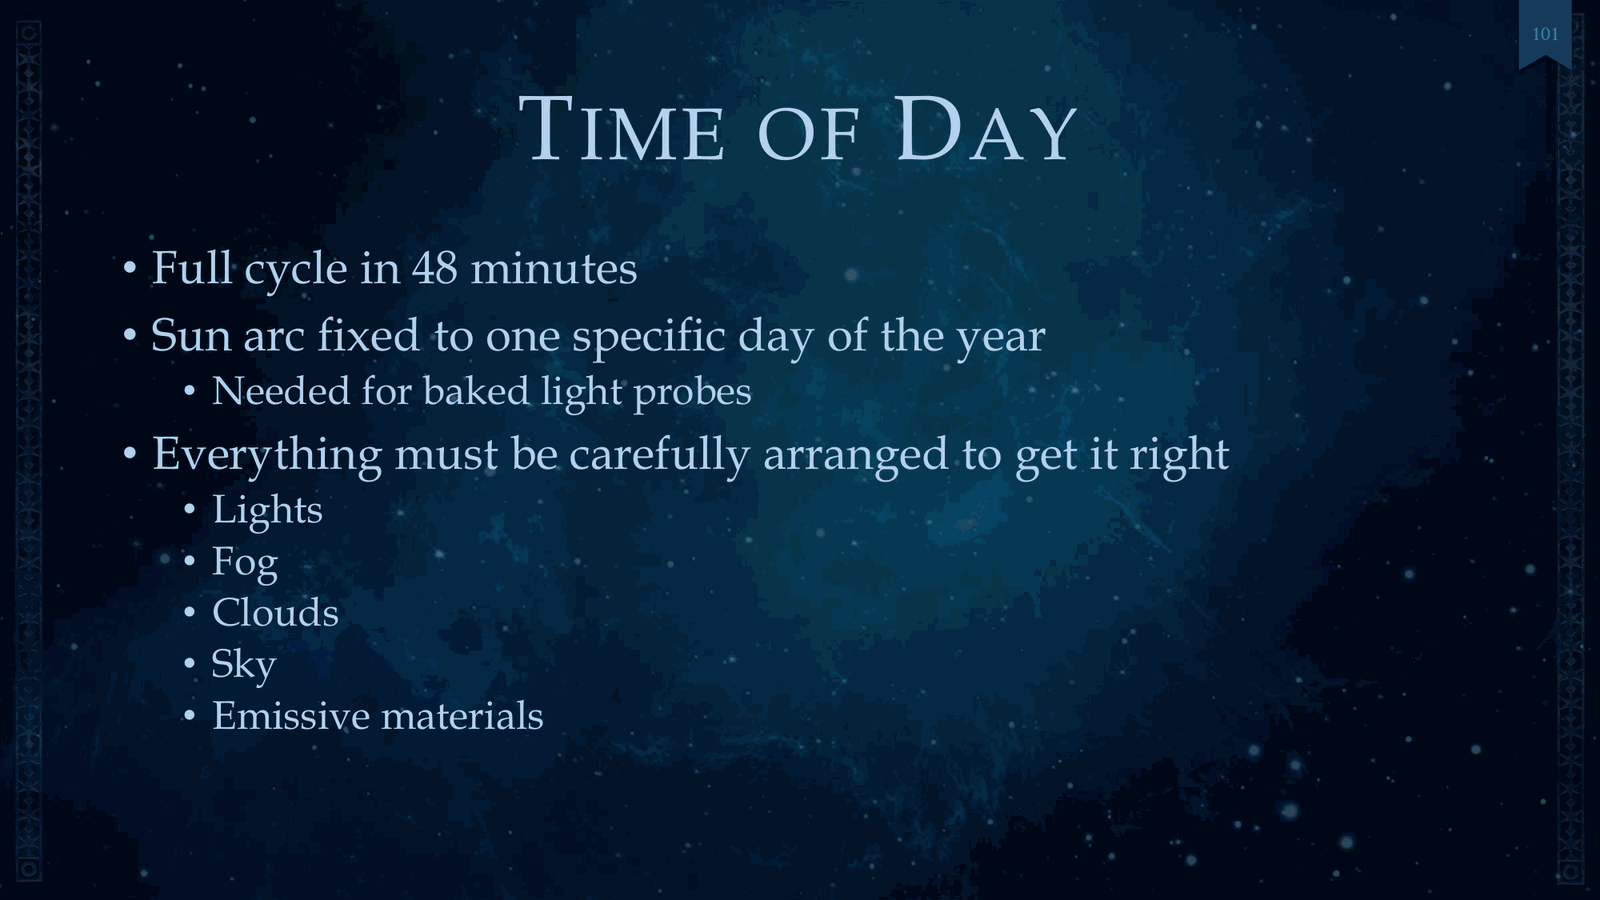
Visual techniques developed for Hogwarts Legacy. So these are the features: time of day, seasons, material permuter, weather, live paintings, and clouds. And we’re going to share details on each of these. So I mentioned a couple times the full cycle of time of day, 48 minutes, and we are limited to a sun arc fixed to once.
Slide 108 — 00:40:28
📌 要点汇总
- 需要设置正确的日期和时间以确保光照效果准确
- 调整灯光、雾、云、天空和发光材质以匹配时间设定
- 提供了24小时时间流逝的演示效果
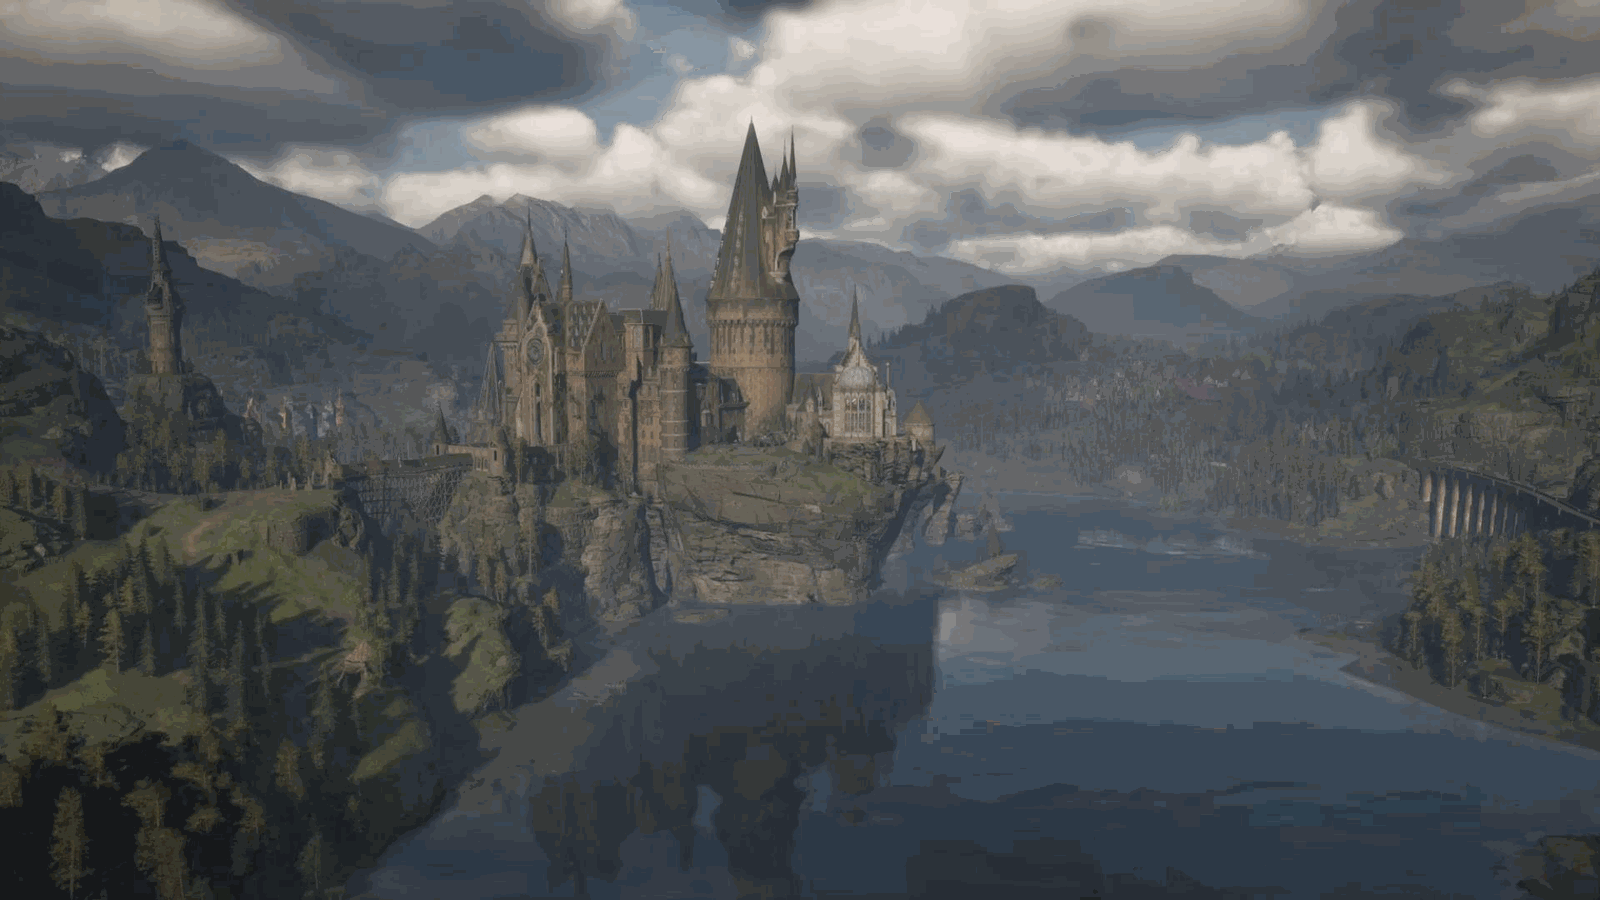
Day of the year. This was for because we had to do it for our baked light probes, and to get the results and a good time of day, we had to make sure everything was arranged correctly. This included adjusting lights, fog, clouds, sky, and emissive materials. And here I’ve got a time lapse of what it looks like a full 24 hours.
Slide 109 — 00:40:50
📌 要点汇总
- (内容过短,无关键要点)
Cycle in the game.
Slide 110 — 00:41:12
📌 要点汇总
- 通过物理基础光照值实现灯光平衡
- 使用时间流逝效果展示晨雾和雨水细节
- 强调场景构建的精细程度和整体协调性
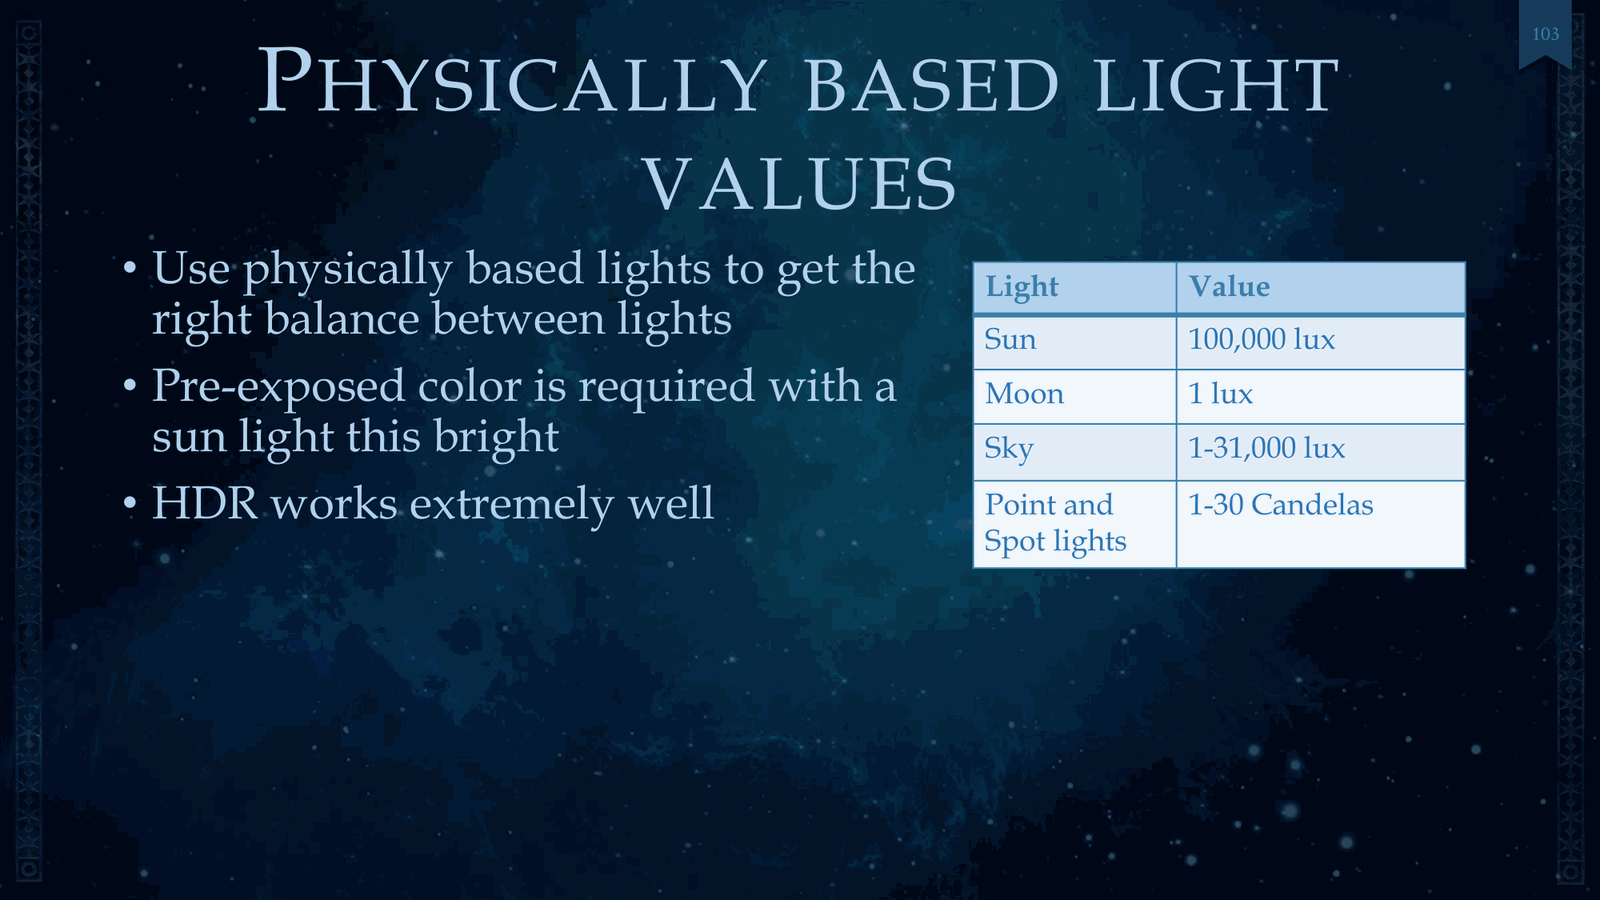
It was really neat seeing the fog in the morning. That’s kind of a fun touch that you can see in a time lapse. So we’re going to discuss how we put these pieces together, and they’re carefully put together. So first, we’ve got physically based light values. We use these to get the right balance between lights, and here’s the rain.
Slide 111 — 00:41:34
📌 要点汇总
- 太阳光照度高达10万lux,需使用预曝光色彩处理
- 物理基础渲染(HDR)在强光环境下表现优异
- 需对引擎进行部分修改以支持HDR效果
So the sun is a 100,000 lux. That’s a lot. You need pre-exposed color to handle sunlight this bright.
The good part here is that since they’re physically based, right? HDR works extremely well. Of course, with some modifications to the engine.
Slide 112 — 00:41:56
📌 要点汇总
- 引入了 ASUS SSTS 参数化音调曲线,用于调整 ASUS 亮度值以适应不同显示设备
- 该方法提升了不同显示设备的音调范围表现
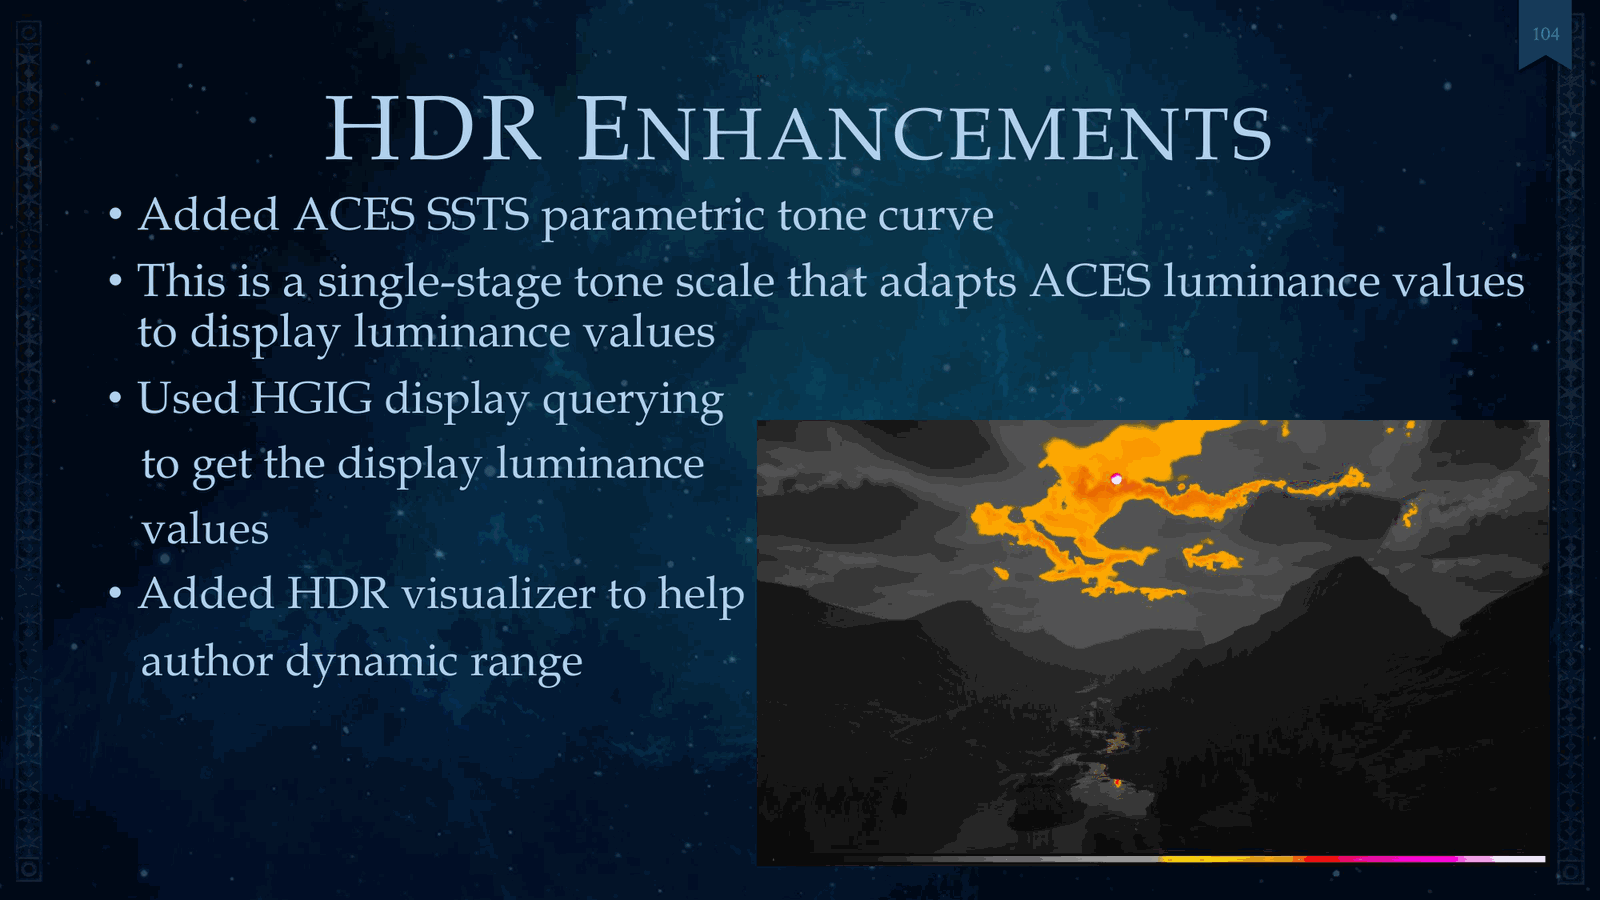
So, we added an ASUS SSTS parametric tone curve. Just a rough overview of that is: it’s just a single-stage tone scale that adapts your ASUS luminance values to your display.
And so, this gave us a lot better range for the individual display that people use.
Slide 113 — 00:42:19
📌 要点汇总
- 使用 H-Gig 显示器查询技术获取准确的亮度值
- 引入 HDR 视觉化工具辅助艺术家调整动态范围
- 强光环境下容易发现室内漏光问题
- 提供了一个体积示例用于演示问题
So we had to use H-Gig display querying to get the right luminance values, and also had an HDR visualizer for artists to help getting the right dynamic range.
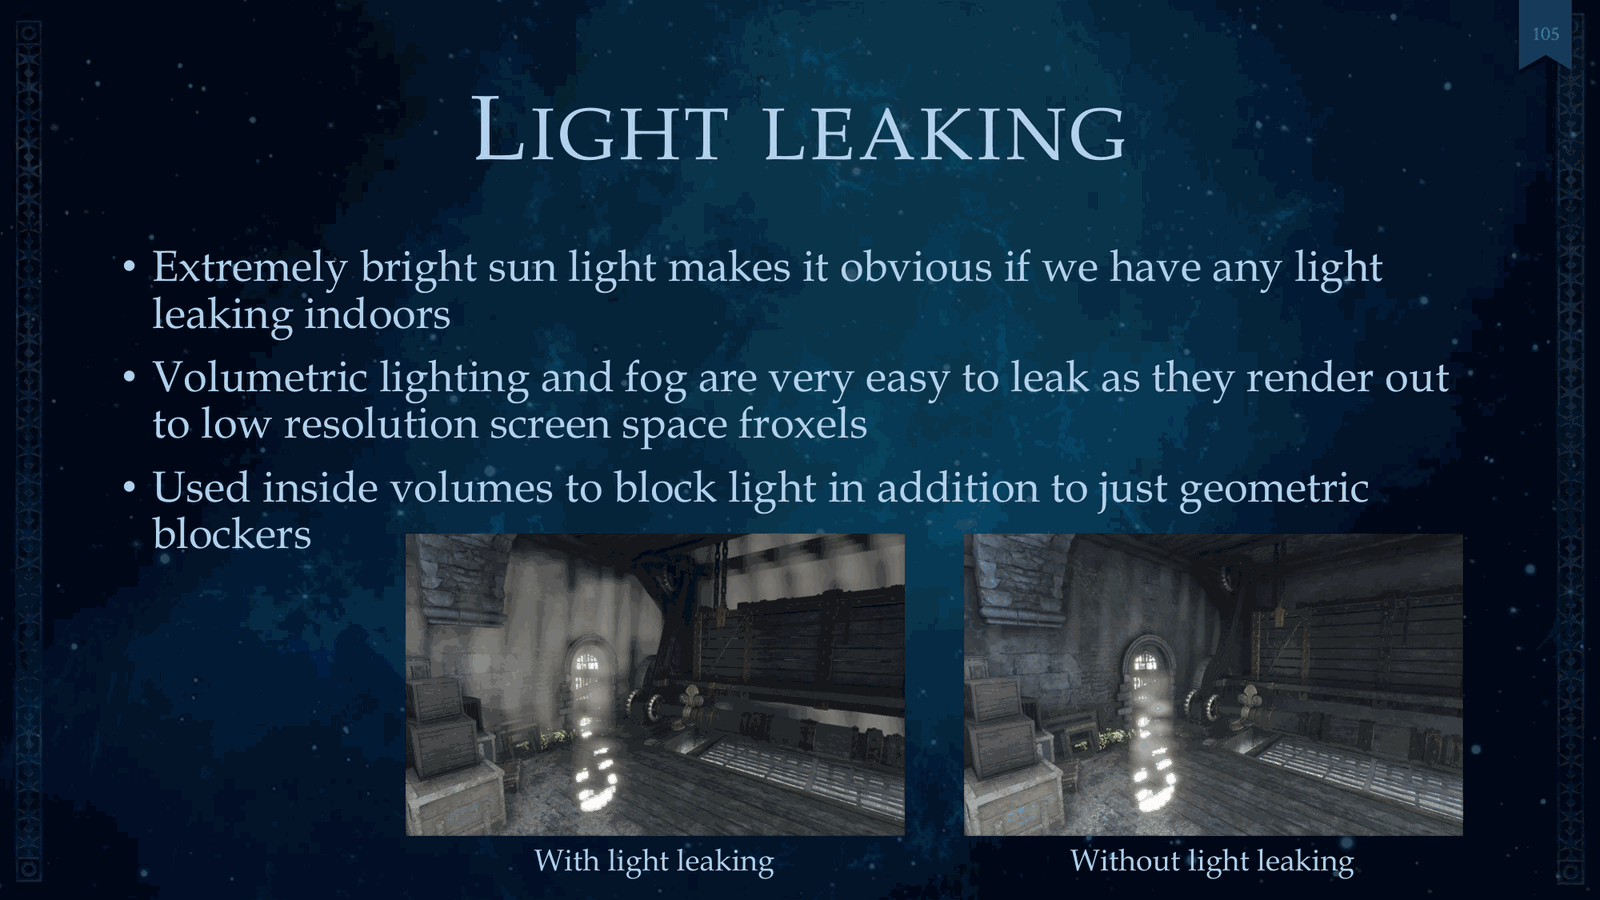
Unfortunately, with an extremely bright light sunlight, it makes it obvious if we have any light leaking indoors. So here we have an example of volume.
Slide 114 — 00:42:41
📌 要点汇总
- 几何光照和雾效容易出现泄漏问题
- 原因是渲染到低分辨率的屏幕空间 froxels
- 使用内部体积和几何阻挡物来减少光照泄漏
Geometric lighting and fog—it’s very easy to leak, and that’s because we render out to a low-resolution screen-space froxels.
So there was a lot of things we needed to do to fix that or reduce it, and so one of the examples here is we used inside volumes to block light, in addition to also adding geometric blockers.
Slide 115 — 00:43:03
📌 要点汇总
- 根据一天中的时间驱动了8个后期处理参数的曲线
- 与时间相关的光照有5条曲线,与太阳高度角相关的有3条曲线
- 使用了曝光补偿曲线来优化画面亮度
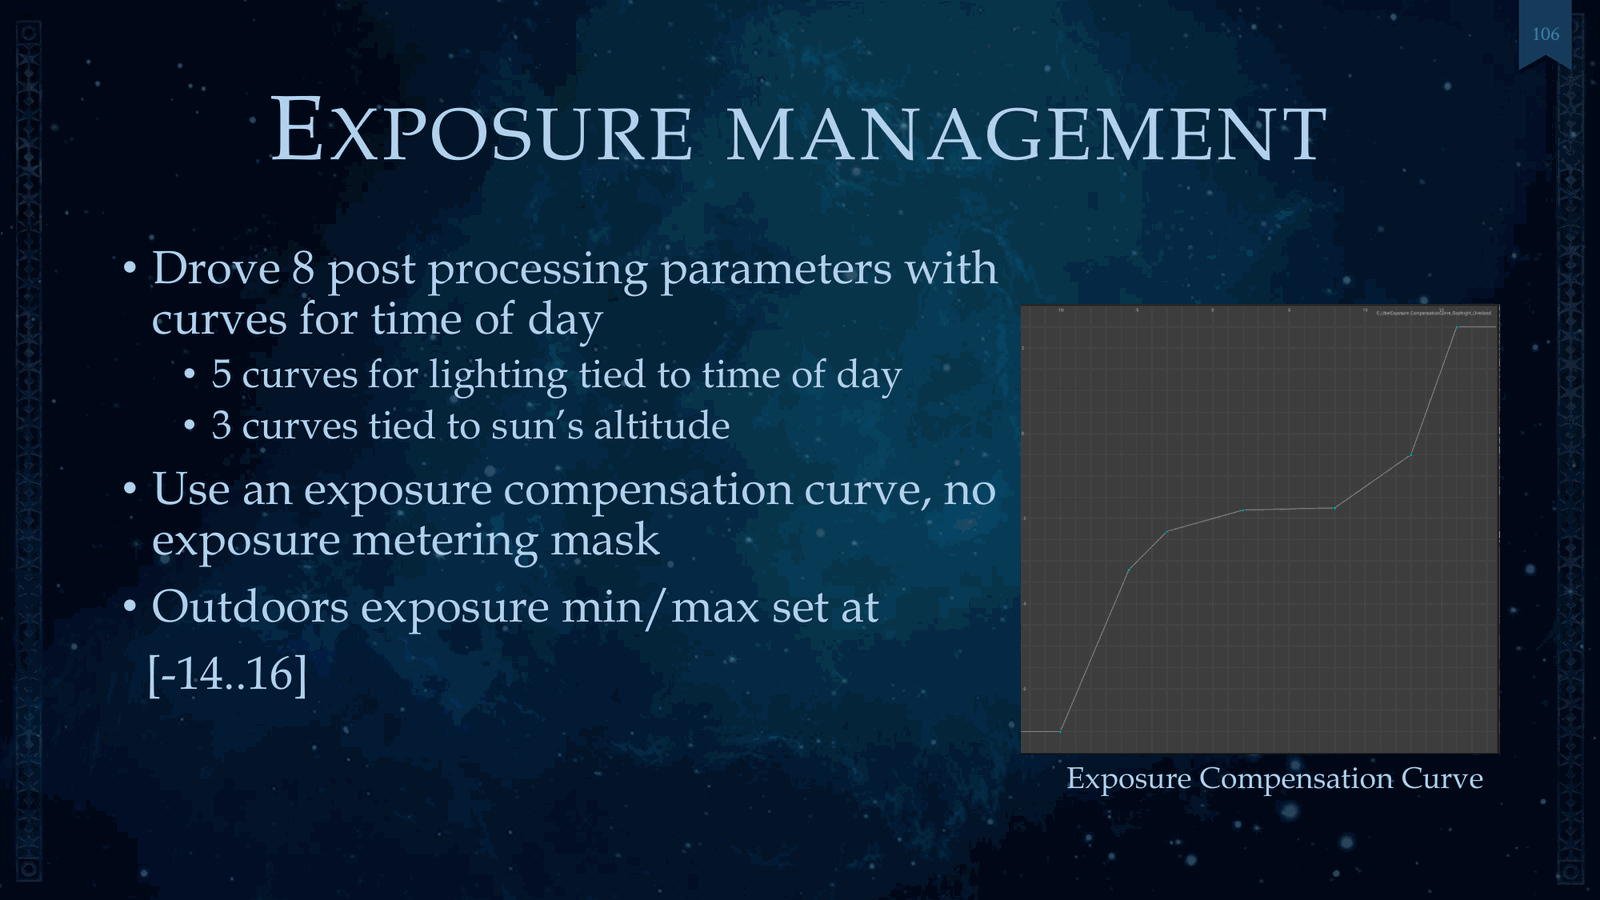
For exposure, we drove eight post-processing parameters with curves for based on time of day.
In addition, there were five curves for lighting tied to time of day, and three curves tied to the sun’s altitude.
And we used an exposure compensation curve.
Slide 116 — 00:43:25
📌 要点汇总
- 未使用曝光计量遮罩,户外场景的曝光范围设为-14到16
- 采用自适应灯光和发射适应技术
- 确保灯光和材质在不同环境下不会过亮或过暗
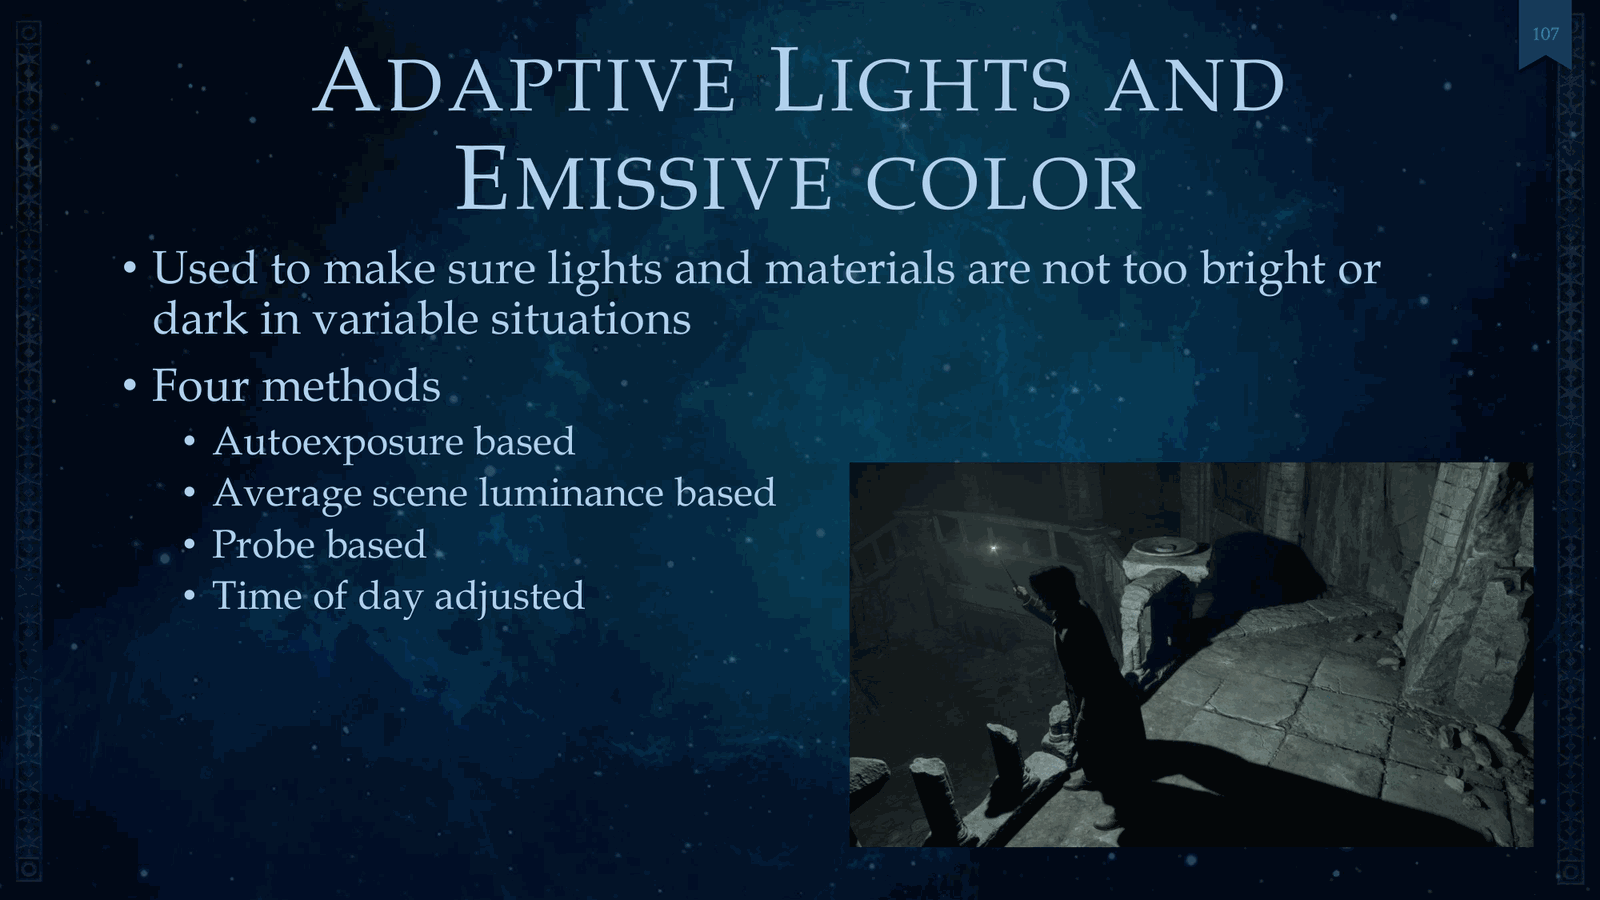
No exposure metering mask. For outdoors, the exposure min/max was set to negative 14 to 16. We also used adaptive lights and emissive adaptation, and this is make sure to we use this to make sure lights and materials are not too bright or dark in variable situations.
Slide 117 — 00:43:47
📌 要点汇总
- 介绍了四种光照调整方法:自动曝光、平均场景亮度、探针和时间调整
- 自动曝光方法实现简单,直接使用相机自动曝光功能
- 平均场景亮度是最常用的方法,基于场景整体亮度进行调整
- 探针方法依赖于场景中放置的光照探针数据
- 时间调整方法根据一天中的时间动态调整光照效果
And so, shown here are four of our methods for this. We’ve got the auto-exposure based. You’ve also got the average scene luminance based. That’s usually the most common one. Probe based and time of day adjusted. And we’ll discuss each of these. So first, auto-exposure. This is pretty simple. It just takes.
Slide 118 — 00:44:09

📌 要点汇总
- Lumos 是用于提升画面亮度的技术
- 在室内外切换时 Lumos 会出现亮度突变问题
- 亮度可能突然加倍或三倍,影响视觉效果
The current exposure of the camera. It was one example for that. Lumos. We use this to make it look bright regardless of where you are. Unfortunately, this thing breaks down when you’re moving from outdoors to indoors. You can have Lumos double or triple in brightness from those, so it’s hard to get that right. So.
Slide 119 — 00:44:31
📌 要点汇总
- 为 Lumos 添加了特殊闪烁效果以重置自动曝光
- VFX 需要始终保持高亮度,不受时间影响
- 传统 VFX 固定亮度会导致白天过暗、夜晚过亮
- 使用自动曝光确保所有场景保持一致的亮度
We added a special flicker effect on Lumos to reset auto exposure. For VFX, we wanted to make them look bright regardless of time of day. And your typical VFX uses fixed brightness, and this would look dim during the day and too bright at night. We don’t want that, and so we used auto exposure to ensure everything would be bright.
Slide 120 — 00:44:53
📌 要点汇总
- 首帧画面切换后平均亮度值计算失效
- 需要手动覆盖或调整亮度计算方式
- 亮度计算依赖于前一帧的平均值
- 首帧画面可能因计算失效导致亮度异常
Would have the bright brightness and bloom correctly. I mentioned earlier the most common thing is average scene luminance, and this is a value based on the previous frame’s average luminance, and this falls apart on the first frame after camera cut. And so, there’s a couple options we could override.
Slide 121 — 00:45:15
📌 要点汇总
- 使用上一帧的值来保持一致性,但并非总能有效避免闪烁
- Lumos在镜头切换或曝光变化时会出现黑屏闪烁问题
- 解决方案是采用基于探针的自适应方法(probe-based adaptation)
With an authored value, stick with last frame’s value. This wasn’t guaranteed to work all the time, and Lumos especially would flicker to black whenever we had a camera cut, or large exposure changes, or other conditions. Source solution here was something called probe-based adaptation. I know other.
Slide 122 — 00:45:37
📌 要点汇总
- 使用 light probe 数据进行适应,确保画面切换时无突兀效果
- 该数据在同一帧渲染中可用,提升视觉连续性
- 电影级画面制作团队(如 Ghosts)广泛应用此技术
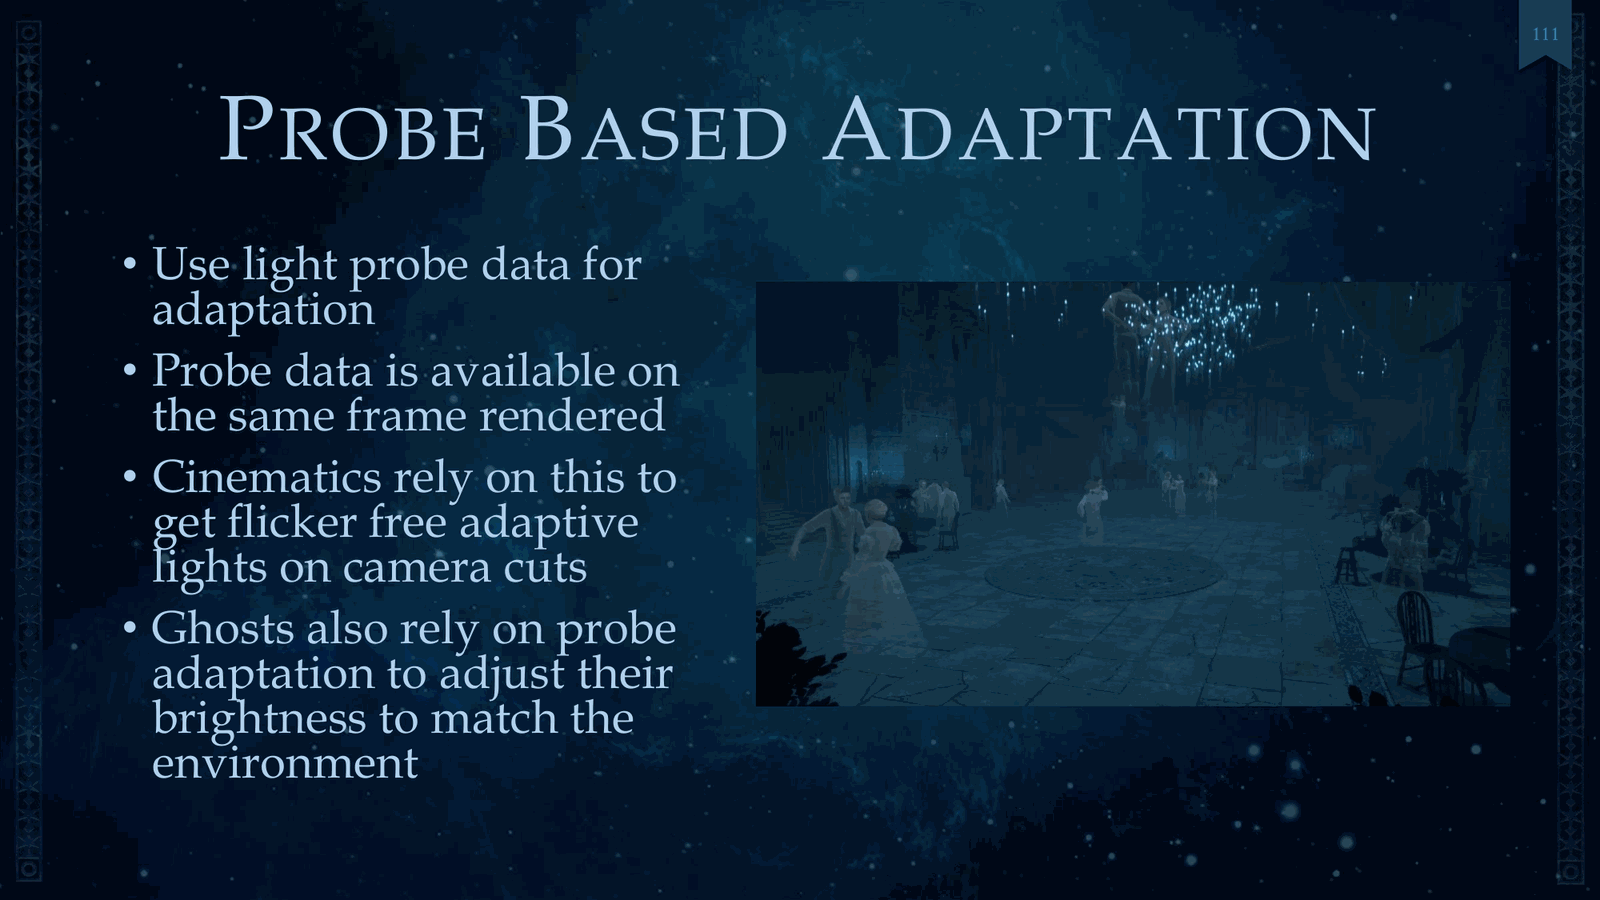
Teams use this, but I’d like to just explain what we did. We use light probe data for adaptation, and this probe data is available on the same frame rendered, so that means no weird pops on camera cuts. And so, cinematics love this, right? They used it as best they could. Another example is Ghosts. They also.
Slide 123 — 00:45:59
📌 要点汇总
- 通过适应环境亮度来生成光照探针
- 光照探针采样距离相机约1米
- 探针采样方式与正向渲染材质一致
- 采样结果会被保存以供后续使用
Rely upon adaptation to match their brightness to their environment. So, to generate this light probe adaptation, all we do is sample light probes about a meter from the camera. These probes are sampled exactly like a forward-rendered material, and we save this.
Slide 124 — 00:46:21
📌 要点汇总
- 使用缓冲区存储结果,材质和光照通道可据此自适应调整
- 该功能在开发后期才加入,存在更稳健系统优化空间
- 时间调整光照是最后实现的功能之一
Results to a buffer, and then your material and lighting passes can read this buffer to adapt, however they see fit. This was added pretty late in development, so I think there’s a far more robust system that we could establish, right? Given some more time. Last, we’ve got our time of day adjusted lights, and.
Slide 125 — 00:46:43
📌 要点汇总
- 在 CPU 上采样天空大气着色器,使用相同的数学计算
- 通过调整光照亮度和颜色实现不同时段的视觉效果
- 在《禁林》场景中,三种不同时段使用相同灯光以保持氛围一致
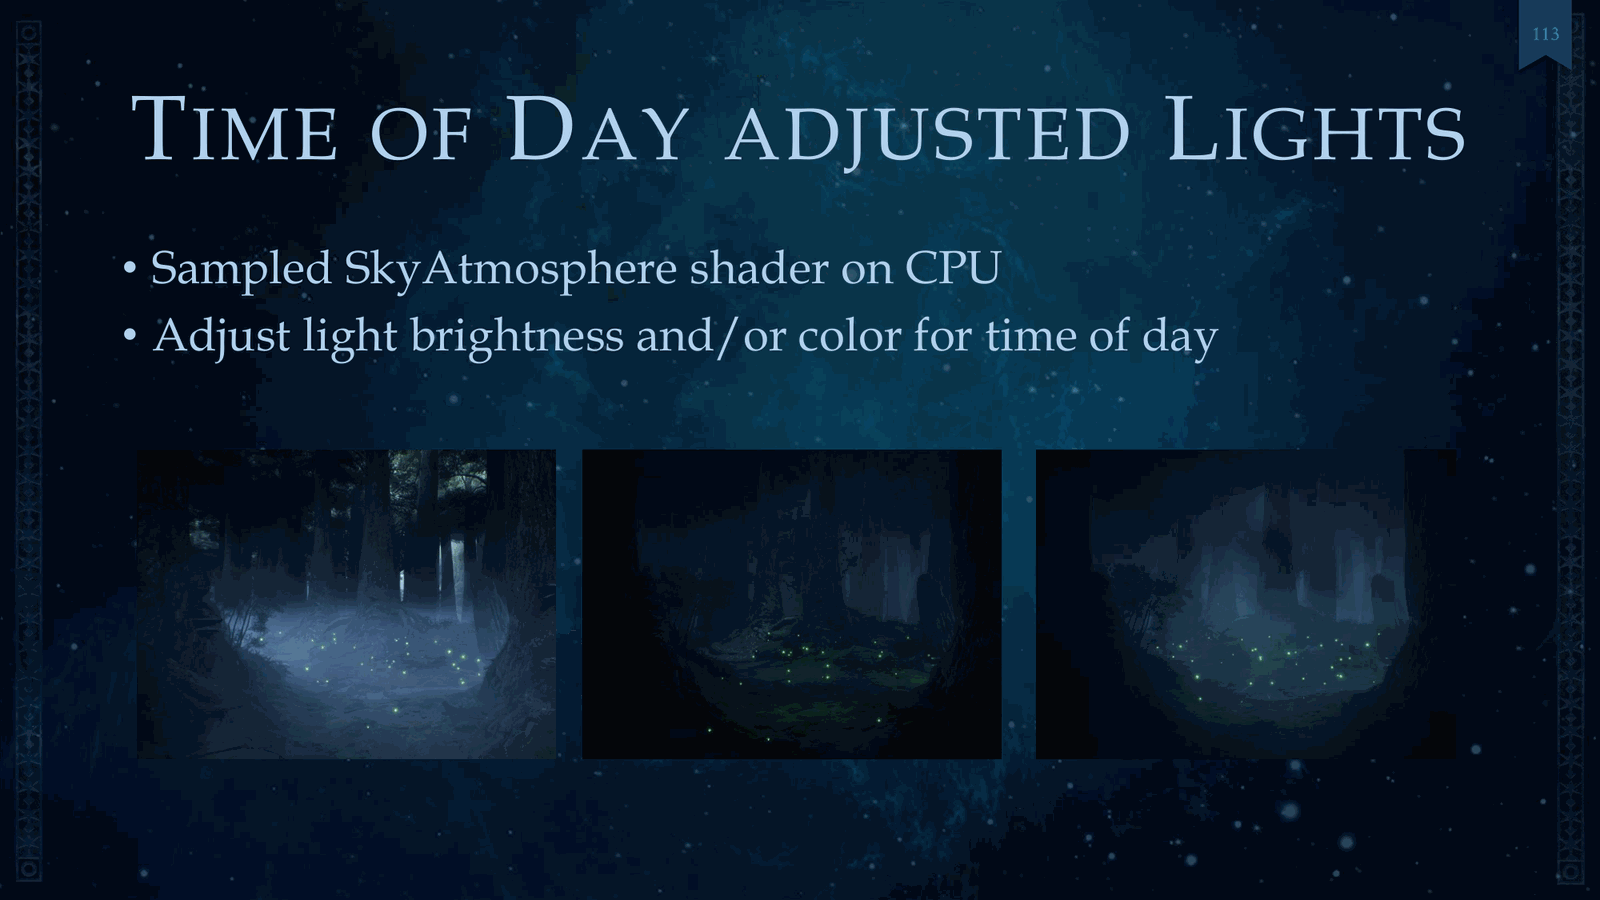
This one, you just sample the sky atmosphere shader on the CPU, so the same math, and you adjust the light brightness and/or color for time of day. So here’s an example in the Forbidden Forest. We have three different times of day and the same lights, because we still want to get that foreboding type of thing going, regardless of how bright it is.
Slide 126 — 00:47:05
📌 要点汇总
- 时间ofday材质需要在CPU上更新参数,这是常见做法
- 用于Windows和灯笼项目
- 天空材质在黎明和黄昏时通常会变黑
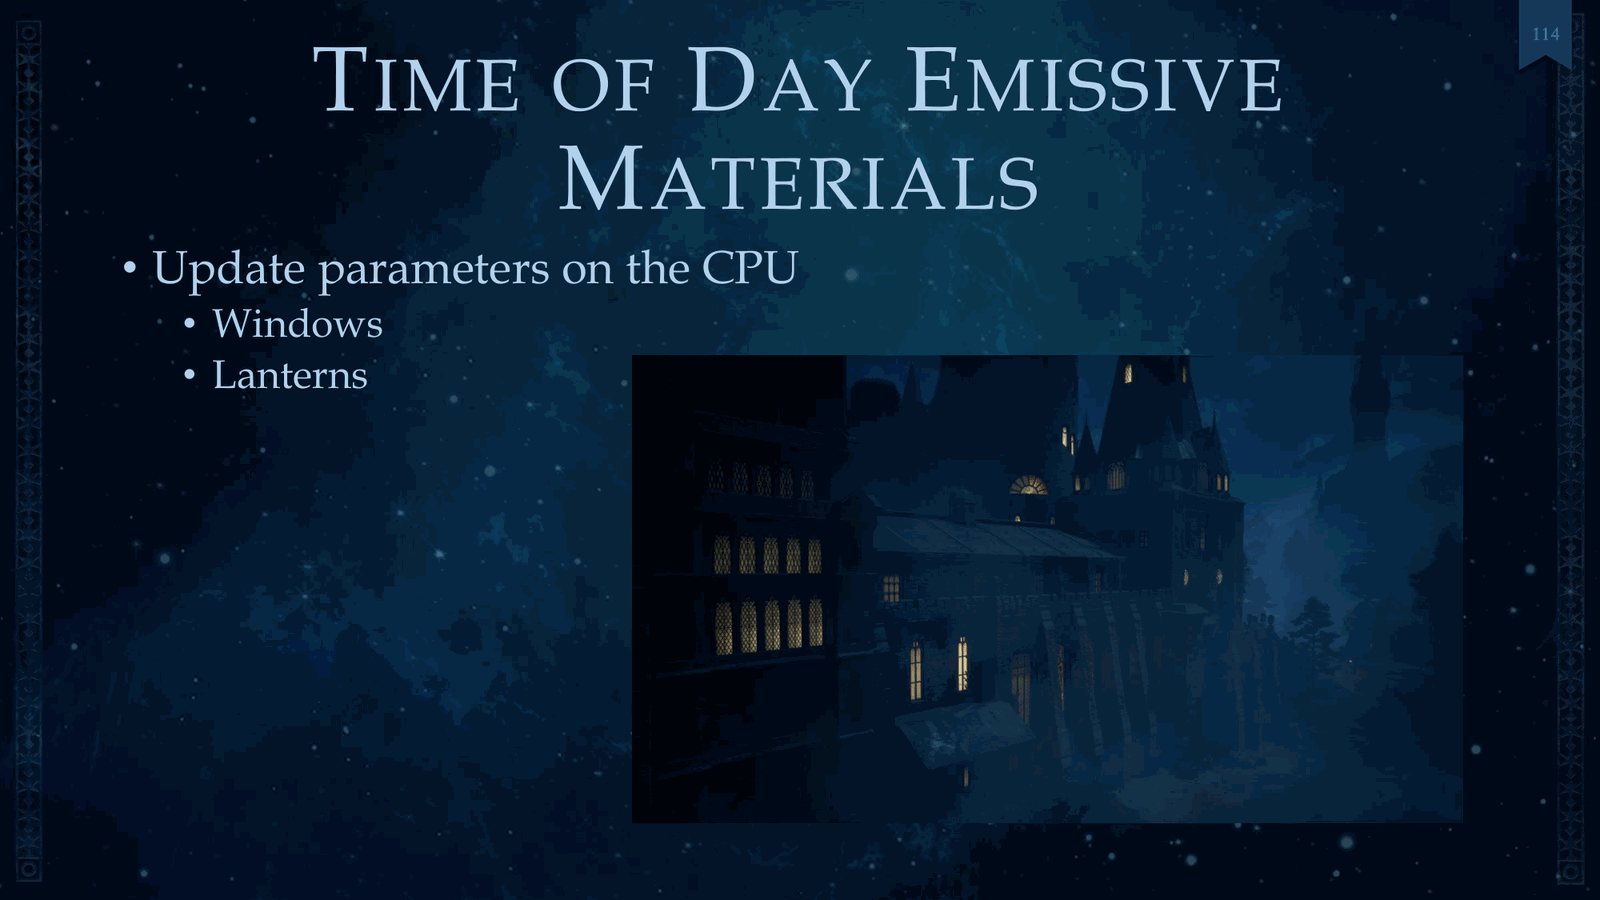
Above the trees. Next, we’ve got our time of day missive materials, and this you update your parameters on the CPU. That’s pretty common. We did this for Windows and lanterns. Next, we’ve got our sky, and typically your sky would go completely black during dawn and dusk.
Slide 127 — 00:47:27
📌 要点汇总
- 在天空大气着色器中添加了HDR地平线到天顶纹理,用于模拟夜间散射
- 纹理的U坐标表示太阳高度的负值(单位为度,范围-12到90)
- V坐标表示天空穹顶的Z轴位置
And so, to add some details here, we added an HDR horizon to zenith texture in sky atmosphere shaders, and this is used to simulate nighttime scattering. And here’s an example on the left of our our texture. The U is a negated height in the sun in degrees from negative 12 to 90. The V is the Z of the sky dome.
Slide 128 — 00:47:49
📌 要点汇总
- 夜空中的月亮基于真实NASA数据,包含准确的月相和光照效果
- 渲染了四颗可见行星和天空中41,000颗最亮的恒星
- 实现了高精度的天文可视化效果
And a picture of that in action in game. For the night sky, the moon was based on real NASA data with accurate lunar phase and lighting. We also rendered four visible planets, with the accurate stars of up to 41,000 brightest stars in the sky. This was also possible.
Slide 129 — 00:48:11

📌 要点汇总
- 该内容涉及19世纪末的天文数据和星系绘制
- 星体数量根据平台进行缩放
- (过渡内容,无关键要点)
Accurately to the 1890s time and location, so any enterprising astronomer could perhaps derive that. You might be surprised what you get out of it. We also had a hand-painted Milky Way galaxy. The star count scales based on platform. It’s also.
Slide 130 — 00:48:33
📌 要点汇总
- 使用 Unreal 的粒子系统和自定义 Niagara 数据接口实现渲染效果
- 开发了一个天文小游戏,利用真实夜空展示星座和单个恒星
- 提供了该游戏的时间流逝效果演示片段
Rendered with Unreal’s particle system, via a custom Niagara data interface, we also had an astronomy mini-game that uses the exact night sky to highlight constellations and individual stars. And here’s a time-lapse of that in action.
Slide 131 — 00:48:55
📌 要点汇总
- 演示同一相机在四季中的不同拍摄效果
- 分别展示夏季、秋季、冬季和春季的图像差异
- 用于说明季节变化对视觉表现的影响
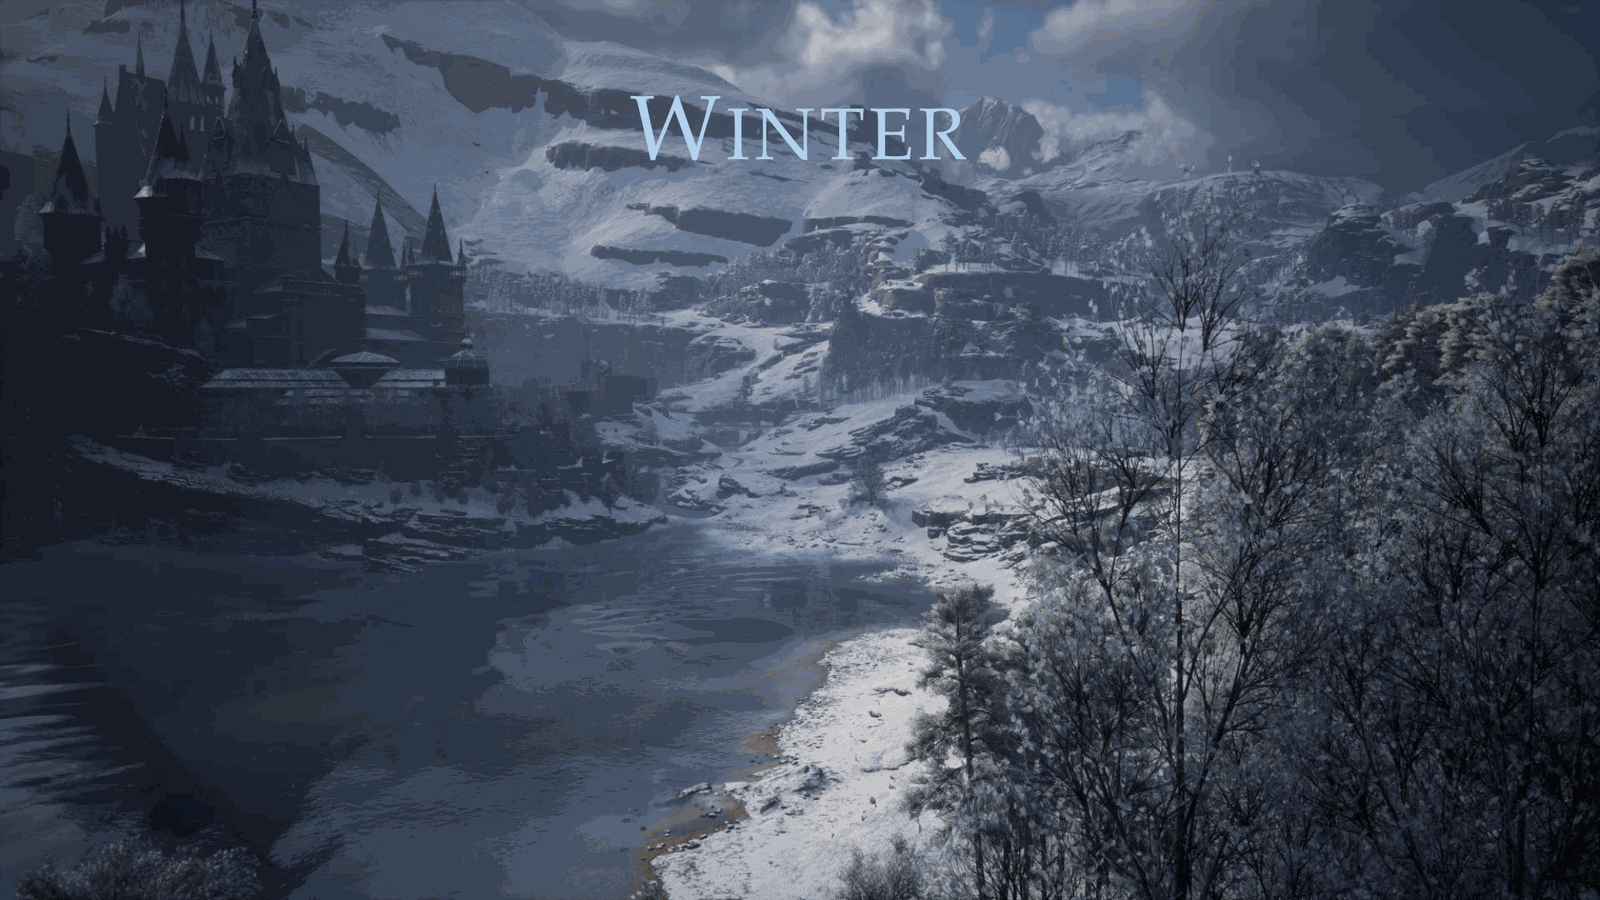
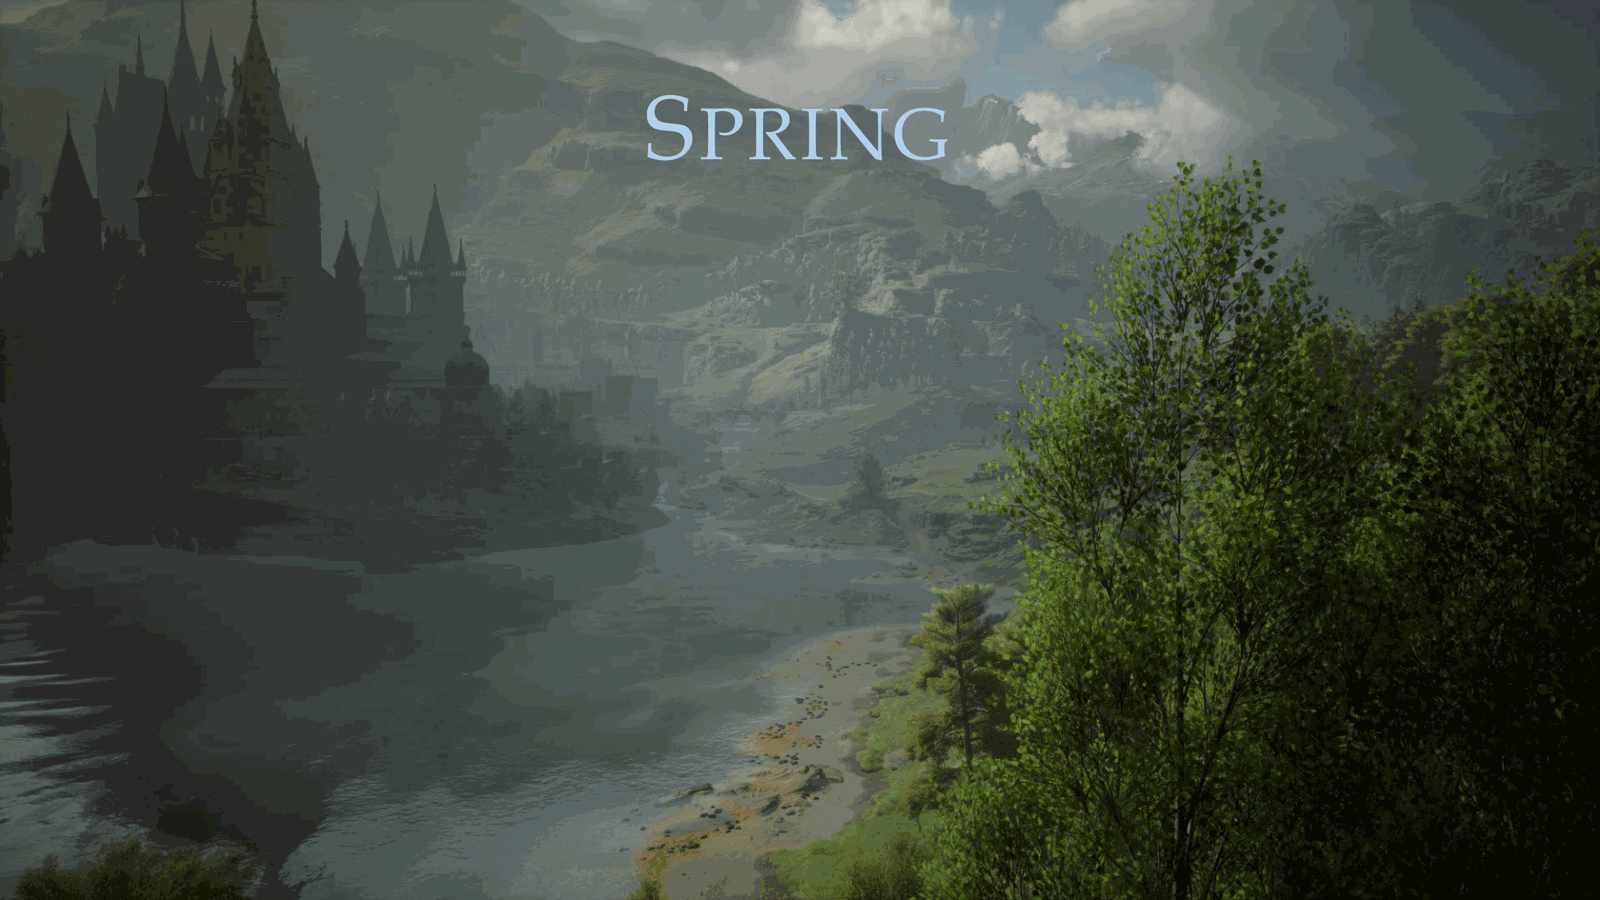
So next, we’ve got seasons. We’ve got the same camera, but with all the four different seasons. So I’m just going to flip through these, and you guys can see the difference in how they look, or how different they look. So we’ve got summer, autumn, winter, and spring. So for seasons.
Slide 132 — 00:49:17
📌 要点汇总
- 季节特定计算会增加资源成本,尤其是每个季节都需要独立资源
- 并非所有元素都需要随季节变化,通常只有植被和草地需要调整
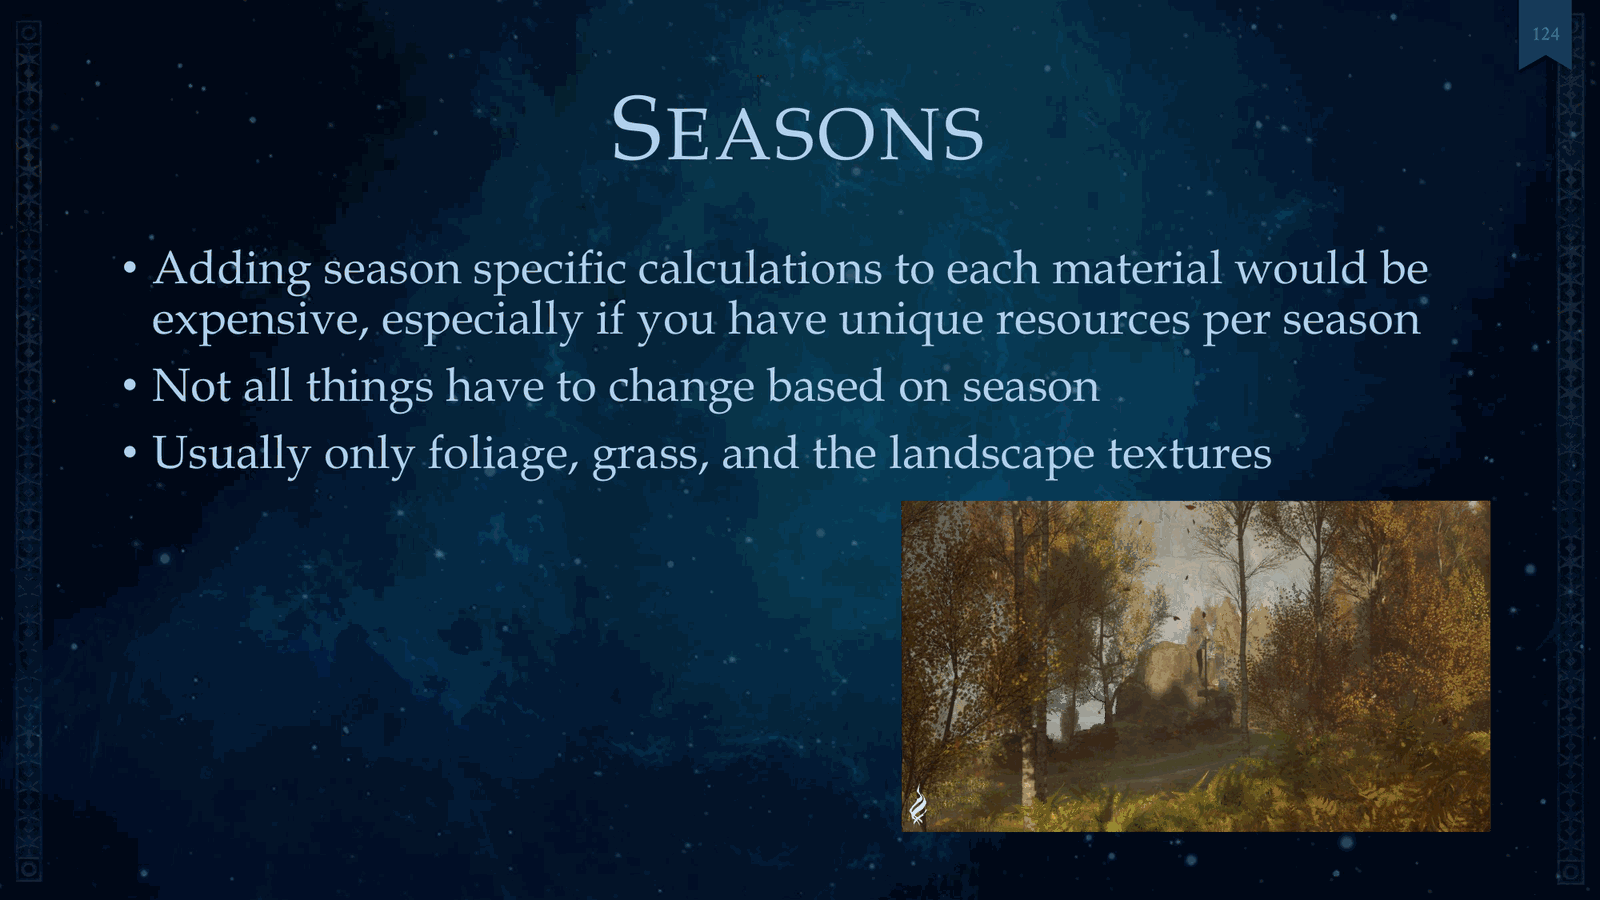
We’re adding we add season specific calculate oh sorry so adding season specific calculations to each material would be pretty expensive, especially have unique resources per season. The thing to note here is that not all things have to change based on the season. It’s usually only foliage grass and.
Slide 133 — 00:49:39
📌 要点汇总
- 使用基于季节的资源切换技术实现景观纹理变化
- 仅根据当前季节流式加载对应资源以提高性能
- 展示了在Unreal引擎中实现季节切换的多种方法
- 季节切换时追求视觉冲击力强的场景变化效果
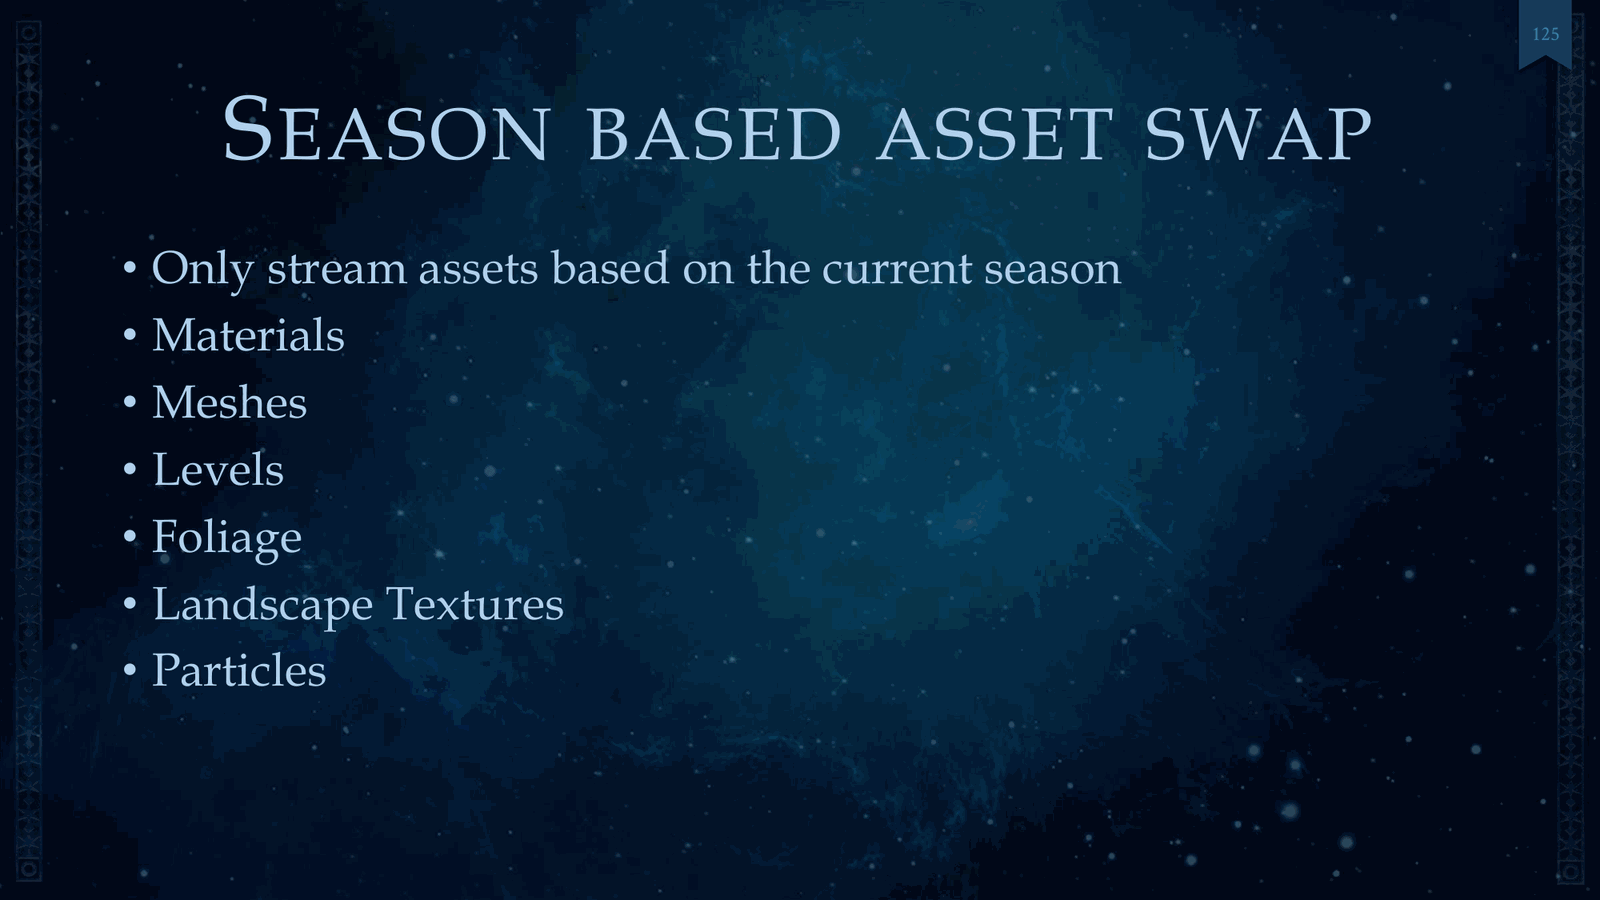
Landscape textures. So we used a season-based asset swap, and we only stream in assets based on the current season. And shown here are all the different ways we hooked that up into Unreal. So when we change seasons, we’d like to have a visually striking change when the seasons.
Slide 134 — 00:50:01
📌 要点汇总
- 使用预渲染视频实现季节过渡效果
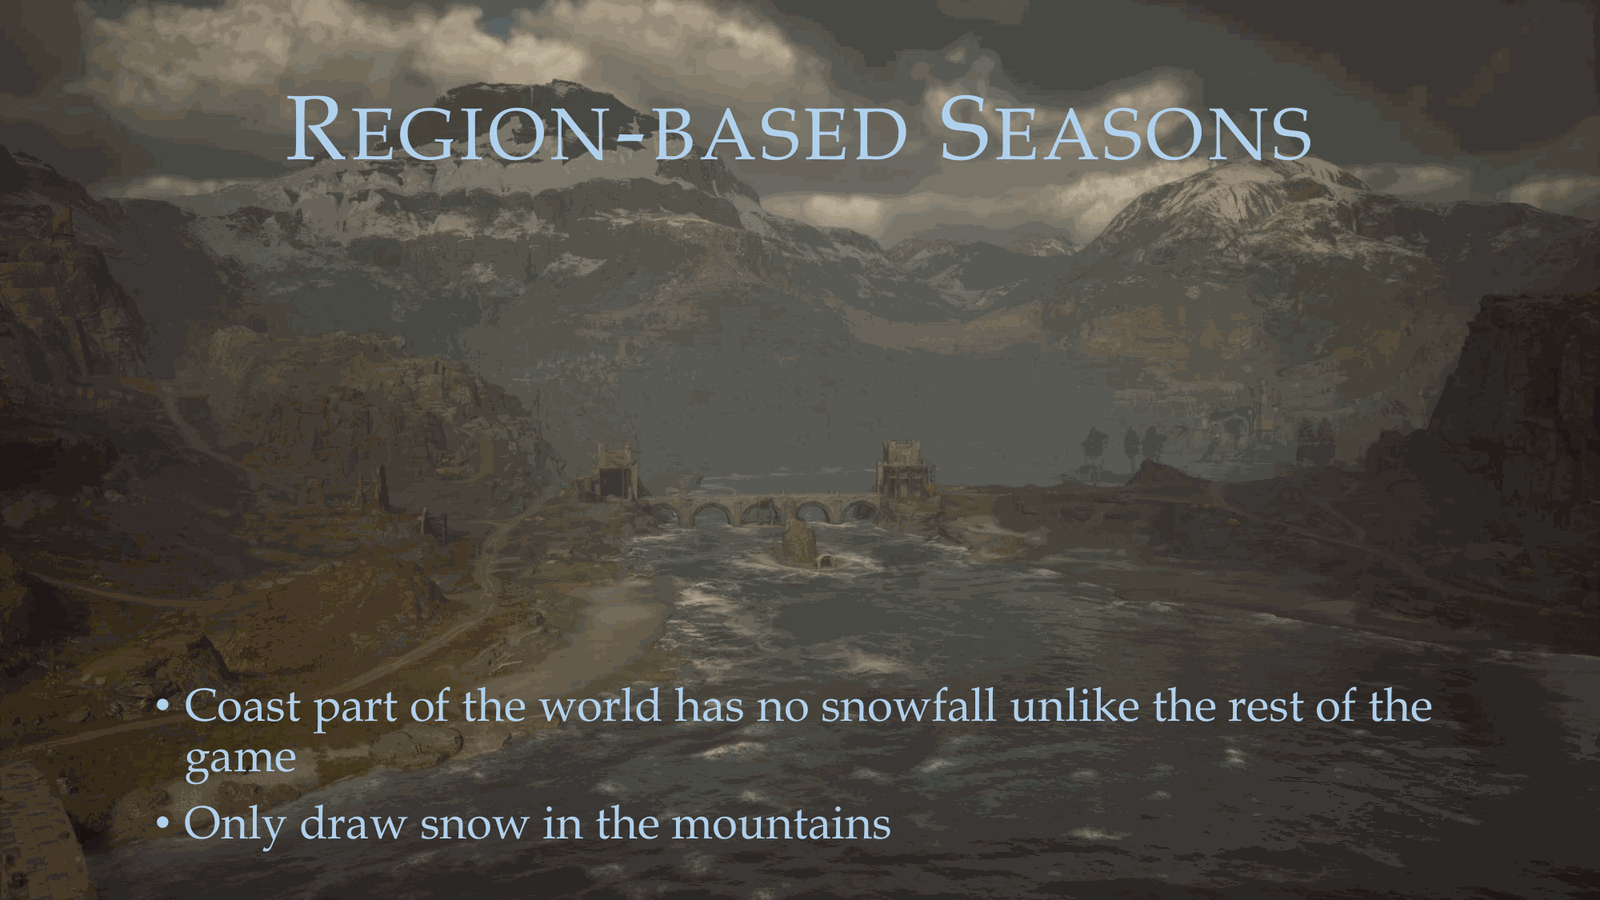
- 根据区域渲染雪景,沿海地区无积雪,仅在山区渲染雪
- 当前系统尚未实现无缝融合的季节过渡方案
And so we leave that up to the story. We don’t have a seamlessly blending system for that. We also used a pre-rendered video for this transition. For region-based seasons, the coast has no snowfall, and so we render only snow in the mountains, shown here. For region-based seasons, the coast has no snowfall, and so we render only snow in the mountains, shown here.
Slide 135 — 00:50:23

📌 要点汇总
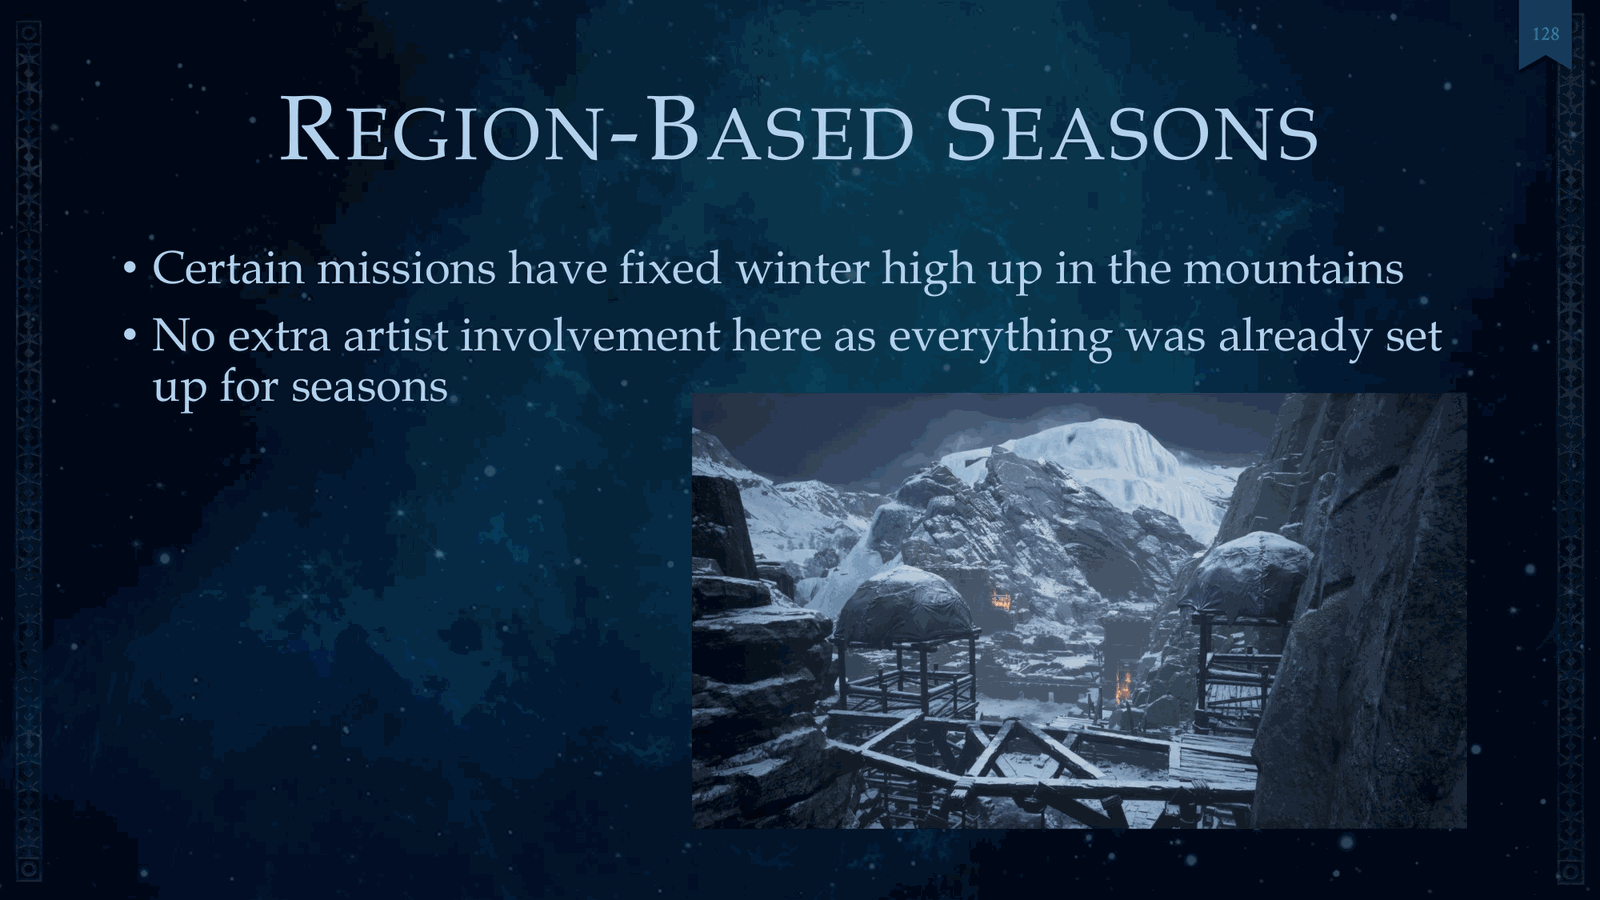
- 采用基于区域的季节系统,山区任务固定为冬季
- 艺术家无需额外工作,季节系统已集成完成
- 使用材质排列器实现实时材质替换
Region-based seasons. Certain missions were high up in the mountains, and so we had a fixed winter there. Cool part is that artists didn’t have to do anything extra because everything was already hooked up for seasons. We’ve got our material permuter. This performs live material swaps, and we do this.
Slide 136 — 00:50:45
📌 要点汇总
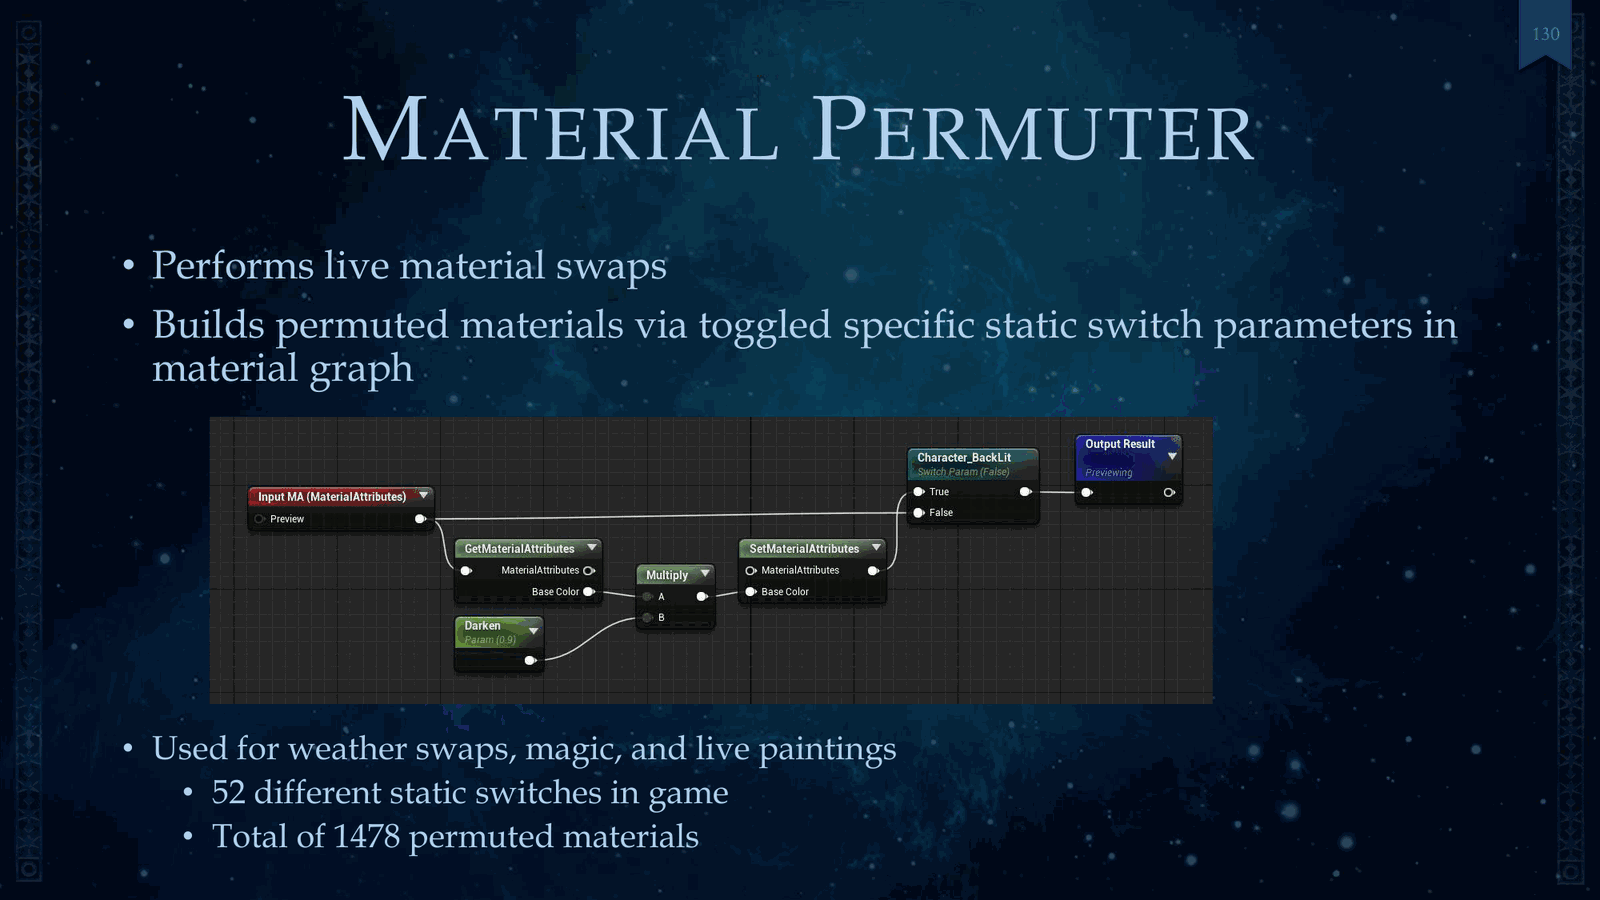
- 通过在材质图中切换特定静态开关参数生成排列材质
- 该技术用于天气切换、魔法效果和生命绘画等场景
- 游戏中共使用了 52 种排列材质,总数超过 1,400 种
By building a permuted materials via toggled specific static switch parameters in the material graph. So here below is an example of one of those, and then we build these permuted materials with these flipped. And so this was used for things like weather swaps, magic, and life paintings. We also had 52 of these in the game, and over 1,400.
Slide 137 — 00:51:07
📌 要点汇总
- 可通过置换材质实现透明度、双面渲染等效果
- 支持材质参数调整与材质替换
- 任何材质设置均可被覆盖和自定义
Of these permuted materials, so there’s a lot of things you can do with these permuted materials, and things you can do like override materials like translucency, double-sided. There’s also things like material parameters and swapping. Just just on that alone, any material can be overridden, any material setting can be overridden, and also.
Slide 138 — 00:51:29
📌 要点汇总
- 使用手工制作材料弥补预设材质不足
- 示例包括《死亡圣器》效果和红蓝传送门地牢
- 该方法还用于皮肤效果系统
We allowed for handcrafted materials for places where the premeter didn’t work so well. So the examples here to show it off, we’ve got our Deathly Howls effect. We’ve also got red and blue portal dungeons. This was also used for skin effects, and that’s its own system.
Slide 139 — 00:51:51
📌 要点汇总
- 基于蓝图的材质参数动画系统专为VFX艺术家设计
- 用于实现Magic等特效,支持天气控制与时辰相关
- 使用可平铺的雨滴纹理增强视觉效果
It’s a blueprint-based material parameter animation system built for VFX artists, and this was shown here below for Magic and other effects. So we’ve got weather, and we control this based on time of day. We also have a tileable raindrop texture.
Slide 140 — 00:52:13
📌 要点汇总
- 使用天气贴图并包含 alpha 通道用于天气累积效果
- 采用天气贴图而非直接烘焙到材质中,使用天气贴图(decal)实现
- 对于效果不佳的材质,使用材质替换(material swap)进行优化
- 支持动态物体和半透明材质的处理
- 使用了 stencil mask 来增强渲染控制
Or weather texture. We also had in that same texture alpha for weather accumulation. For weather, we wanted to not bake it into the material, so we used a weather decal. And for anything that doesn’t look good, we use a material swap. So that’ll work for things like moving objects and translucent materials. We also had a stencil mask on.
Slide 141 — 00:52:35

📌 要点汇总
- 避免材质更换后渲染天气贴图,防止影响其他对象的 stencil 使用
- 移动对象使用材质排列器,并存储天气状态以控制积聚或衰减效果
- 该方法在性能上代价较高,需优化处理
So that we avoid rendering to the weather decal if the material has been swapped, and then other objects can also disallow weather with the same stencil. For moving objects, we use a material permuter, and each moving object stores a weather state in which to show accumulation or decay. This is also expensive.
Slide 142 — 00:52:57
📌 要点汇总
- 需谨慎选择天气遮罩的更新方式,避免在室内接收信号
- 动态自上而下天气渲染通道成本过高,因此采用多种遮罩方式
- 使用虚拟纹理进行自上而下捕获
- 结合法线和内部体积实现遮罩效果
So be careful on how you choose how to update these. For weather masking, this this shouldn’t be received indoors. And so we, if we used a dynamic top-down weather pass render pass, this would be too expensive. So we masked in several ways, and we had a virtual texture for capture top-down. We also used our normals and inside volumes.
Slide 143 — 00:53:19
📌 要点汇总
- 为半透明粒子,将内部体积烘焙成距离场以实现遮挡效果
- 雪地贴图在植被上效果不佳,因此直接使用冬季已烘焙的雪效果
For translucent particles, we baked our we baked our distance fields into our our we baked our inside volumes into distance fields to mask those out too. For snow, the decal doesn’t work great on things like foliage, and so because winter already has baked in snow, we just use that.
Slide 144 — 00:53:41
📌 要点汇总
- 3D绘画渲染到渲染目标成本较高,且分辨率无法匹配
- 存在四个质量层级:3D、2D、baked atlas 和 fixed painting
- 动画演示展示了不同层级的实时效果
Now we’ve got our live paintings. We’ve got four quality tiers: 3D, 2D, baked atlas, and fixed painting. You can see them animating a little bit. For the 3D one, the easy version would be to render to a render target. This is expensive to render, and the resolution will never match.
Slide 145 — 00:54:03
📌 要点汇总
- 通过将场景平面化来优化渲染,同时保留部分深度范围
- 深度缓冲区仍然需要,但平面化处理成本较低
- 使用材质参数控制平面化效果
- 图片展示了不同视角下的平面化效果
So instead, we flatten to a plane. The depth buffer is still needed, so you flatten as much as possible while still preserving some depth range, and this is pretty cheap to render. We also use the material parameter for this. So shown here is a picture of different angles on how it’s flattened. And.
Slide 146 — 00:54:26
📌 要点汇总
- 四个动态3D角色同时渲染成本很高
- 采用预烘焙电影贴图集来减少渲染需求
- 贴图集整合了大量动态绘画内容以提高效率
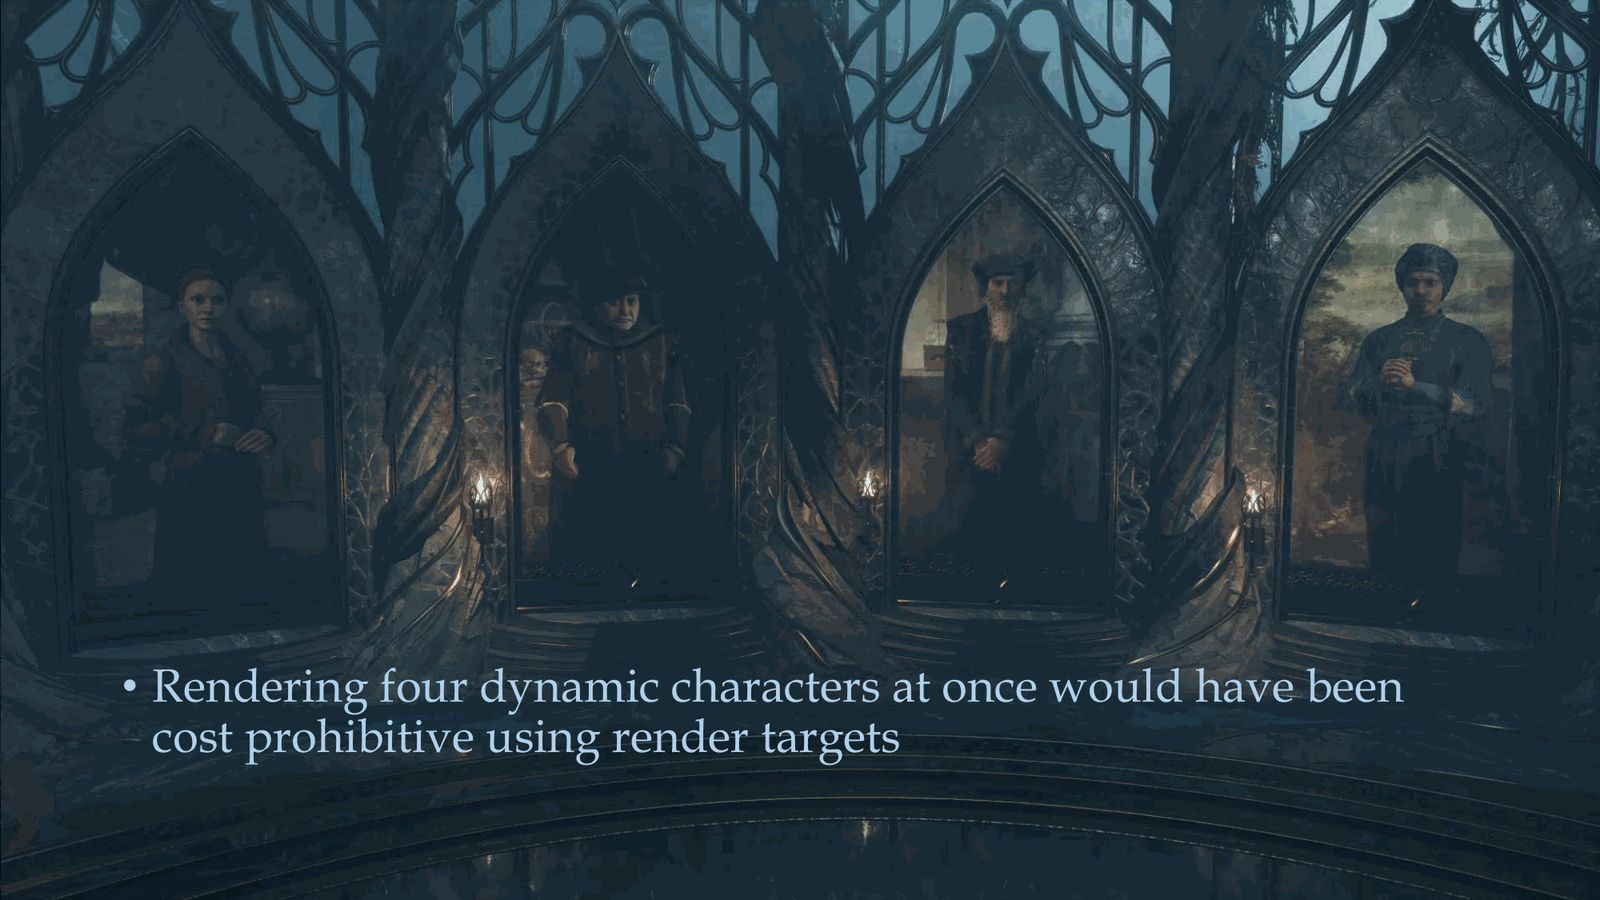
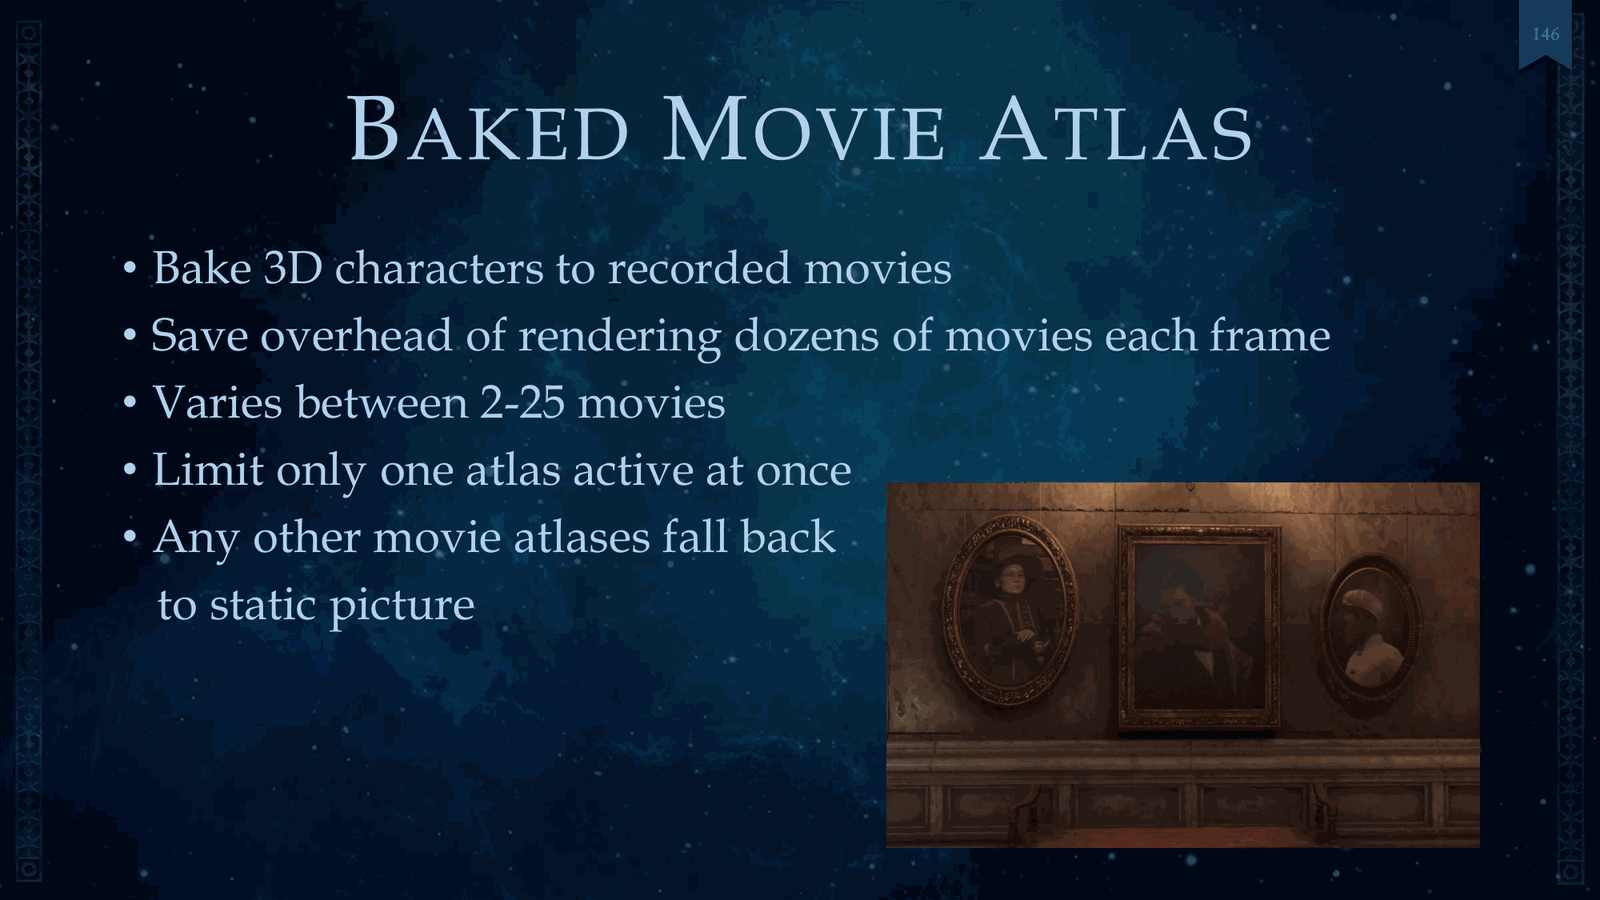
To show this off, all these four characters are dynamic characters, three D characters, and rendering four dynamic characters at once in a render target would be really expensive. But here was no problem. We also have a baked movie atlas for a lot of moving paintings, and this is baked into one atlas to save having to render.
Slide 147 — 00:54:48
📌 要点汇总
- 每部电影包含大量帧,但同一时间仅能处理一帧
- 体积云技术复杂,可独立成篇,基于 Nubus 的工作开发
- 该技术已内部实现,用于生成高质量画面
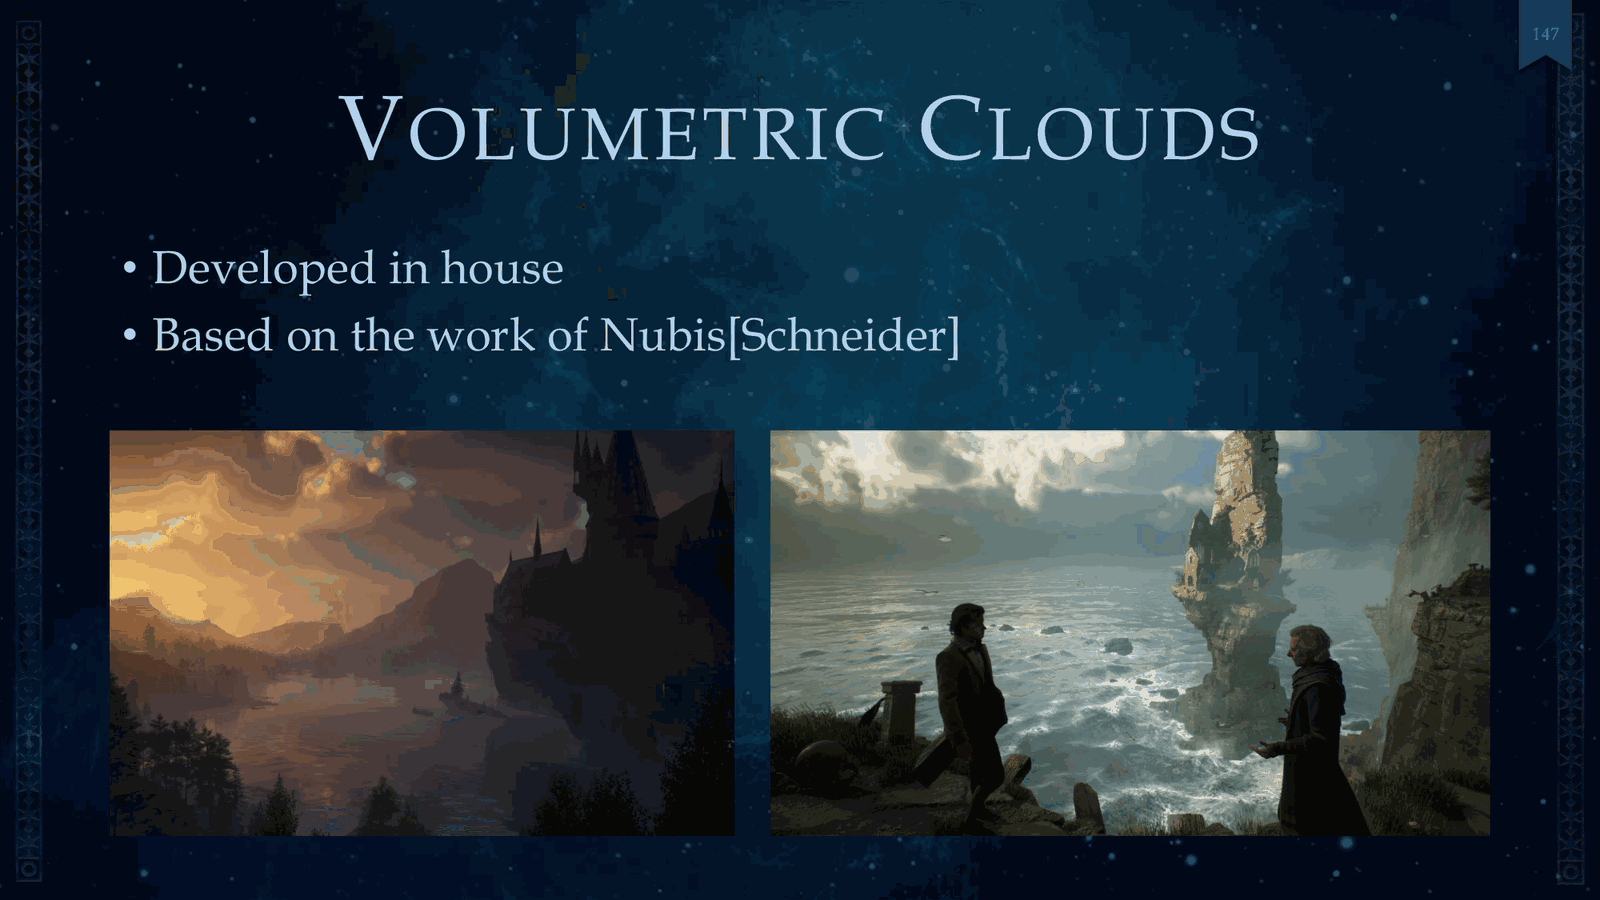
Dozens of movies, each frame, and we only have one of these active at once. And last, we’ve got volumetric clouds. That also could be its own paper. This was developed in-house and based on the work of Nubus. Pretty common, and it was it made these beautiful pictures here.
Slide 148 — 00:55:10
📌 要点汇总
- 《霍格沃茨遗产》是一款复杂的游戏,采用了多种技术手段进行管理
- 资源平衡是实现跨平台性能目标的关键因素
- 自动化测试在开发过程中起到了至关重要的作用
- 所有视觉技术帮助游戏在竞争中脱颖而出
So, my final thoughts on this: Hogwarts Legacy was a very complex game, which we managed with a variety of techniques. Balanced resources helped us achieve our performance targets across all platforms. Automation tests was a critical component to this process. All of our visual techniques helped us stand out amongst other.
Slide 149 — 00:55:32
📌 要点汇总
- 感谢Render Tech团队及外部工程师对《Hogwarts Legacy》的贡献
- 致谢参与游戏开发的艺术家及合作工作室
Games using Unreal Engine, and I’m really proud of Hogwarts Legacy’s success. So, thanks to everyone else on our Render Tech team, and also some external engineers, and also the amazing artists that worked on the game, and all these studios that helped out too. And thank you.
Slide 150 — 00:55:54

📌 要点汇总
- (过渡内容,无关键要点)
So we have some time for questions. Okay, go ahead. Yeah, I was wondering.
Slide 151 — 00:56:16
📌 要点汇总
- HDR显示能力通过HDIG实现,但API信息可能不完全准确
- 需要额外添加校准纹理以确保图形设置准确
- 使用Niagara粒子系统生成动态雨水波纹纹理,并通过渲染目标实现无缝平铺
- 飞行玩法对开放世界渲染提出了更高要求,包括更远的绘制距离和更精确的光照处理
- 未在不支持bindless的GPU上发布游戏,该功能在Switch等平台上得到支持
- DirectX 12的引入对Unreal 4实现bindless功能至关重要
For HDR, it sounded like you were using display capability through HDIG. Did you find that the APIs available were giving you accurate information about displays for all platforms? That’s a good question. I mean, we tried our best, and I know that they may not be completely accurate. And did you add calibration in addition to trying to use that data? Yes. So that was another thing, right, in your graphics settings. You need a calibration texture there. Thank you. Hey, awesome talk. I had a question. You made a comment talking about the pros and cons of bindless, and one of them was that there was no fallback for GPUs that didn’t support it. Did you end up shipping on any GPUs that didn’t support bindless, or was that kind of a targeted decision because you knew that you could get away with it on all the hardware? Yes, we didn’t ship any game that did, or any card that didn’t support bindless. And it’s very important for that to be a factor. That’s why, like, the switch had it. So it’s like, okay, I think we’re good, right? And that’s why it’s also we’ve had to wait 10 years for us to make these certain assumptions. It also had to be DirectX 12, so that was a bit of effort in Unreal 4 to get that working. Got it. Thank you. You had a slide where you showed an animated rain ripple texture. Was that done with a flipbook where you had lots of frames, or did you calculate the math? To do those ripples, and was that then applied with the decal that you mentioned? Okay, I’ll explain this. Yeah, we just didn’t have a lot of time, but it’s actually a Niagara particle system rendered out to a render target, and we actually duplicate the rendering so it’s seamless, so you get it tiled, and then that same tiled texture is in the weather decal, and that’s just tiled everywhere, and it can be pretty noisy in the distance, so we also blend that out at a certain distance. Thanks. Hi. Were there any special considerations or challenges regarding the ability to fly in the game when it came to these visuals and the open-world rendering? Yes, it had a big impact there. That just meant that we had to test everything, right? I mean, we still got the lighting right, right? We didn’t skip any steps there. But to be honest, a flying game—you have to. To be a lot more honest in everything, you can’t skip a lot of steps in that regard. And of course, streaming was a big deal, but lighting also had had to do a lot of things to make sure everything was continuous. And that also means you have a farther draw distance, right? Because since your area of focus is farther away than just on the ground, right? Your vista shots are a lot more important to to get right. Thank you. Okay. Well, I think that’s it. Unless anyone else has more questions, thank you very much for listening to my talk.